I had been looking for a Halloween cupcake that actually felt whimsical instead of just spooky. For a while, I just accepted that October baking meant chocolate everything, black frosting that stained your teeth for days, and those little plastic rings that nobody really wants. But then my niece asked for a birthday party that fell right before Halloween, and she specifically requested something “dreamy and pastel, not scary.” So there I was, staring at my mixing bowls, trying to figure out how to make a cupcake that felt both festive and soft, both Halloween and gentle. (She also wanted purple and orange, which honestly felt like a challenge at first.)
I started playing around with natural coloring ideas and lighter frosting techniques, and somewhere between the second batch of buttercream and a very patient afternoon of piping, these Dreamy Purple and Orange Pastel Halloween Cupcakes came together. They are not the kind of cupcake that screams “BOO” at you. They are the kind that whispers “trick or treat” with a little smile. The crumb is tender, the frosting is silky, and the colors? They look like a sunset got confused and showed up in October. That first bite — soft vanilla cake, creamy pastel buttercream, a tiny sprinkle of edible glitter — felt like I had finally found what I was looking for.
These cupcakes have become my go-to for fall birthdays, classroom parties, and honestly, any Tuesday in October when I need something pretty to look at. They are proof that Halloween baking does not have to be gory to be good. Sometimes the best thing you can make is something that feels like a little pocket of calm in the middle of all that chaos. And that, right there, is why this recipe stuck.
Why You Will Love This Recipe
Let me tell you why these cupcakes are going to become your new favorite fall baking project. I have tested this recipe more times than I care to admit, and every single batch has taught me something new. Here is what makes them special:
- Quick & Easy : These come together in under an hour, including baking and cooling time. Perfect for last-minute Halloween parties or when the kids suddenly announce they need treats for school tomorrow. (Happens more often than you would think.)
- Simple Ingredients : No weird extracts, no specialty flours, no hunting down obscure candy decorations. You probably have everything in your pantry right now. The magic is in the technique, not the grocery list.
- Perfect for Fall Celebrations : Great for Halloween parties, fall birthdays, harvest festivals, or even Thanksgiving dessert tables. They fit right in alongside pumpkin pies and apple crisps without feeling out of place.
- Crowd-Pleaser : Kids love the pastel colors and subtle shimmer. Adults love that they are not overwhelmingly sweet. Even people who “don’t do Halloween” will reach for a second one.
- Unbelievably Delicious : The texture is where these shine. The cake is moist without being dense, the buttercream is light without being airy, and the combination of vanilla bean and a tiny hint of almond makes the flavor feel special without being complicated.
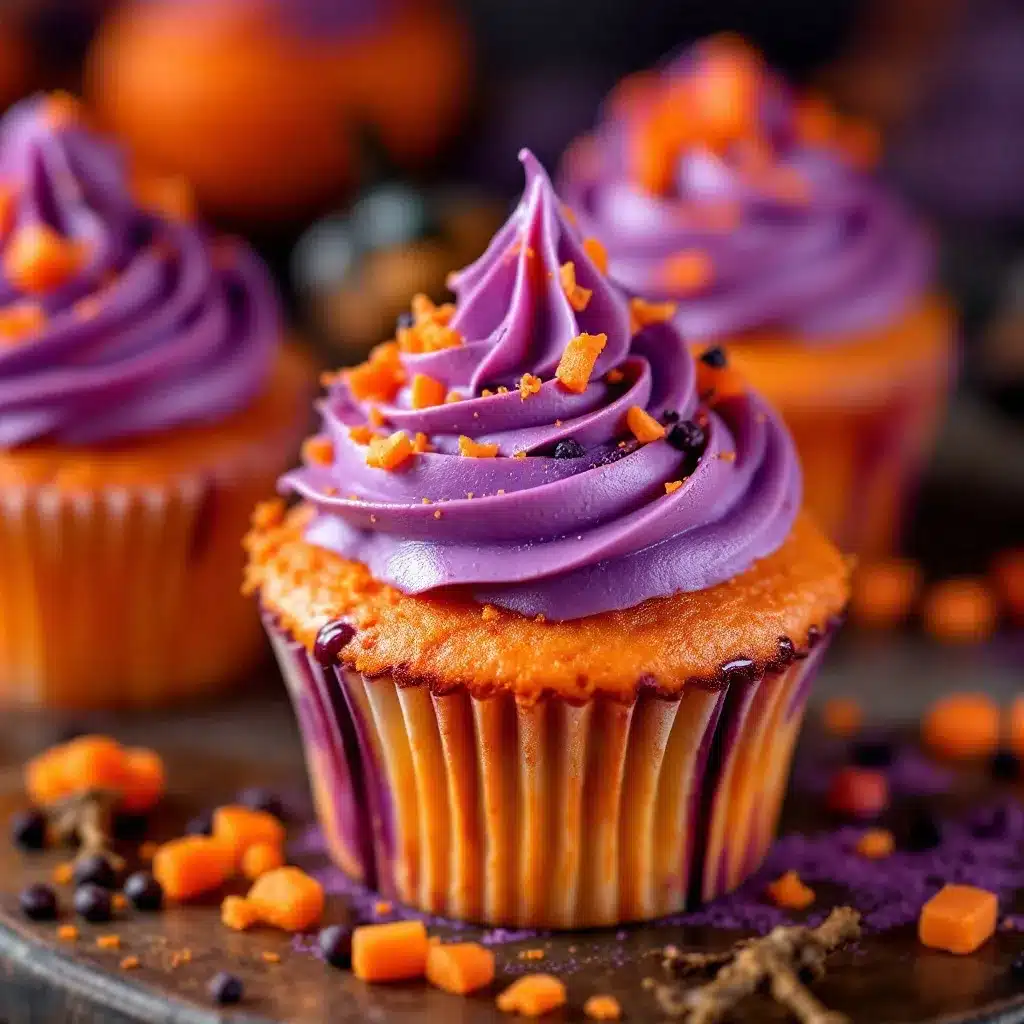
What makes this recipe different from every other Halloween cupcake out there is the frosting technique. I use a two-toned piping method that gives you that dreamy ombré effect without needing multiple piping bags or a steady hand. Honestly, I am not the most patient decorator, so if I can make these look this good, anyone can. These cupcakes are the kind that make you close your eyes after the first bite. They are comfort food reimagined for the spooky season — softer, prettier, and somehow more satisfying than anything covered in gummy worms.
What Ingredients You Will Need
This recipe uses simple, wholesome ingredients to deliver that soft, tender crumb and silky buttercream. Most of these are pantry staples, which means you can whip up a batch whenever the mood strikes. Here is everything you need, broken down by component.
For the Cupcake Batter
- 1 ½ cups (190g) all-purpose flour (I prefer Gold Medal for consistent results, but any brand works)
- 1 cup (200g) granulated sugar (adds sweetness and helps with browning)
- ½ cup (113g) unsalted butter, softened to room temperature (do not melt it — trust me on this)
- 2 large eggs, room temperature (cold eggs can make the batter seize up)
- ½ cup (120ml) whole milk, room temperature (you can use 2% or oat milk in a pinch)
- 1 ½ teaspoons baking powder (make sure it is fresh — expired baking powder ruins everything)
- ½ teaspoon salt (balances the sweetness)
- 1 teaspoon vanilla extract (pure, not imitation, if you can swing it)
- ¼ teaspoon almond extract (optional but highly recommended — it adds a subtle floral note that makes these taste bakery-quality)
- Purple and orange gel food coloring (I use Americolor brand; liquid coloring will not give you the same vibrant pastel effect)
For the Pastel Buttercream Frosting
- 1 cup (226g) unsalted butter, softened (I like Land O Lakes for its consistent texture)
- 3 ½ cups (420g) powdered sugar, sifted (sifting prevents lumps — you will thank me later)
- 2 tablespoons heavy cream (or whole milk if that is what you have)
- 1 teaspoon vanilla extract
- Pinch of salt
- Purple and orange gel food coloring (same brand as above for color consistency)
- Edible glitter or sanding sugar, for decoration (optional but highly recommended)
Ingredient Selection Tips
For the best texture, use room temperature ingredients. I know it is tempting to use cold butter straight from the fridge, but your batter will not cream properly and your cupcakes will turn out dense. If you forget to take your eggs out ahead of time, place them in a bowl of warm water for five minutes. For the food coloring, gel is non-negotiable here. Liquid coloring will thin out your batter and frosting, and you will need a ton of it to get any color at all. Gel gives you vibrant pastels with just a few drops.
Equipment Needed
You do not need a professional bakery setup for these. Here is what I use and what you can substitute if needed.
- Standard 12-cup muffin tin (non-stick works best, but any will do)
- Paper cupcake liners (white or pastel-colored ones show off the frosting best)
- Electric hand mixer or stand mixer (you can do this by hand, but your arm will get a workout)
- Large mixing bowls (at least two)
- Whisk and rubber spatula
- Piping bag with a large star tip (I use a Wilton 1M tip; a zip-top bag with the corner snipped off works in a pinch)
- Cooling rack (essential for even cooling — do not skip this)
- Small bowls or ramekins (for dividing and coloring the frosting)
- Toothpicks (for adding tiny amounts of gel food coloring)
I have made these with a cheap hand mixer from the grocery store, and they turned out just fine. Do not let fancy equipment stop you. The only thing I would not skip is the piping tip — it makes a huge difference in how professional the final cupcakes look. If you do not have one, a zip-top bag with the corner snipped off will work, but the swirls will not have as much definition.
Preparation Method
Step 1: Prepare Your Oven and Pans
Preheat your oven to 350°F (175°C). Line your muffin tin with 12 paper liners. I like to use white liners so the pastel colors really pop, but any color works. Set the tin aside while you make the batter.
Step 2: Cream the Butter and Sugar
In a large mixing bowl, beat the softened butter and granulated sugar together on medium speed for about 3-4 minutes. You want the mixture to look light, fluffy, and pale in color. Scrape down the sides of the bowl halfway through. This step is crucial — proper creaming creates air pockets that help your cupcakes rise. If the mixture looks greasy or separated, keep beating.
Step 3: Add the Eggs and Extracts
Add the eggs one at a time, beating well after each addition. Then add the vanilla extract and almond extract (if using). Beat until just combined. Do not overmix here, or you will deflate all that air you just created. The batter should look smooth and glossy at this point.
Step 4: Combine Dry and Wet Ingredients
In a separate bowl, whisk together the flour, baking powder, and salt. With the mixer on low speed, add the dry ingredients in three additions, alternating with the milk. Start and end with the dry ingredients. Mix just until the flour disappears — a few streaks are fine. Overmixing at this stage will make your cupcakes tough.
Step 5: Divide and Color the Batter
Divide the batter evenly into two bowls. Add purple gel food coloring to one bowl and orange gel food coloring to the other. Use a toothpick to add the color — start with a tiny amount and add more until you reach your desired pastel shade. Stir gently until the color is evenly distributed. Remember, the color will lighten slightly during baking, so go a shade darker than what you want in the final cupcake.
Step 6: Fill the Cupcake Liners
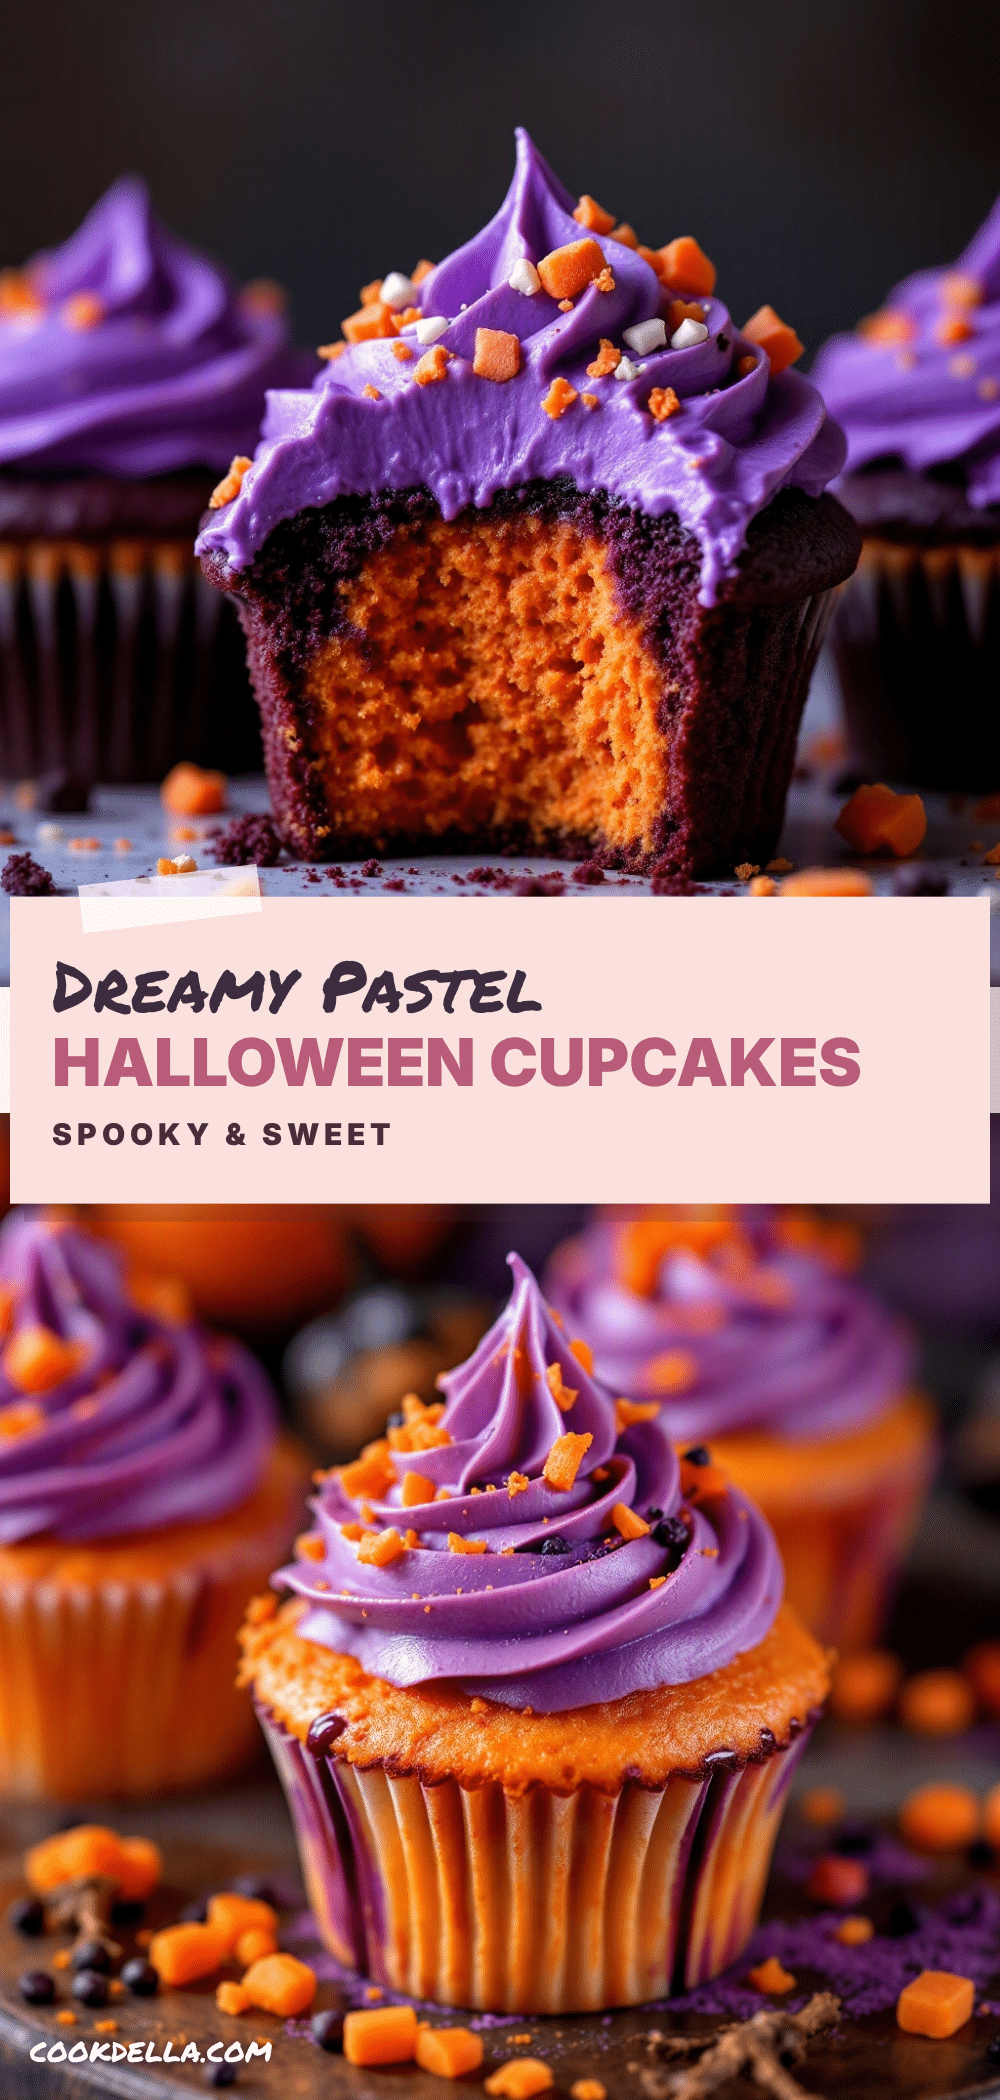
Using a cookie scoop or two spoons, fill each liner about two-thirds full. For a marbled effect, drop a scoop of purple batter and a scoop of orange batter into each liner, then swirl gently with a toothpick. For a solid color look, fill half the liners with purple batter and half with orange. Bake for 18-20 minutes, or until a toothpick inserted into the center comes out clean or with a few moist crumbs. The tops should spring back when lightly touched.
Step 7: Cool Completely
Let the cupcakes cool in the tin for 5 minutes, then transfer them to a wire rack to cool completely. Do not frost warm cupcakes — the buttercream will melt into a sad, greasy puddle. I learned this the hard way. Give them at least 30 minutes to cool.
Step 8: Make the Buttercream
While the cupcakes cool, make the frosting. In a large bowl, beat the softened butter on medium speed for 2 minutes until smooth and creamy. Add the sifted powdered sugar one cup at a time, beating on low speed to prevent a sugar cloud. Add the heavy cream, vanilla extract, and pinch of salt. Beat on medium-high speed for 3-4 minutes until the frosting is light, fluffy, and spreadable. If it is too thick, add another tablespoon of cream. If it is too thin, add a little more powdered sugar.
Step 9: Color the Frosting
Divide the frosting into two bowls. Color one bowl with purple gel food coloring and the other with orange. Use a toothpick to add the color gradually. Stir until the color is even. For the two-toned piping effect, lay a piece of plastic wrap on your work surface. Spoon purple frosting in a line down the center of the plastic wrap, then spoon orange frosting next to it. Roll the plastic wrap into a log, twist the ends, and snip off one corner. Place the log into your piping bag fitted with the star tip. This method gives you that beautiful ombré swirl with zero extra effort.
Step 10: Pipe and Decorate
Pipe the frosting onto the cooled cupcakes in a spiral, starting from the outside edge and working inward. Lift the piping bag straight up at the end for a clean finish. Sprinkle with edible glitter or sanding sugar immediately, while the frosting is still soft. The glitter will stick better this way. Repeat with all 12 cupcakes.
Cooking Tips & Techniques
I have made these cupcakes more times than I can count, and I have definitely made my share of mistakes. Here is what I have learned so you do not have to repeat my errors.
Temperature matters more than you think. Room temperature ingredients are not a suggestion — they are a requirement. Cold butter will not cream properly, and cold eggs can cause your batter to curdle. If your batter looks separated or grainy, your ingredients were probably too cold. Let them sit out for 30 minutes before you start.
Do not overmix the batter. I know it is tempting to keep beating until everything looks perfectly smooth, but overmixing develops gluten, which makes cupcakes tough and dense. Mix just until the flour disappears. A few small lumps are fine — they will bake out.
Gel food coloring is your best friend. I tried making these with liquid food coloring once, and it was a disaster. The batter thinned out, the colors were washed out, and the frosting never set properly. Gel coloring gives you vibrant pastels with just a few drops, and it does not affect the texture. Americolor and Wilton are both reliable brands.
Pipe with confidence. Your first cupcake might not look perfect, and that is okay. The beauty of these cupcakes is that the two-toned effect is forgiving. Even a messy swirl looks intentional and artistic. Start piping from the outside edge and work your way inward in a continuous spiral. Keep steady pressure on the bag, and release pressure as you lift up at the end.
Cool completely before frosting. I cannot stress this enough. If your cupcakes are even slightly warm, the buttercream will melt and slide right off. Patience is hard, but it pays off. Pop them in the fridge for 10 minutes if you are in a hurry.
Variations & Adaptations
One of the best things about this recipe is how easy it is to adapt. Here are some variations I have tried and loved.
Vegan Version: Substitute the butter with vegan butter (I like Miyoko’s), use flax eggs (1 tablespoon ground flaxseed mixed with 3 tablespoons water per egg), and swap the milk for unsweetened oat or almond milk. The texture will be slightly denser but still delicious. For the frosting, use vegan butter and canned coconut cream instead of heavy cream.
Gluten-Free Option: Replace the all-purpose flour with a 1:1 gluten-free baking flour blend. I have had good results with King Arthur Measure for Measure. Do not overmix the batter, and expect the cupcakes to be a bit more delicate. Let them cool completely in the tin before handling.
Flavor Twists: Swap the vanilla extract for lemon or orange extract for a citrusy version. Add a teaspoon of pumpkin pie spice to the batter for a fall-inspired flavor. Or fold in mini chocolate chips for a little crunch. For a chocolate base, replace ¼ cup of flour with unsweetened cocoa powder.
Different Color Schemes: These work for any holiday. Try pink and red for Valentine’s Day, green and gold for St. Patrick’s Day, or blue and silver for New Year’s Eve. The technique is the same — just swap the colors.
Mini Cupcake Version: Use a mini muffin tin and bake for 10-12 minutes instead of 18-20. You will get about 36 mini cupcakes. Perfect for parties where you want people to try a little bit of everything.
Serving & Storage Suggestions
These cupcakes are best served at room temperature. The cake is tender and moist, and the buttercream is silky and soft. If you have refrigerated them, let them sit out for 15-20 minutes before serving. The flavor really opens up as they come to room temperature.
For presentation, arrange the cupcakes on a white cake stand or a wooden board. Mix the purple and orange ones together for a pretty ombré effect. Add a few fall leaves or mini pumpkins around the base for a seasonal touch. If you are serving these at a Halloween party, sprinkle a few edible glitter stars on the table for extra sparkle.
These pair beautifully with a warm cup of apple cider, a pumpkin spice latte, or a simple glass of cold milk. For a dessert spread, serve them alongside creamy make-ahead vegan chocolate avocado pudding for a fun contrast in textures and flavors. They also go well with a fresh cucumber mint green tea cooler if you want something refreshing to balance the sweetness.
Storage Instructions: Store unfrosted cupcakes in an airtight container at room temperature for up to 3 days. Frosted cupcakes should be stored in the refrigerator in a single layer (or stacked with parchment paper between layers) for up to 5 days. The frosting will firm up in the fridge, so let them sit out for 15 minutes before serving.
Freezing Instructions: You can freeze unfrosted cupcakes for up to 3 months. Wrap each cupcake individually in plastic wrap, then place them in a freezer-safe bag. Thaw at room temperature before frosting. Frosted cupcakes can also be frozen, but the texture of the buttercream may change slightly upon thawing. I prefer to freeze unfrosted and make fresh frosting when I am ready to serve.
Nutritional Information & Benefits
Here is the estimated nutritional breakdown per cupcake (based on 12 servings):
- Calories: 385
- Total Fat: 19g
- Saturated Fat: 12g
- Cholesterol: 75mg
- Sodium: 180mg
- Total Carbohydrates: 52g
- Dietary Fiber: 0.5g
- Sugars: 40g
- Protein: 3g
These are definitely a treat, not an everyday snack, but they are made with real ingredients. The butter provides fat-soluble vitamins A, D, E, and K. The eggs add high-quality protein and choline, which supports brain health. And honestly, sometimes the biggest benefit is the joy of making something beautiful and sharing it with people you love. That counts for something, right?
Dietary Considerations: This recipe contains dairy, eggs, and gluten. For vegan and gluten-free adaptations, see the Variations section above. The almond extract is optional, so you can easily omit it for nut-free needs.
FAQs
Can I use liquid food coloring instead of gel?
You can, but I do not recommend it. Liquid food coloring will thin out your batter and frosting, and you will need a lot of it to get any noticeable color. Gel food coloring gives you vibrant pastels without changing the texture. A little goes a long way.
Why did my cupcakes sink in the middle?
This usually happens for one of three reasons: your oven temperature is too low, you opened the oven door too early, or you overmixed the batter. Make sure your oven is fully preheated, resist the urge to peek until the last 5 minutes of baking, and mix just until the flour disappears.
Can I make these cupcakes ahead of time?
Absolutely. Bake the cupcakes up to 3 days in advance and store them unfrosted in an airtight container at room temperature. Make the frosting and decorate the day you plan to serve them. The frosting can be made a day ahead and stored in the refrigerator — just let it come to room temperature and re-whip it before piping.
How do I get the two-toned frosting effect without a piping bag?
You can use a zip-top bag. Fill the bag with purple frosting on one side and orange frosting on the other, then snip off the corner. It will not be as precise as a piping tip, but it will still give you a beautiful ombré effect. Alternatively, you can spread the two colors side by side on the cupcake with a knife and swirl them together.
My buttercream is too runny. What did I do wrong?
This usually means your butter was too soft or you added too much liquid. Pop the frosting in the refrigerator for 10-15 minutes to firm it up, then re-whip it. If it is still too soft, add a little more sifted powdered sugar, one tablespoon at a time, until it reaches the right consistency.
Conclusion
These Dreamy Purple and Orange Pastel Halloween Cupcakes are proof that Halloween baking does not have to be scary. They are soft, pretty, and just sweet enough — the kind of treat that makes both kids and adults smile. Whether you are making them for a classroom party, a fall birthday, or just because you want something pretty on your kitchen counter, they deliver every single time.
I love that these cupcakes let me be creative without stressing me out. The two-toned frosting technique looks impressive, but it is actually easy enough for a beginner. The colors are customizable. The flavor is classic and crowd-pleasing. Honestly, what is not to love?
I would love to see your versions of these. Try different color combinations, experiment with flavors, and make them your own. Share your photos, tag me, and let me know how they turned out. And if you come up with a variation I have not thought of, definitely tell me about it. Happy baking, and happy Halloween!
Pin This Recipe!
Purple Orange Pastel Halloween Cupcakes: Easy Dreamy Recipe
These dreamy purple and orange pastel Halloween cupcakes are soft, pretty, and just sweet enough. With a tender vanilla crumb and silky two-toned buttercream, they are the perfect whimsical treat for fall celebrations.
- Prep Time: 20 minutes
- Cook Time: 20 minutes
- Total Time: 40 minutes
- Yield: 12 cupcakes 1x
- Category: Dessert
- Cuisine: American
Ingredients
- 1 ½ cups (190g) all-purpose flour
- 1 cup (200g) granulated sugar
- ½ cup (113g) unsalted butter, softened
- 2 large eggs, room temperature
- ½ cup (120ml) whole milk, room temperature
- 1 ½ teaspoons baking powder
- ½ teaspoon salt
- 1 teaspoon vanilla extract
- ¼ teaspoon almond extract (optional)
- Purple and orange gel food coloring
- 1 cup (226g) unsalted butter, softened (for frosting)
- 3 ½ cups (420g) powdered sugar, sifted
- 2 tablespoons heavy cream
- 1 teaspoon vanilla extract (for frosting)
- Pinch of salt (for frosting)
- Purple and orange gel food coloring (for frosting)
- Edible glitter or sanding sugar (for decoration)
Instructions
- Preheat oven to 350°F (175°C). Line a 12-cup muffin tin with paper liners.
- In a large bowl, beat softened butter and granulated sugar on medium speed for 3-4 minutes until light and fluffy.
- Add eggs one at a time, beating well after each. Add vanilla and almond extract; beat until combined.
- In a separate bowl, whisk together flour, baking powder, and salt. With mixer on low, add dry ingredients in three additions, alternating with milk. Mix just until combined.
- Divide batter evenly into two bowls. Add purple gel food coloring to one bowl and orange to the other; stir gently.
- Fill each liner about two-thirds full. For marbled effect, drop a scoop of each color into each liner and swirl with a toothpick. Bake 18-20 minutes until a toothpick comes out clean.
- Cool in tin 5 minutes, then transfer to wire rack to cool completely (at least 30 minutes).
- For buttercream: Beat softened butter on medium speed for 2 minutes until creamy. Add sifted powdered sugar one cup at a time, then heavy cream, vanilla, and salt. Beat on medium-high 3-4 minutes until fluffy.
- Divide frosting into two bowls. Color one purple and one orange with gel food coloring. For two-toned effect, spoon both colors onto plastic wrap, roll into a log, snip corner, and place in piping bag with star tip.
- Pipe frosting onto cooled cupcakes in a spiral from outside in. Sprinkle with edible glitter immediately.
Notes
Use room temperature ingredients for best texture. Gel food coloring is essential for vibrant pastels. Do not overmix batter. Cool cupcakes completely before frosting. For two-toned frosting, use plastic wrap method for easy ombré effect.
Nutrition
- Serving Size: 1 cupcake
- Calories: 385
- Sugar: 40
- Sodium: 180
- Fat: 19
- Saturated Fat: 12
- Carbohydrates: 52
- Fiber: 0.5
- Protein: 3
Keywords: Halloween cupcakes, pastel cupcakes, purple orange cupcakes, easy cupcake recipe, fall dessert, buttercream frosting, two-toned frosting


