Third time this week and I still can’t believe how the butter pools around the bone like that. By the fourth batch, I stopped timing it and just started watching for that moment when the garlic bubbles turn a pale gold and the pork releases from the pan without any fight. That’s when you know. That’s when you pull them out.
I wasn’t even trying to make a recipe at first. I had two thick-cut chops left from a Sunday roast experiment and a stick of butter that needed using up. The herb butter was an accident—I grabbed dill instead of parsley and just went with it. Honestly, that’s how most of my good kitchen discoveries happen. By messing up and refusing to start over.
The first batch came out fine. Edible. The kind of pork chop you eat without comment. But something about the butter-to-herb ratio felt off, and the garlic was too sharp, almost bitter against the richness. So I did what I always do: made it again the next day, then again the next. By Friday, my neighbors had started texting me asking what smelled so good. I sent them each a chop wrapped in foil. They didn’t complain.
This version—the one I’m sharing now—is the one that finally stuck. It’s not fancy. It’s not complicated. But it’s the kind of dinner that makes you slow down and actually taste what you’re eating. And honestly? That’s rare enough to write down.
Why You’ll Love This Recipe
Let me tell you why these juicy garlic butter baked pork chops are about to become your new weeknight go-to. I’ve tested this recipe more times than I care to admit, and every single time, the result is the same—tender, flavorful pork that doesn’t dry out.
- Quick & Easy: From start to table in under 30 minutes. No marinating overnight, no complicated techniques. Just simple steps that work.
- Simple Ingredients: You probably have most of this in your kitchen right now. Butter, garlic, herbs, pork chops. That’s it. No fancy grocery runs required.
- Perfect for Busy Weeknights: This is the kind of meal that feels special but comes together on a Tuesday when you’re tired and hungry and just want something good.
- Crowd-Pleaser: I’ve served these to picky eaters, meat-and-potatoes types, and my friend who “doesn’t really like pork.” Everyone cleans their plate.
- Unbelievably Delicious: The herb butter creates this rich, savory crust while keeping the inside juicy. The garlic infuses every bite. It’s comfort food that actually delivers.
What makes this recipe different from the rest? It’s the technique. Most baked pork chop recipes dry out because they cook the meat too long or at the wrong temperature. I tested this at 375°F, 400°F, and 425°F. I tried bone-in and boneless. I learned that the butter acts as a protective barrier, keeping the moisture locked in while the herbs do their flavor magic. This isn’t just another pork chop recipe—it’s the one I keep coming back to, and I think you will too.
What Ingredients You Will Need
This recipe uses simple, wholesome ingredients that work together to create something genuinely delicious. No weird specialty items, no hard-to-find spices. Just good food that tastes like effort (without the actual effort).
- Pork chops (4 pieces, bone-in, about 1-inch thick)—Bone-in chops stay juicier during baking. The bone conducts heat and adds flavor. If you only have boneless, reduce cooking time by about 5 minutes. Look for chops with good marbling—that fat equals flavor.
- Unsalted butter (4 tablespoons, softened)—I use unsalted so I can control the salt level. Let it sit out for 20 minutes before mixing. Cold butter won’t blend smoothly with the herbs, and you’ll end up with clumps. Trust me on this one.
- Garlic (4 cloves, minced)—Fresh garlic only here. The pre-minced stuff in jars has a different flavor that turns bitter when baked. Take the extra 30 seconds to mince fresh cloves. Your taste buds will thank you.
- Fresh parsley (2 tablespoons, finely chopped)—Flat-leaf or curly, doesn’t matter. Parsley adds brightness that cuts through the richness of the butter. If you’re in a pinch, use 1 teaspoon dried parsley, but fresh really is better here.
- Fresh thyme (1 tablespoon, leaves only)—Strip the leaves off the stems. Thyme and pork are a classic combo for a reason. Dried thyme works too—use 1 teaspoon instead.
- Fresh rosemary (1 teaspoon, finely chopped)—Go easy on rosemary. It’s potent and can overpower everything if you’re heavy-handed. A little goes a long way.
- Salt (1 teaspoon)—I prefer kosher salt for its clean taste and easy pinch-ability. Table salt works, but reduce to ¾ teaspoon since it’s more concentrated.
- Black pepper (½ teaspoon, freshly ground)—Pre-ground is fine, but fresh cracked pepper has more aroma. It makes a difference.
- Olive oil (1 tablespoon)—Just enough to sear the chops before baking. It helps create that golden crust. Avocado oil works too if that’s what you have.
Equipment Needed
You don’t need a fancy kitchen for this recipe. Here’s what you’ll actually use:
- Cast iron skillet or oven-safe frying pan—This is the most important tool. A cast iron skillet holds heat evenly and transfers beautifully from stovetop to oven. If you don’t have one, any oven-safe skillet works. Just make sure the handle isn’t plastic or rubber. I learned that lesson the hard way with a melted handle and a smoky kitchen.
- Small mixing bowl—For combining the herb butter. Any small bowl works.
- Sharp knife—For mincing garlic and chopping herbs. A dull knife makes everything harder and more dangerous. Trust me, a sharp knife is safer.
- Cutting board—Wood or plastic, doesn’t matter. Just have a clean surface.
- Tongs—For flipping the pork chops without piercing them. Piercing releases those precious juices.
- Meat thermometer—This is non-negotiable if you want perfectly cooked pork every time. An instant-read thermometer costs about $10 and saves you from overcooked, dry meat. I use mine constantly.
- Aluminum foil—For tenting the chops while they rest. Resting is crucial, and foil keeps them warm.
Budget-friendly tip: You can absolutely use a regular baking dish instead of a cast iron skillet. Just sear the chops in a regular pan first, then transfer them to the baking dish. It’s one extra step but works perfectly fine.
Preparation Method
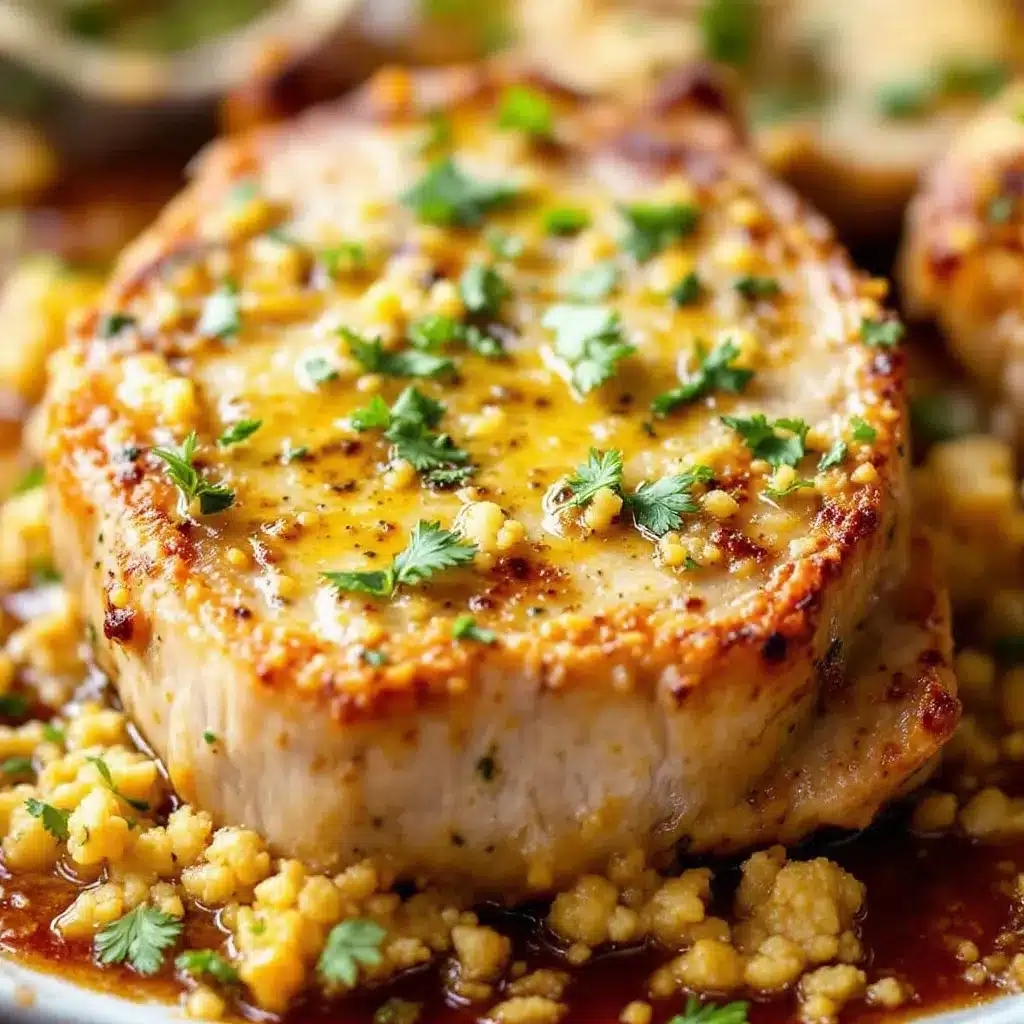
Let’s get cooking. Follow these steps, and you’ll have the juiciest pork chops of your life.
- Preheat your oven to 400°F (200°C). Position the rack in the middle. Give it a full 15 minutes to reach temperature—opening the door early lets heat escape and messes with cooking times.
- Make the herb butter. In your small bowl, combine the softened butter, minced garlic, chopped parsley, thyme leaves, and finely chopped rosemary. Mix until everything is evenly distributed. It should look like a green-flecked, fragrant paste. Set it aside at room temperature. Don’t refrigerate it—cold butter won’t spread properly on the hot chops.
- Pat the pork chops dry. Use paper towels to remove all surface moisture. This is honestly one of the most important steps. Wet meat won’t sear—it’ll steam. And steaming gives you gray, sad pork chops. Take your time here.
- Season generously. Sprinkle both sides of each chop with salt and pepper. Don’t be shy. Most of that seasoning stays on the surface and creates the crust. I use about ¼ teaspoon of salt per side.
- Heat your skillet over medium-high heat. Add the olive oil and swirl to coat the bottom. Wait until the oil shimmers—that’s your cue that it’s hot enough. If you’re not sure, flick a drop of water in the pan. If it sizzles immediately, you’re ready.
- Sear the pork chops. Place them in the hot skillet, being careful not to overcrowd. If your pan is small, work in batches. Sear for 2-3 minutes per side, until deeply golden brown. Don’t move the chops around while they’re cooking. Let them sit and develop that crust. When they release easily from the pan, they’re ready to flip.
- Top with herb butter. Turn off the heat. Using a spoon or spatula, spread about 1 tablespoon of the herb butter on top of each seared chop. Don’t worry if some melts into the pan—that’s flavor for later.
- Transfer to the oven. Place the entire skillet in the preheated oven. Bake for 10-12 minutes for bone-in chops that are 1-inch thick. For thinner chops, check at 8 minutes. For thicker ones, add 2-3 minutes.
- Check the temperature. This is where the meat thermometer comes in. Insert it into the thickest part of the chop, avoiding the bone. You’re looking for 145°F (63°C). That’s the USDA-recommended safe temperature for pork. At 145°F, the meat will be juicy and slightly pink in the center—that’s perfectly safe and delicious.
- Rest the chops. Remove the skillet from the oven. Transfer the pork chops to a cutting board or plate and tent loosely with aluminum foil. Let them rest for 5 minutes. I know it’s tempting to dig in immediately, but this step is crucial. The juices need time to redistribute throughout the meat. Cut into them too early, and all that goodness ends up on the plate instead of in your mouth.
- Spoon the pan juices. While the chops rest, spoon the garlic butter mixture from the skillet over the top. This extra step adds another layer of flavor and keeps the meat moist.
- Serve and enjoy. Place the rested chops on plates and drizzle any remaining pan butter over the top. Garnish with a sprinkle of fresh parsley if you’re feeling fancy.
Cooking Tips & Techniques
I’ve made every mistake in the book with pork chops so you don’t have to. Here’s what I learned the hard way.
Don’t skip the sear. I know it’s tempting to just throw everything in the oven and call it a day. But that stovetop sear creates a crust that locks in moisture and adds flavor you simply can’t get from baking alone. The Maillard reaction—that browning process—is where the magic happens. Skip it, and you’ll have pale, sad pork chops.
Room temperature meat cooks more evenly. Take your pork chops out of the fridge 20 minutes before cooking. Cold meat sears unevenly and takes longer to cook through, which increases the risk of drying out. I used to skip this step and wondered why my chops were always tough on the outside and cold in the middle.
Watch the garlic. Garlic burns easily at high temperatures. That’s why we add it to the butter instead of the hot pan. The butter protects the garlic and allows it to infuse without turning bitter. If your garlic smells sharp or acrid, it’s burning. Start over—it’s not worth salvaging.
Use a timer, but trust your senses. Ovens vary wildly. My oven runs hot, so I start checking at 8 minutes instead of 10. The first time you make this recipe, use the thermometer religiously. After a few times, you’ll start recognizing the visual cues—the way the butter bubbles, the color of the crust, the firmness when you press the meat.
Multitask smartly. While the pork chops are in the oven, prep your side dishes. I like to roast vegetables on the same rack—asparagus or green beans work beautifully. Or make a quick salad. The 10-12 minutes of baking time is perfect for pulling together a simple accompaniment.
One more thing about the butter. If your herb butter seems too soft, pop it in the fridge for 5 minutes. You want it spreadable but not runny. If it’s too cold, it won’t stick to the hot chops. Room temperature is the sweet spot.
Variations & Adaptations
This recipe is flexible. Here are some ways to make it your own.
Herb variations. Not a fan of rosemary? Skip it and double the thyme. Love tarragon? Swap it in for the parsley. I once made this with only dill and chives because that’s what was in my garden, and it was surprisingly good—lighter and fresher, perfect for spring. The herb-to-butter ratio stays the same; just play with the combinations.
Spicy version. Add ½ teaspoon of red pepper flakes to the herb butter. The heat cuts through the richness beautifully. My brother-in-law requests this version every time he visits. I also sometimes add a pinch of smoked paprika for depth.
Lemon herb butter. Add 1 teaspoon of lemon zest and 1 tablespoon of lemon juice to the butter mixture. The acidity brightens everything up and pairs perfectly with the pork. This is my go-to summer version when I want something lighter.
Dairy-free adaptation. Use vegan butter or good quality olive oil instead of butter. The texture won’t be quite as rich, but the flavor is still excellent. I’ve tested this with a high-quality plant-based butter, and honestly, it was hard to tell the difference.
Different cooking methods. If you don’t want to turn on the oven, try this in an air fryer. I have a recipe for crispy air fryer pork chops with garlic herb butter that uses the same herb butter concept but cooks in half the time. The air fryer gives you an even crispier exterior, which is pretty fantastic.
Thicker chops. For 1.5-inch thick chops, increase baking time to 15-18 minutes. For 2-inch thick chops, start checking at 20 minutes. Always use your thermometer—thickness varies by brand and cut.
Serving & Storage Suggestions
These pork chops are versatile enough to pair with almost anything. Here’s how I like to serve them.
Serving temperature. Serve the chops hot, right after resting. The butter should still be glossy and warm. I like to spoon the pan juices over the top right before serving—it adds moisture and makes the presentation look intentional.
What to serve alongside. These chops pair beautifully with roasted vegetables—asparagus, Brussels sprouts, or green beans all work well. Mashed potatoes are a classic choice, soaking up that garlic butter sauce. For something lighter, try a simple green salad with a lemon vinaigrette. I also love serving them with a side of easy creamy cucumber salad with dill and sour cream—the cool, tangy crunch contrasts perfectly with the rich, savory pork.
Wine pairing. A light red like Pinot Noir or a full-bodied white like Chardonnay works beautifully. The butter and herbs in the dish complement both.
Storage. Store leftover pork chops in an airtight container in the refrigerator for up to 3 days. The flavor actually deepens overnight as the herbs continue to infuse. I’ve eaten these cold, straight from the fridge, sliced over a salad, and it was surprisingly good.
Reheating. The best way to reheat is in a low oven (300°F) for about 10 minutes, covered with foil. This prevents the meat from drying out. The microwave works in a pinch, but it’ll toughen the meat. If you must use the microwave, do it in 30-second bursts at 50% power.
Freezing. You can freeze cooked pork chops for up to 2 months. Wrap each chop individually in plastic wrap, then place in a freezer bag. Thaw overnight in the refrigerator before reheating. The texture won’t be quite as perfect as fresh, but it’s still delicious for a quick meal.
How flavors develop. The garlic and herb flavors actually mellow and blend together after a day in the fridge. Some people prefer the leftovers for this reason. The butter solidifies, but it melts back into the meat when reheated.
Nutritional Information & Benefits
Here’s a rough estimate per serving (one pork chop with herb butter):
- Calories: 380-420
- Protein: 35-40g
- Fat: 25-28g
- Carbohydrates: 1-2g
- Fiber: 0g
- Sugar: 0g
Pork chops are an excellent source of high-quality protein, which supports muscle maintenance and repair. They’re also rich in B vitamins, particularly B12 and niacin, which help with energy metabolism. The garlic in this recipe contains allicin, a compound known for its immune-supporting properties. Fresh herbs like parsley and thyme provide antioxidants and add flavor without extra calories or sodium.
This recipe is naturally low-carb and gluten-free, making it suitable for keto and paleo diets. If you’re watching your saturated fat intake, you can reduce the butter to 2 tablespoons, though the texture will be less luxurious. For a lower-calorie version, use olive oil instead of butter—the flavor profile changes but remains delicious.
Potential allergens: dairy (butter). To make it dairy-free, substitute with vegan butter or olive oil as mentioned in the variations section.
Conclusion
These juicy garlic butter baked pork chops are the kind of recipe that proves simple ingredients, done right, beat complicated techniques every time. The herb butter does all the heavy lifting—keeping the meat moist, adding layers of flavor, and making the whole kitchen smell incredible while they bake.
I’ve made this recipe so many times now that I don’t even need to look at my notes anymore. And every single time, I’m surprised by how good it is. Not in a dramatic way—just a quiet, satisfying surprise that something this simple can taste this complete.
Try it once, and I think you’ll understand. Play with the herbs, adjust the garlic to your liking, serve it with whatever sides make you happy. That’s the beauty of a recipe like this—it’s a starting point, not a rulebook.
I’d love to hear how yours turn out. Drop a comment below, tag me in your photos, or tell me what variations you tried. Did you add lemon? Extra garlic? A pinch of cayenne? Share your version. That’s how recipes evolve and get better.
Until next time, happy cooking. And don’t forget the butter.
Frequently Asked Questions
Can I use boneless pork chops for this recipe?
Yes, absolutely. Boneless chops work fine, but they cook faster and can dry out more easily. Reduce the baking time by about 5 minutes and start checking the internal temperature at 8 minutes. Boneless chops are typically thinner, so they need less time in the oven. The bone-in version stays juicier because the bone conducts heat and adds flavor, but boneless is a great option if that’s what you have on hand.
How do I know when the pork chops are done without a thermometer?
While a meat thermometer is the most reliable method, you can check by making a small cut in the thickest part of the chop. The meat should be slightly pink in the center with clear juices. If the juices run clear and the meat is white all the way through, it’s likely overcooked. Another method: press the chop with your finger. It should feel firm but with a little give—similar to the flesh between your thumb and index finger when your hand is relaxed.
Can I prepare the herb butter in advance?
Definitely. The herb butter can be made up to 3 days ahead and stored in the refrigerator. Let it come to room temperature for about 20 minutes before using so it spreads easily. You can also freeze the butter for up to 3 months—wrap it tightly in plastic wrap and store in a freezer bag. Thaw overnight in the fridge before using. Making the butter ahead is a great time-saver for busy weeknights.
What if I don’t have fresh herbs?
Dried herbs work in a pinch, but the flavor won’t be quite as bright. Use about one-third the amount of dried herbs compared to fresh. For example, use 1 teaspoon dried parsley instead of 1 tablespoon fresh. Dried thyme and rosemary are more potent, so use them sparingly. Rehydrate dried herbs in a tablespoon of warm water for 5 minutes before mixing with the butter—this helps release their flavor.
Can I double this recipe for a crowd?
Yes, but you’ll need to work in batches for the searing step. Overcrowding the pan lowers the temperature and prevents proper browning. Sear the chops in batches, then arrange them in a single layer in a large baking dish. Top each with herb butter and bake as directed. You may need to add a few extra minutes of baking time if the dish is crowded. For a larger crowd, I recommend using two pans to ensure even cooking.
Pin This Recipe!
Juicy Garlic Butter Baked Pork Chops – Easy Herb Butter Recipe

Tender, juicy pork chops baked with a flavorful herb butter that keeps them moist and delicious. This easy weeknight recipe comes together in under 30 minutes with simple ingredients.
- Prep Time: 10 minutes
- Cook Time: 15 minutes
- Total Time: 25 minutes
- Yield: 4 servings 1x
- Category: Main Course
- Cuisine: American
Ingredients
- 4 bone-in pork chops, about 1-inch thick
- 4 tablespoons unsalted butter, softened
- 4 cloves garlic, minced
- 2 tablespoons fresh parsley, finely chopped
- 1 tablespoon fresh thyme leaves
- 1 teaspoon fresh rosemary, finely chopped
- 1 teaspoon kosher salt
- ½ teaspoon freshly ground black pepper
- 1 tablespoon olive oil
Instructions
- Preheat your oven to 400°F (200°C). Position the rack in the middle.
- In a small bowl, combine softened butter, minced garlic, chopped parsley, thyme leaves, and finely chopped rosemary. Mix until evenly distributed. Set aside at room temperature.
- Pat the pork chops dry with paper towels to remove all surface moisture.
- Season both sides of each chop generously with salt and pepper.
- Heat a cast iron skillet or oven-safe frying pan over medium-high heat. Add olive oil and swirl to coat. Wait until the oil shimmers.
- Sear the pork chops for 2-3 minutes per side until deeply golden brown. Do not overcrowd the pan.
- Turn off the heat. Spread about 1 tablespoon of herb butter on top of each seared chop.
- Transfer the skillet to the preheated oven. Bake for 10-12 minutes for 1-inch thick bone-in chops.
- Check the internal temperature with a meat thermometer; it should read 145°F (63°C) in the thickest part, avoiding the bone.
- Remove from oven. Transfer pork chops to a cutting board or plate and tent loosely with aluminum foil. Let rest for 5 minutes.
- Spoon the garlic butter mixture from the skillet over the rested chops.
- Serve hot, drizzled with any remaining pan butter. Garnish with fresh parsley if desired.
Notes
For best results, let pork chops sit at room temperature for 20 minutes before cooking. Use a meat thermometer to ensure perfect doneness. If using boneless chops, reduce baking time by about 5 minutes. The herb butter can be made up to 3 days ahead and stored in the refrigerator.
Nutrition
- Serving Size: 1 pork chop with her
- Calories: 400
- Sodium: 650
- Fat: 26
- Saturated Fat: 12
- Carbohydrates: 1
- Protein: 38
Keywords: garlic butter pork chops, baked pork chops, herb butter pork chops, easy pork chop recipe, juicy pork chops, weeknight dinner, low-carb, gluten-free


