The crackle of a gingersnap crust giving way under a spoon — that’s the whole reason I make this pie. Not the pumpkin filling, not the whipped cream on top, though those are lovely. It’s that first bite where the spicy, sandy cookie crumbles against something smooth and cold that gets me every single time.
I landed on this Easy No-Bake Pumpkin Pie with Gingersnap Crust completely by accident. It was the week before Thanksgiving a few years back, and my oven had decided to go on strike. I had a can of pumpkin puree staring at me from the pantry, a bag of gingersnaps I’d bought on a whim, and absolutely no backup plan. The oven was dead silent, but I still wanted that fall dessert feeling. So I started throwing things together in a bowl, not really sure if it would work.
Honestly, I was skeptical. No-bake pumpkin pie sounded like a compromise, a consolation prize for someone without a working oven. But then I took that first cold, creamy bite with the crunchy, molasses-spiked crust, and I realized I wasn’t missing anything at all. It was better. Less fuss, more flavor, and somehow richer than the baked version.
This pie has become my go-to for every fall gathering since. It’s the one I bring when I want to show up with something impressive without spending all day in the kitchen. It’s the one that disappears fastest at the dessert table, and the one people ask for the recipe by name. There’s something about the way the spicy gingersnaps play off the silky pumpkin that just feels right. No oven required, no stress allowed.
Why You’ll Love This Recipe
This isn’t just another pumpkin pie. It’s the one that will change how you think about no-bake desserts entirely. Here’s why this Easy No-Bake Pumpkin Pie with Gingersnap Crust stands apart from everything else:
- No Oven Required: Perfect for when your oven is occupied with a turkey, it’s too hot to bake, or you simply don’t want to deal with the fuss. This pie comes together entirely on the stovetop and in the refrigerator.
- Simple Ingredients: You likely have most of these in your kitchen right now. No fancy extracts, no hard-to-find spices. Just real, whole ingredients that work together beautifully.
- Make-Ahead Magic: This pie actually gets better after a day in the fridge. The flavors meld, the crust sets perfectly, and you get to cross dessert off your to-do list a full 24 hours before your gathering.
- Perfect for Fall Gatherings: Whether it’s Thanksgiving, Friendsgiving, a cozy dinner party, or just a Tuesday that needs some pumpkin, this pie fits the bill. It’s elegant enough to impress and easy enough to make on a whim.
- Unbelievably Creamy Texture: The filling is silky smooth without being heavy. It’s rich but not dense, sweet but perfectly balanced by the spicy, salty crust. That first bite will make you close your eyes.
- Crowd-Pleaser: I’ve served this to pumpkin pie purists and skeptics alike, and every single person goes back for seconds. It’s that good.
What makes this recipe different is the technique. Instead of relying on gelatin or complicated stabilizers, I use a simple combination of cream cheese and whipped cream to create a filling that’s stable, sliceable, and impossibly creamy. The crust isn’t just crushed cookies and butter — it’s toasted first to deepen the flavor, then pressed into the pan while still warm. It’s a small step that makes a huge difference.
This is the kind of dessert that makes you feel like you’ve pulled off something magical, when really all you did was stir a few things together and let the fridge do the work. It’s comfort food reimagined — faster, easier, but with all the soul-soothing satisfaction of the original.
What Ingredients You Will Need
This recipe uses simple, wholesome ingredients that come together to create something truly special. Most of these are pantry staples, especially during fall, and the few specialty items are easy to find at any grocery store.
For the Gingersnap Crust
- 2 cups (about 200g) gingersnap cookies, finely crushed — I recommend Nabisco or Anna’s Ginger Thins for the best flavor and texture. You want cookies with real ginger and molasses for that deep, spicy kick. Pulse them in a food processor or place them in a zip-top bag and crush with a rolling pin.
- 6 tablespoons (85g) unsalted butter, melted — Use good quality butter here. It’s the glue that holds everything together and adds richness. Salted butter works too, just reduce the added salt slightly.
- 2 tablespoons (25g) granulated sugar — Just a little extra sweetness to balance the spicy cookies. You can skip this if your gingersnaps are very sweet.
- Pinch of salt — A tiny pinch brings out all the flavors and keeps the crust from tasting flat.
For the Pumpkin Filling
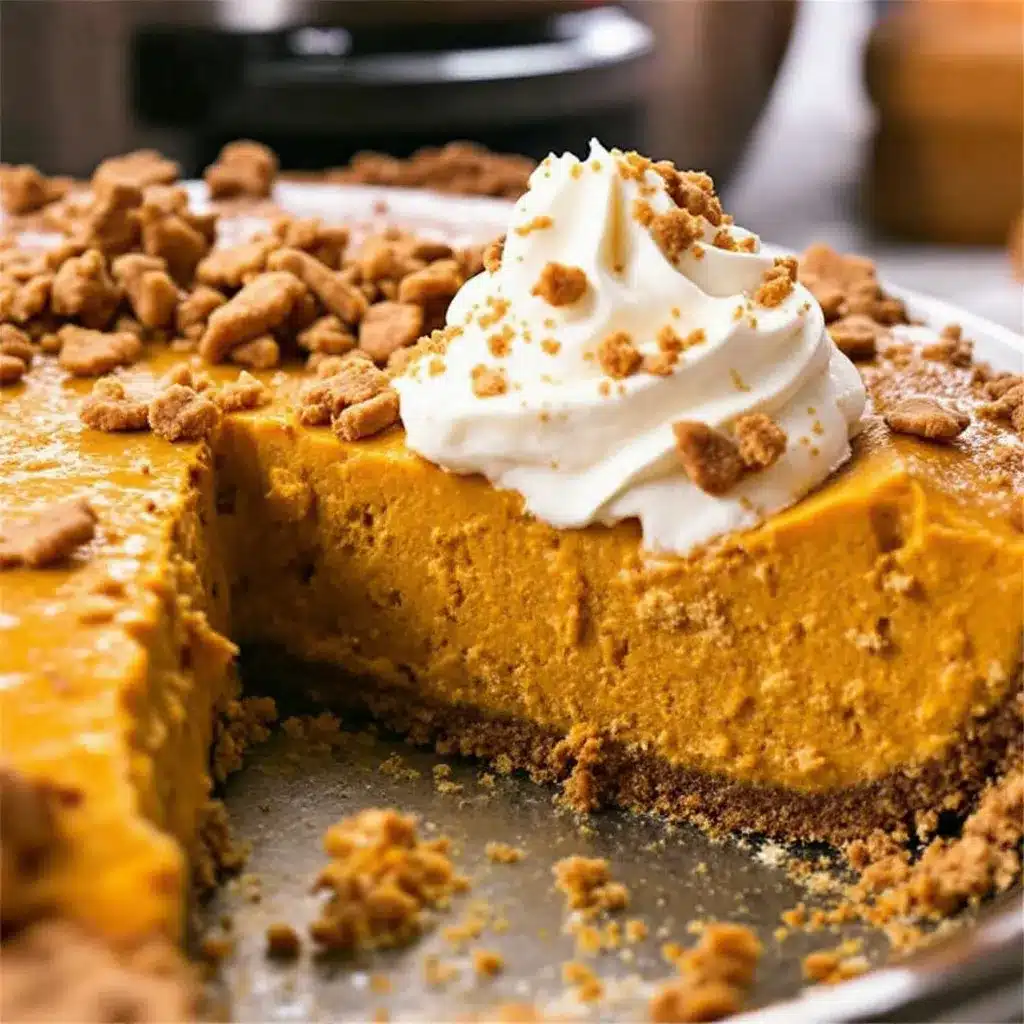
- 1 can (15 ounces or 425g) pumpkin puree — Not pumpkin pie filling! You want 100% pure pumpkin. Libby’s is my go-to brand because it’s consistently thick and not watery. If you’re feeling ambitious, you can roast and puree your own sugar pumpkin, but canned works beautifully here.
- 8 ounces (226g) cream cheese, softened to room temperature — Full-fat cream cheese gives the best texture and flavor. Let it sit on the counter for at least an hour before starting. Philadelphia is my preferred brand for consistent results.
- 1 cup (240ml) heavy whipping cream, cold — This gets whipped into stiff peaks to lighten the filling. Make sure it’s very cold straight from the refrigerator. Heavy cream with at least 36% milk fat works best.
- 1/2 cup (100g) packed light brown sugar — Brown sugar adds molasses notes that complement the gingersnap crust perfectly. Dark brown sugar works too for a deeper flavor.
- 1/4 cup (50g) granulated sugar — Balances the brown sugar and adds just the right amount of sweetness.
- 2 teaspoons pumpkin pie spice — You can use store-bought or make your own with 1 teaspoon cinnamon, 1/2 teaspoon ginger, 1/4 teaspoon nutmeg, 1/4 teaspoon allspice, and a pinch of cloves.
- 1 teaspoon vanilla extract — Pure vanilla extract adds warmth and depth. Avoid imitation vanilla if possible.
- 1/2 teaspoon salt — Don’t skip this. Salt makes all the flavors pop and keeps the filling from tasting one-dimensional.
For Topping (Optional but Recommended)
- 1 cup (240ml) heavy whipping cream, cold — For homemade whipped cream. You can also use store-bought, but homemade is so much better.
- 2 tablespoons powdered sugar — Sweetens and stabilizes the whipped cream.
- 1/2 teaspoon vanilla extract — For flavor.
- Extra crushed gingersnaps and fresh mint leaves — For garnish, because we eat with our eyes first.
Equipment Needed
You don’t need a lot of fancy equipment for this Easy No-Bake Pumpkin Pie with Gingersnap Crust. Here’s what you’ll need:
- 9-inch pie plate or springform pan — A standard glass or ceramic pie plate works perfectly. A springform pan makes for prettier slices and easier removal, but it’s not necessary. I use a deep-dish ceramic pie plate from Emile Henry, and it works beautifully.
- Food processor or zip-top bag and rolling pin — For crushing the gingersnaps. A food processor gives the most consistent texture, but the bag-and-rolling-pin method works in a pinch and is oddly satisfying.
- Electric hand mixer or stand mixer — For whipping the cream and beating the cream cheese mixture. A hand mixer is perfectly fine. If you’re feeling strong, you can whip the cream by hand with a whisk, but your arm will definitely feel it.
- Large mixing bowls — At least two: one for the crust mixture and one for the filling.
- Measuring cups and spoons — For accurate measurements. Baking is a science, and getting the ratios right matters.
- Rubber spatula — For scraping down the sides of the bowl and folding in the whipped cream gently.
- Plastic wrap or aluminum foil — For covering the pie while it chills.
If you don’t have a springform pan, line your pie plate with a strip of parchment paper hanging over the edges — it makes lifting out slices much easier. And if you don’t have a food processor, a sturdy zip-top bag and a heavy-bottomed glass work surprisingly well for crushing cookies. Just make sure the bag doesn’t have any holes, or you’ll be finding cookie dust in unexpected places for days.
Preparation Method
Let’s make this Easy No-Bake Pumpkin Pie with Gingersnap Crust. Trust me, it’s simpler than you think, and the results are absolutely stunning.
- Make the crust: Place the gingersnap cookies in a food processor and pulse until you have fine, even crumbs. You should have about 2 cups of crumbs. Transfer to a medium bowl. Pour in the melted butter, sugar, and salt, and stir with a fork until every crumb is moistened. The mixture should look like wet sand and hold together when pressed in your fist.
- Press the crust into the pan: Transfer the crumb mixture to your 9-inch pie plate. Using the bottom of a flat measuring cup or a glass, press the crumbs firmly and evenly into the bottom and up the sides of the plate. Take your time here — a well-packed crust holds together much better. Place the crust in the refrigerator to firm up while you make the filling, at least 20 minutes.
- Whip the cream: In a large bowl, pour in the cold heavy whipping cream. Using an electric hand mixer or stand mixer fitted with the whisk attachment, beat the cream on medium-high speed until soft peaks form. This takes about 2-3 minutes. Add the powdered sugar and vanilla, then continue beating until stiff peaks form — the cream should hold its shape when you lift the beaters. Set aside in the refrigerator.
- Beat the cream cheese: In another large bowl, beat the softened cream cheese with an electric mixer on medium speed until smooth and creamy, about 1 minute. Scrape down the sides of the bowl. Add the brown sugar, granulated sugar, pumpkin pie spice, vanilla extract, and salt. Beat on medium speed until combined and smooth, about 2 minutes. The mixture should be light and fluffy with no lumps.
- Add the pumpkin: Add the pumpkin puree to the cream cheese mixture and beat on low speed until fully incorporated. Scrape down the sides and bottom of the bowl to make sure everything is evenly mixed. The mixture will be thick and a beautiful deep orange color.
- Fold in the whipped cream: Take the whipped cream out of the refrigerator. Using a rubber spatula, gently fold about one-third of the whipped cream into the pumpkin mixture to lighten it. Then fold in the remaining whipped cream until no white streaks remain. Be gentle — you want the filling to stay airy and light.
- Fill the crust: Take the chilled crust out of the refrigerator. Spoon the pumpkin filling into the crust and spread it evenly with the spatula. Give the pie plate a few gentle taps on the counter to settle the filling and remove any air bubbles.
- Chill the pie: Cover the pie loosely with plastic wrap or aluminum foil and refrigerate for at least 6 hours, but preferably overnight. The filling needs time to set completely. I know it’s tempting to dig in early, but patience pays off here. The pie will slice much cleaner after a full night in the fridge.
- Make the whipped cream topping: Just before serving, make the fresh whipped cream. Beat the cold heavy cream, powdered sugar, and vanilla until stiff peaks form. Spread or pipe the whipped cream over the chilled pie. Sprinkle with extra crushed gingersnaps and garnish with fresh mint leaves if desired.
- Slice and serve: Use a sharp knife dipped in hot water and wiped dry for clean slices. Cut the pie and serve immediately. Store any leftovers in the refrigerator.
Cooking Tips & Techniques
After making this Easy No-Bake Pumpkin Pie with Gingersnap Crust more times than I can count, I’ve learned a few things the hard way. Here are my best tips to ensure your pie turns out perfect every time.
Don’t skip toasting the crust. I know it’s a no-bake recipe, but taking the extra two minutes to toast the gingersnap crumbs in a dry skillet before adding the butter makes a huge difference. It deepens the molasses flavor and adds a subtle warmth you can’t get any other way. Just stir the crumbs in a skillet over medium heat for 2-3 minutes until fragrant, then let them cool before adding the butter.
Room temperature cream cheese is non-negotiable. Cold cream cheese will leave you with lumpy filling and a sad pie. Take it out of the refrigerator at least an hour before you start. If you’re in a hurry, cut it into small cubes and microwave on low power in 10-second bursts until softened but not warm.
Don’t overwhip the cream. Stop as soon as it holds stiff peaks. If you keep going, you’ll end up with butter. And while homemade butter is lovely, it’s not what we want here. Watch for the cream to look thick and billowy, and when you lift the beaters, the peaks should stand up straight without flopping over.
Patience with the chill time. I cannot stress this enough. Six hours is the absolute minimum, but overnight is ideal. The filling needs time to firm up so you get clean, beautiful slices. I once tried to rush it after just four hours and ended up with a messy, soupy situation. Learn from my mistake.
Use a sharp knife for slicing. A dull knife will drag through the filling and ruin your beautiful pie. Dip the knife in hot water, wipe it dry, and make one clean cut. Wipe the knife clean between each slice for the best presentation.
If your crust is too crumbly, you may not have used enough butter or pressed it firmly enough. Next time, add an extra tablespoon of melted butter and really pack the crumbs down. A flat-bottomed measuring cup is your best friend here.
Variations & Adaptations
One of the best things about this Easy No-Bake Pumpkin Pie with Gingersnap Crust is how adaptable it is. Here are some of my favorite variations:
Gluten-Free Version: Use gluten-free gingersnap cookies for the crust. Many brands make excellent gluten-free gingersnaps that taste just as good as the original. The rest of the recipe is naturally gluten-free, so you’re all set.
Dairy-Free Version: Substitute the cream cheese with a high-quality dairy-free alternative like Kite Hill or Miyoko’s. Use coconut cream (the solid part from a can of full-fat coconut milk, chilled overnight) instead of heavy cream for the filling. For the crust, use melted coconut oil or vegan butter instead of regular butter.
Vegan Version: Follow the dairy-free instructions above, and make sure your gingersnaps are vegan-friendly. Most are, but check the label to be sure.
Pumpkin Spice Latte Twist: Add 1 tablespoon of instant espresso powder dissolved in 1 tablespoon of hot water to the filling along with the pumpkin. The coffee flavor enhances the pumpkin and spice beautifully. Top with a dusting of cocoa powder and cinnamon.
Chocolate Pumpkin Pie: Melt 4 ounces of dark chocolate and swirl it into the filling just before pouring it into the crust. The combination of chocolate, pumpkin, and gingersnap is absolutely divine.
Individual Mini Pies: Use a muffin tin lined with paper liners or a mini cheesecake pan. Press the crust into each cup, fill with the pumpkin mixture, and chill. These are perfect for parties or portion control. Reduce the chill time to about 4 hours.
Maple Pecan Variation: Substitute 2 tablespoons of the brown sugar with pure maple syrup, and fold in 1/2 cup of toasted, chopped pecans into the filling. Sprinkle extra pecans on top for crunch.
If you love this kind of easy, make-ahead dessert, you’ll also enjoy this creamy make-ahead vegan chocolate avocado pudding — it’s another no-bake winner that comes together in minutes.
Serving & Storage Suggestions
This Easy No-Bake Pumpkin Pie with Gingersnap Crust is best served cold, straight from the refrigerator. The contrast between the cool, creamy filling and the crunchy, spicy crust is what makes it so special.
Serving Temperature: Serve directly from the refrigerator. If you’ve made the whipped cream topping, add it just before serving so it stays light and fluffy. Let the pie sit at room temperature for no more than 10 minutes before slicing — any longer and the filling starts to soften too much.
Presentation: For the prettiest presentation, pipe the whipped cream in rosettes around the edge of the pie using a star-tipped piping bag. Sprinkle crushed gingersnaps over the top and add a few fresh mint leaves for color. A drizzle of caramel sauce or a dusting of cinnamon also looks beautiful.
Pairings: This pie pairs beautifully with a cup of hot coffee, spiced chai latte, or a glass of cold milk. For a dessert spread, serve it alongside crispy lemon rosemary salmon for an unexpected but delightful savory-sweet combination, or keep it classic with other fall desserts.
Storage: Cover the pie tightly with plastic wrap or aluminum foil and store in the refrigerator for up to 5 days. The crust will soften slightly over time, but the flavor actually improves after a day or two. Do not freeze this pie — the texture of the filling changes when thawed and becomes grainy.
Leftover Whipped Cream: Store leftover whipped cream in an airtight container in the refrigerator for up to 3 days. It may deflate slightly, but you can rewhip it briefly with a hand mixer to bring it back to life.
Nutritional Information & Benefits
Here are the estimated nutritional values for one slice of Easy No-Bake Pumpkin Pie with Gingersnap Crust (based on 10 servings, without optional whipped cream topping):
| Nutrient | Amount Per Serving |
|---|---|
| Calories | 345 |
| Total Fat | 22g |
| Saturated Fat | 13g |
| Cholesterol | 68mg |
| Sodium | 310mg |
| Total Carbohydrates | 35g |
| Dietary Fiber | 2g |
| Sugars | 22g |
| Protein | 4g |
| Vitamin A | 180% DV |
| Vitamin C | 4% DV |
| Calcium | 6% DV |
| Iron | 8% DV |
Pumpkin is packed with vitamin A, which is excellent for eye health and immune function. It’s also a good source of fiber and antioxidants. The gingersnaps provide a touch of ginger, which has anti-inflammatory properties and can aid digestion. While this is definitely a treat, it’s one with some redeeming nutritional qualities.
For a lighter version, you can use reduced-fat cream cheese and a sugar substitute in the filling. The texture won’t be quite as rich, but it will still be delicious. If you have dietary concerns, this pie is naturally nut-free and can easily be made gluten-free or dairy-free with the substitutions mentioned earlier.
Frequently Asked Questions
Can I use pumpkin pie filling instead of pumpkin puree?
No, please don’t. Pumpkin pie filling is already sweetened and spiced, so using it will throw off the entire recipe. You want 100% pure pumpkin puree. The two are usually right next to each other in the baking aisle, so read the label carefully.
How far in advance can I make this pie?
You can make this pie up to 2 days ahead of time. In fact, it tastes even better after a day in the fridge because the flavors have time to meld together. Just wait to add the whipped cream topping until right before serving.
My crust fell apart when I tried to slice it. What went wrong?
This usually happens when the crust wasn’t pressed firmly enough into the pan or didn’t have enough butter. Make sure you pack the crumbs down very firmly using the bottom of a flat glass or measuring cup. If your crumbs are too dry, add an extra tablespoon of melted butter next time.
Can I freeze this no-bake pumpkin pie?
I don’t recommend freezing this pie. The cream cheese and whipped cream filling becomes grainy and watery when thawed, and the texture just isn’t the same. This pie is best enjoyed fresh from the refrigerator within a few days of making it.
Can I use a different type of cookie for the crust?
Absolutely! Graham crackers, vanilla wafers, or shortbread cookies all work beautifully. If you use a less spicy cookie, you might want to add an extra teaspoon of pumpkin pie spice to the crust to keep that warm fall flavor. For a chocolate twist, try chocolate wafer cookies.
Conclusion
This Easy No-Bake Pumpkin Pie with Gingersnap Crust has become my fall signature for a reason. It’s everything you want in a pumpkin dessert — creamy, spicy, rich, and deeply satisfying — without any of the stress that usually comes with pie-making. No blind baking, no custard setting anxiety, no oven timer drama. Just simple, honest ingredients that come together into something truly special.
I love that this recipe lets me focus on what matters: the people around the table. Instead of fussing over a finicky crust or worrying about cracks in the filling, I get to actually enjoy the gathering. And when I bring this pie out, the reaction is always the same. People take one bite, their eyes go wide, and they ask, “Wait, this is no-bake?” That moment never gets old.
I hope you give this Easy No-Bake Pumpkin Pie with Gingersnap Crust a try. Make it for Thanksgiving, make it for a random Tuesday, make it just because you deserve a slice of something wonderful. Customize it with your favorite toppings, play with the spices, make it your own. And when you do, I’d love to hear about it. Drop a comment below, share a photo, tell me how it turned out. That’s what makes this whole thing worth it.
Happy no-baking, friends. Your oven can take the day off.
Pin This Recipe!
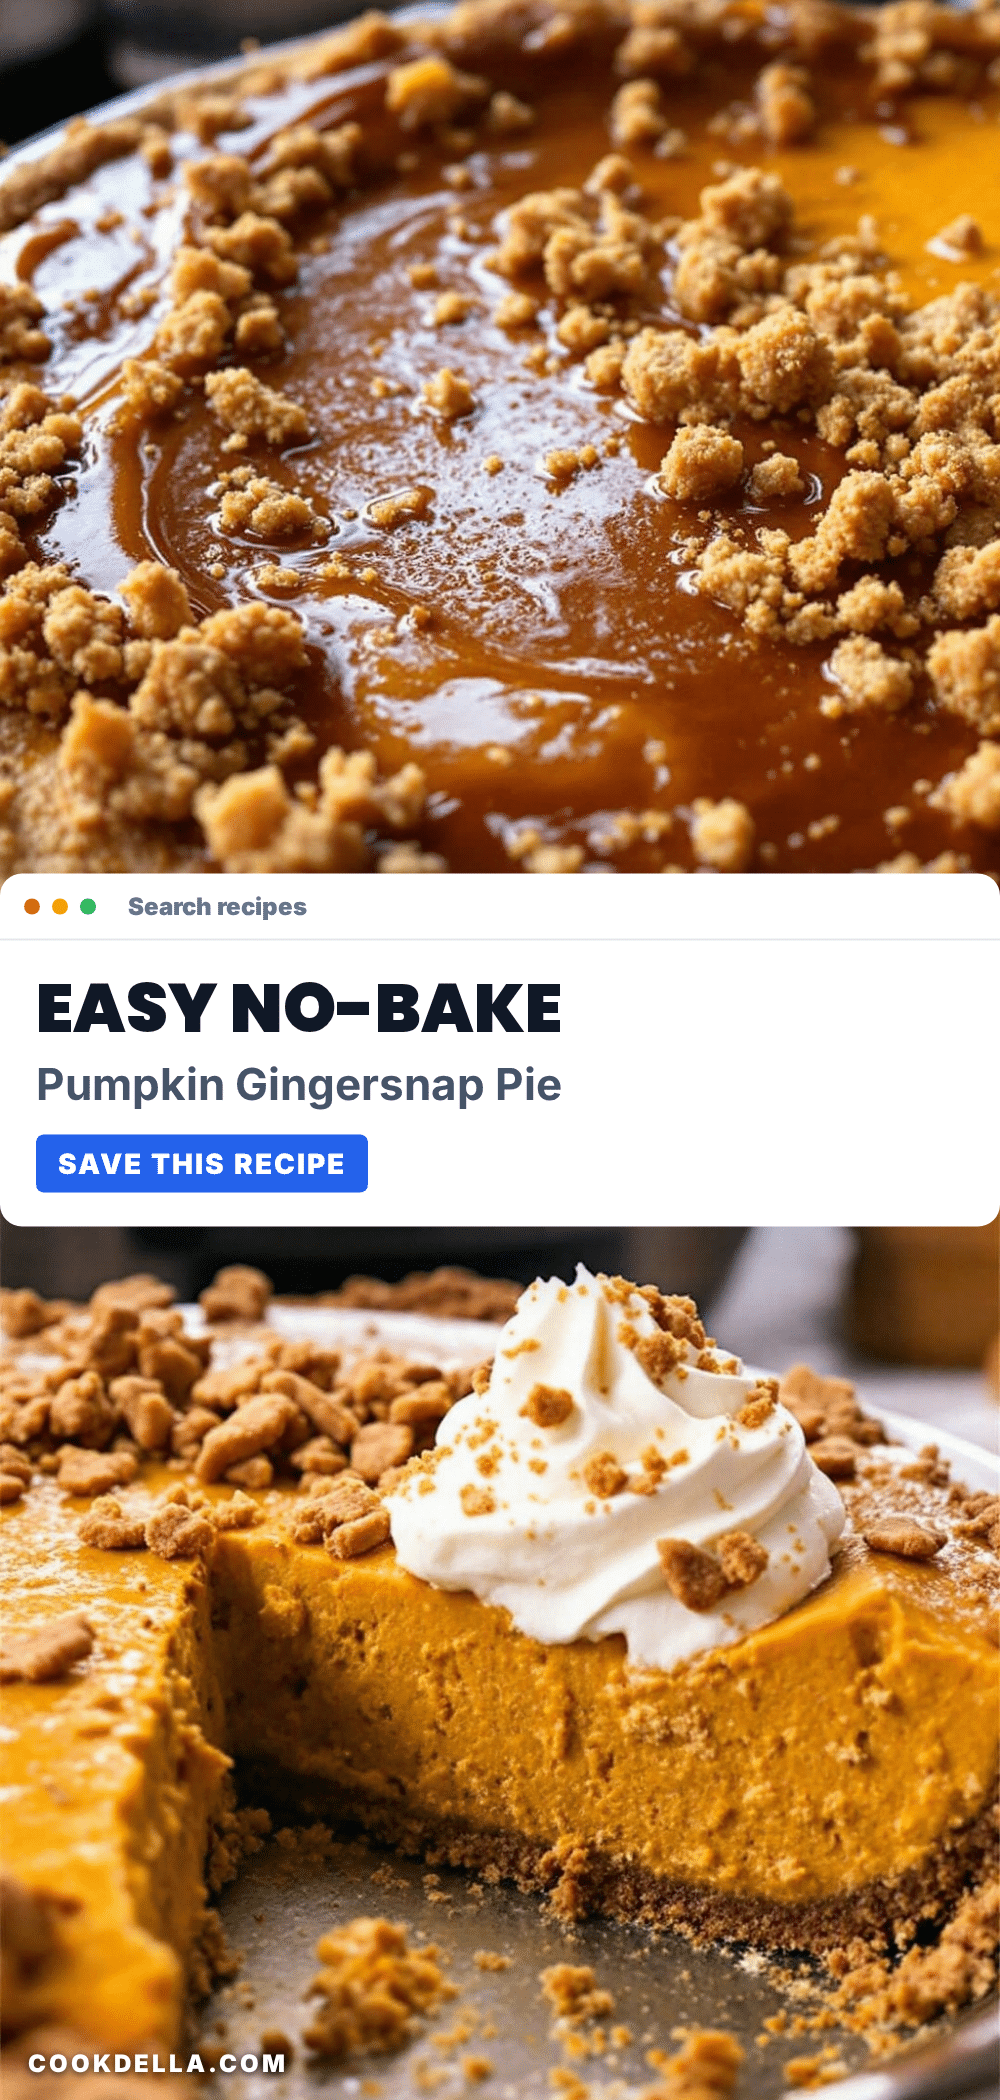
Easy No-Bake Pumpkin Pie with Perfect Gingersnap Crust
This no-bake pumpkin pie features a spicy gingersnap crust and a silky, creamy filling made with cream cheese and whipped cream. It’s an easy, make-ahead dessert perfect for fall gatherings, requiring no oven time.
- Prep Time: 30 minutes
- Cook Time: 0 minutes
- Total Time: 6 hours 30 minutes (includes chilling)
- Yield: 10 servings 1x
- Category: Dessert
- Cuisine: American
Ingredients
- 2 cups (about 200g) gingersnap cookies, finely crushed
- 6 tablespoons (85g) unsalted butter, melted
- 2 tablespoons (25g) granulated sugar
- Pinch of salt
- 1 can (15 ounces or 425g) pumpkin puree
- 8 ounces (226g) cream cheese, softened to room temperature
- 1 cup (240ml) heavy whipping cream, cold
- 1/2 cup (100g) packed light brown sugar
- 1/4 cup (50g) granulated sugar
- 2 teaspoons pumpkin pie spice
- 1 teaspoon vanilla extract
- 1/2 teaspoon salt
- 1 cup (240ml) heavy whipping cream, cold (for topping)
- 2 tablespoons powdered sugar (for topping)
- 1/2 teaspoon vanilla extract (for topping)
- Extra crushed gingersnaps and fresh mint leaves (for garnish)
Instructions
- Make the crust: Place the gingersnap cookies in a food processor and pulse until you have fine, even crumbs. Transfer to a medium bowl. Pour in the melted butter, sugar, and salt, and stir with a fork until every crumb is moistened. The mixture should look like wet sand and hold together when pressed in your fist.
- Press the crust into the pan: Transfer the crumb mixture to your 9-inch pie plate. Using the bottom of a flat measuring cup or a glass, press the crumbs firmly and evenly into the bottom and up the sides of the plate. Place the crust in the refrigerator to firm up while you make the filling, at least 20 minutes.
- Whip the cream: In a large bowl, pour in the cold heavy whipping cream. Using an electric hand mixer or stand mixer fitted with the whisk attachment, beat the cream on medium-high speed until soft peaks form, about 2-3 minutes. Add the powdered sugar and vanilla, then continue beating until stiff peaks form. Set aside in the refrigerator.
- Beat the cream cheese: In another large bowl, beat the softened cream cheese with an electric mixer on medium speed until smooth and creamy, about 1 minute. Scrape down the sides of the bowl. Add the brown sugar, granulated sugar, pumpkin pie spice, vanilla extract, and salt. Beat on medium speed until combined and smooth, about 2 minutes.
- Add the pumpkin: Add the pumpkin puree to the cream cheese mixture and beat on low speed until fully incorporated. Scrape down the sides and bottom of the bowl to make sure everything is evenly mixed.
- Fold in the whipped cream: Take the whipped cream out of the refrigerator. Using a rubber spatula, gently fold about one-third of the whipped cream into the pumpkin mixture to lighten it. Then fold in the remaining whipped cream until no white streaks remain.
- Fill the crust: Take the chilled crust out of the refrigerator. Spoon the pumpkin filling into the crust and spread it evenly with the spatula. Give the pie plate a few gentle taps on the counter to settle the filling and remove any air bubbles.
- Chill the pie: Cover the pie loosely with plastic wrap or aluminum foil and refrigerate for at least 6 hours, but preferably overnight.
- Make the whipped cream topping: Just before serving, beat the cold heavy cream, powdered sugar, and vanilla until stiff peaks form. Spread or pipe the whipped cream over the chilled pie. Sprinkle with extra crushed gingersnaps and garnish with fresh mint leaves if desired.
- Slice and serve: Use a sharp knife dipped in hot water and wiped dry for clean slices. Cut the pie and serve immediately. Store any leftovers in the refrigerator.
Notes
For best results, use room temperature cream cheese and chill the pie overnight. Toasting the gingersnap crumbs in a dry skillet before adding butter deepens the flavor. Do not freeze this pie as the texture becomes grainy upon thawing.
Nutrition
- Serving Size: 1 slice (1/10 of pie
- Calories: 345
- Sugar: 22
- Sodium: 310
- Fat: 22
- Saturated Fat: 13
- Carbohydrates: 35
- Fiber: 2
- Protein: 4
Keywords: no-bake pumpkin pie, gingersnap crust, easy pumpkin pie, fall dessert, Thanksgiving dessert, make-ahead pie


