That sticky-sweet, marshmallowy smell — the kind that clings to your fingers and fills the whole kitchen before you’ve even melted the butter — still takes me straight to my friend Jenna’s apartment, freshman year of college. We were supposed to be studying for finals, but instead, we were hunched over her sad little electric stovetop, trying to make something that felt like home. Jenna had a bag of candy corn left over from Halloween (don’t ask why she still had it in December) and a box of Rice Krispies. I had a stick of butter and a bag of marshmallows. We weren’t trying to be clever. We were just broke, stressed, and craving something that didn’t taste like cafeteria pizza. What came out of that mismatched pile of ingredients was… honestly, kind of magical. The candy corn didn’t just melt into the marshmallow — it bled into it, leaving little pockets of orange and yellow and white, like stained glass made of sugar. We ate half the pan that night, laughing about how we’d accidentally invented the most ridiculous, perfect fall dessert. It wasn’t fancy. It wasn’t healthy. But it was ours. And now, years later, I still make these Easy Candy Corn Rice Krispie Treats every single October. Not because they’re trendy, but because they taste like that night — like doing something imperfect and having it turn out exactly right.
This recipe is so simple it barely qualifies as cooking. Three ingredients. One pot. No baking. No fancy equipment. Just a little patience and a willingness to get your hands sticky. And honestly? That’s the whole point. These treats are pure, unapologetic nostalgia. They’re the kind of thing you make when you want to feel like a kid again, or when you need a last-minute dessert for a Halloween party, or when you just want to stand in your kitchen and eat something that tastes like autumn in candy form. The candy corn adds a subtle honey-vanilla sweetness and that iconic tri-color look, while the marshmallows keep everything perfectly chewy. It’s a match made in October heaven.
Why You’ll Love This Recipe
Look, I’ve made a lot of Rice Krispie treats in my day. I’ve tried the “gourmet” versions with brown butter and sea salt. I’ve attempted vegan marshmallow swaps and gluten-free cereal blends. And you know what? Sometimes you just want the classic, but with a little seasonal flair. These Easy Candy Corn Rice Krispie Treats hit that sweet spot perfectly. Here’s why they keep showing up at my fall gatherings:
- Three Ingredients Only : Butter, marshmallows, and Rice Krispies cereal. Plus the candy corn, obviously. That’s it. No obscure baking supplies, no specialty store trips. You probably have everything except the candy corn already in your pantry.
- Ready in 15 Minutes : From start to finish, these come together faster than a sitcom episode. Melt, stir, press, cool. That’s the whole process. Perfect for when you realize you need a dessert for tomorrow’s potluck at 10 PM.
- Totally Foolproof : If you can stir melting marshmallows without burning them, you can make these. There’s no creaming, no folding, no worrying about over-mixing. It’s practically impossible to mess up.
- Instant Crowd-Pleaser : Kids go wild for the candy corn. Adults pretend they’re above it, then eat three pieces. It’s the kind of dessert that disappears before the main course is even plated.
- Perfect for Fall and Halloween : The colors alone scream autumn. Orange, yellow, and white layered into a chewy, buttery bar. It’s festive without being fussy — exactly what you want for a Halloween party or a cozy movie night.
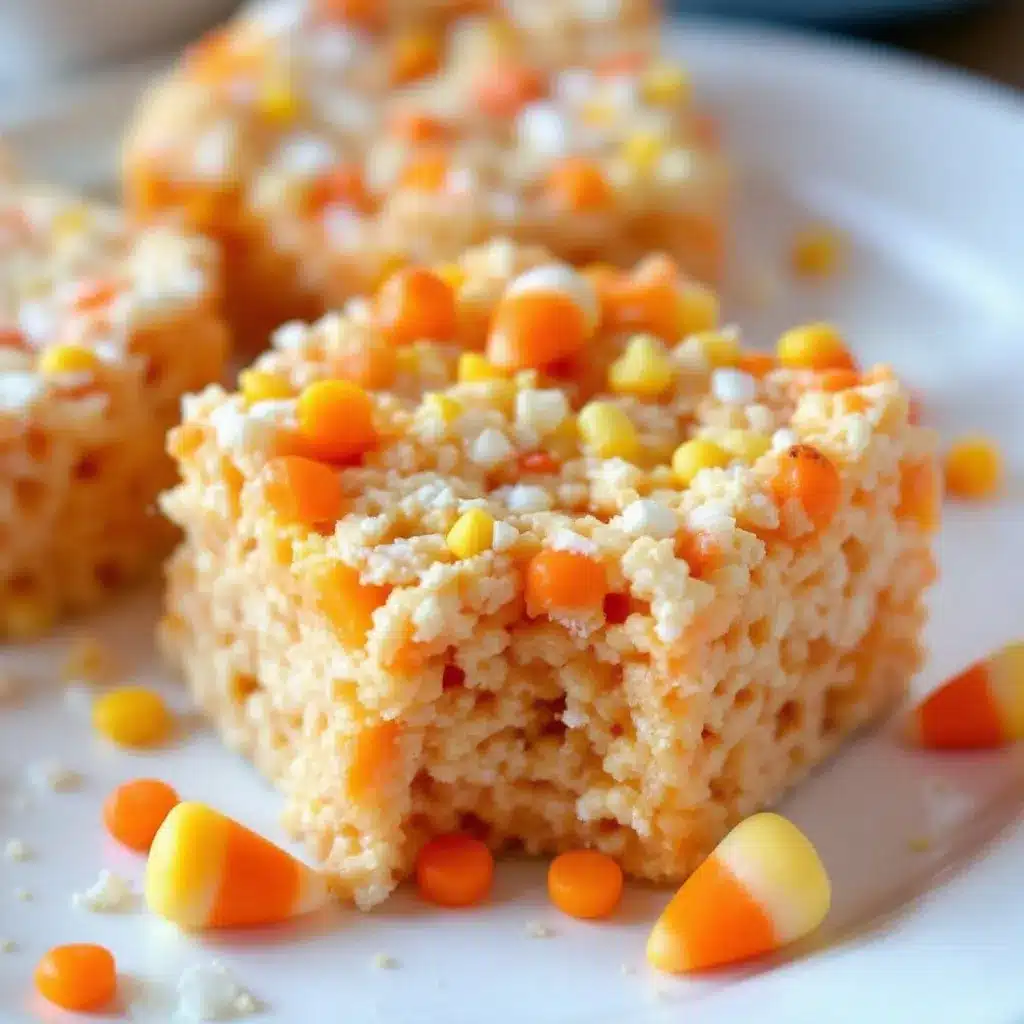
What makes this recipe different from every other candy corn Rice Krispie treat out there? It’s the method. Most recipes just stir the candy corn into the marshmallow mixture whole, which gives you these weird, hard little nuggets of pure sugar that hurt your teeth. Not here. I’ve learned that if you add the candy corn after the marshmallow is melted but before you fold in the cereal, it softens just enough to blend into the mixture without completely disappearing. You get that beautiful marbled effect — streaks of orange and yellow running through the white marshmallow — with a texture that’s soft and chewy, not crunchy in a bad way.
And let’s be real: these treats are comfort food at its most honest. They’re not trying to be healthy. They’re not pretending to be sophisticated. They’re just… good. The kind of good that makes you close your eyes after the first bite and forget about your to-do list for a minute. That’s what I love about them. They’re a little moment of joy in the middle of a busy season.
What Ingredients You Will Need
This recipe uses simple, pantry-friendly ingredients to create a treat that’s greater than the sum of its parts. No fancy extracts, no specialty flours — just three basic components plus the star of the show. Here’s what you need:
For the Base
- 3 tablespoons unsalted butter (plus a little extra for greasing the pan) — I use salted butter in a pinch and just skip the extra salt. Kerrygold is my go-to for the richest flavor, but any good-quality butter works. The butter adds richness and helps the marshmallows melt smoothly without scorching.
- 1 package (10 ounces) regular marshmallows (about 40 large marshmallows) — Please don’t use mini marshmallows for this. They melt too fast and can make the mixture grainy. Jet-Puffed is my preferred brand because they’re consistently fluffy and melt evenly. If you’re feeling fancy, you can use vanilla bean marshmallows for extra flavor.
- 6 cups Rice Krispies cereal (or any crispy rice cereal) — The original is still the best in my opinion, but store brands work fine. Just make sure your cereal is fresh and crunchy. Stale cereal will give you sad, soggy treats.
For the Candy Corn Effect
- 1 cup candy corn (about 6 ounces) — This is where you have options. Traditional candy corn is the classic choice, but I’ve also made these with autumn mix (the one with the little pumpkins and leaves) for a more varied look. Brach’s is the most widely available and works perfectly. If you can find the “harvest” mix with the dark chocolate ends, those are incredible in this recipe.
Substitution Notes
If you need a dairy-free version, use vegan butter (I like Miyoko’s) and vegan marshmallows (Dandies are my favorite). The texture will be slightly different — vegan marshmallows don’t stretch quite as much — but they’re still delicious. For a gluten-free option, you’re in luck: Rice Krispies are naturally gluten-free (though some generic brands aren’t, so check the label). And if you can’t find candy corn? Honestly, any small, colorful fall candy works. I’ve used candy pumpkins, autumn M&Ms, and even chopped-up caramel chews. It won’t look the same, but it’ll still taste amazing.
Equipment Needed
You don’t need a fancy kitchen to make these treats. Here’s what you’ll need:
- Large saucepan or Dutch oven (at least 4-quart capacity) — You need room to stir everything without it spilling over. I use my trusty Le Creuset, but any heavy-bottomed pot works. Avoid nonstick if possible — the marshmallow can scratch the coating.
- Wooden spoon or silicone spatula — Metal spoons can scratch your pot and also conduct heat weirdly. A good wooden spoon is perfect for stirring sticky marshmallow mixtures.
- 9×13-inch baking dish — This is the standard size for a full batch. If you want thicker treats, use an 8×8-inch pan; just increase the cooking time slightly. For thinner, crunchier treats, use a 10×15-inch jelly roll pan.
- Parchment paper or wax paper — Lining your pan is non-negotiable. Trust me, I’ve learned this the hard way. Parchment paper makes cleanup a breeze and prevents the treats from sticking.
- Sharp knife — A good chef’s knife or a serrated knife works best for cutting clean squares. A plastic knife actually works surprisingly well too — it doesn’t stick to the marshmallow as much.
Budget-Friendly Tip: If you don’t have a 9×13 pan, use a disposable aluminum baking pan from the grocery store. They’re cheap and work perfectly. Just line it with parchment and you’re good to go.
Preparation Method
Okay, let’s make these treats. The process is simple, but there are a few little tricks that make the difference between good treats and great treats. Pay attention to the timing — that’s the secret.
- Prep your pan first. Grease your 9×13-inch baking dish with a thin layer of butter, then line it with parchment paper, leaving a couple inches of overhang on the long sides. The overhang acts as handles so you can lift the whole block out later. Grease the parchment too — just a light smear of butter. Set the pan aside.
- Melt the butter. Place your large saucepan over medium-low heat. Add the 3 tablespoons of butter and let it melt slowly, swirling the pan occasionally. Don’t rush this step. If the butter gets too hot, it can brown, which changes the flavor. (Though browned butter Rice Krispie treats are also delicious — that’s a variation for another day.)
- Add the marshmallows. Once the butter is fully melted, pour in the entire 10-ounce bag of marshmallows. Stir constantly with your wooden spoon or silicone spatula. The marshmallows will start to puff up and then collapse into a gooey, stretchy mass. Keep stirring until they’re completely melted and smooth. This takes about 4-5 minutes. Don’t walk away — marshmallows can go from melted to burnt in seconds.
- Remove from heat. As soon as the marshmallows are smooth and fully incorporated with the butter, take the pot off the burner. This is important: if you leave it on the heat while you add the cereal, the mixture can scorch.
- Add the candy corn (the key step). Now, here’s where my method differs from most recipes. Pour the 1 cup of candy corn into the hot marshmallow mixture and stir gently for about 30 seconds. You don’t want the candy corn to melt completely — you want it to soften just enough that it starts to bleed its color into the marshmallow. The result is a beautiful marbled effect: streaks of orange and yellow swirling through the white. If you stir too long, the candy corn will dissolve and you’ll just have orange-tinted marshmallows. Stop when you see ribbons of color.
- Fold in the cereal. Add the 6 cups of Rice Krispies cereal all at once. Use a folding motion — scoop from the bottom and bring it over the top — to incorporate the cereal without crushing it. This is a workout. The mixture will be stiff and sticky. Keep folding until there are no more white patches of marshmallow. Aim for about 1 minute of folding. Over-folding makes the treats dense and hard.
- Press into the pan. Scrape the mixture into your prepared pan. Now, here’s a trick: wet your hands with cold water before pressing. The moisture keeps the marshmallow from sticking to your fingers. Press the mixture into an even layer, working from the center outward. Try not to press too hard — you want the treats to be chewy, not compressed. If the mixture starts sticking to your hands, wet them again.
- Cool completely. Let the treats sit at room temperature for at least 1 hour before cutting. I know it’s tempting to cut into them while they’re warm, but they’ll be too soft and sticky. Patience, my friend. If you’re in a hurry, pop the pan in the fridge for 30 minutes.
- Cut and serve. Lift the block out of the pan using the parchment overhang. Place it on a cutting board. Use a sharp knife to cut into squares — I usually go for 12 big squares or 24 smaller ones. Wipe the knife clean between cuts to keep the edges neat. For the cleanest cuts, dip the knife in hot water and dry it before each slice.
Cooking Tips & Techniques
I’ve made these treats more times than I can count, and I’ve learned a few things the hard way. Here are my best tips for perfect results every time:
Low and slow is the rule. Melt your butter and marshmallows over medium-low heat, not high heat. High heat will scorch the marshmallows and give you a burnt, bitter flavor. If you see steam rising from the marshmallows, your heat is too high. Back it off immediately.
Don’t over-stir the candy corn. This is the most common mistake. People stir and stir, trying to get the candy corn evenly distributed, and end up with completely orange marshmallows. You want visible streaks of color — like a tie-dye effect. Stir just 4-5 times, then stop.
Use fresh marshmallows. Stale marshmallows are hard and dry, and they won’t melt smoothly. If your bag of marshmallows has been sitting in the pantry for months, buy a fresh one. The difference is noticeable.
Butter your knife. When cutting the cooled treats, run a thin layer of butter along the blade of your knife. It prevents the marshmallow from sticking and gives you cleaner cuts. A plastic knife works even better — it doesn’t conduct heat, so the marshmallow doesn’t soften as you cut.
Add a pinch of salt. I know the recipe doesn’t call for it, but a small pinch of flaky sea salt sprinkled over the top before they set balances the sweetness beautifully. It’s optional, but I never skip it.
My biggest failure? The first time I made these, I used stale cereal and old marshmallows. The treats came out hard, chewy in a bad way, and the candy corn had completely melted into a weird orange sludge. It was a mess. I learned that fresh ingredients matter, even in a recipe this simple. Don’t cut corners.
Variations & Adaptations
Once you’ve mastered the basic recipe, feel free to play around. Here are some of my favorite variations:
Chocolate Drizzle : Melt 1/2 cup of chocolate chips with 1 teaspoon of coconut oil and drizzle it over the cooled treats. The combination of sweet candy corn and rich chocolate is incredible. I do this when I want them to feel a little more “adult.”
Peanut Butter Swirl : Before adding the cereal, stir in 1/4 cup of creamy peanut butter. It melts right into the marshmallow and adds a savory note that cuts through the sweetness. This is my husband’s favorite version.
Spiced Autumn Version : Add 1/2 teaspoon of pumpkin pie spice to the marshmallow mixture along with the butter. It gives the treats a warm, cozy flavor that pairs perfectly with the candy corn.
Vegan-Friendly : Use vegan butter and vegan marshmallows (Dandies are the best). The texture will be slightly less stretchy, but the flavor is still spot-on. I’ve made these for vegan friends and they always disappear.
Extra Crunchy : Replace 1 cup of Rice Krispies with 1 cup of crushed pretzels or chopped nuts. The salty crunch contrasts beautifully with the sweet, chewy marshmallow. I love this version for fall parties.
Serving & Storage Suggestions
These treats are best served at room temperature. The texture is perfectly chewy — not too hard, not too soft. If you’ve refrigerated them, let them sit out for 15-20 minutes before serving to soften up.
Presentation ideas: Cut them into squares and arrange on a platter. For Halloween parties, cut them into small bite-sized pieces and serve in cupcake liners. You can also press the mixture into a shaped pan — I’ve used a pumpkin-shaped silicone mold for a fun seasonal look.
Storage: Store leftover treats in an airtight container at room temperature for up to 5 days. Separate layers with parchment paper to prevent sticking. Do not refrigerate them — the fridge makes them hard and stale-tasting. If you need to keep them longer, freeze them.
Freezing instructions: Wrap individual squares tightly in plastic wrap, then place them in a freezer-safe bag. They’ll keep for up to 3 months. To thaw, let them sit at room temperature for about 30 minutes. The texture won’t be quite as fresh, but they’re still delicious.
Flavor development: Honestly, these treats are best the day they’re made. The cereal stays crunchier, the marshmallow is at its softest. But if you have leftovers, they’re still great for 2-3 days. Just don’t expect them to be as perfect as day one.
Nutritional Information & Benefits
Let’s be real: these are a treat, not a health food. But here’s the nutritional breakdown for one square (based on 12 servings):
| Nutrient | Amount per Serving |
|---|---|
| Calories | 210 |
| Total Fat | 6g |
| Saturated Fat | 3.5g |
| Carbohydrates | 38g |
| Sugar | 24g |
| Protein | 1g |
| Sodium | 150mg |
Health considerations: This recipe contains dairy (butter) and gluten (Rice Krispies are made from rice, but check your brand for cross-contamination if you’re celiac). The candy corn is essentially pure sugar, so these are definitely an occasional treat, not an everyday snack. If you’re watching your sugar intake, you can reduce the candy corn to 1/2 cup — you’ll still get the color and flavor, just less sweetness.
My take: I believe in balance. These treats are pure joy in bar form. They’re meant to be shared at parties, enjoyed after a long day, or made with kids on a rainy afternoon. One square won’t derail your health goals. Two squares? Maybe. But that’s a risk I’m willing to take.
Conclusion
These Easy Candy Corn Rice Krispie Treats are more than just a dessert — they’re a little slice of fall nostalgia that anyone can make. Three ingredients. Fifteen minutes. Zero stress. Whether you’re bringing them to a Halloween party, surprising your kids after school, or just craving something sweet and simple, this recipe delivers every single time.
What I love most about these treats is how adaptable they are. You can dress them up with chocolate drizzle, keep them classic, or experiment with different mix-ins. They’re a blank canvas for your fall creativity. And honestly? They’re just fun to make. There’s something deeply satisfying about watching that candy corn bleed into the marshmallow, creating those beautiful streaks of autumn color.
I’d love to hear how yours turn out! Did you add a twist? Did your kids help you make them? Drop a comment below and let me know. And if you’re looking for more easy fall desserts, check out my recipe collection for more seasonal inspiration. Happy fall baking, friends — now go make something sticky and sweet.
Frequently Asked Questions
Can I use mini marshmallows instead of regular ones?
I don’t recommend it. Mini marshmallows melt too quickly and can make the mixture grainy. Stick with regular-sized marshmallows for the best texture.
Why did my candy corn completely disappear into the marshmallow?
You stirred it too long! Add the candy corn after removing the pot from heat, and stir just 4-5 times — just enough to create streaks of color. If you keep stirring, the candy corn will melt completely.
Can I make these treats ahead of time for a party?
Absolutely. Make them the day before, store them in an airtight container at room temperature, and they’ll be perfect for your party. Just don’t refrigerate them — the fridge makes them hard.
How do I prevent the treats from sticking to the pan?
Line your pan with parchment paper, leaving overhang on the sides. Grease the parchment with butter. This creates a non-stick surface and makes it easy to lift the whole block out for cutting.
Can I use a different cereal instead of Rice Krispies?
Yes! Cocoa Krispies, Fruity Pebbles, or even crushed Chex cereal all work. Just keep the total volume at 6 cups. The flavor and color will change, but the texture will be similar.
Pin This Recipe!
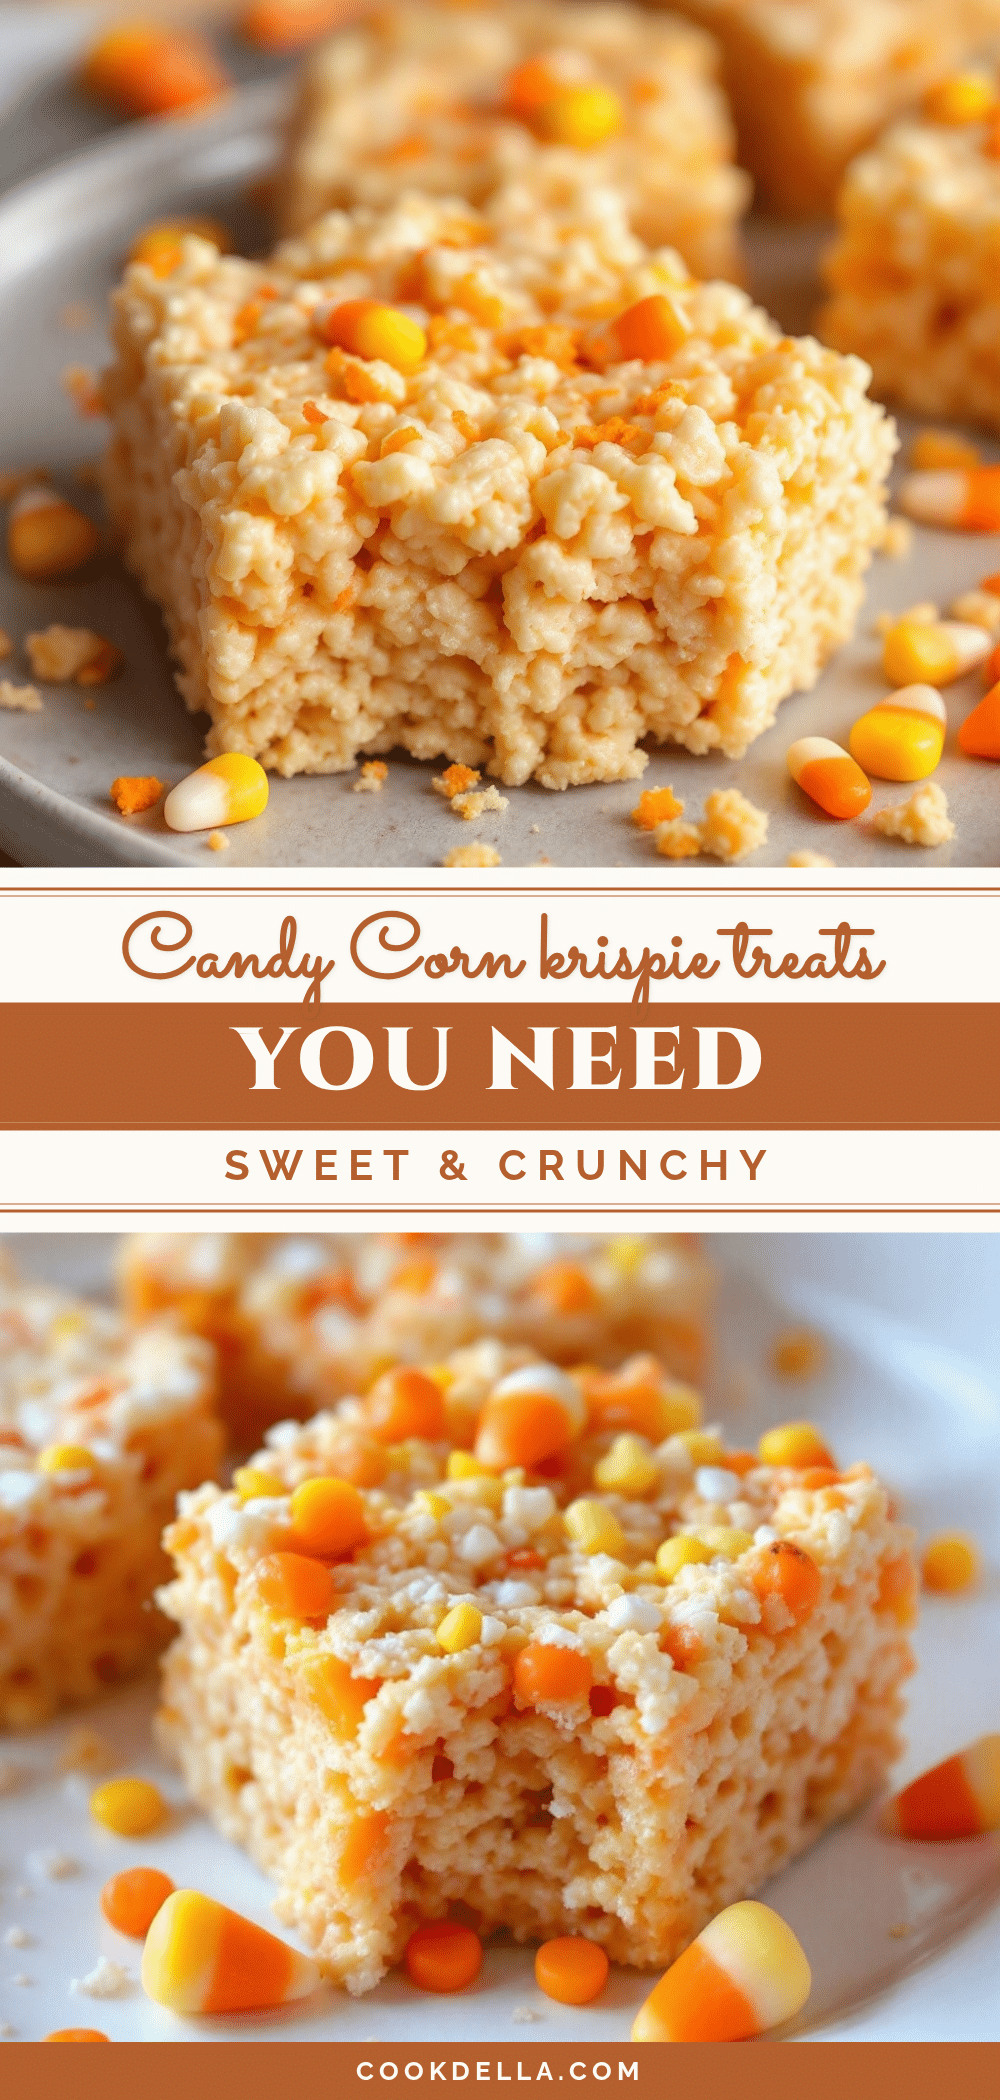
Easy Candy Corn Rice Krispie Treats: Perfect 3-Ingredient Fall Dessert
These Easy Candy Corn Rice Krispie Treats are a simple, nostalgic fall dessert made with just three ingredients. Ready in 15 minutes, they feature a beautiful marbled effect of orange, yellow, and white from softened candy corn, creating a chewy, buttery treat perfect for Halloween parties or cozy autumn nights.
- Prep Time: 5 minutes
- Cook Time: 10 minutes
- Total Time: 15 minutes
- Yield: 12 servings 1x
- Category: Dessert
- Cuisine: American
Ingredients
- 3 tablespoons unsalted butter (plus extra for greasing)
- 1 package (10 ounces) regular marshmallows (about 40 large marshmallows)
- 6 cups Rice Krispies cereal
- 1 cup candy corn (about 6 ounces)
Instructions
- Grease a 9×13-inch baking dish with butter, then line with parchment paper, leaving overhang on the long sides. Grease the parchment as well.
- Place a large saucepan over medium-low heat and melt 3 tablespoons of butter, swirling occasionally.
- Add the entire 10-ounce bag of marshmallows to the melted butter. Stir constantly until completely melted and smooth, about 4-5 minutes.
- Remove the pot from heat immediately.
- Pour 1 cup of candy corn into the hot marshmallow mixture and stir gently for about 30 seconds, just until streaks of color appear. Do not over-stir.
- Add 6 cups of Rice Krispies cereal all at once. Fold gently until no white patches remain, about 1 minute.
- Scrape the mixture into the prepared pan. Wet your hands with cold water and press the mixture into an even layer, working from the center outward.
- Let the treats cool at room temperature for at least 1 hour (or 30 minutes in the fridge).
- Lift the block out using the parchment overhang. Cut into squares using a sharp knife (dip in hot water and dry between cuts for clean edges).
Notes
For best results, use fresh marshmallows and cereal. Add candy corn after removing from heat and stir only 4-5 times to create a marbled effect. Wet hands with cold water before pressing mixture into pan to prevent sticking. For cleaner cuts, butter the knife or use a plastic knife. Add a pinch of flaky sea salt on top before setting for a sweet-salty balance. Store in an airtight container at room temperature for up to 5 days; do not refrigerate. Freeze individual squares wrapped in plastic wrap for up to 3 months.
Nutrition
- Serving Size: 1 square
- Calories: 210
- Sugar: 24
- Sodium: 150
- Fat: 6
- Saturated Fat: 3.5
- Carbohydrates: 38
- Protein: 1
Keywords: candy corn rice krispie treats, easy fall dessert, 3-ingredient dessert, Halloween treats, no-bake dessert, rice krispie treats with candy corn


