I want banana bread right now and I have everything except the willpower to wait an hour for it to bake. That’s the thought that hit me last Tuesday at 9 PM, standing in my kitchen with three spotty bananas on the counter that were basically begging for a purpose. I had butter, sugar, flour, eggs, and a bag of walnuts staring back at me from the pantry. But I did not have the energy to pull out my stand mixer, cream butter and sugar for five minutes, and then deal with a stiff batter that fights back against the spoon.
So I didn’t.
I just grabbed a bowl, a fork, and started mashing. No electric mixer, no sifting, no folding technique I had to remember from that one baking class I took in 2018. Just me, a fork, and the stubborn belief that banana bread shouldn’t require a workout to make. Twenty minutes later, the batter was in the oven and I was washing exactly one bowl and one fork. That’s when I knew this no-knead method was going to stick.
The loaf that came out of the oven was everything I wanted—tender, moist, with that crackly top that makes you feel like you actually tried hard. The walnuts added this warm, toasty crunch that balanced the soft crumb perfectly. It wasn’t just good for a no-knead recipe. It was just good banana bread, period. And honestly, that’s the only standard that matters.
This is the recipe I now make when I want banana bread without the fuss. No stand mixer, no sore arm, no complicated steps. Just real banana bread that tastes like you spent hours on it.
Why You’ll Love This Recipe
Let me tell you why this no-knead banana bread with walnuts has become my go-to, and I think it will become yours too. I’ve tested this recipe at least eight times to get the texture just right—because I wanted a loaf that was tender and moist without being dense or gummy. That kind of trial and error is what builds trust in a recipe, and I’m confident this one delivers.
- Quick & Easy: From bowl to oven in under 20 minutes. No electric mixer needed, no complicated techniques. Just a fork, a bowl, and a little patience while it bakes.
- Simple Ingredients: You probably have everything in your kitchen right now. Bananas, flour, sugar, eggs, butter, baking soda, salt, and walnuts. That’s it. No weird extracts or specialty flours.
- Perfect for Busy Mornings: This bread is great for breakfast on the go, a midday snack, or even a simple dessert. It’s the kind of thing you can make the night before and enjoy all week.
- Crowd-Pleaser: Every time I bring this to a gathering, people ask for the recipe. Kids love it, adults love it, and nobody believes it only took one bowl to make.
- Unbelievably Delicious: The texture is what gets me every time. It’s moist without being wet, tender without being crumbly, and the walnuts add that little bit of crunch that makes each bite interesting.
What makes this recipe different from the rest is the technique. By not overmixing the batter—which is easy to do when you use a mixer—you avoid developing too much gluten. That means a more tender, delicate crumb. Plus, the walnuts are folded in at just the right moment so they stay suspended in the batter instead of sinking to the bottom. It’s a small detail, but it makes a big difference.
This is the banana bread you make when you want something that feels like a hug in food form. It’s comfort without the stress, and honestly, that’s the best kind of comfort.
What Ingredients You Will Need
This recipe uses simple, everyday ingredients to create something genuinely special. The magic is in how they work together, not in fancy additions. Here’s what you’ll need and why each one matters.
- Ripe Bananas: 3 large bananas, mashed (about 1 ½ cups or 340g). The riper the better—those spotty, almost-black bananas are ideal. They’re sweeter and easier to mash, which means you can use less sugar. If your bananas aren’t ripe enough, pop them in a 300°F oven for 10 minutes to speed things up.
- All-Purpose Flour: 1 ¾ cups (220g). Spoon and level your flour for the best results. Scooping directly from the bag packs in too much flour and makes the bread dense. If you want a whole wheat option, swap half the flour with whole wheat pastry flour.
- Granulated Sugar: ¾ cup (150g). Regular white sugar works perfectly here. It dissolves easily into the wet ingredients without needing a mixer. You can reduce this to ½ cup if your bananas are very sweet, but I wouldn’t go lower than that.
- Unsalted Butter: ½ cup (113g), melted and slightly cooled. Melted butter is what makes this a no-knead recipe—no creaming required. I use salted butter sometimes and just reduce the added salt to ¼ teaspoon.
- Large Eggs: 2, at room temperature. Room temperature eggs mix more evenly into the batter. If you forgot to take them out of the fridge, place them in a bowl of warm water for 5 minutes.
- Vanilla Extract: 1 teaspoon. Pure vanilla extract adds warmth and depth. Imitation vanilla works fine too, but pure is better if you have it.
- Baking Soda: 1 teaspoon. This is the only leavening agent you need. Baking soda reacts with the acidity of the bananas to create lift. Make sure it’s fresh—test it by dropping a little into vinegar; it should fizz immediately.
- Salt: ½ teaspoon. Salt balances the sweetness and enhances the banana flavor. Don’t skip it, even if you’re using salted butter.
- Walnuts: 1 cup (120g), roughly chopped. I toast mine lightly before adding them to the batter—just 5 minutes in a dry pan over medium heat. It brings out their nutty flavor and keeps them crunchy. I recommend using fresh walnuts from a bulk bin or a brand like Fisher for the best texture.
For a dairy-free version, substitute the butter with melted coconut oil or a neutral vegetable oil. For a gluten-free option, use a 1:1 gluten-free baking flour blend—I’ve had good results with Bob’s Red Mill. Just note that the texture will be slightly more delicate.
Equipment Needed
One of the best things about this recipe is how little equipment you need. No stand mixer, no hand mixer, no food processor. Just the basics.
- Large Mixing Bowl: Any large bowl works. I use a glass bowl because it’s easy to see when everything is combined, but metal or ceramic are fine too.
- Fork or Potato Masher: For mashing the bananas. A fork works perfectly, but a potato masher speeds things up if you have one.
- Wooden Spoon or Rubber Spatula: For mixing the batter. A spatula is great for scraping down the sides of the bowl.
- 9×5 Inch Loaf Pan: A standard loaf pan is ideal. If you use an 8×4 inch pan, your bread will be taller and may need an extra 5-10 minutes of baking time. I like using a light-colored metal pan for even browning.
- Parchment Paper: Lining the pan makes removal so much easier. You can also grease the pan with butter or non-stick spray, but parchment is foolproof.
- Cooling Rack: Essential for cooling the bread properly. If you leave it in the pan, the bottom can get soggy.
- Measuring Cups and Spoons: For accurate measurements. A kitchen scale is even better for consistent results, but not required.
If you don’t have a loaf pan, you can bake this in an 8×8 inch square pan—just reduce the baking time to about 35-40 minutes. And if you’re truly in a pinch, muffin tins work great; bake for 18-22 minutes for perfect banana bread muffins.
Preparation Method
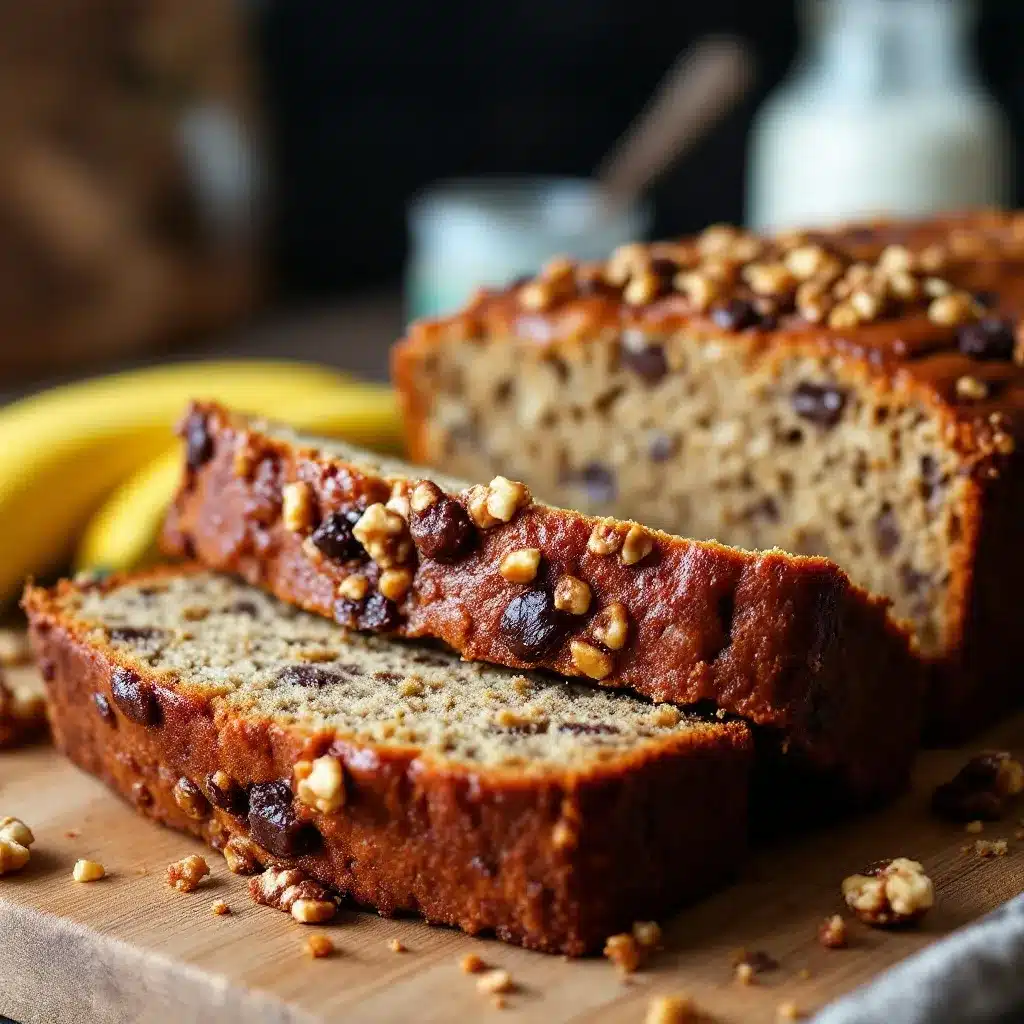
Let’s get to the good part. Follow these steps, and you’ll have the best no-knead banana bread with walnuts you’ve ever made. I’ve included time estimates and sensory cues so you know exactly what to look for at each stage.
- Preheat your oven to 350°F (175°C). Position a rack in the center of the oven. Line a 9×5 inch loaf pan with parchment paper, leaving some overhang on the long sides—this makes lifting the bread out super easy. If you don’t have parchment, grease the pan thoroughly with butter or non-stick spray.
- Mash the bananas. In a large mixing bowl, add your 3 ripe bananas. Use a fork or potato masher to mash them until smooth. You want some small lumps remaining for texture—about the consistency of a thick puree. This should take about 1-2 minutes. The bananas should look glossy and smell intensely sweet.
- Add the wet ingredients. To the mashed bananas, add the ½ cup melted butter (slightly cooled), ¾ cup granulated sugar, 2 room-temperature eggs, and 1 teaspoon vanilla extract. Stir with a wooden spoon or spatula until everything is well combined. The mixture should look smooth and slightly glossy, with the sugar mostly dissolved. This takes about 1 minute. Don’t worry if it looks a little separated—that’s normal.
- Add the dry ingredients. Sprinkle the 1 ¾ cups all-purpose flour, 1 teaspoon baking soda, and ½ teaspoon salt over the wet mixture. Stir gently until just combined. This is the most important step: stop mixing as soon as you no longer see streaks of flour. Overmixing at this stage develops gluten and makes the bread tough. The batter should look thick and slightly lumpy—that’s exactly what you want. This takes about 30 seconds.
- Fold in the walnuts. Add the 1 cup roughly chopped walnuts to the batter. Use a spatula to fold them in with just 3-4 strokes. You want the walnuts evenly distributed, but you don’t want to overmix. The batter should look studded with walnut pieces throughout.
- Transfer to the pan. Pour the batter into your prepared loaf pan. Use the spatula to spread it evenly. Tap the pan gently on the counter 2-3 times to release any air bubbles. The batter should come about halfway up the sides of the pan.
- Bake. Place the pan in the preheated oven and bake for 50-60 minutes. At the 30-minute mark, check the top—if it’s browning too quickly, tent loosely with aluminum foil. The bread is done when a toothpick inserted into the center comes out clean or with just a few moist crumbs. The top should be golden brown and cracked, and the loaf should feel firm when you gently press the center. If the toothpick has wet batter on it, bake for another 5 minutes and check again.
- Cool. Remove the pan from the oven and place it on a cooling rack. Let the bread cool in the pan for 10 minutes. Then, use the parchment overhang to lift the bread out of the pan and transfer it to the cooling rack. Let it cool completely before slicing—about 1 hour. I know it’s tempting to cut into it warm, but it will be gummy if you do. Patience pays off here.
A quick note: if your kitchen is humid, you might need to add an extra 5 minutes of baking time. And if you’re at a high altitude, reduce the sugar by 2 tablespoons and increase the flour by 2 tablespoons to prevent the bread from rising too quickly and collapsing.
Cooking Tips & Techniques
I’ve made this recipe more times than I can count, and I’ve learned a few things along the way—including some mistakes you can avoid.
Don’t overmix the batter. This is the number one mistake people make with quick breads. When you overmix, you develop gluten, which makes the bread tough and dense. Mix until the flour just disappears, then stop. A few lumps are fine. I learned this the hard way after making a brick-like loaf that could have doubled as a doorstop.
Toast your walnuts first. This is a small step that makes a huge difference. Toasting walnuts in a dry pan over medium heat for 3-5 minutes brings out their natural oils and deepens their flavor. They’ll stay crunchier in the finished bread too. I forgot to do this once, and the walnuts were soft and almost flavorless. Never again.
Use a kitchen scale for accuracy. If you have one, weigh your flour (220g) and bananas (340g mashed). Measuring by volume can be inconsistent—one cup of flour can vary by 20-30 grams depending on how you scoop. A scale takes the guesswork out and ensures consistent results every time.
Check for doneness with a toothpick. But don’t just poke the center—check a spot near the center but slightly off to the side. The very center is often the last to set, and you might pull out a clean toothpick from the edge while the middle is still underdone. Insert the toothpick about an inch from the center for the most accurate test.
Let it cool completely. I know, I know. Warm banana bread smells incredible. But slicing into it while it’s still warm will result in a gummy, crumbly mess. The bread continues to set as it cools, and the moisture redistributes evenly. Give it at least an hour on the cooling rack. If you can wait overnight, the flavors actually meld together even better.
Multitasking tip: While the bread is baking, clean your dishes. You’ll only have one bowl, a fork, and a spatula to wash—it takes two minutes. Then you can enjoy your banana bread without a sink full of dirty dishes staring at you.
Variations & Adaptations
This no-knead banana bread is incredibly versatile. Here are some variations I’ve tried and loved, along with adjustments for different dietary needs.
Chocolate Chip Banana Bread: Swap the walnuts for 1 cup of semi-sweet chocolate chips. The chocolate melts into little pockets of gooey goodness throughout the bread. I’ve also done a combination of ½ cup walnuts and ½ cup chocolate chips, which is honestly the best of both worlds.
Vegan Banana Bread: Replace the eggs with 2 flax eggs (2 tablespoons ground flaxseed mixed with 6 tablespoons water, let sit for 5 minutes) and use melted coconut oil instead of butter. The texture is slightly denser but still incredibly moist. I’ve made this version for my vegan friends and they always ask for seconds.
Gluten-Free Banana Bread: Use a 1:1 gluten-free baking flour blend that contains xanthan gum. I’ve had great results with Bob’s Red Mill 1-to-1 Baking Flour. The bread will be a little more delicate, so let it cool completely in the pan before removing. Don’t skip the parchment paper for this version.
Spiced Banana Bread: Add 1 teaspoon of cinnamon, ½ teaspoon of nutmeg, and ¼ teaspoon of ground ginger to the dry ingredients. The warm spices complement the banana flavor beautifully and make the kitchen smell incredible. This is my go-to fall variation.
Nut-Free Banana Bread: Simply omit the walnuts or replace them with 1 cup of pumpkin seeds or sunflower seeds. Toasted pumpkin seeds add a similar crunch without the allergens. You can also add ½ cup of dried cranberries or raisins for a different texture.
Lower Sugar Option: Reduce the sugar to ½ cup and add an extra ripe banana. The natural sweetness from the bananas compensates for the reduced sugar, and the bread stays moist. I’ve tested this and it works well, though the bread is slightly less sweet.
If you’re looking for another simple, wholesome recipe, try these Fresh Quinoa and Kale Power Bowls for a savory counterpoint to this sweet bread.
Serving & Storage Suggestions
This banana bread is wonderful on its own, but here are some ways to serve and store it for the best experience.
Serving Suggestions: Serve at room temperature or slightly warmed. To warm a slice, pop it in a toaster oven for 2-3 minutes or microwave for 10-15 seconds. For a special treat, spread a slice with salted butter, cream cheese, or a drizzle of honey. It’s also fantastic with a dollop of Greek yogurt on the side for breakfast.
Complementary Dishes and Beverages: Pair a slice with a cup of coffee or tea for a perfect afternoon snack. For brunch, serve it alongside scrambled eggs and fresh fruit. It also goes surprisingly well with a glass of cold milk—classic for a reason. If you’re in the mood for a refreshing drink to go with it, try this Fresh Cucumber Mint Green Tea Cooler for a light and bright pairing.
Storage Instructions: Store the banana bread in an airtight container at room temperature for up to 4 days. Wrap the cut end of the loaf in plastic wrap or press a piece of parchment paper against the cut side to keep it from drying out. Do not refrigerate—the cold temperature actually speeds up staling.
Freezing Instructions: This bread freezes beautifully. Wrap the cooled loaf (or individual slices) tightly in plastic wrap, then in aluminum foil. Freeze for up to 3 months. To thaw, leave at room temperature for 2-3 hours, or microwave individual slices for 20-30 seconds. I always keep a loaf in the freezer for unexpected guests or lazy Sunday mornings.
Reheating Tips: For the best texture, reheat slices in a toaster oven at 350°F for 5 minutes. The outside gets slightly crisp while the inside stays soft. If you’re in a hurry, the microwave works, but the texture will be softer and more uniform.
How Flavors Develop: Interestingly, this banana bread actually tastes better on the second day. The flavors meld together and the moisture distributes more evenly. So if you can resist eating it all on day one, you’re in for a treat on day two.
Nutritional Information & Benefits
Here’s the estimated nutritional information for one slice (based on 12 slices per loaf). Keep in mind these are approximations and can vary based on specific ingredients and portion sizes.
| Nutrient | Amount per Slice |
|---|---|
| Calories | 285 |
| Total Fat | 14g |
| Saturated Fat | 6g |
| Cholesterol | 45mg |
| Sodium | 220mg |
| Total Carbohydrates | 37g |
| Dietary Fiber | 2g |
| Sugars | 18g |
| Protein | 5g |
Health Benefits: Bananas are a great source of potassium, which supports heart health and muscle function. They also provide vitamin B6 and vitamin C. Walnuts are rich in omega-3 fatty acids, which are beneficial for brain health. The fiber content helps with digestion and keeps you feeling full longer.
Dietary Considerations: This recipe can be made vegan, gluten-free, and nut-free with the substitutions mentioned earlier. It is not low-carb or keto-friendly due to the bananas and sugar. If you have allergies, be sure to check your specific ingredient labels.
Personal Perspective: I love that this banana bread feels like a treat but uses real, whole ingredients. It’s not health food, but it’s made with things I feel good about eating. And honestly, sometimes a slice of homemade banana bread is exactly what your soul needs.
Conclusion
This no-knead banana bread with walnuts is the recipe I turn to when I want something homemade without the hassle. It’s simple, forgiving, and consistently delicious. The bananas do the heavy lifting—both in flavor and texture—while the walnuts add that little bit of crunch that makes each bite interesting.
I love that this recipe doesn’t require any special skills or equipment. If you can mash a banana and stir a bowl, you can make this bread. And once you taste it, you’ll understand why I’ve made it so many times. It’s the kind of recipe that feels like a secret weapon—easy enough for a Tuesday night but impressive enough for a brunch spread.
I’d love to hear how yours turns out. Did you add chocolate chips? Try it with different nuts? Leave a comment below and let me know what variations you tried. And if you’re looking for another easy, one-bowl recipe, check out this Creamy Make-Ahead Vegan Chocolate Avocado Pudding for a no-bake dessert that’s just as simple.
Go mash those bananas. You’ve got this.
Frequently Asked Questions
Can I use frozen bananas for this recipe?
Absolutely! Frozen bananas work great. Thaw them completely at room temperature, then drain off any excess liquid before mashing. The thawed bananas will be very soft and almost liquid, which actually makes them easier to mash. Just be aware that they may release more moisture, so your batter might be slightly wetter—bake for an extra 5 minutes if needed.
Why did my banana bread sink in the middle?
A sunken middle usually means the bread was underbaked or the oven temperature was too low. Make sure your oven is properly preheated to 350°F and check for doneness with a toothpick inserted near the center. Another common cause is opening the oven door too often during baking, which lets out heat and causes the bread to collapse.
Can I make this recipe without walnuts?
Yes, absolutely. The walnuts are optional. You can simply omit them, or substitute with chocolate chips, dried fruit, pumpkin seeds, or another nut of your choice. The bread will still be delicious without any add-ins—just a classic banana bread.
How do I know when the bananas are ripe enough?
Look for bananas that are heavily spotted with brown or even black patches. They should feel soft to the touch and smell very sweet. The peel may be mostly brown—that’s perfect. If your bananas are still yellow with just a few spots, they’re not quite ripe enough and your bread may be less sweet and less moist.
Can I double this recipe?
Yes, you can easily double the recipe. Use a large bowl and mix everything as directed. You’ll need two 9×5 inch loaf pans, or you can bake the doubled batter in a 9×13 inch pan for about 45-55 minutes. Just keep an eye on it and test for doneness with a toothpick.
Pin This Recipe!
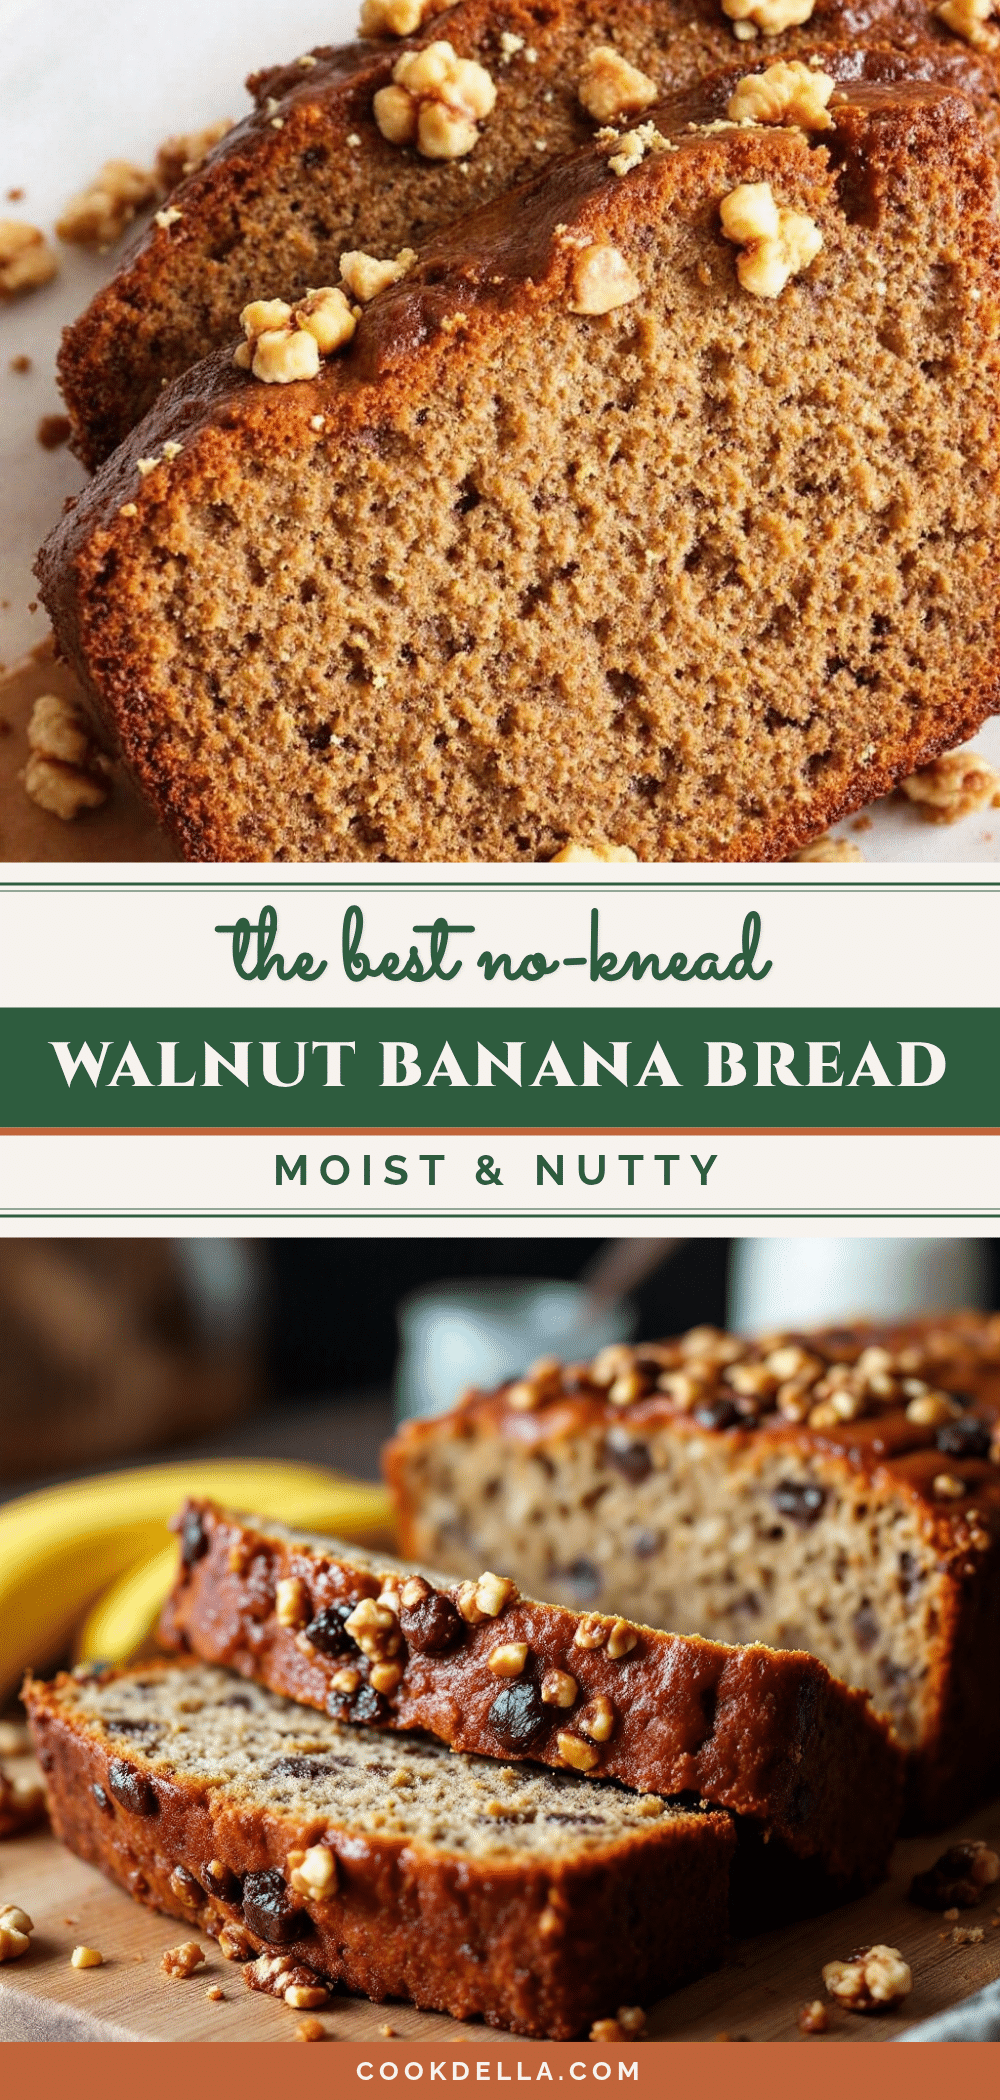
Best No-Knead Banana Bread with Walnuts (Easy Recipe)
This no-knead banana bread with walnuts is tender, moist, and has a crackly top. Made with simple ingredients and no electric mixer, it’s the perfect quick bread for busy mornings or a comforting snack.
- Prep Time: 20 minutes
- Cook Time: 55 minutes
- Total Time: 1 hour 15 minutes
- Yield: 12 servings 1x
- Category: Dessert
- Cuisine: American
Ingredients
- 3 large ripe bananas, mashed (about 1 ½ cups or 340g)
- 1 ¾ cups all-purpose flour (220g)
- ¾ cup granulated sugar (150g)
- ½ cup unsalted butter, melted and slightly cooled (113g)
- 2 large eggs, at room temperature
- 1 teaspoon vanilla extract
- 1 teaspoon baking soda
- ½ teaspoon salt
- 1 cup walnuts, roughly chopped (120g)
Instructions
- Preheat your oven to 350°F (175°C). Position a rack in the center of the oven. Line a 9×5 inch loaf pan with parchment paper, leaving some overhang on the long sides. If you don’t have parchment, grease the pan thoroughly with butter or non-stick spray.
- In a large mixing bowl, mash the bananas with a fork or potato masher until smooth with some small lumps remaining (about 1-2 minutes).
- Add the melted butter, sugar, eggs, and vanilla extract to the mashed bananas. Stir with a wooden spoon or spatula until well combined and smooth (about 1 minute).
- Sprinkle the flour, baking soda, and salt over the wet mixture. Stir gently until just combined—stop as soon as no streaks of flour remain. The batter should be thick and slightly lumpy (about 30 seconds).
- Fold in the chopped walnuts with 3-4 strokes until evenly distributed.
- Pour the batter into the prepared loaf pan and spread evenly. Tap the pan gently on the counter 2-3 times to release air bubbles.
- Bake for 50-60 minutes. At the 30-minute mark, if the top is browning too quickly, tent loosely with aluminum foil. The bread is done when a toothpick inserted into the center comes out clean or with a few moist crumbs, and the top is golden brown and cracked.
- Remove the pan from the oven and place on a cooling rack. Let cool in the pan for 10 minutes, then lift the bread out using the parchment overhang and transfer to the cooling rack. Cool completely before slicing (about 1 hour).
Notes
Do not overmix the batter to avoid tough bread. Toast walnuts in a dry pan over medium heat for 3-5 minutes for better flavor. Use a kitchen scale for accurate measurements. Let the bread cool completely before slicing to prevent a gummy texture. For high altitude, reduce sugar by 2 tablespoons and increase flour by 2 tablespoons.
Nutrition
- Serving Size: 1 slice
- Calories: 285
- Sugar: 18
- Sodium: 220
- Fat: 14
- Saturated Fat: 6
- Carbohydrates: 37
- Fiber: 2
- Protein: 5
Keywords: banana bread, no-knead, easy banana bread, walnut banana bread, quick bread, one bowl banana bread


