Dropped a whole bag of frozen fries onto a baking sheet—my third attempt at dinner that night—when I realized I had leftover chili in the fridge and a cast iron skillet I hadn’t used in weeks. The kids were circling the kitchen like hungry sharks, and honestly, I was this close to ordering pizza for the third time this week. But then it hit me: why not combine everything into one glorious, messy, cheesy skillet situation?
That’s how this Easy Chili Cheese Fries Nacho Skillet was born. Not from a carefully planned recipe test or a Pinterest board, but from pure desperation and a fridge full of odds and ends. The first version was a little too soggy (rookie mistake—overloaded the fries), but the second attempt? That was the one. The one where everyone went quiet and just ate. You know that kind of quiet—the kind that says “don’t talk, I’m enjoying this.”
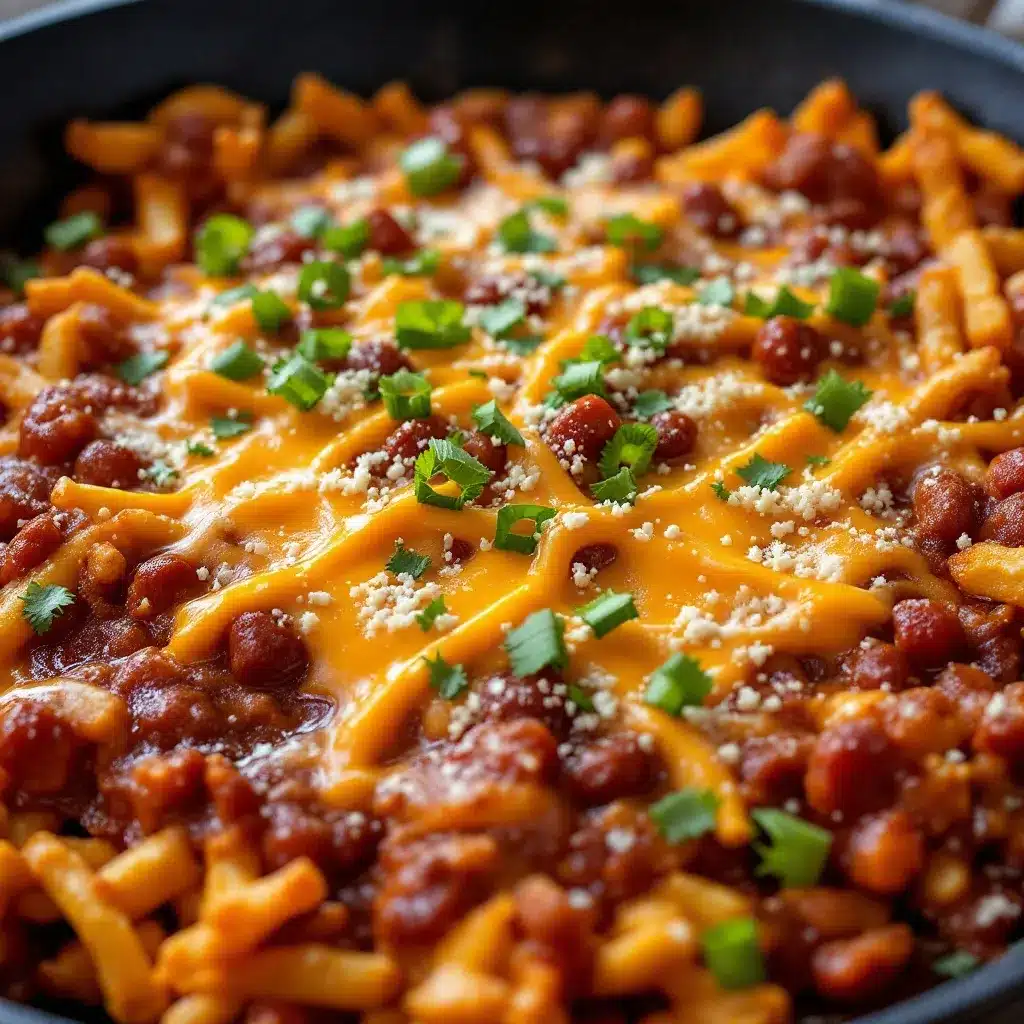
This isn’t fancy food. It’s the kind of meal you make when you want comfort without the fuss. A layer of crispy fries smothered in hearty chili, blanketed with melted cheese, and topped with all the good stuff. It’s dinner, it’s game day food, it’s late-night snack material—all in one skillet. And honestly, it might just become your new favorite way to use up leftover chili.
Why You’ll Love This Recipe
Let me tell you why this skillet has become my go-to for busy nights and lazy weekends alike. I’ve tested this recipe about six times now (rough job, I know), and every version just works.
- Quick & Easy: From fridge to table in under 25 minutes. Seriously. If you have leftover chili, it’s even faster. This is faster than delivery.
- Simple Ingredients: Frozen fries, canned chili (or homemade), cheese, and a few toppings. You probably have most of this stuff already.
- Perfect for Game Day: This skillet screams football watching. It’s shareable, dippable, and absolutely disappears within minutes. Pair it with our easy football game day charcuterie cups for the ultimate spread.
- Crowd-Pleaser: Kids love it. Adults love it. Picky eaters? They love it too. There’s something about fries and cheese that breaks down all resistance.
- Unbelievably Delicious: The contrast between crispy fries, warm chili, and gooey melted cheese is pure magic. Every bite hits different.
What makes this different from just piling stuff on fries? It’s the layering technique. You don’t just dump everything on top—you build it so every fry gets some love. Plus, using a skillet means the edges get extra crispy while the center stays melty and decadent. This isn’t just nacho fries—it’s nacho fries with intention.
I love this recipe because it reminds me that cooking doesn’t have to be complicated to be memorable. It’s the kind of meal that makes people lean in and grab another forkful without saying a word. That’s the good stuff.
What Ingredients You Will Need
This recipe keeps things simple with ingredients that work together to create maximum flavor with minimal effort. Most of these are pantry or freezer staples, which makes this perfect for those nights when you don’t want to think too hard.
For the Base
- Frozen french fries (1 bag, about 24-28 oz) – I prefer crinkle-cut or steak fries for extra texture. They hold up better under the toppings. Ore-Ida or store brand both work great.
- Chili (3 cups, homemade or canned) – If using canned, go with a hearty brand like Wolf Brand or Hormel with beans. Homemade works beautifully too—try our game day crockpot beer and bean football chili for an extra flavor boost.
- Shredded cheddar cheese (2 cups) – Sharp cheddar melts beautifully and adds that classic nacho flavor. Pre-shredded works in a pinch, but freshly shredded melts creamier.
- Monterey Jack cheese (1 cup) – For extra gooeyness. You can use all cheddar if that’s what you have.
For the Toppings
- Sour cream (½ cup) – Adds cool creaminess to balance the heat.
- Jalapeños (¼ cup, sliced) – Pickled or fresh. Pickled gives you that tangy kick.
- Green onions (¼ cup, sliced) – For freshness and color.
- Roma tomatoes (1, diced) – Adds juiciness and acidity.
- Fresh cilantro (2 tablespoons, chopped) – Optional but highly recommended for brightness.
Optional Add-Ins
- Black olives (¼ cup, sliced) – Adds briny depth.
- Pickled red onions – For tangy crunch.
- Avocado (1, diced) – Creamy richness.
- Hot sauce – For heat lovers. I like Cholula or Valentina.
For the chili, I’ve used everything from quick stovetop versions to slow-cooker batches. If you’re short on time, doctoring up canned chili with some extra cumin and smoked paprika makes a world of difference. And if you want to go all out, our best slow cooker chili with easy cornbread croutons is absolutely incredible as the base for this skillet.
Equipment Needed
You don’t need much for this recipe, which is part of the beauty. Here’s what I use:
- Cast iron skillet (10-12 inch) – The ideal vessel. It retains heat beautifully and gives you those crispy edges. If you don’t have one, an oven-safe stainless steel skillet works too.
- Baking sheet – For pre-cooking the fries if you want them extra crispy before layering.
- Mixing bowls – For holding toppings and prepping ingredients.
- Cheese grater – Freshly shredded cheese melts so much better than pre-shredded (which has anti-caking agents).
- Spatula – For serving and scraping up every last bit.
If you don’t have a cast iron skillet, don’t stress. A 9×13 baking dish works perfectly—just layer everything in there and bake. The presentation won’t be as dramatic, but the flavor will be just as good. I’ve also made this in a disposable foil pan for potlucks, and it travels beautifully.
Preparation Method
Alright, let’s get cooking. This comes together faster than you’d think, so have everything prepped and ready to go.
- Preheat your oven to 425°F (220°C). While it’s heating, spread your frozen fries in a single layer on a baking sheet. Bake for 18-20 minutes, flipping halfway, until golden and crispy. Don’t undercook them—they’ll soften a bit under the toppings.
- While the fries bake, warm your chili. In a saucepan over medium heat, bring your chili to a gentle simmer. Stir occasionally to prevent sticking. If your chili is thick, add a splash of water or broth to loosen it up. You want it spoonable, not pasty.
- Shred your cheeses if you bought blocks. Combine the cheddar and Monterey Jack in a bowl. Set aside about ¼ cup for the very top—it makes the final presentation prettier.
- Prep your toppings. Slice the green onions, dice the tomato, slice the jalapeños, and chop the cilantro. If you’re adding avocado, dice it just before serving to prevent browning.
- Assemble the skillet. Once the fries are crispy, transfer them to your cast iron skillet (or baking dish). Spread them into an even layer. Pour the warm chili evenly over the fries—don’t dump it all in one spot or you’ll get soggy patches.
- Add the cheese. Sprinkle the cheese mixture evenly over the chili-covered fries. Make sure every fry has some cheese coverage—this is what holds everything together.
- Bake again. Return the skillet to the oven and bake for 8-10 minutes, until the cheese is fully melted and bubbly. If you want those golden brown spots, switch to broil for the last 1-2 minutes—watch it carefully so it doesn’t burn.
- Top and serve. Remove from the oven and let it rest for 2 minutes (trust me, it’s lava hot). Dollop sour cream in streaks or spoonfuls, then scatter the jalapeños, tomatoes, green onions, and cilantro over the top. Add your avocado and hot sauce if using.
- Serve immediately. This is best eaten straight from the skillet. Provide forks or let everyone grab a spoon—no judgment here.
A few visual cues: your fries should be deep golden with crispy edges before layering. The chili should be bubbling slightly when it comes out of the oven. And the cheese should stretch when you pull a fork through it—that’s the money shot.
Cooking Tips & Techniques
I’ve made this skillet more times than I care to count, and I’ve learned a few things the hard way. Here’s what I wish someone had told me:
Don’t overload the fries. I know it’s tempting to pile everything on, but too much chili makes the fries soggy before they even hit the oven. Aim for a ratio of about 1 cup chili per 8 ounces of fries. You want every fry coated, not swimming.
Pre-cook your fries properly. This is non-negotiable. Undercooked fries turn into sad, limp mush under the chili. Bake them until they’re a shade darker than you think they need to be—they’ll soften slightly in the second bake, but they’ll still have structure.
Layer strategically. Don’t just dump everything in the middle. Spread the fries evenly, then drizzle the chili in a zigzag pattern. This ensures every bite has balanced flavor instead of one bite getting all the chili and another getting just fries.
Use room temperature cheese. Cold cheese takes longer to melt, which means you risk overcooking the fries while waiting for the cheese to bubble. Let your shredded cheese sit out for 10 minutes before using.
Watch the broiler. I once got distracted and turned perfectly good nacho fries into charcoal. The broiler works fast—30 seconds can be the difference between golden perfection and a smoky kitchen.
Let it rest. I know you’re hungry, but that 2-minute rest allows the cheese to set slightly so it doesn’t slide off every fry when you dig in. Use that time to snap a photo or pour drinks.
Variations & Adaptations
This recipe is endlessly adaptable, which is why I keep coming back to it. Here are some ways to switch it up:
Loaded Baked Potato Style: Swap the fries for frozen potato wedges, use bacon bits and chives as toppings, and drizzle with ranch dressing instead of sour cream. It’s a whole different vibe.
Vegetarian Version: Use a meatless chili or black bean chili. Load up on extra veggies like bell peppers and corn. The texture stays hearty without the meat.
Spicy Fiesta: Add a can of diced green chiles to your chili, use pepper jack cheese instead of Monterey Jack, and top with pickled jalapeños and a drizzle of chipotle crema (mix sour cream with adobo sauce).
Breakfast Skillet: Top with a fried egg or two before serving. The runny yolk mixing with the chili and cheese is next-level good. Serve with a side of easy make-ahead breakfast casserole cups for a full brunch spread.
Keto/Low-Carb: Swap the fries for roasted cauliflower florets or zucchini slices. The chili and cheese provide plenty of flavor without the carbs.
Air Fryer Method: Cook the fries in the air fryer at 400°F for 12-15 minutes, then assemble in an oven-safe dish and finish under the broiler. The air fryer gives you ultra-crispy fries with less oil.
I once made a version with leftover taco meat instead of chili, and it was incredible. Honestly, this recipe works with whatever you have in your fridge—it’s more of a template than a rigid formula.
Serving & Storage Suggestions
This skillet is best enjoyed immediately, right from the oven. The contrast between hot, melty cheese and cool sour cream is something you don’t want to miss. Serve it as a main dish with a simple side salad if you’re feeling virtuous, or let it shine as the star of your game day spread alongside our best loaded pulled pork nacho bar for a truly epic spread.
For drinks, an ice-cold beer (lager or pale ale) cuts through the richness beautifully. If you’re going non-alcoholic, a tangy limeade or sparkling water with a squeeze of lime works perfectly.
Storage: Leftovers keep in an airtight container in the fridge for up to 3 days. The texture won’t be as crispy, but the flavor is still fantastic. To reheat, spread the leftovers on a baking sheet and warm in a 375°F oven for 8-10 minutes. The microwave works in a pinch but makes everything soft.
Freezer: I don’t recommend freezing this one. The fries get mushy when thawed, and the texture just isn’t the same. Make it fresh—it’s fast enough that you don’t need to plan ahead.
One thing I love about this recipe: the flavors actually get better after a day in the fridge. The chili and cheese meld together, and the spices deepen. It’s not the same experience as fresh, but it’s still darn good.
Nutritional Information & Benefits
Let’s be real—this isn’t a health food. But it is comfort food made with real ingredients, and sometimes that’s exactly what you need.
Per serving (based on 6 servings):
- Calories: 485
- Protein: 22g
- Carbohydrates: 38g
- Fat: 28g
- Fiber: 5g
- Sodium: 980mg
The chili provides a good amount of protein and fiber, especially if you use a bean-based chili. Cheese adds calcium and protein. And the fries? Well, they provide joy, and that counts for something.
If you’re watching sodium, use low-sodium chili and go easy on the cheese. You can also swap the fries for sweet potato fries for extra vitamin A and fiber. For a lighter version, use ground turkey chili and reduced-fat cheese—it still hits the spot.
I’m not here to tell you this is a balanced meal. But it is a satisfying one. And honestly, sometimes that matters more.
Conclusion
This Easy Chili Cheese Fries Nacho Skillet is the kind of recipe that saves dinner when you have nothing planned and everyone’s hungry. It’s flexible, forgiving, and deeply satisfying in that way only cheese and fries can be. Whether you’re feeding a crowd on game day or just treating yourself on a Tuesday night, this skillet delivers.
What I love most about this recipe is how it brings people together. There’s something about pulling a hot skillet to the table and watching everyone dive in that feels like pure hospitality. No fancy plating, no complicated techniques—just good food shared with people you love.
Now I want to hear from you. What toppings would you add? Have you tried this with a different chili? Drop a comment below and let me know how your skillet turned out. And if you loved it, share this recipe with someone who needs a little comfort food in their life. Happy cooking!
Frequently Asked Questions
Can I use homemade chili for this recipe?
Absolutely. Homemade chili takes this skillet to another level. Use your favorite recipe or try our slow cooker chili for maximum flavor.
What type of fries work best?
Crinkle-cut or steak fries hold up best. Shoestring fries get too soggy. Waffle fries are also amazing if you can find them.
Can I make this in a 9×13 baking dish?
Yes, absolutely. The presentation won’t be as dramatic as a skillet, but it works perfectly. Just layer everything the same way.
How do I prevent the fries from getting soggy?
Pre-cook the fries until extra crispy, don’t overload with chili, and serve immediately. The second bake should be just long enough to melt the cheese.
Can I prep this ahead of time?
You can prep the toppings and shred the cheese in advance. But assemble and bake just before serving for the best texture. Leftovers are good, but fresh is best.
Pin This Recipe!
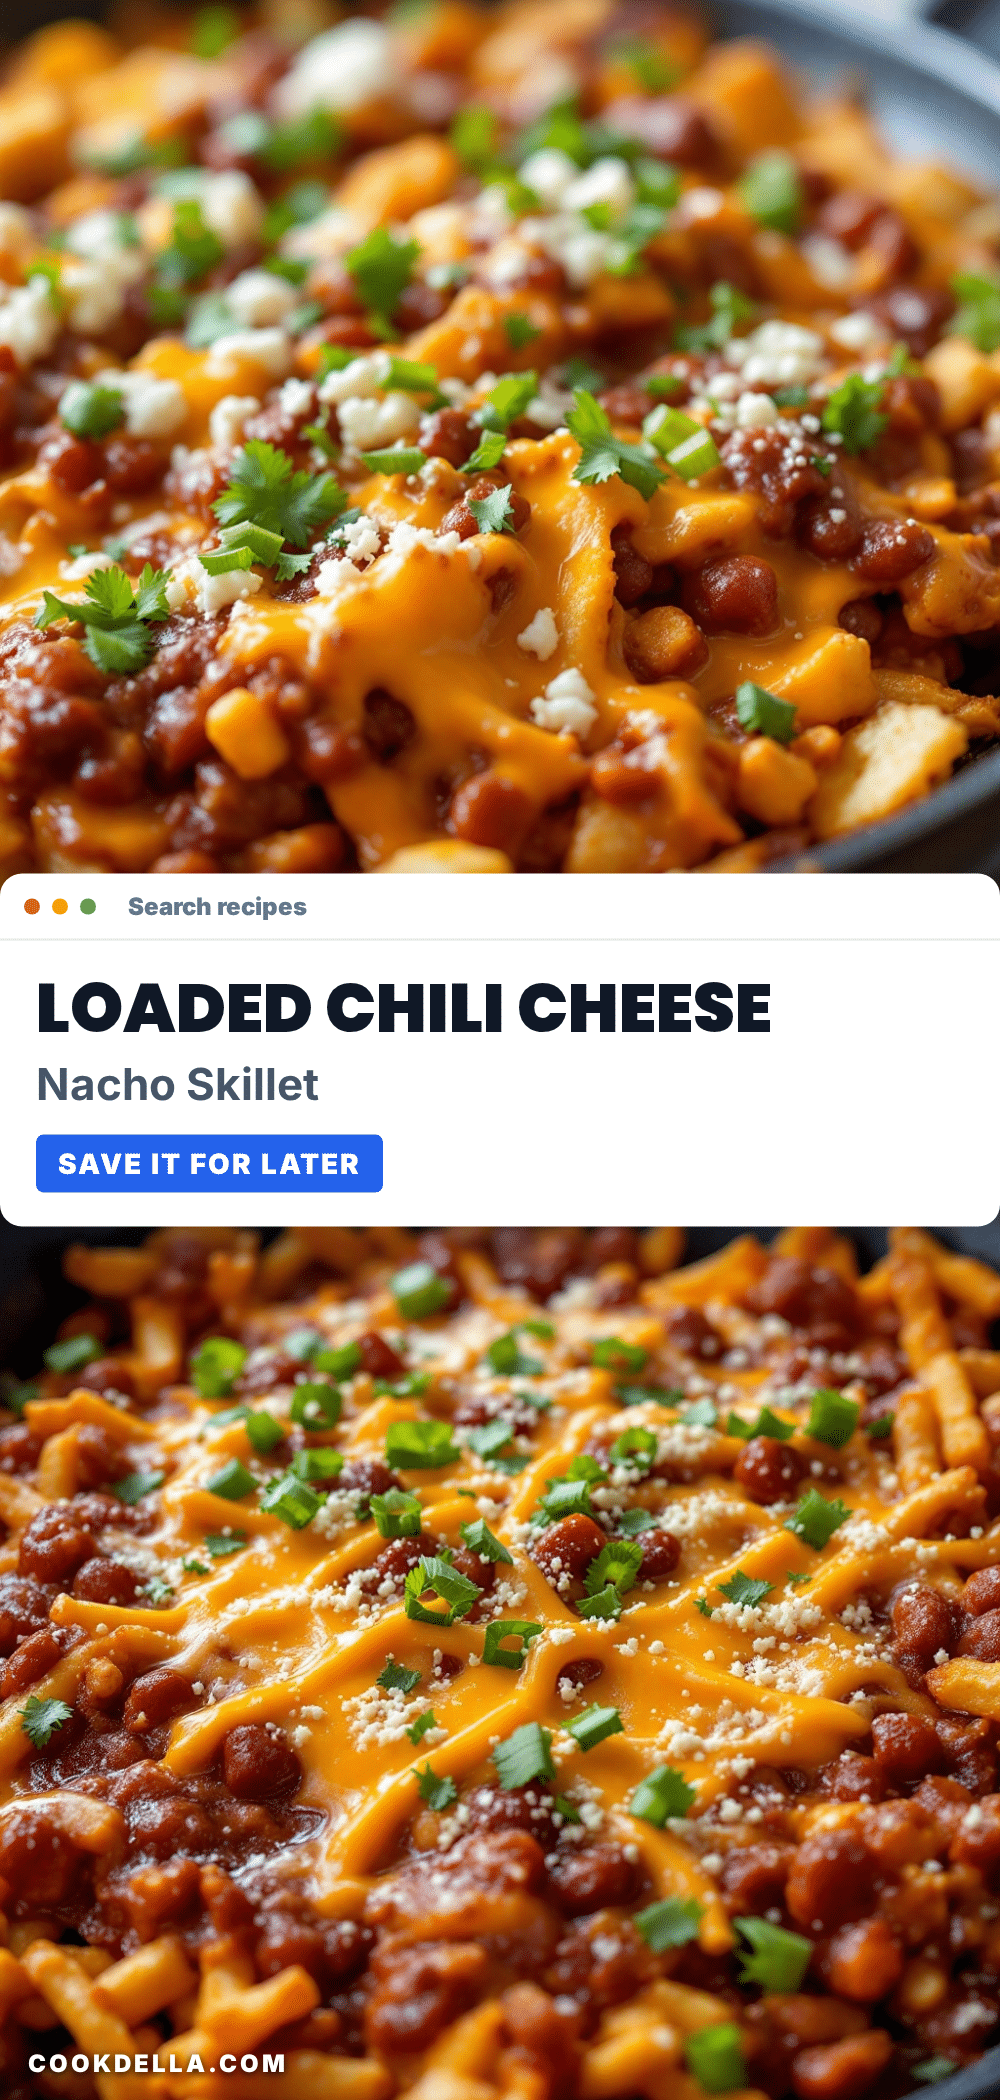
Easy Chili Cheese Fries Nacho Skillet

A quick and easy skillet dinner featuring crispy fries smothered in hearty chili, melted cheese, and all your favorite toppings. Perfect for busy weeknights or game day gatherings.
- Prep Time: 10 minutes
- Cook Time: 30 minutes
- Total Time: 40 minutes
- Yield: 6 servings 1x
- Category: Main Course
- Cuisine: American
Ingredients
- 1 bag (24-28 oz) frozen french fries (crinkle-cut or steak fries)
- 3 cups chili (homemade or canned, such as Wolf Brand or Hormel with beans)
- 2 cups shredded sharp cheddar cheese
- 1 cup shredded Monterey Jack cheese
- ½ cup sour cream
- ¼ cup sliced jalapeños (pickled or fresh)
- ¼ cup sliced green onions
- 1 Roma tomato, diced
- 2 tablespoons chopped fresh cilantro
- ¼ cup sliced black olives (optional)
- Pickled red onions (optional)
- 1 avocado, diced (optional)
- Hot sauce (optional, such as Cholula or Valentina)
Instructions
- Preheat oven to 425°F (220°C). Spread frozen fries in a single layer on a baking sheet. Bake for 18-20 minutes, flipping halfway, until golden and crispy.
- While fries bake, warm chili in a saucepan over medium heat until gently simmering. Add a splash of water or broth if too thick.
- Shred cheeses if using blocks. Combine cheddar and Monterey Jack in a bowl; set aside ¼ cup for topping.
- Prep toppings: slice green onions, dice tomato, slice jalapeños, chop cilantro. Dice avocado just before serving.
- Once fries are crispy, transfer to a 10-12 inch cast iron skillet (or 9×13 baking dish). Spread into an even layer. Pour warm chili evenly over fries.
- Sprinkle cheese mixture evenly over chili-covered fries.
- Return skillet to oven and bake for 8-10 minutes, until cheese is melted and bubbly. For golden spots, broil for 1-2 minutes, watching carefully.
- Remove from oven and let rest for 2 minutes. Dollop sour cream, then scatter jalapeños, tomatoes, green onions, and cilantro over top. Add avocado and hot sauce if using.
- Serve immediately straight from the skillet.
Notes
For best texture, pre-cook fries until extra crispy and don’t overload with chili. Let the skillet rest for 2 minutes before serving to allow cheese to set. Leftovers keep in the fridge for up to 3 days; reheat in a 375°F oven for 8-10 minutes.
Nutrition
- Serving Size: 1 serving (based on
- Calories: 485
- Sugar: 3
- Sodium: 980
- Fat: 28
- Saturated Fat: 12
- Carbohydrates: 38
- Fiber: 5
- Protein: 22
Keywords: chili cheese fries, nacho skillet, game day food, easy dinner, comfort food, skillet recipe


