Three times in one week I made this no-bake pumpkin pie, and the third time I finally stopped second-guessing myself. It wasn’t that the first two were bad—they were perfectly fine, actually—but something about the way the gingersnap crust held its crunch against the silky filling kept pulling me back to the kitchen counter. By Thursday, I’d stopped measuring the gingersnaps with any precision and just crushed until the bowl felt right. That’s when I knew this recipe had me in a chokehold.
The thing is, I’ve never been a traditional pumpkin pie person. Something about that oven-baked custard always felt a little too wobbly for my taste, and honestly? Waiting for it to cool completely felt like a test of patience I wasn’t interested in passing. But this version? It skips the oven entirely, which means no cracked tops, no soggy bottom crust, and no hovering by the stove wondering if it’s set yet. The filling comes together in a single bowl, the crust presses into the pan with your fingers, and the hardest part is waiting for it to chill in the fridge. That’s it.
I kept making it because every time I pulled a slice out of the pan, the edges stayed sharp and clean. The gingersnap crust didn’t crumble into a mess, and the filling held its shape without that gelatinous texture some no-bake pies get. It felt like a small victory every single time. And honestly, after a long day of recipe testing and kitchen chaos, a clean slice of pie that tasted like fall in a single bite was exactly what I needed.
Why You’ll Love This Recipe
Let me tell you straight up—this isn’t one of those no-bake pies that tastes like a compromise. You know the ones I mean. They’re fine in a pinch, but you’d never serve them to guests without apologizing first. This recipe is the opposite. I’ve brought it to two Friendsgiving gatherings and both times someone asked for the recipe before finishing their first slice. That’s the kind of energy we’re working with here.
- No oven required. Not even for the crust. Your oven can stay off while you whip up something that tastes like you spent hours in the kitchen.
- Simple ingredients. You probably have most of this in your pantry right now. Canned pumpkin, cream cheese, whipped topping, and a box of gingersnaps. No weird specialty items.
- Make-ahead friendly. This pie actually gets better after a day in the fridge. The flavors meld together and the crust sets up perfectly. You can make it two days ahead without any issues.
- No cracking or sinking. Because there’s no baking involved, you won’t have to deal with the classic pumpkin pie anxiety of checking for cracks every five minutes.
- Perfect for Thanksgiving. If your oven is already packed with a turkey and sides, this pie is your saving grace. It chills in the fridge while everything else bakes.
What makes this different from other no-bake pumpkin pies I’ve tried is the texture. Most versions use instant pudding mix, which gives you that almost artificial mouthfeel. This one uses cream cheese as the base, which adds richness without being heavy. The gingersnap crust isn’t just a pretty face either—the warm spices in the cookies complement the pumpkin filling in a way that a standard graham cracker crust just can’t pull off.
What Ingredients You Will Need
This recipe keeps things simple with ingredients that pull their weight. No fillers, no shortcuts that compromise flavor. Here’s what you’ll need and why each one matters.
- 2 cups gingersnap cookies, finely crushed (about 8 ounces) — I prefer Nabisco or Anna’s Ginger Thins for consistent texture. Pulse them in a food processor until they resemble fine sand. You don’t want big chunks or the crust won’t hold together.
- 6 tablespoons unsalted butter, melted — This binds the crust. Salted butter works in a pinch, but reduce any added salt elsewhere. Let it cool slightly before mixing so it doesn’t steam the cookies.
- 2 tablespoons granulated sugar — Just a touch to balance the gingersnap’s bite. You can skip this if your cookies are on the sweeter side.
- 8 ounces cream cheese, softened to room temperature — Full-fat is non-negotiable here. Low-fat cream cheese makes the filling runny and won’t set properly. Let it sit on the counter for at least 30 minutes before starting.
- 1 cup canned pumpkin puree — Not pumpkin pie filling. Make sure you grab 100% pure pumpkin. Libby’s is my go-to for consistent thickness and flavor.
- ½ cup packed light brown sugar — Adds moisture and that deep molasses note that pairs so well with pumpkin and ginger.
- 1 teaspoon pumpkin pie spice — Store-bought is fine, but you can make your own with ½ teaspoon cinnamon, ¼ teaspoon ginger, ⅛ teaspoon nutmeg, and a pinch of cloves. (If you love pumpkin spice, you might also enjoy my homemade pumpkin spice latte for a cozy pairing.)
- ½ teaspoon vanilla extract — Pure vanilla adds warmth. Imitation works but the flavor won’t be as rounded.
- 1 ½ cups frozen whipped topping, thawed — Cool Whip or a store brand works great. If you prefer homemade, whip ¾ cup heavy cream with 2 tablespoons powdered sugar until stiff peaks form.
For the topping, you’ll want extra whipped cream and a sprinkle of cinnamon or crushed gingersnaps right before serving. It makes the presentation pop without any extra effort.
Equipment Needed
You don’t need a fancy kitchen setup for this one. Here’s what you’ll actually use:
- 9-inch pie dish — Glass or ceramic works best. Metal pie pans can work but the crust might brown slightly faster (though we’re not baking it, so that’s less of a concern here).
- Food processor or rolling pin — For crushing the gingersnaps. A food processor gives you the most consistent texture, but a zip-top bag and rolling pin will get the job done. Just make sure you crush them fine enough—no pea-sized pieces.
- Medium mixing bowl — For the crust mixture.
- Large mixing bowl — For the filling. A glass or stainless steel bowl works better than plastic for getting cream cheese truly smooth.
- Hand mixer or stand mixer — You can do this by hand with a whisk and some elbow grease, but a mixer makes the cream cheese silky in under a minute.
- Rubber spatula — For scraping down the sides and folding in the whipped topping gently.
- Plastic wrap — To cover the pie while it chills.
If you don’t have a food processor, don’t stress. I’ve made this crust using a sturdy glass and the bottom of a measuring cup to crush the cookies. It takes a little longer, but the result is the same. Budget-friendly tip: store-brand gingersnaps work perfectly fine here and cost half as much as the name brands.
Preparation Method
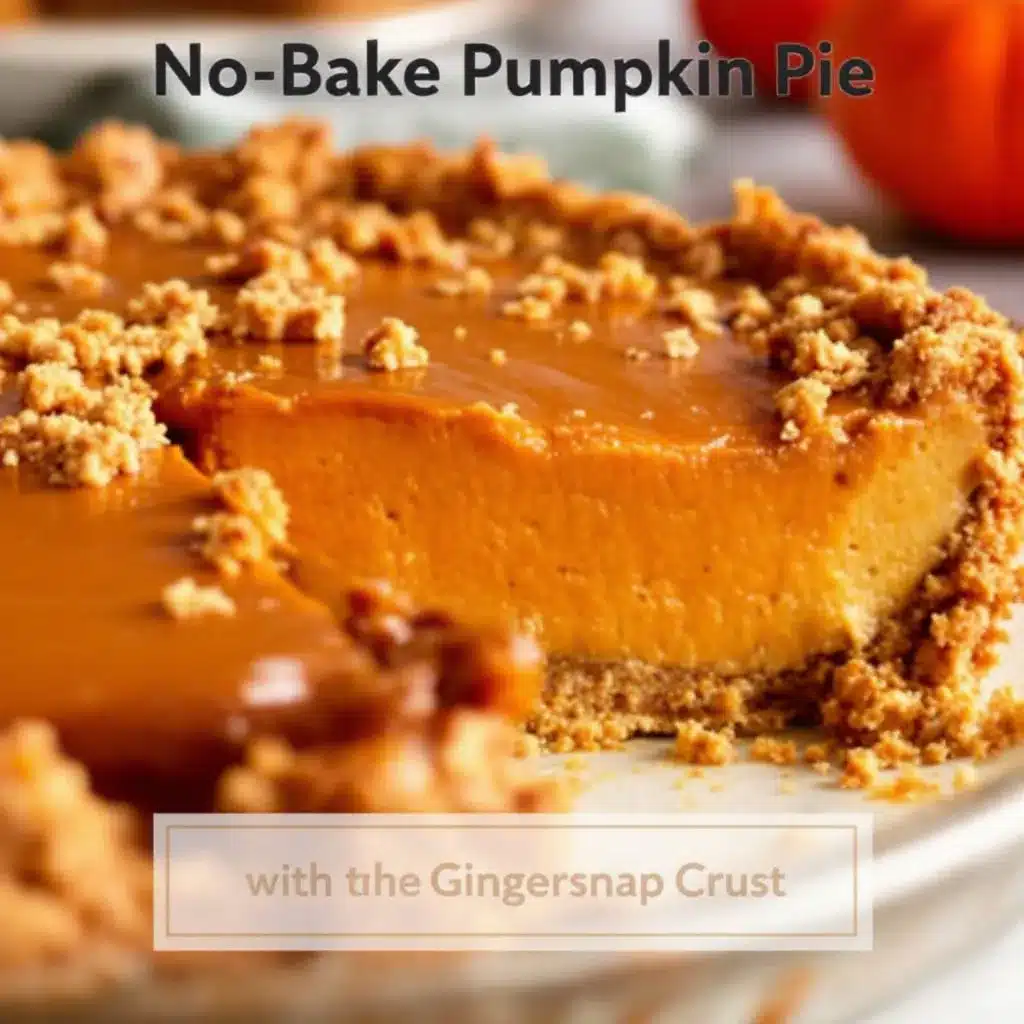
Let’s walk through this step by step. I’ve included time estimates and sensory cues so you know exactly what you’re looking for at each stage.
Make the Gingersnap Crust
- Pulse 2 cups of finely crushed gingersnap cookies in a food processor until they’re uniform crumbs. You should have about 1 ½ cups of crumbs total. If you’re crushing by hand, place the cookies in a zip-top bag and roll over them firmly until no large pieces remain.
- Transfer the crumbs to a medium bowl. Add 2 tablespoons of granulated sugar and stir to combine.
- Pour in 6 tablespoons of melted butter and stir with a fork until every crumb is moistened. The mixture should look like wet sand and hold together when you squeeze a handful.
- Press the mixture firmly into a 9-inch pie dish. Start with the bottom, using the flat bottom of a measuring cup to pack it down evenly. Then work up the sides. Aim for an even thickness—about ¼ inch on the bottom and slightly thinner on the sides.
- Place the crust in the refrigerator for at least 15 minutes while you make the filling. This helps it firm up so it doesn’t crumble when you add the filling.
Make the Pumpkin Filling
- In a large mixing bowl, beat 8 ounces of softened cream cheese with a hand mixer on medium speed until smooth and creamy—about 2 minutes. Scrape down the sides of the bowl with a rubber spatula. There should be no lumps at all. If you see any, keep beating for another minute.
- Add ½ cup packed light brown sugar and beat until well combined, about 1 minute. The mixture will look slightly grainy at this point—that’s normal.
- Add 1 cup of canned pumpkin puree, 1 teaspoon of pumpkin pie spice, and ½ teaspoon of vanilla extract. Beat on low speed until fully incorporated. Scrape down the sides again. The filling should be a uniform orange color with no white streaks.
- Fold in 1 ½ cups of thawed whipped topping using a rubber spatula. Use gentle, sweeping motions—don’t stir vigorously or you’ll deflate the mixture. Fold until no white streaks remain. The filling should be light, airy, and mousse-like in texture.
Assemble and Chill
- Remove the crust from the refrigerator. Spoon the pumpkin filling into the crust and spread it evenly with the spatula. Smooth the top as best you can—it doesn’t have to be perfect because you’ll cover it with whipped cream later.
- Cover the pie loosely with plastic wrap. Make sure the wrap doesn’t touch the surface of the filling or it will stick.
- Refrigerate for at least 4 hours, but overnight is better. The filling needs time to set completely. If you cut into it too early, it will be soft and won’t hold its shape.
- Before serving, top with additional whipped cream and a sprinkle of cinnamon or crushed gingersnaps. Slice with a sharp knife, wiping the blade clean between cuts for neat edges.
Cooking Tips & Techniques
I’ve made enough mistakes in the kitchen to fill a small notebook, and this pie taught me a few lessons the hard way. Here’s what I wish I’d known from the start.
Don’t skip chilling the crust. The first time I made this, I was impatient and poured the filling into a warm crust. The butter hadn’t fully set, so the crust crumbled when I tried to slice it. Fifteen minutes in the fridge makes a world of difference.
Soft cream cheese is not optional. Cold cream cheese will leave you with lumpy filling no matter how long you beat it. Let it sit on the counter for a full 30 to 45 minutes. If you forget, you can microwave it in 10-second bursts, but be careful—cream cheese melts quickly and you don’t want it hot.
Fold, don’t stir. When you add the whipped topping, use a gentle folding motion. Stirring aggressively deflates the air you just whipped in, and your filling will end up dense instead of light and mousse-like. Think of it like you’re wrapping the whipped cream around the pumpkin mixture, not beating them together.
Patience with setting time. I know 4 hours feels like forever when you’re craving pie. But trust me on this—cutting it early is the single biggest mistake you can make. The filling needs time to firm up so it slices cleanly. If you’re serving this for Thanksgiving, make it the day before. Your future self will thank you.
Multitasking tip: While the crust chills, clean up your workspace and measure out your filling ingredients. That way, when you’re ready to assemble, everything flows smoothly without scrambling for the measuring cups.
Variations & Adaptations
This recipe is flexible enough to adapt to different diets and taste preferences without losing its soul. Here are a few variations I’ve tried and loved.
Gluten-free version: Swap the gingersnaps for gluten-free gingersnap cookies. Most major brands offer a gluten-free option now. The rest of the ingredients are naturally gluten-free, so you’re good to go. Just double-check your pumpkin pie spice label to be safe.
Dairy-free adaptation: Use dairy-free cream cheese (Kite Hill or Violife work well) and a coconut-based whipped topping. The texture will be slightly softer, so plan for an extra hour of chilling time. The crust can use vegan butter or coconut oil in place of regular butter.
Pumpkin spice variation: If you want more warmth, add an extra ¼ teaspoon of ginger and a pinch of cardamom to the filling. It gives the pie a slightly more complex flavor profile that pairs beautifully with the gingersnap crust. (For another pumpkin-forward treat, try my soft-baked pumpkin snickerdoodle cookies—they use similar spices and are perfect for fall baking.)
Chocolate twist: Melt ¼ cup of semi-sweet chocolate chips and drizzle it over the crust before adding the filling. Let it set in the fridge for 10 minutes, then proceed as usual. The chocolate adds a subtle bitterness that balances the sweet pumpkin filling.
Mini pie version: Use a muffin tin with removable bottoms or individual tart pans. Press the crust into each cavity, fill, and chill. These are perfect for parties or portion control. Reduce chilling time to 2 hours for the smaller size.
Serving & Storage Suggestions
This pie is best served cold, straight from the refrigerator. Let it sit at room temperature for about 5 minutes before slicing—just enough to take the chill off without softening the filling too much.
For presentation, I like to dollop a generous swirl of whipped cream on top and finish with a light dusting of cinnamon or pumpkin pie spice. A few crushed gingersnaps scattered around the edges add texture and visual appeal. If you’re feeling fancy, candied pecans or a drizzle of caramel sauce take it over the top.
This pie pairs beautifully with a cup of hot coffee or a warm cider. For a full fall dessert spread, serve it alongside my easy one-bowl chocolate chip pumpkin bread for variety.
Storage: Cover the pie tightly with plastic wrap or foil and store it in the refrigerator for up to 5 days. The crust will stay crisp for the first 2 to 3 days, then soften slightly after that—it’s still delicious, just different texture-wise.
Freezing: This pie freezes beautifully. Wrap the entire pie (or individual slices) in plastic wrap, then a layer of foil. Freeze for up to 3 months. To serve, thaw overnight in the refrigerator. Don’t thaw at room temperature or the filling may weep.
Reheating: Honestly, don’t. This is a cold pie through and through. If you want a warm pumpkin dessert, this isn’t the one—try my Starbucks copycat pumpkin cream cheese muffins instead.
One thing I love about this pie is that the flavors actually deepen after a day in the fridge. The ginger from the crust mingles with the pumpkin spice in the filling, and by day two, it tastes even more cohesive. So don’t be afraid to make it ahead.
Nutritional Information & Benefits
Here’s an approximate nutritional breakdown for one slice of this pie (based on 8 servings):
| Nutrient | Amount per Serving |
|---|---|
| Calories | 320 |
| Total Fat | 18g |
| Saturated Fat | 10g |
| Cholesterol | 45mg |
| Sodium | 280mg |
| Total Carbohydrates | 36g |
| Dietary Fiber | 2g |
| Sugars | 24g |
| Protein | 4g |
Pumpkin is a nutritional powerhouse—it’s packed with vitamin A (great for eye health), fiber, and antioxidants. The cream cheese adds calcium and protein, while the gingersnap crust provides a small amount of iron from the molasses in the cookies.
This recipe is vegetarian and can easily be made gluten-free or dairy-free with the swaps mentioned above. It’s not low-calorie by any stretch, but it’s a dessert made with real ingredients—no artificial flavors or preservatives lurking in the background.
If you’re watching your sugar intake, you can reduce the brown sugar to ⅓ cup and use a sugar-free whipped topping. The filling will be slightly less sweet, but the pumpkin and spice flavors will shine through more prominently.
Conclusion
This no-bake pumpkin pie with gingersnap crust has officially earned a permanent spot in my fall dessert rotation. It’s the kind of recipe that makes you look like a hero with almost no effort—the oven stays off, the ingredients are straightforward, and the result is genuinely impressive. Every time I pull this out of the fridge, someone comments on how good it looks. And then they taste it, and that’s when the real magic happens.
What I love most about this pie is how forgiving it is. You can customize the spices, swap the crust, adjust the sweetness—it all works. There’s no finicky custard to temper, no blind baking, no worrying about whether it’s set. You just mix, press, chill, and serve. That’s it.
I’d love to hear how this turns out for you. Did you add any twists? Try a different crust? Leave a comment below and let me know—I read every single one and I’m always looking for new ideas to try in my own kitchen. And if you’re sharing this on social media, tag me so I can see your beautiful creation. Happy fall, friends. Go make some pie.
Frequently Asked Questions
Can I use fresh pumpkin instead of canned?
Yes, but you’ll need to cook and puree it first, then drain off as much liquid as possible. Fresh pumpkin has more water content than canned, so your filling might be slightly softer. If you go this route, add an extra hour of chilling time to compensate.
Why did my crust fall apart when I sliced the pie?
This usually happens when the crust wasn’t packed firmly enough or didn’t chill long enough before adding the filling. Make sure you press the crumbs down with authority—use the bottom of a measuring cup to really compact them. And don’t skip the 15-minute chill before adding the filling.
Can I make this pie a day ahead?
Absolutely. In fact, I recommend it. The pie needs at least 4 hours to set, but overnight gives the flavors time to meld and the crust to firm up perfectly. Just cover it tightly with plastic wrap and keep it refrigerated.
How do I get clean slices without the filling sticking to the knife?
Use a sharp knife and wipe it clean with a damp paper towel between each cut. You can also dip the knife in hot water and dry it off before slicing—the warmth helps the knife glide through the filling without dragging.
Can I use a different cookie for the crust?
Yes, but the flavor will change. Graham crackers work well for a milder taste. Shortbread cookies make a buttery, neutral crust. If you use chocolate cookies, you’ll get a mocha-pumpkin vibe that’s surprisingly good. Just keep the ratio the same—2 cups crushed cookies to 6 tablespoons melted butter.
Pin This Recipe!
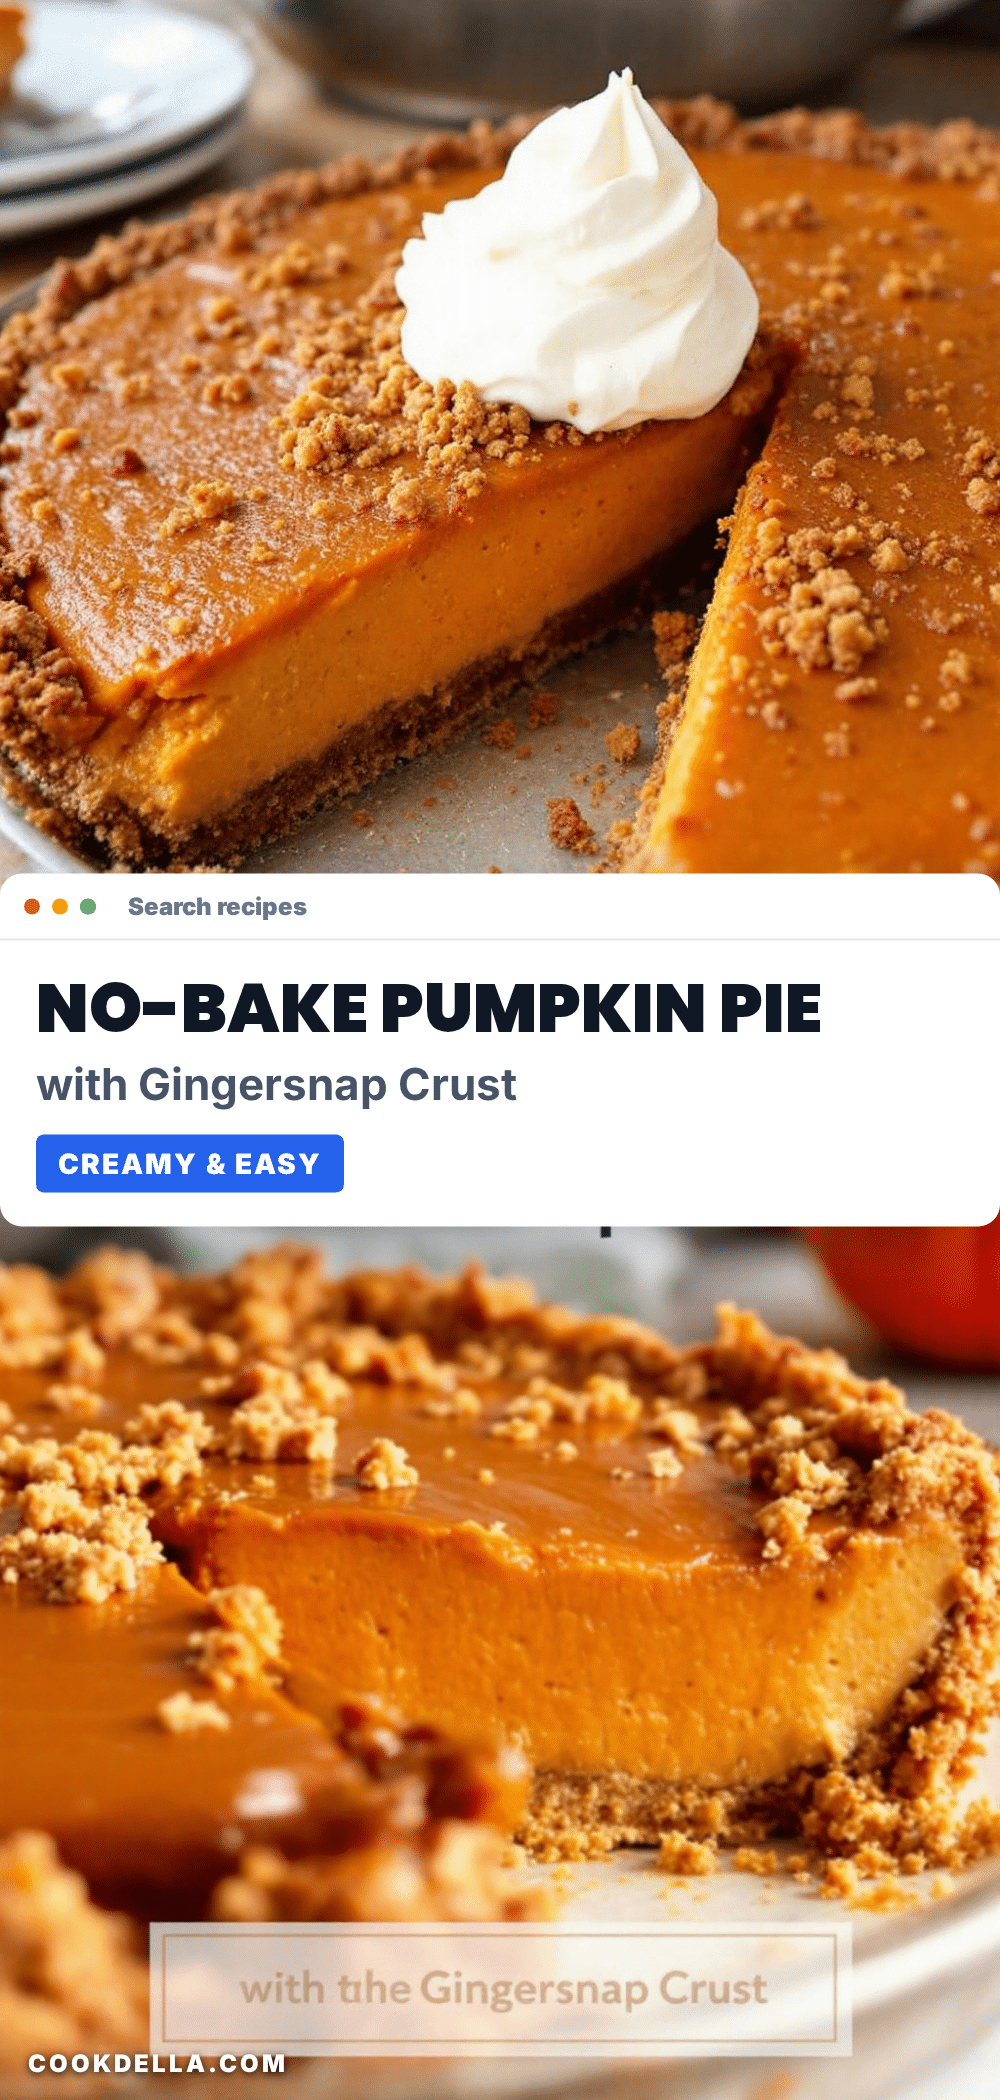
Best Easy No-Bake Pumpkin Pie with Gingersnap Crust Recipe

This no-bake pumpkin pie features a crunchy gingersnap crust and a silky, mousse-like filling made with cream cheese and pumpkin puree. It’s a make-ahead friendly dessert that skips the oven entirely, perfect for Thanksgiving or any fall gathering.
- Prep Time: 20 minutes
- Cook Time: 0 minutes
- Total Time: 4 hours 20 minutes (includes chilling time)
- Yield: 8 servings 1x
- Category: Dessert
- Cuisine: American
Ingredients
- 2 cups gingersnap cookies, finely crushed (about 8 ounces)
- 6 tablespoons unsalted butter, melted
- 2 tablespoons granulated sugar
- 8 ounces cream cheese, softened to room temperature
- 1 cup canned pumpkin puree (100% pure, not pumpkin pie filling)
- ½ cup packed light brown sugar
- 1 teaspoon pumpkin pie spice
- ½ teaspoon vanilla extract
- 1 ½ cups frozen whipped topping, thawed
- Additional whipped cream and cinnamon or crushed gingersnaps for topping (optional)
Instructions
- Pulse 2 cups of finely crushed gingersnap cookies in a food processor until they’re uniform crumbs. You should have about 1 ½ cups of crumbs total. If crushing by hand, place cookies in a zip-top bag and roll over them firmly until no large pieces remain.
- Transfer the crumbs to a medium bowl. Add 2 tablespoons of granulated sugar and stir to combine.
- Pour in 6 tablespoons of melted butter and stir with a fork until every crumb is moistened. The mixture should look like wet sand and hold together when squeezed.
- Press the mixture firmly into a 9-inch pie dish. Start with the bottom, using the flat bottom of a measuring cup to pack it down evenly. Then work up the sides. Aim for an even thickness—about ¼ inch on the bottom and slightly thinner on the sides.
- Place the crust in the refrigerator for at least 15 minutes while you make the filling.
- In a large mixing bowl, beat 8 ounces of softened cream cheese with a hand mixer on medium speed until smooth and creamy—about 2 minutes. Scrape down the sides of the bowl with a rubber spatula.
- Add ½ cup packed light brown sugar and beat until well combined, about 1 minute.
- Add 1 cup of canned pumpkin puree, 1 teaspoon of pumpkin pie spice, and ½ teaspoon of vanilla extract. Beat on low speed until fully incorporated. Scrape down the sides again.
- Fold in 1 ½ cups of thawed whipped topping using a rubber spatula. Use gentle, sweeping motions until no white streaks remain.
- Remove the crust from the refrigerator. Spoon the pumpkin filling into the crust and spread it evenly with the spatula.
- Cover the pie loosely with plastic wrap. Refrigerate for at least 4 hours, but overnight is better.
- Before serving, top with additional whipped cream and a sprinkle of cinnamon or crushed gingersnaps. Slice with a sharp knife, wiping the blade clean between cuts.
Notes
Don’t skip chilling the crust for at least 15 minutes before adding filling. Use full-fat cream cheese for best results—low-fat will make the filling runny. The pie needs at least 4 hours to set, but overnight is ideal for clean slices. For a gluten-free version, use gluten-free gingersnap cookies. For dairy-free, use dairy-free cream cheese and coconut-based whipped topping. The pie can be stored in the refrigerator for up to 5 days or frozen for up to 3 months.
Nutrition
- Serving Size: 1 slice (1/8 of pie)
- Calories: 320
- Sugar: 24
- Sodium: 280
- Fat: 18
- Saturated Fat: 10
- Carbohydrates: 36
- Fiber: 2
- Protein: 4
Keywords: no-bake pumpkin pie, gingersnap crust, easy pumpkin pie, Thanksgiving dessert, no-bake dessert, fall dessert, pumpkin pie without oven


