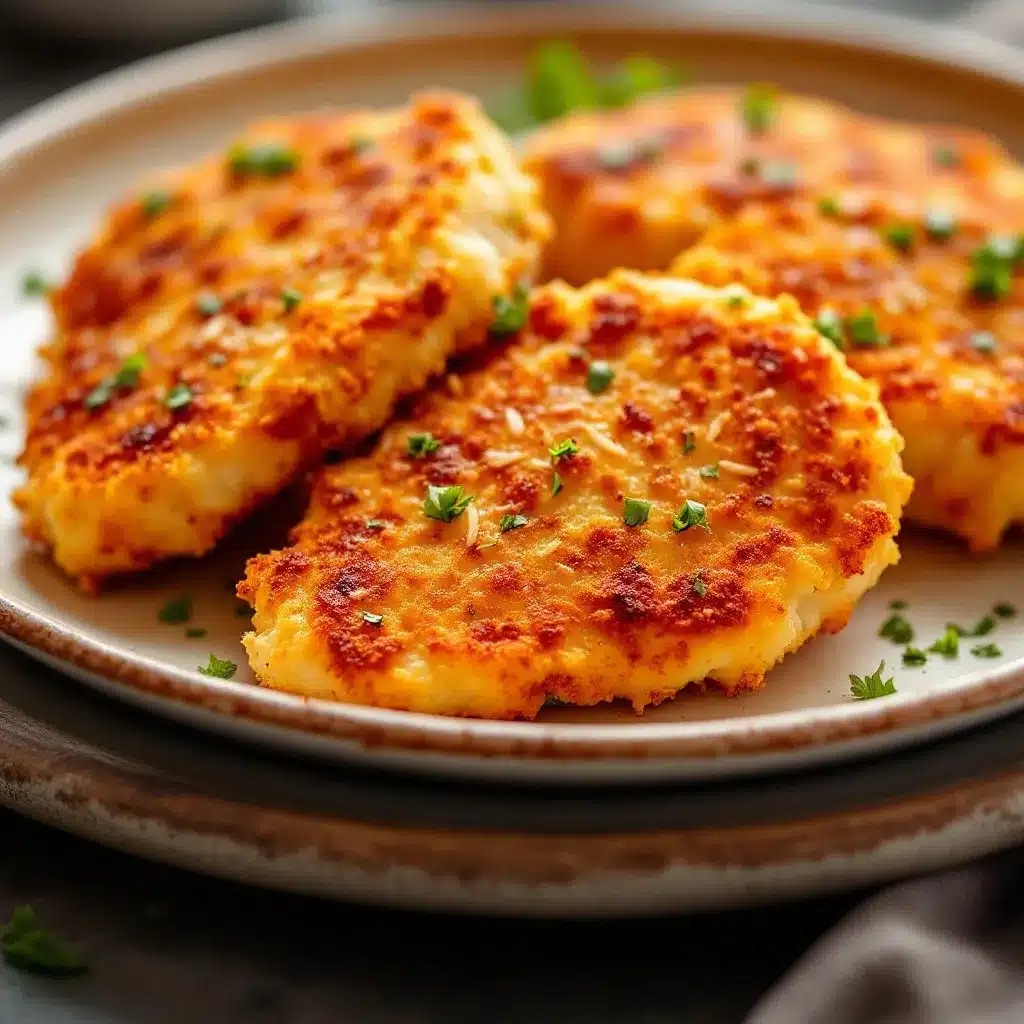
The sound. That first tooth-shattering, golden-brown crunch that echoed through my kitchen and made my husband look up from his laptop. That’s what I made these crispy air fryer parmesan chicken cutlets for. Everything else — the juicy meat, the salty cheese, the fact that I didn’t have to stand over a spitting pan of hot oil — was just a bonus.
Honestly, I was skeptical at first. I mean, can an air fryer really deliver that deep-fried texture without the guilt? I’d tried other “crispy” chicken recipes before, and they always came out… well, sad. Soggy breading. Pale spots. That weirdly chewy texture that makes you wonder if you’re eating chicken or regret. But this one? This one was different.
It started on a Tuesday night when I had a pack of thin chicken cutlets thawing in the fridge and absolutely zero energy for cleanup. The oil splatter from pan-frying was not happening. I’d just finished making a batch of crispy air fryer pork chops with garlic herb butter a few nights before, and the method was still fresh in my mind. So I took a gamble. I grabbed the parmesan, some panko, and my last egg. I figured, what’s the worst that could happen? A mediocre dinner?
What happened instead was a plate of chicken so good that I texted a photo to my mom before I even took a bite. The breading was shattery and light. The parmesan added this salty, nutty depth that made the whole thing feel fancy — but it came together in under 20 minutes. No exaggeration. I’ve made it four times since that first night, tweaking the seasoning, testing the temperature, and figuring out exactly how to get that perfect crust every single time.
And now I’m sharing all of that with you. No fluff. No overpromising. Just a genuinely good, easy recipe that I actually look forward to making — and eating.
Why You’ll Love This Recipe
Let me be real with you for a second. I’ve tested this recipe more times than I care to admit. I’ve burned my fingers on hot baskets. I’ve undercooked chicken and had to panic-nuke it. I’ve over-seasoned and under-seasoned. But through all that trial and error, I landed on a version that I genuinely believe is foolproof. Here’s why it works:
- Quick & Easy: From fridge to table in under 25 minutes. That’s faster than ordering takeout in most neighborhoods.
- Simple Ingredients: You probably have everything already. Panko, parmesan, eggs, chicken, salt, pepper. That’s it. No weird specialty items.
- Perfect for Busy Weeknights: This is my go-to when I need something satisfying but don’t want to spend an hour in the kitchen. It also works great alongside a easy creamy cucumber salad with dill and sour cream for a complete meal.
- Crowd-Pleaser: My kids devour these. My picky-eater friend asked for the recipe. Even my mother-in-law, who’s notoriously hard to impress, went back for seconds.
- Unbelievably Delicious: The texture is what gets everyone. That crust is genuinely crunchy — not just “air fryer crunchy” where you have to squint and pretend. It’s the real deal.
What makes this different from every other air fryer chicken recipe out there? Two things. First, I mix finely grated parmesan directly into the panko breading. It melts and crisps up in a way that creates these tiny, craggy bits of flavor all over the surface. Second, I use a light spray of oil at the perfect moment — not too early, not too late — so the breading gets golden without burning. It’s a small tweak, but it makes all the difference.
This is the kind of recipe that makes you close your eyes on the first bite. It’s comfort food reimagined — healthier, faster, but with the same soul-soothing satisfaction. Perfect for impressing guests without stress, or turning a simple Tuesday dinner into something memorable.
What Ingredients You Will Need
This recipe uses simple, wholesome ingredients to deliver bold flavor and satisfying texture without the fuss. Most of these are pantry staples, which is exactly why I love it for last-minute meals.
- Chicken cutlets (about 1 to 1.5 pounds) — Look for thin-sliced chicken breasts or buy regular breasts and slice them in half horizontally. Even thickness is key for even cooking.
- Panko breadcrumbs (1 cup) — Regular breadcrumbs work in a pinch, but panko gives you that superior crunch. I prefer the Japanese-style ones for their light, flaky texture.
- Finely grated parmesan cheese (1/2 cup) — Please, for the love of good food, use real parmesan here. The stuff in the green can won’t melt the same way. Grate it yourself from a block — it takes 30 seconds and makes a huge difference.
- Large eggs (2) — These help the breading stick. Make sure they’re at room temperature for the best coating.
- All-purpose flour (1/4 cup) — This creates a dry surface for the egg to cling to, which prevents the breading from sliding off.
- Garlic powder (1 teaspoon) — Adds savory depth without being overpowering.
- Onion powder (1/2 teaspoon) — Rounds out the flavor profile nicely.
- Paprika (1/2 teaspoon) — I use smoked paprika when I want a deeper flavor, but sweet works great too.
- Salt and black pepper (to taste) — Don’t skimp. Season the flour mixture and the chicken itself.
- Olive oil cooking spray — This is crucial for that golden crust. Avocado oil spray works too. Just don’t skip it.
- Fresh parsley (optional, for garnish) — Adds a pop of color and freshness.
- Lemon wedges (for serving) — A squeeze of lemon right before eating cuts through the richness beautifully.
For the seasoning, I recommend using a brand like McCormick or Simply Organic — they have consistent quality. If you’re looking for a gluten-free option, use gluten-free panko and substitute the all-purpose flour with a 1:1 gluten-free blend. It works perfectly.
One note on the parmesan: I’ve tried this with pecorino romano, and it’s also delicious — just saltier, so adjust accordingly. For a dairy-free version, you can use nutritional yeast mixed with the panko, but the texture won’t be quite as crispy.
Equipment Needed
You don’t need a professional kitchen for this. Here’s what you’ll actually use:
- Air fryer (any size) — I use a 6-quart Cosori, and it handles four cutlets at a time. If yours is smaller, work in batches. Don’t overcrowd the basket.
- Shallow bowls (3) — For the flour, egg wash, and breadcrumb mixture. Wide, shallow bowls make the dredging process much easier.
- Tongs — For transferring the chicken from bowl to bowl without making a mess. Trust me, your fingers will thank you.
- Cutting board and sharp knife — If you’re slicing your own chicken breasts, a sharp knife is non-negotiable.
- Meat mallet or rolling pin — For pounding the chicken to even thickness. You can use a heavy skillet in a pinch.
- Plastic wrap or parchment paper — Place this over the chicken before pounding to avoid splatter.
- Wire rack — Optional, but helpful for holding the breaded chicken before cooking. It keeps the coating from getting soggy.
- Instant-read thermometer — I recommend this for peace of mind. Chicken needs to reach 165°F internally.
If you don’t own an air fryer yet, you can still make this recipe. Bake the cutlets on a wire rack set over a baking sheet at 425°F for about 15-18 minutes, flipping halfway. The texture won’t be quite as crispy, but it’s still delicious. I actually learned this method from making crispy baked buffalo cauliflower bites, and the same principle applies here.
Preparation Method
Alright, let’s get cooking. Here’s exactly how I do it, step by step:
- Prep the chicken. If you’re using whole chicken breasts, slice them in half horizontally to create thin cutlets. Place each piece between two sheets of plastic wrap and pound to about 1/4-inch thickness using a meat mallet or rolling pin. Even thickness is crucial — it ensures everything cooks at the same rate. Season both sides with salt and pepper.
- Set up your dredging station. Grab three shallow bowls. In the first, mix the flour with 1/2 teaspoon salt, 1/4 teaspoon pepper, and the garlic powder. In the second, beat the eggs with a splash of water until uniform. In the third, combine the panko, parmesan, onion powder, and paprika. Stir everything together so the cheese is evenly distributed.
- Dredge the chicken. Working one piece at a time, coat the chicken in the flour mixture. Shake off any excess — you want a thin, even layer. Dip it into the egg wash, letting any excess drip off. Then press it firmly into the panko-parmesan mixture, making sure both sides are fully coated. Don’t be shy here. Really press it in.
- Rest the breaded cutlets. Place the breaded chicken on a wire rack (or a plate) and let them rest for 5-10 minutes. This step is important — it helps the coating adhere better and prevents it from sliding off during cooking. I learned this the hard way after my first batch turned into a mess of bare chicken and loose breadcrumbs.
- Preheat your air fryer. Set it to 400°F and let it run for 3-5 minutes. A hot start gives you that immediate sear that locks in the crust.
- Arrange the cutlets. Lightly spray the air fryer basket with oil. Place the cutlets in a single layer — no overlapping, no crowding. You want air to circulate around each piece. Depending on your air fryer size, you might need to work in batches. Don’t try to squeeze them in; it’ll compromise the crunch.
- Spray and cook. Lightly spray the tops of the cutlets with oil. This is what gives you that golden, crispy finish. Cook at 400°F for 6 minutes. Flip the cutlets carefully with tongs, spray the other side, and cook for another 5-6 minutes. The total time is usually 11-12 minutes, but check at 10 minutes if your cutlets are on the thinner side.
- Check for doneness. Use an instant-read thermometer to check the thickest part of a cutlet. It should read 165°F. If it’s not there yet, give it another minute or two. Don’t overcook, though — chicken cutlets dry out fast.
- Rest and serve. Let the cutlets rest for 2-3 minutes on a clean wire rack. This keeps the bottom from getting steamy and soggy. Garnish with fresh parsley and serve with lemon wedges on the side.
A few sensory cues to watch for: The chicken should sizzle when it hits the hot basket. The breading will look pale and soft before you spray the oil — that’s normal. After spraying, you’ll see it transform into a golden, craggy crust. The smell of parmesan toasting in the air fryer is absolutely intoxicating.
Cooking Tips & Techniques
I’ve made every mistake you can imagine with this recipe, so you don’t have to. Here’s what I’ve learned:
Don’t skip the flour. I know it seems like an extra step, but the flour creates a dry surface that helps the egg stick. Without it, the breading slides right off. I once tried to save time by skipping it, and I ended up with a basket full of naked chicken and a pile of sad, loose panko.
Use a light hand with the oil spray. Too much oil makes the breading heavy and greasy. Too little, and it stays pale and floury. A light, even mist is all you need. I hold the spray can about 8 inches away and do a quick sweep across the surface.
Don’t overcrowd the basket. This is the number one mistake people make with air fryers. If the cutlets are touching, they’ll steam instead of crisp. Leave at least half an inch between each piece. If that means cooking in batches, do it. The extra 10 minutes is worth it.
Flip halfway through. The bottom of the cutlet sits against the basket and won’t brown as evenly. Flipping ensures both sides get that beautiful golden crust. Use tongs, not a fork — piercing the meat releases juices and can make the chicken dry.
Let the chicken rest after breading. This isn’t just for the cooked chicken. Letting the breaded, raw cutlets sit for 5-10 minutes helps the coating adhere. The flour absorbs moisture from the egg, creating a glue-like bond. Skip this step, and you’ll have patchy breading.
Timing is everything. Air fryers vary wildly. My Cosori runs hot, so 11 minutes is perfect. My friend’s Ninja takes 13 minutes. Start checking at 10 minutes and go from there. Write down what works for your specific model — future you will thank you.
For extra crunch, double dredge. If you’re feeling ambitious, dip the chicken in the egg wash, then the panko, then back in the egg wash, then the panko again. It creates a thicker, extra-crunchy crust. It’s more work, but for special occasions, it’s absolutely worth it.
Variations & Adaptations
This recipe is a great base, but don’t be afraid to play with it. Here are some of my favorite variations:
Spicy Parmesan Chicken: Add 1 teaspoon of cayenne pepper and 1/2 teaspoon of red pepper flakes to the panko mixture. The heat pairs beautifully with the salty parmesan. I make this version when I’m craving something with a kick, and it’s fantastic alongside a easy creamy cucumber salad with dill and sour cream to balance the heat.
Herb and Garlic Version: Mix 2 tablespoons of dried Italian seasoning or herbes de Provence into the panko. Add an extra clove of garlic (minced) to the egg wash. This gives the chicken a fragrant, garden-fresh flavor that’s perfect for spring and summer meals.
Gluten-Free Adaptation: Use gluten-free panko (I like the Ian’s brand) and substitute the all-purpose flour with almond flour or a 1:1 gluten-free blend. The texture is slightly different — a bit more delicate — but still delicious. My gluten-intolerant friend couldn’t tell the difference.
Lemon-Pepper Twist: Add the zest of one lemon and 1 teaspoon of coarsely ground black pepper to the panko mixture. Serve with extra lemon wedges. This is my go-to when I want something bright and fresh without a heavy sauce.
Air Fryer Chicken Parmesan (the full dish): After cooking the cutlets, top each one with a spoonful of marinara sauce and a slice of mozzarella. Return to the air fryer for 2-3 minutes until the cheese melts. Serve over pasta or with a side salad. It’s a full meal in under 30 minutes.
Make it a wrap or sandwich: Slice the cooked cutlets and stuff them into a warm pita or crusty roll with lettuce, tomato, and a drizzle of ranch or Caesar dressing. It’s my favorite lunch the next day.
Serving & Storage Suggestions
These cutlets are best served fresh out of the air fryer — that’s when the crust is at its peak crunchiness. But here’s how to handle leftovers and make the most of them:
Serving temperature: Serve immediately while hot. The cutlets will stay crispy for about 10-15 minutes on a wire rack. If you pile them on a plate, the bottoms will steam and get soft within a few minutes. A wire rack is your best friend here.
What to serve with them: These cutlets are incredibly versatile. Pair them with a simple green salad, roasted vegetables, or pasta. They’re also great sliced over a Caesar salad or tucked into a sandwich. For a lighter meal, I love serving them with the easy creamy cucumber salad with dill and sour cream — the cool, tangy salad is the perfect contrast to the warm, crispy chicken.
Storing leftovers: Place any leftover cutlets in an airtight container lined with paper towels. The paper towels absorb excess moisture and help maintain some crunch. Store in the refrigerator for up to 3 days.
Reheating: The air fryer is your best bet for reheating. Preheat to 375°F and cook for 3-4 minutes, flipping halfway. The microwave will make them soggy, so avoid it if you can. If you’re in a rush, a hot skillet with a tiny bit of oil works in a pinch — about 2 minutes per side.
Freezing: You can freeze the cooked cutlets for up to 2 months. Let them cool completely, then wrap individually in plastic wrap and place in a freezer bag. To reheat, cook from frozen in the air fryer at 375°F for 6-8 minutes. The texture won’t be quite as crispy as fresh, but it’s still pretty darn good.
Flavor development: Honestly, the cutlets are best the day they’re made. The crust loses its magic overnight. But the meat stays juicy, so if you’re meal-prepping, I recommend cooking the chicken plain and adding the breading right before cooking.
Nutritional Information & Benefits
Here’s an approximate breakdown per serving (based on 4 servings, using average ingredients):
| Nutrient | Amount per Serving |
|---|---|
| Calories | 385 |
| Protein | 42g |
| Fat | 16g |
| Saturated Fat | 5g |
| Carbohydrates | 18g |
| Fiber | 1g |
| Sugar | 1g |
| Sodium | 620mg |
These cutlets are a solid source of lean protein, which keeps you full and supports muscle health. Chicken breast is naturally low in fat, and the air fryer method keeps the added fat to a minimum — just a light spray of oil. The parmesan adds calcium and a small amount of protein, plus that unmistakable savory flavor.
If you’re watching your sodium, use low-sodium parmesan and go easy on the added salt. The garlic powder and paprika add flavor without extra sodium. For a lower-carb option, swap the panko for crushed pork rinds or almond flour — it changes the texture but keeps the macros in check.
This recipe is naturally nut-free and, with the right substitutions, can be gluten-free and low-carb. It’s not suitable for those with dairy allergies unless you use a dairy-free parmesan alternative.
Conclusion
Look, I’m not going to tell you that these crispy air fryer parmesan chicken cutlets will change your life. But they might change your Tuesday night dinner routine. They’re quick, satisfying, and genuinely delicious — the kind of recipe that makes you feel like you’re eating something indulgent without the guilt or the mess.
What I love most about this recipe is how adaptable it is. You can keep it simple with just salt and pepper, or dress it up with herbs and spices. You can serve it as a main dish, slice it over a salad, or stuff it into a sandwich. It works for busy weeknights, lazy Sundays, and everything in between.
I’d love to hear how this turns out for you. Did you try a variation? Did your kids love it? Did you burn the first batch like I did? (No judgment here.) Drop a comment below and let me know. And if you share a photo on social media, tag me — I genuinely love seeing your creations. Happy cooking, friends.
Frequently Asked Questions
Can I use chicken thighs instead of breasts?
Absolutely. Boneless, skinless chicken thighs work great. They’re a bit juicier and more forgiving if you overcook them slightly. Just adjust the cooking time — thighs may need an extra 1-2 minutes depending on thickness.
Why is my breading falling off?
This usually happens for one of three reasons: you skipped the flour step, you didn’t press the breading firmly enough, or you didn’t let the breaded chicken rest before cooking. Make sure you’re doing all three, and the breading should stay put.
Can I make these ahead of time for a party?
You can bread the chicken up to 4 hours ahead and keep it in the refrigerator on a wire rack. Cook them just before serving for the best texture. If you need to reheat, use the air fryer at 375°F for 3-4 minutes.
What’s the best way to keep the cutlets crispy after cooking?
Place them on a wire rack set over a baking sheet in a warm oven (200°F). This allows air to circulate around the entire cutlet and prevents the bottom from steaming. Avoid covering them with foil or stacking them on a plate.
Can I use this recipe for chicken tenders or strips?
Yes, and it works beautifully. Just cut the chicken into strips instead of cutlets. Reduce the cooking time to 8-10 minutes total, flipping halfway. They make great finger food for kids or game day snacking.
Pin This Recipe!
Easy Crispy Air Fryer Parmesan Chicken Cutlets Recipe

Crispy, golden-brown air fryer parmesan chicken cutlets that are juicy on the inside and perfectly crunchy on the outside. Ready in under 25 minutes with simple ingredients, this foolproof recipe is perfect for busy weeknights.
- Prep Time: 15 minutes
- Cook Time: 12 minutes
- Total Time: 27 minutes
- Yield: 4 servings 1x
- Category: Main Course
- Cuisine: American
Ingredients
- 1 to 1.5 pounds chicken cutlets (thin-sliced chicken breasts or halved horizontally)
- 1 cup panko breadcrumbs
- 1/2 cup finely grated parmesan cheese
- 2 large eggs, room temperature
- 1/4 cup all-purpose flour
- 1 teaspoon garlic powder
- 1/2 teaspoon onion powder
- 1/2 teaspoon paprika (smoked or sweet)
- Salt and black pepper to taste
- Olive oil cooking spray
- Fresh parsley (optional, for garnish)
- Lemon wedges (for serving)
Instructions
- Prep the chicken: If using whole chicken breasts, slice them in half horizontally to create thin cutlets. Place each piece between two sheets of plastic wrap and pound to about 1/4-inch thickness using a meat mallet or rolling pin. Season both sides with salt and pepper.
- Set up your dredging station: In the first shallow bowl, mix the flour with 1/2 teaspoon salt, 1/4 teaspoon pepper, and the garlic powder. In the second, beat the eggs with a splash of water until uniform. In the third, combine the panko, parmesan, onion powder, and paprika.
- Dredge the chicken: Working one piece at a time, coat the chicken in the flour mixture, shaking off excess. Dip into the egg wash, letting excess drip off. Then press firmly into the panko-parmesan mixture, ensuring both sides are fully coated.
- Rest the breaded cutlets: Place on a wire rack or plate and let rest for 5-10 minutes to help the coating adhere.
- Preheat your air fryer to 400°F for 3-5 minutes.
- Lightly spray the air fryer basket with oil. Arrange cutlets in a single layer without overlapping or crowding.
- Lightly spray the tops of the cutlets with oil. Cook at 400°F for 6 minutes. Flip carefully with tongs, spray the other side, and cook for another 5-6 minutes (total 11-12 minutes). Check at 10 minutes if cutlets are thinner.
- Check for doneness: Use an instant-read thermometer to ensure the thickest part reaches 165°F.
- Let cutlets rest on a clean wire rack for 2-3 minutes. Garnish with fresh parsley and serve with lemon wedges.
Notes
For extra crunch, double dredge: dip in egg wash, then panko, then egg wash again, then panko. Don’t overcrowd the basket; leave at least half an inch between cutlets. Air fryer temperatures vary; start checking at 10 minutes. Let breaded cutlets rest before cooking to prevent breading from falling off.
Nutrition
- Serving Size: 1 cutlet (based on 4
- Calories: 385
- Sugar: 1
- Sodium: 620
- Fat: 16
- Saturated Fat: 5
- Carbohydrates: 18
- Fiber: 1
- Protein: 42
Keywords: air fryer chicken cutlets, crispy chicken, parmesan chicken, easy chicken recipe, weeknight dinner, air fryer recipe


