My niece Lily did not believe white chocolate could actually look like a witch’s fingernail. She stood there, arms crossed, watching me melt the candy melts in the microwave. “It’s just going to look like a pretzel with white goo on it,” she said. And honestly? I had the same fear the first time I tried making these. But then I dipped the first pretzel rod, tapped off the excess, and pressed a sliced almond onto the tip. The way that almond curves naturally—it really does look like a fingernail. It’s almost unsettling how convincing it is. Lily leaned in closer, squinted, and said, “Okay, that’s actually creepy.” That’s when I knew these would be a hit.
These Easy Witch Finger Pretzel Rods are the kind of Halloween treat that makes people do a double-take. They’re spooky enough for a Halloween party but simple enough that you can make them with kids without losing your mind. I’ve made them for three Halloweens now, and every single time, someone asks, “Wait, how did you get the fingernails to look so real?” The secret is just sliced almonds and a little patience. No fancy tools, no food coloring that stains your counter. Just pretzels, white chocolate, and almonds doing their best creepy impression.
And here’s the thing—I’m not usually a themed treat person. I like my desserts straightforward. But these? They earned a permanent spot in my Halloween rotation. They’re the kind of recipe that makes you feel clever without actually having to do much work. That’s my favorite kind of recipe, honestly.
Why You’ll Love This Recipe
Let me tell you why these witch finger pretzels have become my most-requested Halloween recipe. I’ve tested them with different chocolates, different almonds, and different chilling methods—all so you don’t have to.
- Quick & Easy: You can make a whole batch in under 30 minutes. Most of that time is just waiting for the chocolate to set. Perfect for last-minute Halloween plans or when your kid announces at 8 PM that they need treats for school tomorrow.
- Simple Ingredients: Three ingredients. That’s it. Pretzel rods, white chocolate or candy melts, and sliced almonds. You probably already have everything but the candy melts in your pantry right now.
- Perfect for Halloween Parties: These disappear fast at any gathering. Kids love the creepy factor, and adults appreciate that they’re not overwhelmingly sweet. They work for classroom parties, office potlucks, or just making your kitchen feel festive.
- Crowd-Pleaser: I’ve watched people who “don’t like white chocolate” eat three of these in a row. The salty-sweet combo is just that good. The pretzel keeps it from being too rich.
- Unbelievably Realistic: The almond really does look like a fingernail. It’s the kind of detail that makes people say, “Oh, that’s gross!” in the best possible way. That’s the reaction you want.
What makes these different from other Halloween treats is how effortlessly convincing they are. I’ve tried making black cat sugar cookies that required royal icing and precise piping, and they looked like sad blobs. These pretzels? They look genuinely spooky with almost no effort. The almond’s natural shape does all the work. You just dip and press. It’s the perfect Halloween treat for people who want maximum impact with minimum fuss.
What Ingredients You Will Need
This recipe uses three simple ingredients to create something that looks far more complicated than it actually is. Here’s what you need and why each ingredient matters.
- Pretzel rods (12 ounces, about 24 rods): Look for thick, sturdy pretzel rods that won’t snap easily when you dip them. I prefer the standard brand from the grocery store—they’re consistently sized and hold up well to the chocolate coating. Avoid thin pretzel sticks; they’ll break under the weight of the chocolate. If you can find extra-long rods, even better—they look more like witch fingers.
- White chocolate melting wafers or candy melts (12 ounces): This is where you have options. I use Ghirardelli white chocolate melting wafers because they melt smoothly and set with a nice shine. Candy melts also work great and come in vanilla or white colors. Avoid white chocolate chips—they contain stabilizers that prevent smooth melting and often seize up. If you must use chips, add a teaspoon of coconut oil to help them melt smoothly. For a creamier finish, you can also use almond bark, which melts like a dream.
- Sliced almonds (about ½ cup): These are the secret to the fingernail effect. Look for natural sliced almonds (not roasted or salted) for the most realistic color. The natural curve of the almond slice perfectly mimics a fingernail shape. I’ve tried using whole almonds cut in half, but they’re too thick. Sliced almonds are thin enough to look delicate and creepy. If you can only find roasted almonds, they’ll work fine—they just have a slightly darker color.
- Green food coloring gel (optional): If you want to give your witch fingers a greenish tint, add a drop or two of green gel food coloring to the melted white chocolate. I skip this most of the time because I like the pale, corpse-like look of plain white chocolate. But if you’re going for a more traditional witch vibe, a tiny bit of green works well. Liquid food coloring can seize the chocolate, so stick with gel.
Ingredient Selection Tip: For the best texture, make sure your pretzel rods are fresh and crisp. Stale pretzels will feel soft and disappointing. I check the expiration date at the store and give the bag a gentle squeeze to make sure the rods are intact. Broken rods can still work—they just look less like fingers.
Substitution Guidance: If you need a dairy-free option, use dairy-free white chocolate chips or Enjoy Life brand white chocolate morsels. They melt differently (thicker), so you may need to thin them with a teaspoon of coconut oil. For a nut-free version, skip the almonds entirely and use a small candy corn piece or a white chocolate disk for the nail. It won’t look as realistic, but it will still be delicious.
Equipment Needed
You don’t need fancy equipment for these. Here’s what I use every time.
- Microwave-safe bowl: Any medium-sized bowl works. Glass or ceramic is best because they heat evenly. I use a Pyrex measuring cup because the spout makes dipping easier.
- Baking sheet: A standard half-sheet pan lined with parchment paper or a silicone baking mat. The silicone mat works best because the chocolate doesn’t stick at all.
- Spatula or spoon: For stirring the chocolate as it melts. A silicone spatula is ideal because it won’t scratch your bowl.
- Small offset spatula or butter knife: For spreading chocolate if needed. Honestly, I mostly just dip and tap, but the spatula helps clean up edges.
- Tweezers (optional but helpful): For placing the almond slices precisely. I use kitchen tweezers, but clean eyebrow tweezers work too. Your fingers work fine, just be prepared for chocolate-covered fingertips.
- Piping bag or zip-top bag (optional): If you want to add veins or knuckle details with extra chocolate. I skip this for everyday batches, but it’s fun for parties.
I’ve made these with just a bowl, a spoon, and a baking sheet. The tweezers make it easier, but they’re not essential. If you don’t have parchment paper, wax paper works in a pinch—just make sure it’s not the microwave-safe kind.
Preparation Method

Let me walk you through exactly how I make these. I’ve refined the process over several Halloweens, so these steps should help you avoid my early mistakes.
- Line your baking sheet with parchment paper or a silicone mat. Make sure it’s flat and stable. If you’re using parchment, put a dab of melted chocolate under each corner to hold it in place. Trust me, sliding parchment is annoying.
- Pour your white chocolate melting wafers into a microwave-safe bowl. Don’t crowd the bowl—you want room to dip. I use about 12 ounces for 24 pretzel rods. If you’re making a smaller batch, scale down accordingly.
- Melt the chocolate in 30-second intervals at 50% power. Stir between each interval. This is crucial. High heat will scorch the chocolate and turn it grainy. I start with 30 seconds, stir, then do 20-second intervals until most of the wafers are melted. The residual heat will melt the last few pieces. If you’re using green food coloring, add it now and stir until evenly distributed.
- Let the melted chocolate cool for 2-3 minutes. This is the step I used to skip, and it made everything harder. Hot chocolate is too thin and runs off the pretzel too quickly. Slightly cooled chocolate coats better and sets faster. It should feel warm but not hot to the touch.
- Take one pretzel rod and dip it into the melted chocolate. Submerge about two-thirds of the rod—leave the top third bare so people have a place to hold it without getting chocolate on their fingers. I learned this the hard way after my first batch became a sticky mess.
- Lift the pretzel out and let the excess chocolate drip back into the bowl. Tilt the pretzel slightly and tap it gently against the side of the bowl. You want a thin, even coating—not a thick blob. The chocolate should look smooth, not lumpy.
- Place the dipped pretzel onto the prepared baking sheet. Leave a little space between each one so they don’t touch. If the chocolate pools at the bottom, use your spatula to gently spread it or let it drip off before placing it down.
- Immediately press a sliced almond onto the tip of the pretzel. The almond should overlap the end of the pretzel by about ¼ inch, with the curved side facing out to look like a fingernail. Press gently so it sticks into the chocolate. If the chocolate has started to set, the almond won’t adhere well—work quickly.
- Repeat with the remaining pretzels. Work in batches of 4-6 at a time so the chocolate doesn’t set before you add the almonds. If the chocolate in your bowl starts to thicken, microwave it for 10 seconds at 50% power to loosen it up.
- Optional: Add knuckle details. If you want extra creepy fingers, use a toothpick or the tip of a small knife to create horizontal lines on the chocolate where knuckles would be. Do this while the chocolate is still wet. I usually do this for about half the batch—it adds character.
- Let the pretzels set completely. This takes about 15-20 minutes at room temperature, or 5-7 minutes in the refrigerator. Don’t touch them until the chocolate is fully firm. If you refrigerate them, let them sit at room temperature for a few minutes before serving to prevent condensation.
- Once set, carefully peel them off the parchment. They should release easily. If they stick, the chocolate wasn’t fully set. Pop them back in the fridge for a few more minutes.
Sensory Cue: When you tap the dipped pretzel against the bowl, the chocolate should fall in a smooth ribbon. If it’s too thick and drops in blobs, it needs a few more seconds in the microwave. If it runs off like water, it’s too hot—let it cool.
Cooking Tips & Techniques
I’ve made every mistake you can make with these pretzels, so you don’t have to. Here’s what I’ve learned.
Don’t overheat the chocolate. This is the number one mistake. White chocolate burns easily and turns into a thick, grainy mess. Low and slow is the way to go. If your chocolate does seize up, you can try adding a teaspoon of vegetable oil or coconut oil and stirring vigorously, but sometimes it’s better to just start over. I’ve ruined two batches this way, and it’s frustrating every time.
Work in small batches. Don’t dip all 24 pretzels at once. The chocolate in your bowl will start to set, and the last few pretzels will have thick, uneven coatings. I dip 4-6 at a time, add their almonds, then move on to the next batch. It takes a little longer, but the results are much better.
Use room-temperature pretzels. If your pretzels are cold from the pantry, the chocolate will set too quickly and won’t adhere properly. Let them sit out for 10 minutes before you start. Same goes for the almonds—room temperature helps them stick.
Keep the chocolate at the right consistency. As you work, the chocolate will thicken. Every 10 minutes or so, give it a quick 10-second blast in the microwave at 50% power and stir well. This keeps it dippable without overheating it.
Let the chocolate set completely before moving them. I once tried to transfer a batch to a serving platter too early, and the chocolate smeared everywhere. Patience is key. If you’re in a rush, the refrigerator is your friend.
Variations & Adaptations
One of the best things about this recipe is how easy it is to customize. Here are some variations I’ve tried and loved.
- Green Witch Fingers: Add a drop of green gel food coloring to the melted white chocolate for a classic witchy look. The green tint makes them look even more realistic and creepy. I did this for a Halloween party last year, and they were the first thing to disappear.
- Bloody Fingers: After the white chocolate sets, drizzle a small amount of red candy melt or strawberry syrup near the tip to look like blood. This is a fun variation for older kids and adults who want something extra gruesome. Just don’t overdo it—a little goes a long way.
- Dark Chocolate Version: Swap white chocolate for dark or milk chocolate. The dark chocolate version looks less realistic but tastes amazing if you prefer less sweetness. Use dark chocolate melting wafers and follow the same instructions. The almonds still look like fingernails against the dark background.
- Gluten-Free Option: Use gluten-free pretzel rods. They’re available at most grocery stores and work exactly the same way. Just check the label to make sure they’re certified gluten-free if you’re serving someone with celiac disease.
- Nut-Free Version: Skip the almonds and use a small candy corn piece, a white chocolate disk, or even a dab of pink icing for the nail. It won’t look as realistic, but it’s still cute and completely nut-free.
I’ve also tried adding a sprinkle of edible glitter or luster dust to make them look magical rather than creepy. It’s a fun option if you’re making these for a Halloween party with kids who prefer sparkle over scare.
Serving & Storage Suggestions
These pretzels are best served at room temperature. The chocolate should be firm but not hard, and the pretzel should snap when you bite into it. Arrange them on a platter with the “fingers” pointing outward for maximum creep factor. I like to place them in a small vase or cup so they stand up like a bouquet of witch fingers—it’s a great conversation starter.
Storage: Store leftover pretzels in an airtight container at room temperature for up to one week. Don’t refrigerate them unless your kitchen is very warm—the chocolate can develop condensation when it comes back to room temperature. If you do refrigerate them, let them sit out for 10 minutes before serving.
Freezing: You can freeze these for up to three months. Place them in a single layer in a freezer-safe container with parchment paper between layers. Thaw at room temperature for about 30 minutes before serving. The texture stays great, though the chocolate might lose a bit of its shine.
Make Ahead: These are perfect for making a day or two ahead of time. In fact, the chocolate sets better overnight. I often make them on a Thursday for a Saturday Halloween party, and they’re always perfect.
If you’re serving these at a party, consider pairing them with other Halloween treats like soft baked pumpkin snickerdoodle cookies for a festive dessert table. The salty-sweet pretzels balance beautifully with the warm, spiced cookies.
Nutritional Information & Benefits
Per serving (1 pretzel rod): Approximately 120 calories, 6g fat, 16g carbohydrates, 2g protein, 10g sugar, 1g fiber. These values are estimates and will vary based on your specific ingredients and portion sizes.
While these are definitely a treat, they’re not the worst option out there. The pretzel provides a small amount of iron and B vitamins from the enriched flour. Almonds are a good source of vitamin E, magnesium, and healthy fats—though the amount per pretzel is small. White chocolate contains calcium from the milk solids, but it’s primarily a source of sugar and fat.
Dietary Considerations: This recipe contains dairy (white chocolate), gluten (pretzels), and nuts (almonds). For dairy-free, use dairy-free white chocolate. For gluten-free, use gluten-free pretzel rods. For nut-free, skip the almonds. Always check labels if you’re serving someone with allergies.
I don’t pretend these are health food—they’re a Halloween treat, and they should be enjoyed as such. But compared to some other holiday sweets that are pure sugar, these at least have a little salt and protein to balance things out.
Frequently Asked Questions
Can I use almond bark instead of white chocolate?
Yes, absolutely. Almond bark melts beautifully and sets with a nice shine. It’s actually easier to work with than white chocolate because it’s less likely to seize. Just melt it according to the package directions and proceed with the recipe.
Why did my white chocolate seize up?
White chocolate seizes when it comes into contact with even a tiny amount of water. Make sure your bowl and utensils are completely dry. Also, avoid overheating—use 50% power in the microwave and stir frequently. If it does seize, you can try adding a teaspoon of vegetable oil and stirring vigorously, but sometimes it’s better to start over.
How do I get the almonds to stick better?
Press the almond into the chocolate while it’s still wet—don’t wait. If the chocolate has started to set, the almond won’t adhere well. Also, make sure your almonds are at room temperature. Cold almonds can cause the chocolate to set too quickly around them.
Can I make these without a microwave?
Yes, you can melt the white chocolate using a double boiler. Bring a pot of water to a simmer, place a heat-safe bowl on top (make sure it doesn’t touch the water), and melt the chocolate slowly, stirring constantly. It takes a bit longer, but the results are just as good.
How far in advance can I make these?
You can make them up to a week ahead if stored properly in an airtight container at room temperature. For best texture and appearance, I recommend making them no more than 3-4 days ahead. The chocolate stays shiny, and the pretzels stay crisp.
Conclusion
These Easy Witch Finger Pretzel Rods are the Halloween treat that keeps on giving. They’re spooky enough to impress at parties, simple enough to make with kids, and delicious enough that people will keep reaching for them long after the initial shock wears off. I’ve made them for three Halloweens now, and they never fail to get the exact reaction I’m hoping for—that mix of delight and disgust that makes Halloween treats so fun.
The best part? You can customize them endlessly. Add green coloring for a classic witch look, drizzle red for bloody fingers, or skip the almonds for a nut-free version. However you make them, they’re guaranteed to be a hit. I love that I can whip up a batch in under 30 minutes and still feel like I put in real effort. That’s my kind of Halloween magic.
If you make these, I’d love to hear how they turn out. Leave a comment below and let me know if your kids screamed (in a good way) or if you came up with a fun variation I haven’t tried yet. And if you’re looking for more easy Halloween treats, check out my easy one-bowl chocolate chip pumpkin bread for another crowd-pleaser. Happy Halloween, and happy snacking!
Pin This Recipe!
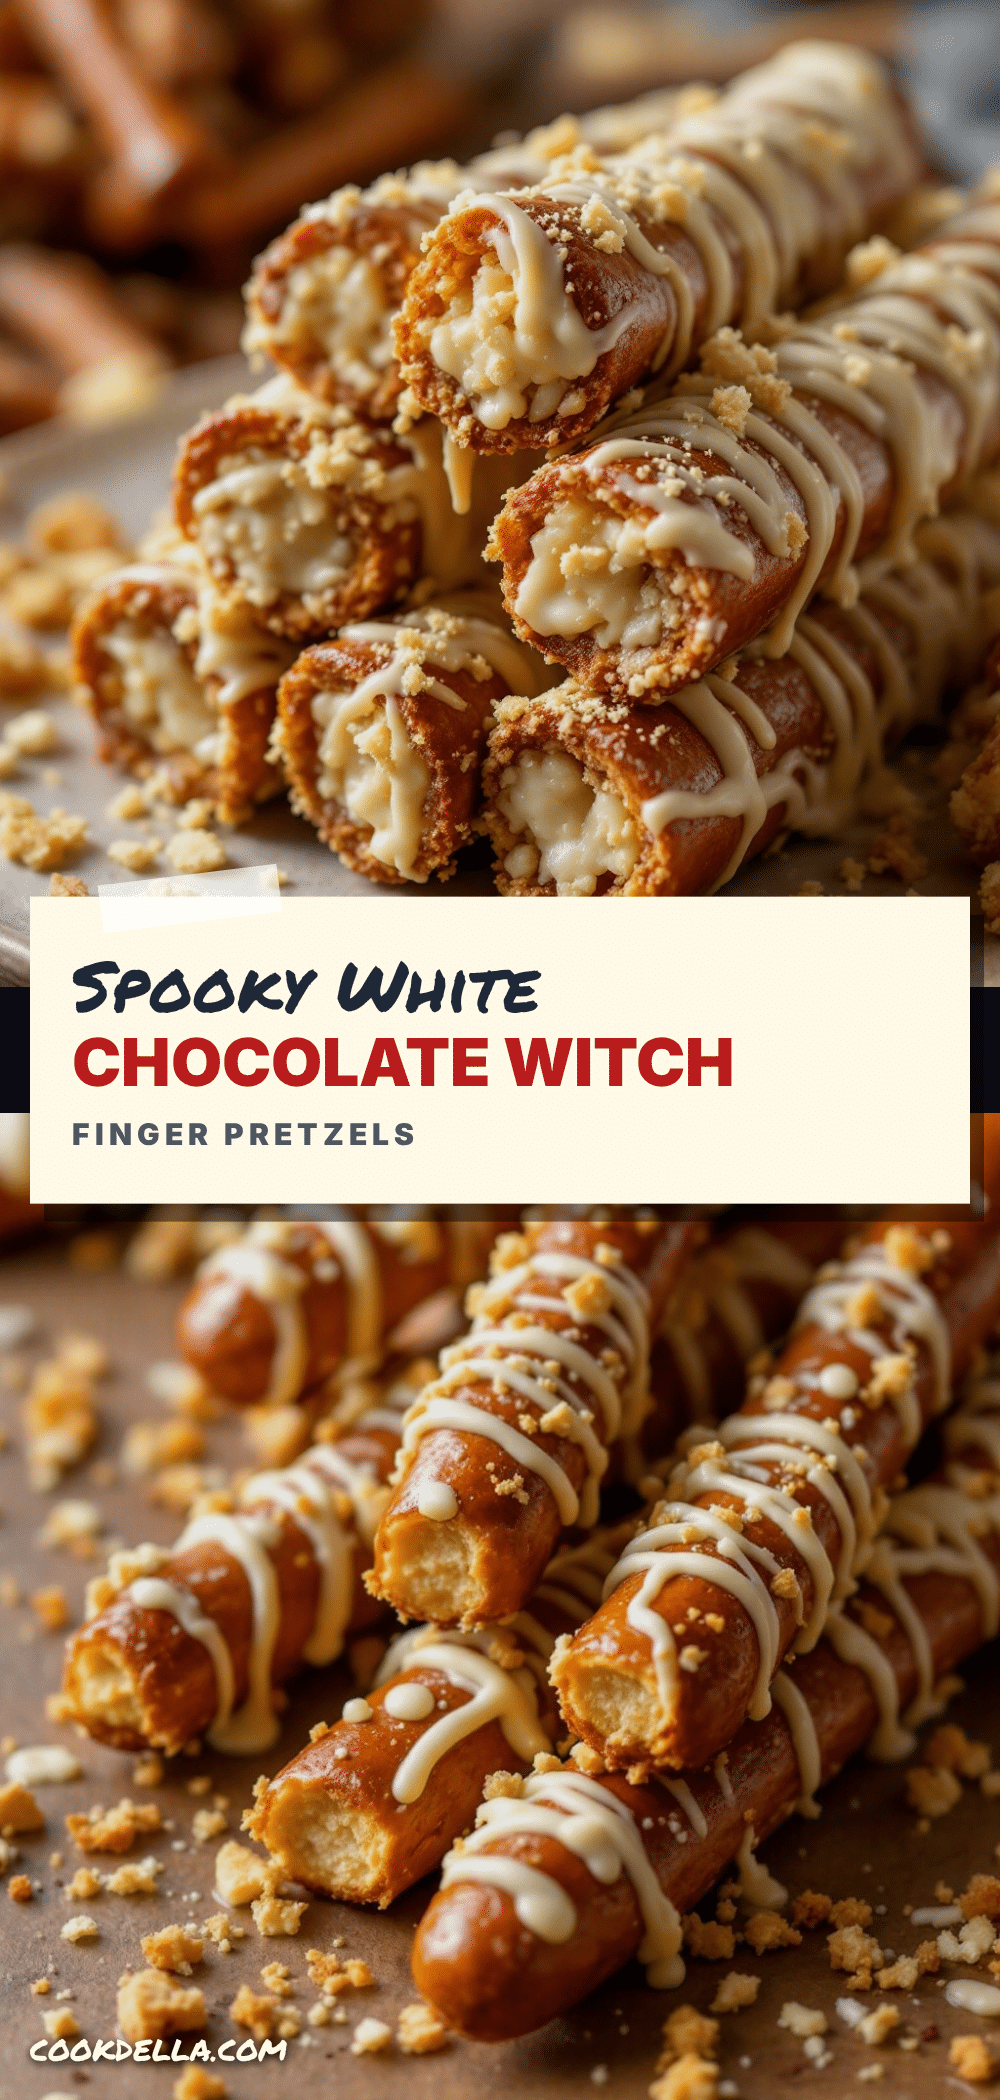
Easy Witch Finger Pretzel Rods Best Halloween Treat

These spooky witch finger pretzel rods are made with just three ingredients—pretzel rods, white chocolate, and sliced almonds—for a creepy Halloween treat that’s quick, easy, and perfect for parties.
- Prep Time: 15 minutes
- Cook Time: 5 minutes
- Total Time: 20 minutes
- Yield: 24 servings 1x
- Category: Dessert
- Cuisine: American
Ingredients
- 12 ounces pretzel rods (about 24 rods)
- 12 ounces white chocolate melting wafers or candy melts
- ½ cup sliced almonds (natural, not roasted or salted)
- Green food coloring gel (optional)
Instructions
- Line a baking sheet with parchment paper or a silicone mat.
- Pour white chocolate melting wafers into a microwave-safe bowl.
- Melt the chocolate in 30-second intervals at 50% power, stirring between each interval, until smooth. If using green food coloring, stir it in now.
- Let the melted chocolate cool for 2-3 minutes until warm but not hot.
- Dip one pretzel rod into the melted chocolate, submerging about two-thirds of the rod.
- Lift the pretzel out and let excess chocolate drip back into the bowl, tapping gently against the side for a thin, even coating.
- Place the dipped pretzel onto the prepared baking sheet.
- Immediately press a sliced almond onto the tip of the pretzel, overlapping the end by about ¼ inch with the curved side facing out to look like a fingernail.
- Repeat with remaining pretzels, working in batches of 4-6 at a time.
- Optional: Use a toothpick to create horizontal lines on the chocolate for knuckle details while still wet.
- Let the pretzels set completely at room temperature for 15-20 minutes, or in the refrigerator for 5-7 minutes.
- Once set, carefully peel them off the parchment and serve.
Notes
Don’t overheat the chocolate—use 50% power in the microwave. Work in small batches to prevent chocolate from setting before adding almonds. Use room-temperature pretzels and almonds for better adhesion. Store in an airtight container at room temperature for up to one week. For a nut-free version, skip almonds and use candy corn or a white chocolate disk for the nail.
Nutrition
- Serving Size: 1 pretzel rod
- Calories: 120
- Sugar: 10
- Sodium: 150
- Fat: 6
- Saturated Fat: 3
- Carbohydrates: 16
- Fiber: 1
- Protein: 2
Keywords: Halloween treats, witch finger pretzels, easy Halloween recipe, pretzel rods, white chocolate, spooky snacks, kid-friendly Halloween


