I want black cat sugar cookies right now, and I have everything except the patience to chill the dough. That’s the thing about Halloween baking—you get this wild idea at 9 PM on a Tuesday, convinced you can whip up something adorable before bed. And honestly? I almost can.
These aren’t just any cut-out cookies. They’re the kind that make people do that little double-take, the “wait, you MADE these?” reaction that never gets old. I’ve been testing black cat cookie recipes for years, trying to find that perfect balance between a cookie that holds its shape (cats need their pointy ears, people) and one that actually tastes good enough to eat without a gallon of milk.
The first batch I ever made looked more like sad blobs than cats. Their ears melted off in the oven. It was tragic, honestly. But I learned a few tricks along the way—like how a little extra flour and a brief chill time can save your sanity. Now I make these every October, and they’ve become the cookie I’m actually known for.
There’s something about handing someone a cookie that looks like a cute little black cat. It’s pure joy, you know? And that’s really what Halloween should be about—not the scary stuff, but the silly, sweet moments.
Why You’ll Love This Recipe
Let me tell you why these black cat sugar cookies are about to become your new Halloween tradition. I’ve tested this recipe more times than I care to admit, and it’s finally foolproof.
- Quick & Easy: From start to finish, you’re looking at about 45 minutes (plus chill time). Perfect for last-minute Halloween party prep or a fun afternoon baking session with kids.
- Simple Ingredients: Nothing weird here. Butter, sugar, flour, eggs—the usual suspects. You probably have everything in your pantry right now.
- Perfect for Halloween: These are the star of any spooky spread. Great for classroom parties, office potlucks, or just making your kitchen feel festive.
- Crowd-Pleaser: Kids go crazy for them. Adults pretend they’re too cool for cute cookies, then eat three. Trust me on this.
- Unbelievably Delicious: These aren’t those bland, dry sugar cookies that only look good. They’re soft in the middle, slightly crisp on the edges, and have that perfect vanilla-butter flavor.
What makes these different from every other black cat cookie out there? It’s the texture. Most cut-out cookies taste like cardboard. Not these. I use a technique where you cream the butter and sugar just until fluffy—not too long—and add a touch of cream cheese for tenderness. The result is a cookie that actually tastes as good as it looks.
These cookies make people happy. That’s the honest truth. When you set a plate of these out, everyone’s face lights up. It’s comfort food with a Halloween twist, and it’s exactly the kind of treat that makes the season special.
What Ingredients You Will Need
This recipe keeps things simple. You don’t need specialty baking supplies or weird extracts. Just good, basic ingredients that work together to create something magical.
For the Cookies
- Unsalted butter, softened – 1 cup (2 sticks, 226g). I use Kerrygold for the best flavor, but any good unsalted butter works. Let it sit out for about an hour before starting.
- Granulated sugar – 1 cup (200g). Regular white sugar gives these cookies that nice crisp edge.
- Cream cheese, softened – 2 ounces (57g). This is my secret ingredient. It adds tenderness without making the cookies taste like cheesecake. Use full-fat for best results.
- Large egg – 1, room temperature. Cold eggs can make the dough seize up, so let yours sit out for 15 minutes.
- Vanilla extract – 2 teaspoons. Pure vanilla, not imitation. It makes a difference.
- All-purpose flour – 2 ½ cups (312g). Spoon and level your flour—don’t scoop straight from the bag or you’ll end up with dry cookies.
- Baking powder – 1 teaspoon. Helps the cookies puff slightly without losing their shape.
- Salt – ½ teaspoon. Balances the sweetness and enhances flavor.
For the Decoration

- Black gel food coloring – 1 to 2 teaspoons. I prefer Americolor Super Black. Liquid food coloring won’t give you that deep, dark color.
- Powdered sugar – 2 cups (240g), for the royal icing or glaze.
- Meringue powder – 2 tablespoons (optional, for royal icing). Makes the icing dry hard and shiny.
- Water or milk – 3 to 4 tablespoons, to thin the icing.
- Candy eyes – Small white and black candy eyes (optional). These make decorating way faster and cuter.
- Orange or purple sprinkles – For a festive touch, if you want.
For the black color, I’ve tried everything. Cocoa powder makes them brown, not black. Activated charcoal works but can be gritty. The easiest, most reliable method is good gel food coloring. It doesn’t affect the taste much and gives you that gorgeous midnight color.
Equipment Needed
You don’t need a professional bakery setup for these cookies. Here’s what you’ll actually use:
- Stand mixer or hand mixer – Either works. A stand mixer makes creaming the butter easier, but a hand mixer gets the job done too.
- Large mixing bowls – At least two. One for dry ingredients, one for wet.
- Cat-shaped cookie cutter – This is important. Look for one that’s about 3-4 inches tall with distinct ears. I found mine on Amazon for $8, and it’s perfect.
- Rolling pin – A regular rolling pin works, but I love my adjustable one. It has those little rings that ensure even thickness every time.
- Parchment paper or silicone baking mat – Silicone mats are non-stick and reusable. Parchment paper is cheaper and works almost as well.
- Baking sheets – At least two, so you can rotate batches.
- Cooling rack – Wire racks let air circulate so cookies cool evenly.
- Piping bags or small zip-top bags – For the icing. If you don’t have piping bags, snip a tiny corner off a zip-top bag. Works like a charm.
- Offset spatula – Not required, but makes spreading icing so much easier.
If you don’t have a cat-shaped cutter, you can use a round cutter and add ears with extra dough. It’s more work, but it’s doable. I’ve done it when my cat cutter disappeared (it was in the dishwasher, of course).
Preparation Method
Let’s make some cookies. I’ll walk you through every step so you don’t end up with earless blobs like my first batch.
Step 1: Make the Dough
In your stand mixer bowl (or a large bowl if using a hand mixer), beat the softened butter and granulated sugar together on medium speed until light and fluffy. This takes about 2-3 minutes. Scrape down the sides once or twice.
Add the softened cream cheese and beat until fully incorporated, about 1 minute. It should look smooth and creamy.
Add the egg and vanilla extract. Beat until just combined. Don’t overmix here, or the cookies might spread too much.
In a separate bowl, whisk together the flour, baking powder, and salt. Gradually add this dry mixture to the wet ingredients, mixing on low speed. Stop as soon as the flour disappears. The dough will be soft but not sticky.
Now, add your black gel food coloring. Start with 1 teaspoon and mix well. If the color isn’t dark enough, add more, a few drops at a time. I usually end up using about 1 ½ teaspoons. The dough will look grey at first, but it darkens as it sits.
Step 2: Chill the Dough
Divide the dough into two discs, wrap each in plastic wrap, and flatten slightly. Refrigerate for at least 30 minutes. This step is non-negotiable. Chilled dough holds its shape better when you cut and bake it.
If you’re in a hurry, you can pop the discs in the freezer for 15 minutes. But don’t skip the chill entirely—trust me on this one.
Step 3: Roll and Cut
Preheat your oven to 350°F (175°C). Line your baking sheets with parchment paper or silicone mats.
Lightly flour your work surface and rolling pin. Roll one disc of dough to about ¼-inch thickness. If the dough sticks, dust with a little more flour.
Dip your cat cookie cutter in flour (this prevents sticking), then cut out your cats. Place them about 2 inches apart on the prepared baking sheets.
Gather the scraps, reroll, and cut more cats. You should get about 18-24 cookies, depending on the size of your cutter.
Step 4: Bake
Bake for 8-10 minutes. The cookies are done when the edges are just barely set and the tops look dry. They shouldn’t be brown—you want them to stay black.
Let the cookies cool on the baking sheet for 5 minutes, then transfer to a wire rack to cool completely. Don’t skip the cooling rack step, or the bottoms will get soggy.
Step 5: Decorate
While the cookies cool, make your icing. In a small bowl, whisk together the powdered sugar and meringue powder (if using). Add water or milk, 1 tablespoon at a time, until the icing is thick but flowable. It should hold a ribbon for a few seconds when you lift the whisk.
Divide the icing into small bowls. Leave most of it black. Tint a tiny bit white for eyes and whiskers (or just use candy eyes).
Transfer the icing to piping bags or zip-top bags with a tiny corner snipped off.
Pipe the black icing onto the cooled cookies, spreading it gently with an offset spatula if needed. While the icing is still wet, add candy eyes. Let the icing set for about 30 minutes.
If you want whiskers, pipe tiny white lines on the cheeks. Add a little pink nose if you’re feeling fancy.
Cooking Tips & Techniques
I’ve made every mistake in the book with these cookies, so let me save you some trouble.
Don’t overwork the dough. I know it’s tempting to keep mixing until everything is perfectly combined, but overmixing develops gluten and makes tough cookies. Mix until the flour just disappears, then stop.
Chill between batches. If your dough gets warm and sticky while you’re cutting cookies, pop it back in the fridge for 10 minutes. Warm dough spreads in the oven, and nobody wants a cat with melted ears.
Check your oven temperature. Ovens lie. Mine runs hot, so I always use an oven thermometer. If your cookies are browning on the bottom but still soft in the middle, your oven is too hot.
Use a light hand with flour. Too much flour on your work surface makes dry cookies. Use just enough to prevent sticking, and brush off excess before baking.
Bake one sheet at a time. If you crowd the oven, the heat doesn’t circulate properly. Your cookies will bake unevenly. I know it takes longer, but it’s worth it.
Let cookies cool completely before icing. I learned this the hard way. Iced a warm cookie once and ended up with a puddle of black goo. Not cute.
One thing I love about this recipe is how forgiving it is. Even if your cats aren’t perfect, they’ll still taste amazing. And honestly, wonky cats have more personality anyway.
Variations & Adaptations
These black cat cookies are great as-is, but here are some fun ways to change them up:
Gluten-Free Version
Swap the all-purpose flour for a 1:1 gluten-free baking blend. I’ve used Bob’s Red Mill with great results. Add an extra tablespoon of flour if the dough feels sticky.
Vegan Version
Use vegan butter (I like Earth Balance) and a flax egg (1 tablespoon ground flaxseed mixed with 3 tablespoons water, let sit for 5 minutes). Omit the cream cheese or use a vegan version. The texture will be slightly different, but still delicious.
Chocolate Version
Replace ¼ cup of the flour with unsweetened cocoa powder. This gives you a naturally darker cookie that needs less food coloring. Plus, chocolate and Halloween just go together.
Spooky Cat Variations
Instead of black cats, make white ghosts or orange pumpkins using the same dough recipe. Just change the food coloring and cookie cutter. I’ve done a whole Halloween set this way.
Faster Decoration Method
Skip the icing entirely and use store-bought black frosting from a tube. It’s not as pretty, but it takes 5 minutes. Perfect for when you’re short on time.
I tried a pumpkin spice version last year—added a teaspoon of pumpkin pie spice to the dough. It was good, but honestly, I prefer the classic vanilla. Sometimes simple is best.
Serving & Storage Suggestions
These cookies are best served at room temperature. Arrange them on a platter with some other Halloween treats for a fun party spread.
For a Halloween party, I like to set them out with a bowl of candy corn and some spooky green punch. The contrast between the dark cookies and bright drinks looks great.
Storage: Keep undecorated cookies in an airtight container at room temperature for up to 1 week. If you’ve already iced them, layer them between sheets of parchment paper so the designs don’t smudge.
Freezer: You can freeze the baked, undecorated cookies for up to 3 months. Just wrap them tightly in plastic wrap and foil. Thaw at room temperature before decorating. You can also freeze the raw dough discs for up to 2 months—just thaw in the fridge overnight before rolling and cutting.
Reheating: These cookies are meant to be eaten at room temperature. If you want them warm, pop them in a 300°F oven for 3-4 minutes. But honestly, they’re better cold.
The flavors actually get better after a day or two. Something about the icing setting and the cookie softening slightly makes them taste even more homemade and comforting.
Nutritional Information & Benefits
Let’s be real—these are cookies, not health food. But here’s the breakdown if you’re curious:
| Nutrient | Per Cookie (approx.) |
|---|---|
| Calories | 150-180 |
| Total Fat | 8g |
| Saturated Fat | 5g |
| Carbohydrates | 20g |
| Sugar | 12g |
| Protein | 2g |
| Sodium | 80mg |
Dietary Considerations: These cookies contain dairy (butter, cream cheese) and gluten (flour). They can be made vegan or gluten-free with the substitutions listed above.
Potential Allergens: Wheat, dairy, eggs. If you’re using candy eyes, check the label for soy or corn.
Look, I’m not saying these are good for you. But they’re good for your soul, and that counts for something, right? Halloween comes once a year. Enjoy the cookies.
Conclusion
These black cat sugar cookies are everything I want in a Halloween treat—cute, delicious, and surprisingly easy to make. The dough comes together in minutes, the decorating is fun (even if your piping skills are shaky), and the end result is something that makes people smile.
I love that this recipe is forgiving. Your cats don’t have to be perfect. Mine never are. Some have crooked ears. Some look more like bears than cats. But they all taste amazing, and that’s what matters.
So grab your ingredients, put on some spooky music, and make a batch of these adorable cookies. You’ll be glad you did. And if you come up with your own variation—maybe add some sparkly edible glitter or turn them into vampire cats—I’d love to hear about it.
Drop a comment below and tell me how your black cat cookies turned out. Share a photo if you’re feeling brave. I promise I won’t judge your piping skills. Happy Halloween, friends!
Frequently Asked Questions
Can I make these cookies ahead of time?
Absolutely. You can make the dough up to 2 days ahead and keep it in the fridge. Or bake the cookies and freeze them for up to 3 months. Decorate them the day you plan to serve for the freshest look.
Why did my cookies spread in the oven?
Most likely, the dough wasn’t chilled enough. Pop the cut cookies in the fridge for 10-15 minutes before baking. Also, make sure your butter wasn’t too soft when you started. It should be room temperature, not melted.
Can I use liquid food coloring instead of gel?
You can, but you’ll need a lot more to get a deep black color, and that adds extra liquid that can mess up the dough texture. Gel food coloring is concentrated and gives you better color with less product. It’s worth the few dollars.
How do I get the icing perfectly smooth?
Thin your icing slightly with water or milk until it’s the consistency of honey. When you pipe it onto the cookie, use a toothpick or small spatula to gently spread it to the edges. Work quickly before the icing starts to set.
My cookies taste a little like food coloring. What did I do wrong?
You probably used too much. Start with less than you think you need—the color deepens as the dough rests. Also, some brands of food coloring taste stronger than others. Americolor and Wilton are both good options that don’t leave a weird aftertaste.
Pin This Recipe!
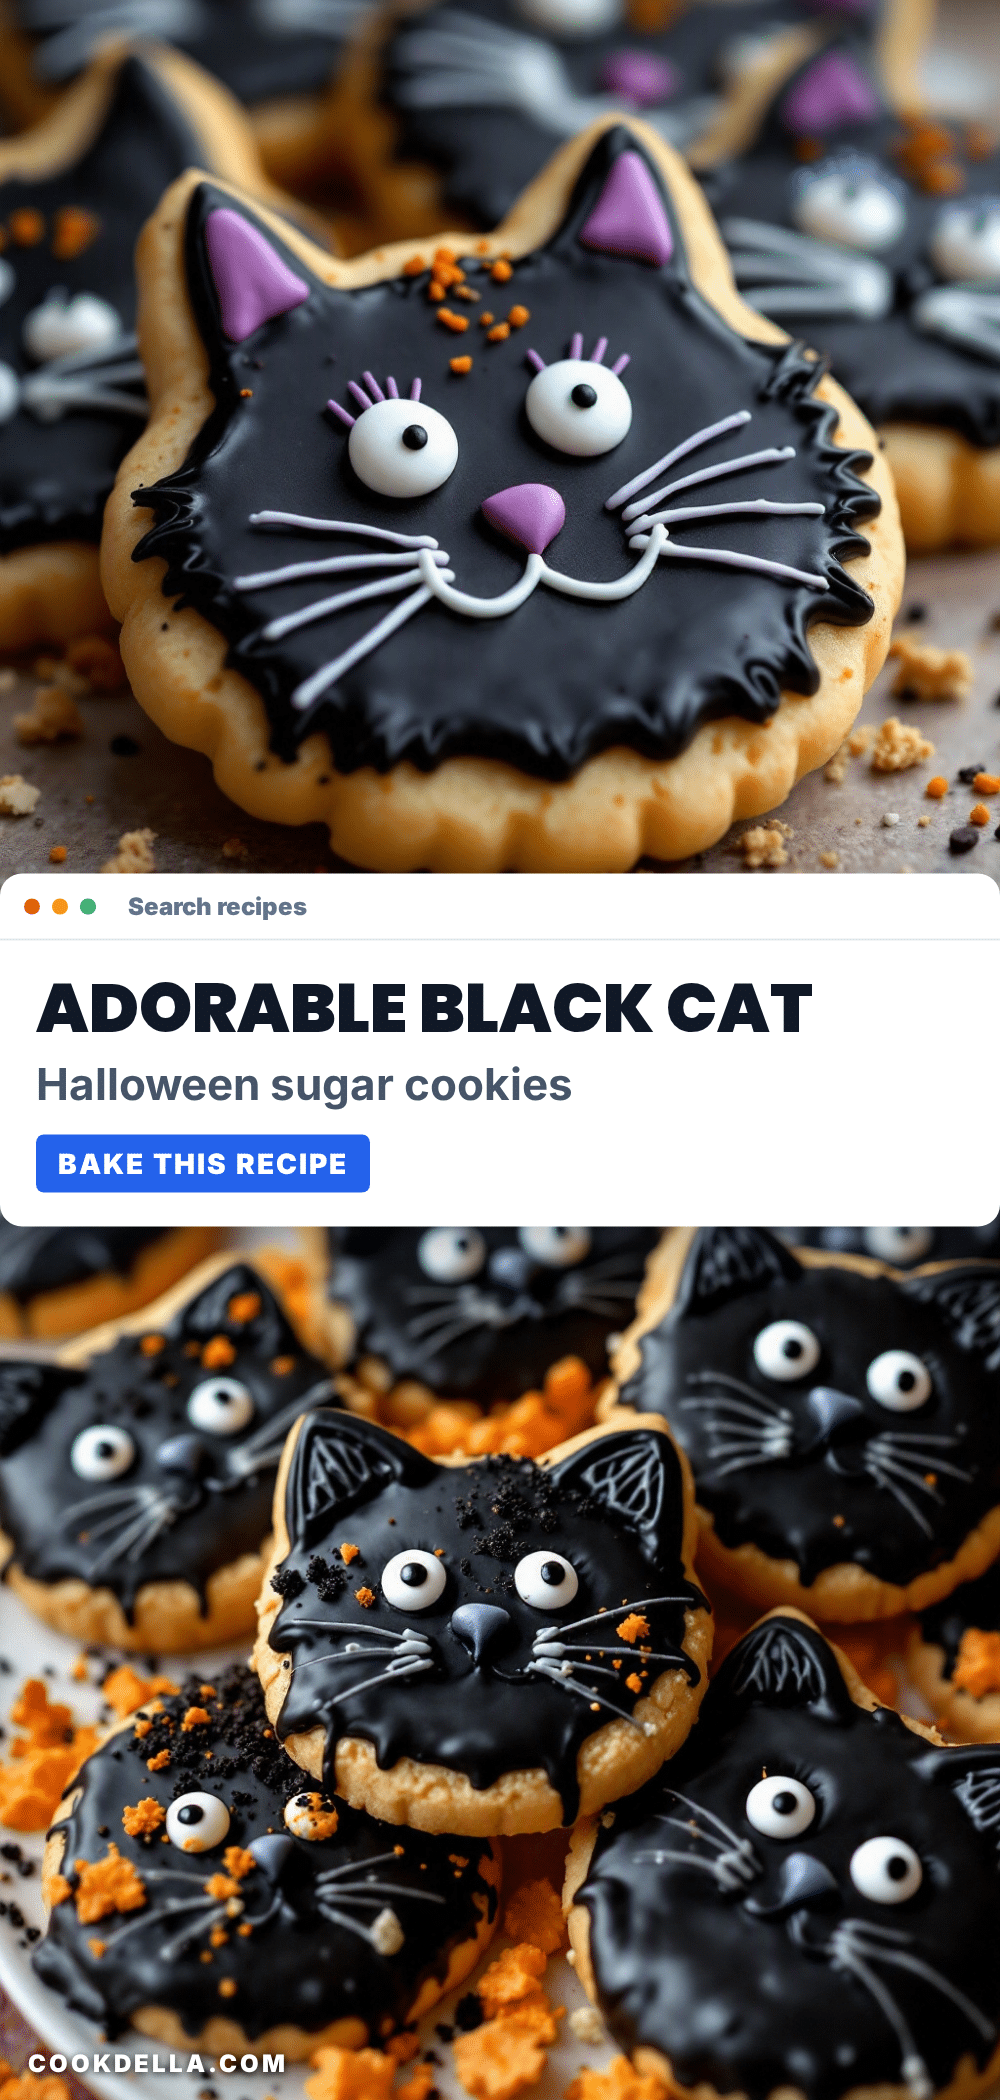
Easy Black Cat Sugar Cookies – Perfect Halloween Treat

These black cat sugar cookies are cute, delicious, and surprisingly easy to make. The dough comes together in minutes, the decorating is fun, and the end result is something that makes people smile.
- Prep Time: 15 minutes
- Cook Time: 10 minutes
- Total Time: 45 minutes (plus 30 minutes chill time and 30 minutes icing set time)
- Yield: 18-24 cookies 1x
- Category: Dessert
- Cuisine: American
Ingredients
- 1 cup (2 sticks, 226g) unsalted butter, softened
- 1 cup (200g) granulated sugar
- 2 ounces (57g) cream cheese, softened
- 1 large egg, room temperature
- 2 teaspoons vanilla extract
- 2 ½ cups (312g) all-purpose flour
- 1 teaspoon baking powder
- ½ teaspoon salt
- 1 to 2 teaspoons black gel food coloring
- 2 cups (240g) powdered sugar
- 2 tablespoons meringue powder (optional)
- 3 to 4 tablespoons water or milk
- Candy eyes (optional)
- Orange or purple sprinkles (optional)
Instructions
- In a stand mixer bowl, beat the softened butter and granulated sugar together on medium speed until light and fluffy, about 2-3 minutes. Scrape down the sides once or twice.
- Add the softened cream cheese and beat until fully incorporated, about 1 minute. It should look smooth and creamy.
- Add the egg and vanilla extract. Beat until just combined. Don’t overmix.
- In a separate bowl, whisk together the flour, baking powder, and salt. Gradually add this dry mixture to the wet ingredients, mixing on low speed. Stop as soon as the flour disappears.
- Add black gel food coloring, starting with 1 teaspoon and mixing well. Add more if needed, a few drops at a time, until the dough is dark black.
- Divide the dough into two discs, wrap each in plastic wrap, and flatten slightly. Refrigerate for at least 30 minutes.
- Preheat oven to 350°F (175°C). Line baking sheets with parchment paper or silicone mats.
- Lightly flour your work surface and rolling pin. Roll one disc of dough to about ¼-inch thickness.
- Dip a cat-shaped cookie cutter in flour, then cut out cats. Place them about 2 inches apart on prepared baking sheets.
- Gather scraps, reroll, and cut more cats. You should get about 18-24 cookies.
- Bake for 8-10 minutes. Cookies are done when edges are just barely set and tops look dry. They shouldn’t be brown.
- Let cookies cool on baking sheet for 5 minutes, then transfer to a wire rack to cool completely.
- While cookies cool, make icing: In a small bowl, whisk together powdered sugar and meringue powder (if using). Add water or milk, 1 tablespoon at a time, until icing is thick but flowable.
- Divide icing into small bowls. Leave most black. Tint a tiny bit white for eyes and whiskers (or use candy eyes).
- Transfer icing to piping bags or zip-top bags with a tiny corner snipped off.
- Pipe black icing onto cooled cookies, spreading gently with an offset spatula if needed. While icing is still wet, add candy eyes.
- Let icing set for about 30 minutes. If desired, pipe tiny white lines for whiskers and a pink nose.
Notes
Chill the dough for at least 30 minutes to prevent spreading. Use gel food coloring for best color. Let cookies cool completely before icing. For gluten-free, use a 1:1 gluten-free baking blend. For vegan, use vegan butter and a flax egg.
Nutrition
- Serving Size: 1 cookie
- Calories: 165
- Sugar: 12
- Sodium: 80
- Fat: 8
- Saturated Fat: 5
- Carbohydrates: 20
- Protein: 2
Keywords: black cat sugar cookies, Halloween cookies, sugar cookies, cat cookies, Halloween treats, easy sugar cookies


