Six-thirty on a late September morning, and the kitchen is still dark except for the little light above the stove. The rest of the house is asleep, and honestly, that is exactly how I want it. There is a chill in the air that wasn’t there last week, the kind that slips through the window screen and makes you reach for a sweater before your coffee. And the only thing I want, the only thing that makes sense on a morning like this, is a batch of fluffy pumpkin spice scones with maple glaze.
I do not make these for anyone else, not really. I make them because the smell of pumpkin and cinnamon filling the kitchen feels like a secret I am keeping, just for myself, before the day gets loud. There is something about pressing cold butter into flour, watching it turn into crumbles, that slows everything down. My grandmother used to make scones, but she made them plain with raisins, and I loved them, but I always thought they could use a little more warmth. A little more fall. So I started playing around with pumpkin puree and maple syrup, trying to get that balance between tender and sturdy, sweet and spiced.
It took me a few tries, honestly. The first batch came out flat and dense, more like hockey pucks than scones. But I learned, batch by batch, that the secret is not overworking the dough and keeping everything cold. Now these fluffy pumpkin spice scones with maple glaze are my quiet morning ritual, the thing I look forward to when the leaves start turning. They are not fancy, they are not complicated, but they taste like the season, and that is enough.
If you have ever wanted a bakery-style scone at home without the fuss, this is the one to try. Trust me, the first bite will make you close your eyes.
Why You Will Love This Recipe
I have tested this recipe more times than I care to admit, and I can tell you with confidence that these scones hit every single note. They are not dry, not crumbly in that frustrating way, and they definitely do not taste like pumpkin spice air. They are genuinely fluffy, tender, and packed with real flavor.
- Quick & Easy: From start to finish, these scones come together in about 30 minutes. Perfect for a lazy weekend morning or a last-minute brunch contribution.
- Simple Ingredients: No weird specialty flours or hard-to-find extracts. You probably have most of this in your pantry right now, especially if you are a fall baker.
- Perfect for Fall Mornings: These are ideal for cozy breakfasts, Thanksgiving brunch, or even a Halloween treat. Pair them with a homemade pumpkin spice latte and you have got the ultimate seasonal combo.
- Crowd-Pleaser: I have brought these to potlucks and family gatherings, and they disappear fast. Kids love the maple glaze, and adults love the warm spice blend.
- Unbelievably Delicious: The texture is light and flaky on the outside, soft and tender on the inside. The maple glaze adds just the right amount of sweetness without overpowering the pumpkin.
What makes these different from every other pumpkin scone recipe out there? It is the technique. I use a combination of cold butter and a light hand, plus a little trick with buttermilk that keeps the scones from turning into dense bricks. I have also dialed in the spice ratio so that the pumpkin flavor shines through without being buried under cinnamon. This is not just another version, it is the version I make every single week in the fall, and it has never let me down.
There is something deeply satisfying about pulling a tray of warm scones out of the oven, drizzling that maple glaze over the top, and watching it set into a glossy finish. It feels like a small victory, a moment of calm in a busy world. That is why I love this recipe, and I think you will too.
What Ingredients You Will Need
This recipe uses simple, wholesome ingredients that come together to create something truly special. The magic is in the balance, so let us talk about each one and why it matters.
- All-purpose flour (2 cups / 250g): The backbone of the scone. I recommend unbleached all-purpose flour for the best texture. Do not substitute with bread flour, it will make the scones too tough.
- Granulated sugar (1/3 cup / 65g): Just enough sweetness to complement the pumpkin and spices. You can reduce it slightly if you prefer a less sweet scone, but I would not go below 1/4 cup.
- Baking powder (1 tablespoon): This is what gives the scones their lift. Make sure your baking powder is fresh, otherwise your scones will fall flat.
- Pumpkin pie spice (2 teaspoons): You can use store-bought or make your own blend. I usually make mine with cinnamon, nutmeg, ginger, and a pinch of cloves. It is more aromatic that way.
- Ground cinnamon (1/2 teaspoon): Extra warmth because you can never have too much cinnamon in a fall recipe.
- Salt (1/2 teaspoon): Balances the sweetness and enhances the spices. Do not skip it.
- Unsalted butter (1/2 cup / 113g), cold and cubed: This is the most important ingredient. The butter must be cold so that it creates pockets of steam in the oven, resulting in flaky layers. I pop my butter in the freezer for 10 minutes before cutting it.
- Pumpkin puree (1/2 cup / 120g): Use 100% pure pumpkin puree, not pumpkin pie filling. The filling has added sugar and spices that will throw off the balance. I like Libby’s brand for consistent results.
- Heavy cream (1/4 cup / 60ml): Adds richness and tenderness to the dough. You can substitute with half-and-half if needed, but do not use milk, it will make the scones drier.
- Vanilla extract (1 teaspoon): Pure vanilla extract is best. It deepens the flavor of the pumpkin and spices.
- For the Maple Glaze:
- Powdered sugar (1 cup / 120g): Sifted to avoid lumps.
- Pure maple syrup (2 tablespoons): Use the real stuff, not pancake syrup. It makes a huge difference in flavor.
- Heavy cream (1-2 tablespoons): To thin the glaze to the perfect drizzling consistency.
- Pinch of salt: To balance the sweetness of the glaze.
Ingredient Tips: For the best texture, make sure your pumpkin puree is not watery. If it looks loose, pat it dry with a paper towel before using. I also recommend using a good quality maple syrup, it is worth the splurge for the glaze. And if you are out of pumpkin pie spice, you can mix 1 teaspoon cinnamon, 1/2 teaspoon ginger, 1/4 teaspoon nutmeg, and 1/4 teaspoon cloves as a substitute.
Equipment Needed
You do not need a lot of fancy tools to make these scones, which is part of the appeal. Here is what you will need:
- Large mixing bowl: For combining dry ingredients.
- Pastry cutter or two forks: To cut the cold butter into the flour. A pastry cutter works best, but forks do the job in a pinch.
- Measuring cups and spoons: Accuracy matters in baking, so use proper measuring tools.
- Baking sheet: Line it with parchment paper for easy cleanup.
- Bench scraper or sharp knife: For cutting the dough into wedges.
- Whisk: For the glaze.
- Cooling rack: Essential for letting the scones cool evenly before glazing.
If you do not have a pastry cutter, do not worry. I have used a food processor in a pinch, just pulse the butter into the flour until it looks like coarse meal. Just be careful not to over-process. Also, a silicone baking mat works great instead of parchment paper if you have one.
Preparation Method
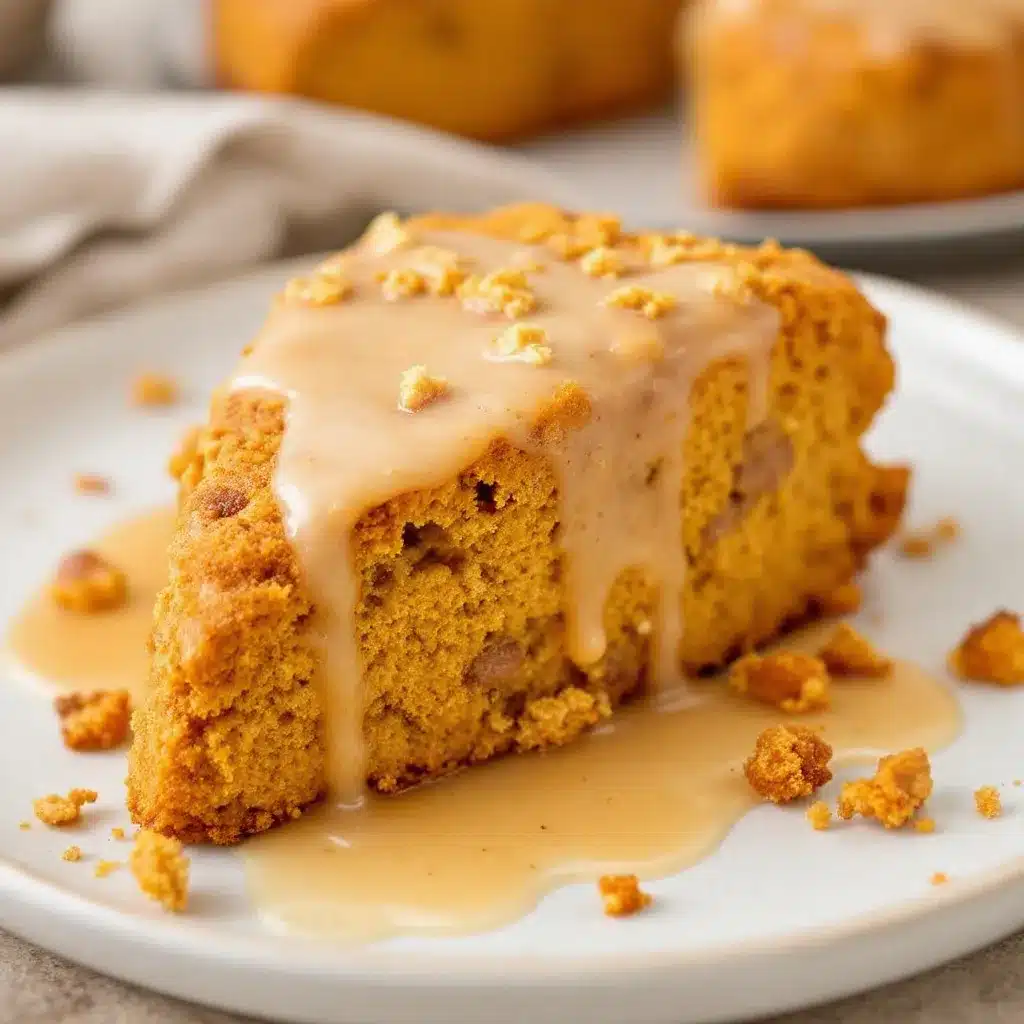
Let us get to the fun part. Follow these steps carefully, and you will have the fluffiest pumpkin scones of your life.
- Preheat your oven to 400°F (200°C). Line a baking sheet with parchment paper. This high heat is what gives the scones that beautiful golden crust.
- Mix the dry ingredients. In a large bowl, whisk together the flour, sugar, baking powder, pumpkin pie spice, cinnamon, and salt. Make sure everything is evenly distributed.
- Cut in the cold butter. Add the cold, cubed butter to the flour mixture. Using a pastry cutter or two forks, cut the butter into the flour until the mixture resembles coarse crumbs with some pea-sized butter pieces remaining. This takes about 2 minutes. Do not overdo it, those butter pieces are what create flaky layers.
- Combine the wet ingredients. In a small bowl, whisk together the pumpkin puree, heavy cream, and vanilla extract until smooth.
- Bring the dough together. Make a well in the center of the dry ingredients and pour in the wet mixture. Use a spatula or your hands to gently fold everything together until just combined. The dough will be shaggy and a little sticky, that is perfect. Do not knead it, or the scones will be tough.
- Shape the dough. Turn the dough out onto a lightly floured surface. Gently bring it together into a disk about 1 inch thick. Use your hands, do not use a rolling pin, it will overwork the dough. If the dough is too sticky, dust your hands with a little flour.
- Cut the scones. Use a bench scraper or a sharp knife to cut the disk into 8 equal wedges, like you are cutting a pizza. Place the wedges on the prepared baking sheet, spacing them about 2 inches apart.
- Chill the scones. Pop the baking sheet in the freezer for 10 minutes. This is a crucial step. Chilling the scones firms up the butter, which means they will rise higher and spread less in the oven. Do not skip this.
- Bake. Bake for 14-16 minutes, or until the scones are golden brown on the bottom and lightly golden on top. They should feel firm to the touch. Let them cool on the baking sheet for 5 minutes, then transfer to a cooling rack.
- Make the maple glaze. While the scones are cooling, whisk together the powdered sugar, maple syrup, and 1 tablespoon of heavy cream in a small bowl. Add more cream, 1 teaspoon at a time, until the glaze is thick but pourable. It should coat the back of a spoon.
- Glaze the scones. Once the scones are completely cool, drizzle the glaze over the top using a spoon or a piping bag. Let the glaze set for about 10 minutes before serving.
Sensory Cues: When you cut the butter into the flour, you should see small, flattened pieces of butter throughout the mixture. When you fold the wet and dry ingredients together, the dough should look shaggy and come together without any dry flour left at the bottom of the bowl. The scones are done when the bottoms are golden brown and the edges look slightly crisp.
Cooking Tips & Techniques
I have made enough mistakes with scones to fill a cookbook, so let me share what I have learned so you can skip the frustration.
Keep everything cold. This is the number one rule of scone-making. Cold butter creates steam pockets in the oven, which gives you that flaky texture. If your kitchen is warm, pop the flour and butter in the freezer for 10 minutes before you start. I also chill the shaped scones before baking, and it makes a visible difference in how much they rise.
Do not overmix the dough. I cannot stress this enough. Overmixing develops the gluten in the flour, which makes scones tough and dense. Mix until the dough just comes together, and then stop. A few dry spots are fine, they will hydrate during baking.
Use a light touch when shaping. Press the dough together gently with your hands. Do not knead it like bread dough. Think of it more like you are coaxing it into shape, not forcing it.
Bake at high heat. 400°F is the sweet spot. It gives the scones a nice rise and a golden crust without drying out the inside. If your oven runs hot, check them a minute or two early.
Let them cool completely before glazing. If you drizzle the glaze on warm scones, it will melt into a puddle instead of setting into a beautiful glossy layer. Patience is key here.
Common mistake I made: The first time I made these, I used pumpkin pie filling instead of pure pumpkin puree. The scones were overly sweet and had a strange texture. Learn from my mistake and double-check the label at the store.
Variations & Adaptations
One of the best things about this recipe is how adaptable it is. Here are some ways to make it your own.
- Gluten-Free: Substitute the all-purpose flour with a 1:1 gluten-free baking flour blend. I have used Bob’s Red Mill with great results. Add an extra tablespoon of heavy cream to compensate for the drier texture of gluten-free flour.
- Dairy-Free: Use cold vegan butter and substitute the heavy cream with full-fat coconut cream. The scones will still be tender and flavorful.
- Add Mix-Ins: Fold in 1/2 cup of chopped pecans, walnuts, or dried cranberries after combining the wet and dry ingredients. The nuts add a lovely crunch, and the cranberries give a tart pop of flavor.
- Spice It Up: If you like a little heat, add a pinch of cayenne pepper or ground cardamom to the spice blend. It sounds unusual, but it works beautifully with the maple glaze.
- Make Them Savory-Sweet: Skip the maple glaze and brush the baked scones with a little melted butter and sprinkle with coarse sugar. It is a simpler finish that lets the pumpkin and spices shine.
I once made a batch with chopped crystallized ginger folded into the dough, and it was incredible. The ginger added a spicy sweetness that paired perfectly with the maple glaze. If you are feeling adventurous, give that a try.
Serving & Storage Suggestions
These scones are best served warm, but they are still delicious at room temperature. Here is how to enjoy them and keep them fresh.
Serving: Serve the scones slightly warm with a pat of butter or a dollop of clotted cream. They are perfect alongside a cup of coffee, tea, or a pumpkin cream cold foam coffee. For a brunch spread, arrange them on a platter with fresh fruit and a fall harvest charcuterie board for a stunning presentation.
Storage: Store leftover scones in an airtight container at room temperature for up to 2 days. They will lose a bit of their crispness, but the flavor will still be excellent. If you have glazed them, place a piece of parchment paper between layers to prevent sticking.
Freezing: You can freeze the unbaked scones. Place the cut wedges on a baking sheet and freeze until solid, then transfer to a freezer-safe bag. Bake from frozen, adding 2-3 minutes to the baking time. You can also freeze baked, unglazed scones for up to 3 months. Thaw at room temperature and reheat in a 300°F oven for 5 minutes before glazing.
Reheating: To revive day-old scones, pop them in a 300°F oven for 5-7 minutes. The microwave will make them soggy, so avoid it. The oven brings back that crisp exterior and warm, tender interior.
Flavor Development: Honestly, these scones taste even better the next day. The spices have time to meld together, and the maple glaze soaks in just a little, making each bite more flavorful. If you can resist eating them all on day one, you are in for a treat.
Nutritional Information & Benefits
Here is the estimated nutritional breakdown for one scone (with glaze, based on 8 servings):
| Nutrient | Amount |
|---|---|
| Calories | 310 |
| Fat | 14g |
| Saturated Fat | 8g |
| Carbohydrates | 44g |
| Sugar | 22g |
| Protein | 4g |
| Fiber | 2g |
| Sodium | 210mg |
Health Benefits: Pumpkin is packed with vitamin A, which supports eye health and immune function. The cinnamon in the spice blend is known for its anti-inflammatory properties. And while these scones are definitely a treat, using real pumpkin puree adds a dose of fiber and nutrients that you do not get from processed desserts.
Dietary Considerations: This recipe is vegetarian. For a lower-sugar option, you can reduce the maple syrup in the glaze or use a sugar-free powdered sugar substitute. The scones themselves are not low-carb, but swapping the flour for almond flour can make them keto-friendly.
Allergens: Contains wheat, dairy, and eggs (if using). For allergen-friendly adaptations, see the variations section above.
Conclusion
These fluffy pumpkin spice scones with maple glaze are everything I want in a fall recipe. They are warm, spiced, tender, and just sweet enough to feel like a treat without being overwhelming. The maple glaze takes them over the top, adding a rich, woodsy sweetness that complements the pumpkin perfectly.
I love that this recipe is simple enough for a weekday morning but special enough to serve at a holiday brunch. It is the kind of recipe that makes you look forward to the season, the kind you will come back to year after year. And honestly, the smell of these baking in the oven is worth the effort alone.
I would love to hear how yours turn out. Did you add any mix-ins? Did you try a different glaze? Leave a comment below and let me know. And if you share a photo on Pinterest, tag me so I can see your beautiful scones. Happy baking, friends!
Frequently Asked Questions
Can I use canned pumpkin pie filling instead of pumpkin puree?
No, I do not recommend it. Pumpkin pie filling has added sugar and spices that will throw off the balance of the recipe. Stick with 100% pure pumpkin puree for the best results.
Why did my scones turn out flat?
Flat scones are usually caused by one of three things: your butter was too warm, your baking powder is old, or you overmixed the dough. Make sure your butter is cold, check the expiration date on your baking powder, and handle the dough as little as possible.
Can I make the dough ahead of time?
Absolutely. You can prepare the dough, shape it into wedges, and refrigerate them on a baking sheet covered with plastic wrap for up to 24 hours. Bake them straight from the fridge, adding 1-2 minutes to the baking time.
How do I know when the scones are done baking?
The scones are done when the bottoms are golden brown and the edges look slightly crisp. They should feel firm to the touch. If you insert a toothpick into the center, it should come out clean or with a few moist crumbs.
Can I skip the maple glaze?
Yes, you can. The scones are delicious on their own. If you skip the glaze, brush the tops with a little heavy cream and sprinkle with coarse sugar before baking for a crunchy, sparkly finish.
Pin This Recipe!
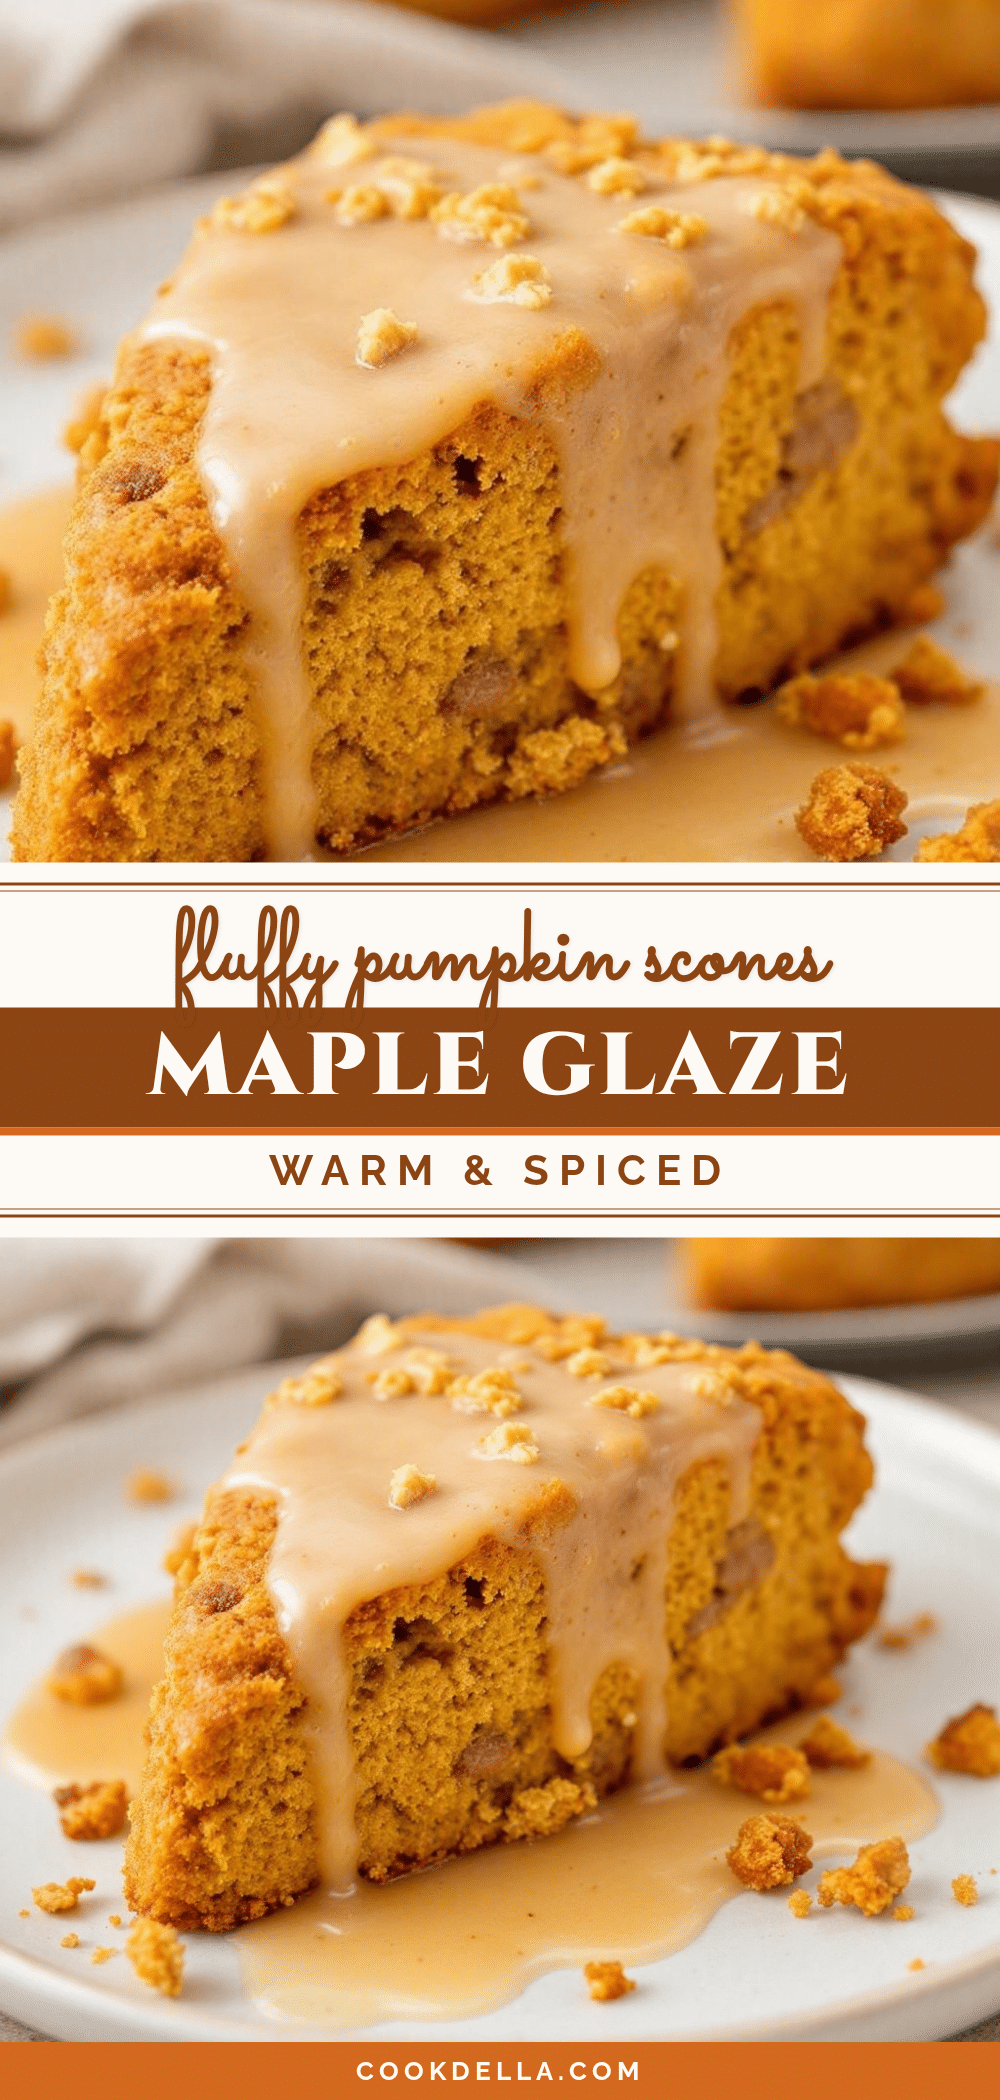
Fluffy Pumpkin Spice Scones with Maple Glaze – Best Easy Recipe
These fluffy pumpkin spice scones with maple glaze are tender, spiced, and perfectly sweet. Made with simple ingredients and a light hand, they are the ultimate fall breakfast or brunch treat.
- Prep Time: 15 minutes
- Cook Time: 16 minutes
- Total Time: 31 minutes
- Yield: 8 servings 1x
- Category: Breakfast
- Cuisine: American
Ingredients
- 2 cups (250g) all-purpose flour
- 1/3 cup (65g) granulated sugar
- 1 tablespoon baking powder
- 2 teaspoons pumpkin pie spice
- 1/2 teaspoon ground cinnamon
- 1/2 teaspoon salt
- 1/2 cup (113g) unsalted butter, cold and cubed
- 1/2 cup (120g) pumpkin puree
- 1/4 cup (60ml) heavy cream
- 1 teaspoon vanilla extract
- 1 cup (120g) powdered sugar, sifted
- 2 tablespoons pure maple syrup
- 1–2 tablespoons heavy cream (for glaze)
- Pinch of salt (for glaze)
Instructions
- Preheat your oven to 400°F (200°C). Line a baking sheet with parchment paper.
- In a large bowl, whisk together the flour, sugar, baking powder, pumpkin pie spice, cinnamon, and salt.
- Add the cold, cubed butter to the flour mixture. Using a pastry cutter or two forks, cut the butter into the flour until the mixture resembles coarse crumbs with some pea-sized butter pieces remaining.
- In a small bowl, whisk together the pumpkin puree, heavy cream, and vanilla extract until smooth.
- Make a well in the center of the dry ingredients and pour in the wet mixture. Use a spatula or your hands to gently fold everything together until just combined. The dough will be shaggy and a little sticky.
- Turn the dough out onto a lightly floured surface. Gently bring it together into a disk about 1 inch thick. Use your hands, do not use a rolling pin.
- Use a bench scraper or a sharp knife to cut the disk into 8 equal wedges. Place the wedges on the prepared baking sheet, spacing them about 2 inches apart.
- Chill the scones in the freezer for 10 minutes.
- Bake for 14-16 minutes, or until the scones are golden brown on the bottom and lightly golden on top. Let them cool on the baking sheet for 5 minutes, then transfer to a cooling rack.
- While the scones are cooling, whisk together the powdered sugar, maple syrup, and 1 tablespoon of heavy cream in a small bowl. Add more cream, 1 teaspoon at a time, until the glaze is thick but pourable.
- Once the scones are completely cool, drizzle the glaze over the top. Let the glaze set for about 10 minutes before serving.
Notes
Keep all ingredients cold for flaky scones. Do not overmix the dough. Chill the shaped scones before baking for better rise. Let scones cool completely before glazing.
Nutrition
- Serving Size: 1 scone
- Calories: 310
- Sugar: 22
- Sodium: 210
- Fat: 14
- Saturated Fat: 8
- Carbohydrates: 44
- Fiber: 2
- Protein: 4
Keywords: pumpkin scones, maple glaze, fall breakfast, easy scone recipe, pumpkin spice


