I figured slow cooker apple butter was basically just applesauce that cooked longer. It took about three hours of watching my crockpot do absolutely nothing visible for that assumption to fall completely apart.
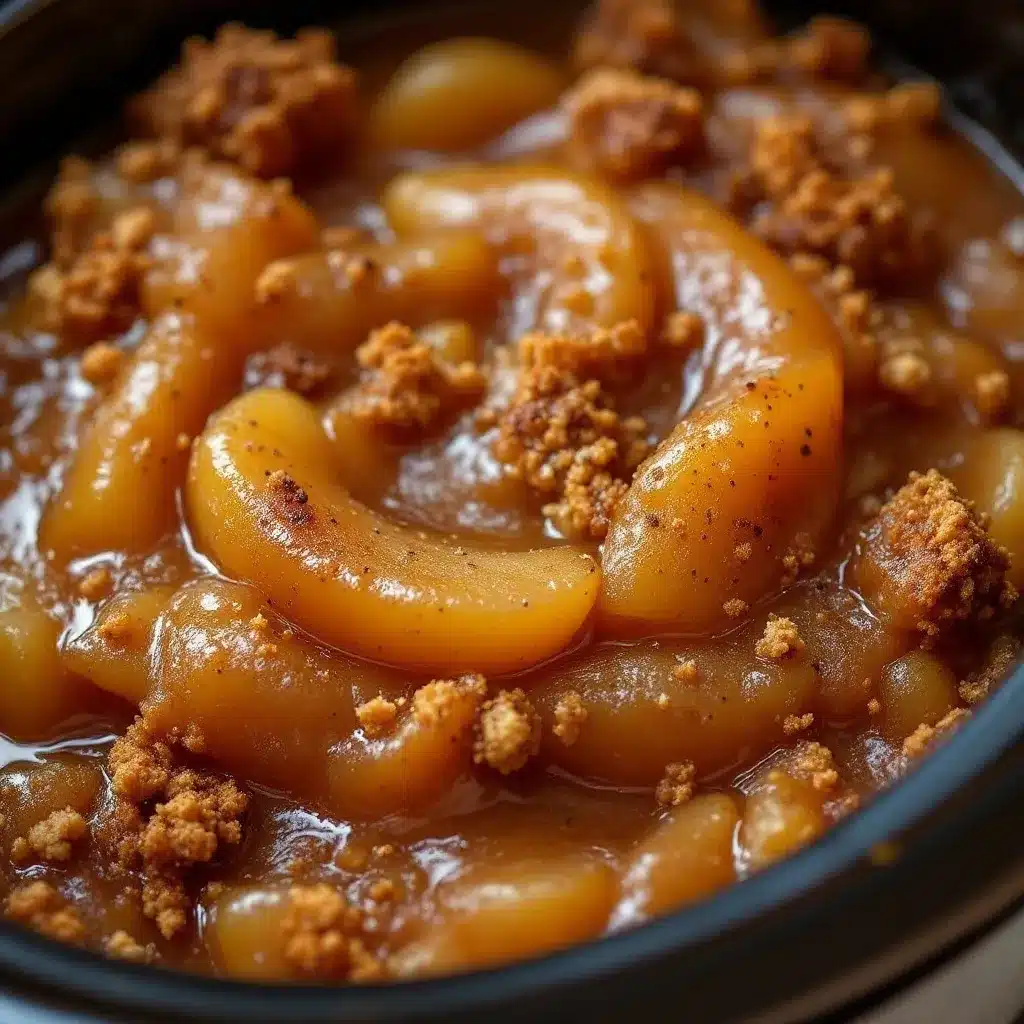
The first time I made this homemade crockpot apple butter, I kept lifting the lid to check on it. You know, like that would speed things up. The apples were just sitting there, looking smug in their cinnamon bath, refusing to change. Then somewhere around hour six, the kitchen started smelling like a candle you want to eat. And by hour ten, something magical had happened—the apples had melted into this dark, velvety spread that made my toast feel like it had its life together.
Honestly, the whole process felt like watching paint dry for the first five hours. But that last stretch? Pure kitchen alchemy. The apples go from chunky to silky, the color deepens to a warm mahogany, and the cloves and cinnamon stop being separate spices and become one unified thing that tastes like fall in a jar.
I kept waiting for the recipe to need something complicated. A special technique. A secret ingredient. But four ingredients and a crockpot later, I had a pantry full of apple butter that made store-bought taste like sad apple-flavored paste. That first batch taught me that some things just need time, not fuss.
This recipe stuck because it proved me wrong about what homemade actually means. It doesn’t have to be hard. It just has to be patient.
Why You’ll Love This Recipe
Let’s be real for a second. Most homemade apple butter recipes want you to stand over a stovetop for hours, stirring constantly, praying nothing scorches. I’ve done that. It’s not fun. This crockpot version changes everything.
- Set It and Forget It : You literally dump everything in the slow cooker and walk away. No stirring. No watching. No stress. Your crockpot does all the work while you go about your day.
- Only 4 Simple Ingredients : Apples, sugar, cinnamon, and cloves. That’s it. No weird preservatives, no pectin, no special equipment. You probably have most of this in your kitchen right now.
- Perfect for Fall Canning : This makes enough to stock your pantry for months. It’s incredible on toast, stirred into yogurt, or slathered on pork chops. Speaking of which, if you’re looking for a savory main to pair with this, my crispy air fryer pork chops with garlic herb butter are a fantastic match.
- Budget-Friendly : Apples go on sale in the fall for pennies a pound. You can make a year’s worth of apple butter for less than the cost of three fancy jars at the farmers market.
- Makes Your House Smell Amazing : This isn’t just a recipe. It’s aromatherapy. Your whole home will smell like warm cinnamon and cloves for an entire day.
What makes this recipe different from every other apple butter out there? It’s the ratio. I tested this five times to get the balance just right—sweet enough to feel indulgent but not cloying, spiced enough to taste complex but not overwhelming. The cloves add this warm, almost peppery depth that cinnamon alone can’t deliver. It’s the difference between good apple butter and the kind people ask you to make again.
This isn’t just another recipe. It’s the kind of thing you make once, give away as gifts, and then everyone starts texting you in September asking when you’re making more. It’s comfort in a jar, made with zero effort and a whole lot of patience.
What Ingredients You Will Need
This recipe keeps things wonderfully simple. Just four ingredients, plus a pinch of salt to balance the sweetness. Here’s what you need and why each one matters.
For the Apple Butter
- 5 pounds apples, mixed varieties – Use a combination of sweet (like Fuji, Gala, or Honeycrisp) and tart (like Granny Smith) apples. The sweet ones give natural sugar, and the tart ones add complexity. I personally love using 3 pounds of Honeycrisp and 2 pounds of Granny Smith. Don’t bother peeling them—the slow cooking breaks down the skins, and they add color and pectin (natural thickener). Just core and roughly chop them.
- 1 ½ cups granulated sugar – You can reduce this to 1 cup if your apples are very sweet or if you prefer a less sweet spread. Brown sugar works too, but it darkens the color and adds a slight molasses note. I’ve tested both, and granulated gives the cleanest apple flavor.
- 2 tablespoons ground cinnamon – This is the backbone of the spice profile. Use fresh cinnamon if possible—the difference is night and day. I recommend Saigon cinnamon for its bold, warm flavor. It’s pricier but worth it for a recipe this simple.
- 1 teaspoon ground cloves – Cloves are potent, so don’t go overboard. They add that deep, almost smoky warmth that makes apple butter taste like it simmered for hours (which it did). Freshly ground cloves from whole cloves are even better, but pre-ground works fine.
- ½ teaspoon salt – Not optional. Salt amplifies the sweetness and rounds out the spices. Use fine sea salt for even distribution.
- 1 tablespoon vanilla extract (optional) – I add this about 30 minutes before the end. It’s not traditional, but it adds a lovely warmth that makes the apple butter taste even more homemade. Skip it if you want pure, classic flavor.
Ingredient Tips and Substitutions
If you want a sugar-free version, swap the granulated sugar for ½ cup of maple syrup or honey. Keep in mind that liquid sweeteners will make the apple butter slightly thinner, so you might need to cook it an extra hour to thicken. For a low-sugar option, use ¾ cup of coconut sugar—it gives a deeper, almost caramel-like flavor.
Don’t have cloves? You can substitute with ½ teaspoon of allspice or nutmeg. The flavor won’t be the same, but it’ll still be delicious. Some folks add a pinch of cardamom for a more complex spice blend, which I’ve tried and loved.
For the apples, avoid Red Delicious—they turn into mush and lack flavor. Stay with firm, crisp varieties. If you’re unsure, ask your grocery store’s produce person what’s in season. They always know.
One more thing: this recipe is naturally gluten-free and dairy-free, so it’s safe for most dietary needs. Just double-check your spice labels if you’re serving someone with celiac disease.
Equipment Needed
You don’t need a fancy kitchen to make this. Here’s what you’ll need:
- 6-quart or larger slow cooker – A 6-quart Crockpot is ideal. Anything smaller and you’ll have to cut the recipe in half. I use a basic oval model, nothing fancy. If you have a programmable one with a timer, even better.
- Immersion blender (or regular blender) – An immersion blender lets you puree the apples right in the crockpot, which is way less messy. If you don’t have one, carefully transfer the cooked apples to a regular blender in batches. Let the mixture cool slightly first to avoid steam explosions.
- Sharp knife and cutting board – For coring and chopping the apples. A good chef’s knife makes this go fast.
- Measuring cups and spoons – For the sugar, spices, and vanilla.
- Wooden spoon or silicone spatula – For stirring occasionally.
- Mason jars (4 to 6 half-pint jars) – For storing the finished apple butter. Make sure they’re clean and sterilized. Wide-mouth jars are easier to fill.
- Canning funnel and ladle – Optional but helpful for filling jars without making a mess.
If you don’t have an immersion blender, a potato masher works in a pinch. The texture won’t be as silky smooth, but it’ll still taste amazing. Honestly, some people prefer the slightly chunky version.
Preparation Method
This recipe is about as hands-off as cooking gets. But there are a few moments where paying attention makes all the difference. Here’s the step-by-step.
- Prep the apples (15 minutes). Wash your apples thoroughly. No need to peel them—the skins soften during cooking and get blended smooth. Cut each apple into quarters, remove the core and seeds, and chop into rough 1-inch chunks. Don’t stress about uniform sizes; they’ll all break down eventually. I usually do this while listening to a podcast. It’s meditative, honestly.
- Combine everything in the crockpot (5 minutes). Dump the chopped apples into your slow cooker. Add the sugar, cinnamon, cloves, and salt. Stir everything together until the apples are evenly coated. The sugar will look dry at first—that’s normal. It’ll draw out the apples’ juices within the first hour.
- Cook on low for 8-10 hours. Put the lid on and set your slow cooker to low. Do NOT open the lid for the first 4 hours. I know it’s tempting. Every time you lift that lid, you release heat and add 20 minutes of cooking time. Let the apples do their thing. After about 6 hours, give it a gentle stir. The apples should be very soft and starting to fall apart. If they’re still firm, let them go another hour.
- Blend until smooth (5 minutes). Once the apples are tender and the mixture looks dark and jammy, turn off the slow cooker. Let it cool for 10 minutes. Use your immersion blender to puree the mixture right in the crockpot. Blend until completely smooth—no chunks allowed. If you’re using a regular blender, work in batches and fill the pitcher no more than halfway. Hold the lid down with a towel and start on low speed.
- Taste and adjust (2 minutes). Now’s the time to taste your apple butter. Is it sweet enough? Add a tablespoon of sugar or honey. Needs more spice? Stir in another ¼ teaspoon of cinnamon. Want that vanilla warmth? Add it now. Stir well and let it sit for 5 minutes before tasting again.
- Thicken if needed (30 minutes to 2 hours). If your apple butter seems too thin, return it to the crockpot and cook on low with the lid slightly ajar for another 30 minutes to 2 hours. The steam needs to escape for the mixture to thicken. Stir every 30 minutes and check the consistency. It should mound on a spoon and not run off immediately.
- Cool and jar (30 minutes to cool, then refrigerate). Let the apple butter cool to room temperature. Ladle it into clean mason jars, leaving about ½ inch of headspace. Seal tightly and refrigerate. It will thicken more as it cools.
Cooking Tips & Techniques
I’ve made this recipe at least a dozen times, and I’ve messed it up in almost every way possible. Here’s what I learned so you don’t have to.
Don’t rush the low heat. I tried cooking this on high once to save time. Big mistake. The edges scorched while the center stayed watery. Low and slow is non-negotiable. The long cooking time is what concentrates the apple flavor and deepens the color. You can’t shortcut caramelization.
The lid stays on. I know I said this already, but it’s the most common mistake. Every time you peek, you lose heat and moisture. Set a timer for 6 hours and don’t touch it until then. Your curiosity will be rewarded with better apple butter.
Watch the thickness at the end. Apple butter should be spreadable but not runny. If it’s too thin, it’ll make your toast soggy. If it’s too thick, it’ll be hard to spread. The perfect consistency is like thick jam—it should hold its shape on a spoon but still slide off easily. Test it by putting a small spoonful on a cold plate. If it doesn’t run, it’s ready.
Use the right apples. I once used all McIntosh apples because they were on sale. The apple butter turned into a watery mess. Use firm apples like Fuji, Honeycrisp, or Braeburn. They hold their shape better during the long cook and produce a thicker final product.
Season in layers. Don’t dump all the spices in at the beginning. Add half the cinnamon and cloves upfront, then taste and adjust after blending. Spices mellow during cooking, so you might need more at the end. I learned this after making a batch that tasted like nothing but sugar.
Batch cooking tip: Double the recipe if you have a large crockpot. Apple butter freezes beautifully, and you’ll thank yourself in January when you want a taste of fall. Just portion it into freezer-safe containers and thaw overnight in the fridge.
Variations & Adaptations
This base recipe is perfect, but sometimes you want to mix things up. Here are some variations I’ve tried and loved.
Spiced Apple Butter
Add ½ teaspoon of nutmeg, ¼ teaspoon of allspice, and a pinch of cardamom along with the cinnamon and cloves. This gives the apple butter a more complex, almost chai-like flavor. It’s incredible on no-knead banana bread with walnuts for a next-level breakfast treat.
Maple Apple Butter
Replace the granulated sugar with 1 cup of pure maple syrup. The maple flavor pairs beautifully with the apples and spices. You’ll need to cook it an extra 30-60 minutes to thicken since maple syrup is liquid. This version is perfect for drizzling over pancakes or waffles.
Slow Cooker vs. Stovetop
If you don’t have a crockpot, you can make this on the stovetop. Combine all ingredients in a heavy-bottomed pot and cook over the lowest possible heat for 3-4 hours, stirring every 20 minutes to prevent scorching. The result is slightly thicker and more caramelized, but it requires way more attention. I prefer the crockpot method for its hands-off nature.
Low-Sugar Version
Use ½ cup of sugar or substitute with ¼ cup of monk fruit sweetener. The apple butter will be tarter and less jammy, but still delicious. You might need to cook it a bit longer to achieve the right consistency since sugar helps thicken the mixture naturally.
Savory Apple Butter
Add 2 sprigs of fresh rosemary and 1 tablespoon of balsamic vinegar during the last hour of cooking. Remove the rosemary before blending. This savory version is incredible on roasted pork or as a glaze for chicken. It’s my secret weapon for holiday dinners.
Serving & Storage Suggestions
Apple butter is way more versatile than you think. Here’s how to use it and keep it fresh.
Serving Ideas: Spread it on warm toast, biscuits, or English muffins. Swirl it into oatmeal or yogurt. Use it as a filling for crepes or thumbprint cookies. Glaze pork chops or roasted chicken with it during the last 10 minutes of cooking. Stir a spoonful into barbecue sauce for a sweet-tangy kick. Layer it in a fall harvest charcuterie board with figs and honey for a stunning spread.
Storage: Store homemade apple butter in airtight mason jars in the refrigerator for up to 3 weeks. For longer storage, freeze it in freezer-safe containers for up to 6 months. Thaw overnight in the refrigerator before using.
Canning: If you want shelf-stable jars, process the filled jars in a boiling water bath for 10 minutes (adjust for altitude). Make sure jars are sterilized and lids are new. Properly canned apple butter lasts up to a year in a cool, dark pantry.
Reheating: Apple butter is best served at room temperature or slightly warm. If it’s too thick straight from the fridge, microwave a small amount for 10-15 seconds or let it sit out for 15 minutes. Stir well before using.
Flavor Development: Like many preserves, apple butter actually tastes better after a day or two in the fridge. The flavors meld and deepen. Don’t worry if it seems a bit sharp right after cooking—give it 24 hours and it’ll be perfect.
Nutritional Information & Benefits
Here’s the approximate nutritional breakdown per 2-tablespoon serving (based on the full sugar recipe):
- Calories: 45
- Total Fat: 0g
- Sodium: 35mg
- Total Carbohydrates: 12g
- Dietary Fiber: 1g
- Sugars: 10g
- Protein: 0g
Health Benefits: Apples are packed with fiber and antioxidants, particularly quercetin, which supports heart health and immune function. Cinnamon is known for its anti-inflammatory properties and may help regulate blood sugar levels. Cloves contain eugenol, a compound with antimicrobial effects. While this apple butter does contain sugar, a small serving adds flavor without excessive calories.
Dietary Considerations: This recipe is naturally gluten-free, dairy-free, egg-free, and vegan. For a low-sugar option, use the reduced-sugar variation mentioned above. The apple butter is also nut-free, making it safe for school lunches and nut-free households.
Personal Note: I love that this apple butter lets me enjoy the flavor of fall without all the processed ingredients in store-bought versions. It’s a small, simple way to eat more whole foods without feeling deprived.
Conclusion
This homemade crockpot apple butter is proof that the best things in life really are simple. Four ingredients, a slow cooker, and a little patience—that’s all it takes to create something that tastes like it came from a fancy farm stand. The deep, spiced sweetness, the silky texture, the way it makes your kitchen smell like autumn itself—it’s hard to beat.
What I love most about this recipe is how forgiving it is. The first time, follow the instructions exactly. After that, play around. Use different apple combinations. Adjust the spices. Add a splash of bourbon or a vanilla bean. Make it yours. That’s the beauty of homemade cooking—you’re in control.
I’d love to hear how your batch turns out. Did you try a variation? Did you give jars away as gifts? Drop a comment below and let me know. And if you’re looking for more cozy fall recipes, check out this easy crockpot pumpkin chili for fall game day for another set-it-and-forget-it winner.
Go make some apple butter. Your toast will thank you.
Frequently Asked Questions
Can I use frozen apples for this recipe?
Yes, you can use frozen apples. No need to thaw them first. Just add them directly to the crockpot. The cooking time might be slightly longer since they release more water. Expect an extra 1-2 hours on low heat.
Why is my apple butter runny?
Runny apple butter usually means it hasn’t cooked long enough. The water from the apples needs to evaporate to concentrate the flavor and thicken the mixture. Cook it on low with the lid slightly ajar for another 30-60 minutes. Stir occasionally and check the consistency on a cold plate.
Can I reduce the sugar in this recipe?
Absolutely. You can cut the sugar to 1 cup or even ¾ cup without ruining the recipe. The apple butter will be tarter and slightly less thick (sugar helps with texture), but it’ll still taste delicious. If you reduce sugar significantly, consider adding a tablespoon of lemon juice to help preserve the color.
How long does homemade apple butter last?
In the refrigerator, homemade apple butter lasts 3-4 weeks in airtight jars. In the freezer, it’s good for up to 6 months. If you can it properly in a boiling water bath, it stays shelf-stable for up to a year. Always check for mold or off smells before using.
Do I have to peel the apples?
No, you don’t need to peel the apples. The skins soften during the long cooking time and get completely blended smooth. Leaving the skins on adds color, fiber, and natural pectin that helps thicken the apple butter. Just wash the apples thoroughly before chopping.
Pin This Recipe!
Homemade Crockpot Apple Butter Easy 4-Ingredient Recipe

This easy crockpot apple butter uses just four ingredients and a slow cooker to create a dark, velvety spread that tastes like fall in a jar. Set it and forget it for a hands-off, budget-friendly recipe that makes your house smell amazing.
- Prep Time: 15 minutes
- Cook Time: 10 hours
- Total Time: 10 hours 15 minutes
- Yield: 4 servings 1x
- Category: Condiment
- Cuisine: American
Ingredients
- 5 pounds apples, mixed varieties (e.g., 3 lbs Honeycrisp, 2 lbs Granny Smith), cored and roughly chopped
- 1 ½ cups granulated sugar
- 2 tablespoons ground cinnamon
- 1 teaspoon ground cloves
- ½ teaspoon fine sea salt
- 1 tablespoon vanilla extract (optional)
Instructions
- Wash apples thoroughly. Cut each apple into quarters, remove core and seeds, and chop into rough 1-inch chunks. No need to peel.
- Dump the chopped apples into a 6-quart or larger slow cooker. Add sugar, cinnamon, cloves, and salt. Stir until apples are evenly coated.
- Cover and cook on low for 8-10 hours. Do not open the lid for the first 4 hours. After about 6 hours, give it a gentle stir.
- Once apples are very soft and the mixture looks dark and jammy, turn off the slow cooker. Let cool for 10 minutes.
- Use an immersion blender to puree the mixture right in the crockpot until completely smooth. Alternatively, carefully transfer to a regular blender in batches and blend until smooth.
- Taste and adjust sweetness or spices as desired. If using vanilla extract, stir it in now.
- If apple butter is too thin, return to crockpot and cook on low with lid slightly ajar for 30 minutes to 2 hours, stirring every 30 minutes, until thickened to desired consistency.
- Let apple butter cool to room temperature. Ladle into clean mason jars, leaving ½ inch headspace. Seal tightly and refrigerate.
Notes
Don’t rush the low heat; cooking on high may scorch the edges. Keep the lid on for the first 4 hours to retain heat and moisture. For a thicker consistency, cook with lid slightly ajar at the end. Apple butter tastes better after a day or two in the fridge as flavors meld.
Nutrition
- Serving Size: 2 tablespoons
- Calories: 45
- Sugar: 10
- Sodium: 35
- Carbohydrates: 12
- Fiber: 1
Keywords: crockpot apple butter, slow cooker apple butter, homemade apple butter, easy apple butter, 4-ingredient apple butter, fall recipe, apple spread


