Third batch in three weeks, and I finally stopped adding extra sugar. That was the thing—every time I made these Healthy Pumpkin Oat Breakfast Bars, I’d taste the batter and think, “Needs a little more sweetness.” So I’d toss in another tablespoon of maple syrup. Then another. And then I’d bake them, and they’d be good—sure—but they weren’t what I wanted. They were dessert masquerading as breakfast.
It took me until week two to realize the problem wasn’t the recipe. It was my brain. I was so used to store-bought granola bars tasting like candy that I forgot what actual food was supposed to taste like. So I pulled back. I trusted the pumpkin. Trusted the oats. Trusted that a little cinnamon and vanilla could do the heavy lifting. And you know what? They did. These bars are sweet enough to satisfy that morning craving but not so sweet that you crash by 10 a.m. They’re soft, a little chewy, and honestly—they taste like fall in bar form.
I bring a batch to work every Monday now. My coworker Jen asked for the recipe last week, and when I told her there’s no butter and barely any sweetener, she just stared at me. That’s the reaction I was after. Something that tastes indulgent but isn’t. These bars finally clicked when I stopped trying to make them something they’re not. Sometimes the simplest version is the one worth keeping.
Why You’ll Love This Recipe
I’ve tested a lot of breakfast bars over the years. Some were too dry. Some fell apart. Some tasted like cardboard dressed up in pumpkin spice. These are none of those things. Here’s what makes them stand out:
- Quick & Easy : Mix everything in one bowl, spread it in a pan, and bake. From start to finish, you’re looking at about 30 minutes of active time. Perfect for Sunday meal prep or a lazy weekday morning.
- Simple Ingredients : Oats, pumpkin puree, eggs, a little maple syrup, and pantry spices. No protein powder, no weird flours, no ingredients you have to order online.
- Perfect for Fall Mornings : These bars pair beautifully with a warm drink. I’ve been having mine with a homemade pumpkin spice latte and it’s basically the coziest start to any day.
- Crowd-Pleaser : I brought these to a tailgate last month, and they disappeared faster than the chips. Kids, adults, even the guy who said he “doesn’t do healthy food” grabbed two.
- Unbelievably Delicious : The texture is where these shine. Soft but not mushy, sturdy enough to hold in your hand, with little pockets of chewiness from the oats. The pumpkin flavor is front and center, backed by warm spices that smell like heaven while they bake.
This isn’t just another pumpkin oat bar recipe. It’s the one I kept tweaking until I got it right—not too dense, not too sweet, and actually filling enough to get you through the morning. If you’ve tried other versions and been disappointed, give these a shot. They’re different.
What Ingredients You Will Need
This recipe keeps things simple. Most of these ingredients are probably in your kitchen right now. If not, they’re easy to find at any grocery store.
- Rolled oats (2 cups) – Not quick oats. Rolled oats give the bars structure and a nice chewy texture. Quick oats turn them mushy. I use old-fashioned Quaker oats, but any brand works.
- Pumpkin puree (1 cup) – Make sure it’s 100% pumpkin puree, not pumpkin pie filling. The pie filling has added sugar and spices that will throw off the balance. Libby’s is my go-to, but store brands are fine too.
- Eggs (2 large) – They bind everything together. Room temperature eggs mix more evenly, but cold ones work in a pinch.
- Maple syrup (¼ cup) – Pure maple syrup, not pancake syrup. The flavor is cleaner and less cloying. If you’re out of maple, honey works as a substitute, though the taste changes slightly.
- Unsweetened applesauce (¼ cup) – This adds moisture without extra fat or sugar. You won’t taste it, I promise. It just makes the bars tender.
- Coconut oil (2 tablespoons, melted) – Or any neutral oil. Avocado oil works too. Butter is fine if you’re not keeping these dairy-free, but coconut oil adds a subtle richness that plays well with pumpkin.
- Vanilla extract (1 teaspoon) – Pure vanilla, not imitation. It deepens the warm flavor profile.
- Pumpkin pie spice (1½ teaspoons) – Store-bought is fine, but I usually make my own with cinnamon, nutmeg, ginger, and a pinch of cloves. It’s fresher and you can adjust the ratios.
- Cinnamon (1 teaspoon) – Because you can never have too much cinnamon with pumpkin.
- Baking powder (1 teaspoon) – Helps the bars rise just a little so they’re not dense bricks.
- Salt (¼ teaspoon) – Don’t skip this. Salt makes the sweetness pop and balances the flavors.
- Mix-ins (optional) – Chocolate chips, chopped pecans, dried cranberries, or unsweetened shredded coconut. I usually add a handful of dark chocolate chips because I have zero self-control, but the bars are great without them too.
One thing I learned the hard way: don’t use fresh pumpkin puree unless you’ve drained it really well. Fresh pumpkin has way more water than canned, and it’ll make your bars soggy. Stick with canned for consistent results.
Equipment Needed
You don’t need fancy tools for these bars. Here’s what I use:
- 8×8-inch baking pan – Glass or metal works fine. If you use a 9×9, the bars will be thinner and bake faster, so keep an eye on them.
- Parchment paper – Absolute lifesaver. Line the pan with it, leaving some overhang on two sides. That way you can lift the whole block of bars out cleanly. No scraping, no sticking.
- Large mixing bowl – Any bowl big enough to stir everything without making a mess.
- Whisk or fork – For beating the eggs and mixing the wet ingredients.
- Rubber spatula – For folding the oats in and scraping the bowl clean. A wooden spoon works too, but the spatula gets every last bit.
- Measuring cups and spoons – Standard set. Nothing fancy.
- Cooling rack – Optional but helpful. If you don’t have one, just let the bars cool in the pan on the counter. The rack just speeds things up.
I’ve made these bars in a disposable foil pan before (for a road trip) and they turned out fine. Don’t overthink the equipment. If you’ve got a pan and a bowl, you’re good.
Preparation Method
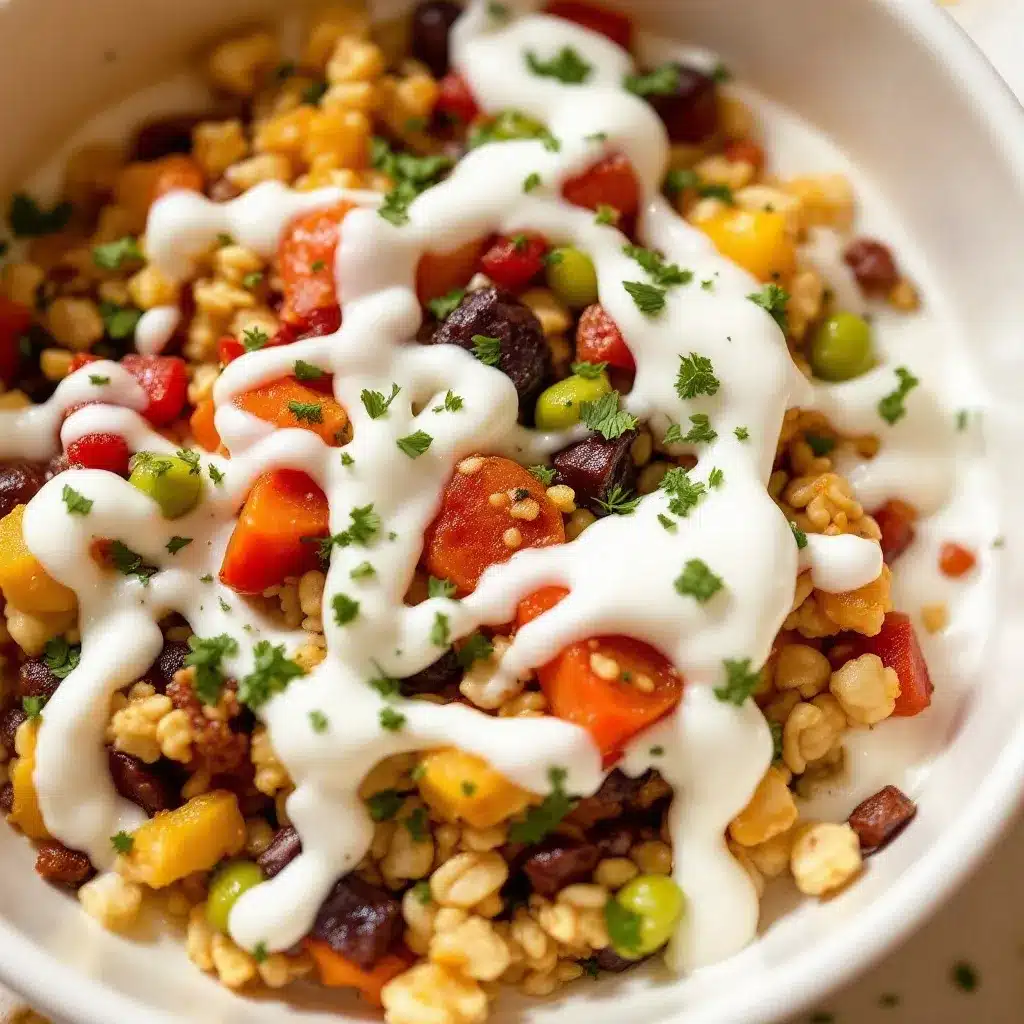
Let’s get to it. This is straightforward, but I’ll walk you through every step so you know exactly what to expect.
- Preheat your oven to 350°F (175°C). Line your 8×8 pan with parchment paper, leaving some overhang on two opposite sides. Lightly spray the exposed edges with nonstick spray if you’re paranoid about sticking. I always do this, and I’ve never regretted it.
- Mix the wet ingredients. In a large bowl, whisk together the pumpkin puree, eggs, maple syrup, applesauce, melted coconut oil, and vanilla extract. Whisk until everything is smooth and uniform. The mixture should look like a thick, orange-colored batter. If your coconut oil solidifies on contact with cold ingredients (this happens in winter), just warm the bowl slightly or whisk more vigorously. It’ll come together.
- Add the dry ingredients. Sprinkle the pumpkin pie spice, cinnamon, baking powder, and salt over the wet mixture. Whisk again until the spices are fully incorporated. You should smell the cinnamon and nutmeg right away—that’s how you know it’s working.
- Fold in the oats. Add the rolled oats to the bowl. Use your rubber spatula to fold them in gently. Don’t overmix—just stir until every oat is coated and no dry patches remain. The batter will look thick and almost like a chunky oatmeal. If you’re adding mix-ins (chocolate chips, nuts, dried fruit), fold them in now.
- Spread the batter in the pan. Pour the mixture into your prepared pan. Use the spatula to spread it evenly, pushing it into the corners. The batter is thick, so take your time. Wet the spatula slightly if it sticks too much. Try to make the surface as level as possible so the bars bake evenly.
- Bake for 25-30 minutes. Place the pan on the middle rack. Bake until the edges are golden brown and the center feels firm to the touch. A toothpick inserted into the middle should come out clean or with just a few moist crumbs. Every oven runs differently, so start checking at 25 minutes. My oven takes exactly 28 minutes, but yours might be faster or slower.
- Cool completely in the pan. This is the hardest part, I know. You’ll want to cut into them immediately because they smell incredible. But if you cut them while they’re warm, they’ll crumble. Let them cool in the pan on a wire rack for at least 30 minutes. Then use the parchment overhang to lift the whole block out and transfer it to a cutting board.
- Slice into bars. Use a sharp knife to cut into 9 or 12 squares, depending on how big you want them. I usually go with 9 for a hearty breakfast portion. Wipe the knife clean between cuts for neater edges.
A quick note: if your bars seem too soft after baking, they probably need a few more minutes. Pumpkin puree adds a lot of moisture, and underbaked bars will fall apart. Better to err on the side of slightly overbaked than underbaked. You can always soften them with a quick reheat in the microwave.
Cooking Tips & Techniques
I’ve made enough mistakes with these bars to fill a small notebook. Here are the lessons I learned so you don’t have to repeat them:
- Don’t overmix the batter. Once the oats go in, stir just until combined. Overmixing develops the starches in the oats and makes the bars tough. You want them tender, not chewy like shoe leather.
- Let the batter rest for 5 minutes before baking. This gives the oats a chance to absorb some of the liquid, which helps the bars hold together better. I stumbled onto this by accident when I got distracted by my phone, and it made a noticeable difference.
- Use a light hand with mix-ins. It’s tempting to go overboard with chocolate chips and nuts, but too many add-ins can prevent the bars from binding properly. Stick to about ⅓ cup total. Trust me, you’ll still get plenty of flavor in every bite.
- Check for doneness with your finger, not just a toothpick. Press the center of the bars gently. If it springs back, they’re done. If your finger leaves an indent, give them another 3-5 minutes. The toothpick test is reliable, but the spring-back test catches underbaked centers that a toothpick might miss.
- Run your knife under hot water before slicing. This gives you cleaner cuts and prevents the bars from dragging or tearing. Dry the knife off quickly, then slice. Repeat between cuts if needed.
- If your bars turn out dry, you probably baked them too long. Set a timer and check early. Every oven is a liar, and yours might run hot. I learned this after a particularly sad batch that crumbled into oatmeal dust.
One more thing: if you’re making these for the first time, don’t stress about perfection. The first batch I made was a little flat. The second was too sweet. The third was just right. Each attempt taught me something. You’ll get there faster than I did.
Variations & Adaptations
These bars are forgiving. Here are some ways to switch them up based on what you have on hand or what you’re craving:
- Vegan version : Replace the eggs with flax eggs (2 tablespoons ground flaxseed mixed with 5 tablespoons water, let sit for 5 minutes). Use maple syrup instead of honey if you were using honey. The texture will be slightly denser, but still delicious.
- Gluten-free option : Use certified gluten-free rolled oats. That’s it. Oats are naturally gluten-free, but they’re often processed in facilities that handle wheat, so check the label if you’re sensitive.
- Nutty crunch : Add ⅓ cup chopped pecans or walnuts to the batter. Toast them first in a dry pan for 3-4 minutes to bring out their flavor. I did this for a Thanksgiving brunch and everyone raved about the extra texture.
- Chocolate lover’s twist : Fold in ⅓ cup dark chocolate chips and drizzle melted chocolate over the cooled bars. It pushes these into dessert territory, but who’s judging? I’ve definitely eaten one for breakfast and called it balanced.
- Lower sugar version : Reduce the maple syrup to 2 tablespoons and add an extra 2 tablespoons of applesauce. The bars will be less sweet but still flavorful from the pumpkin and spices. This is my go-to when I’m trying to be extra mindful.
- Protein boost : Add 2 tablespoons of your favorite protein powder. You might need to increase the applesauce by a tablespoon to compensate for the dryness. Vanilla or unflavored works best. I tried chocolate protein powder once and it was good, but it masked the pumpkin flavor.
If you’re feeling adventurous, try swapping the pumpkin for mashed sweet potato. The texture is similar, and the flavor pairs beautifully with the same spices. I did this by accident once (grabbed the wrong can from the pantry) and it turned out surprisingly well.
Serving & Storage Suggestions
These bars are versatile. Here’s how I like to serve and store them:
- Serving temperature : Room temperature is perfect. The flavors are most balanced when they’re not too cold. If you’re storing them in the fridge, let them sit on the counter for 10 minutes before eating.
- Presentation ideas : Cut them into neat squares and arrange on a plate. A light dusting of cinnamon on top makes them look bakery-level. For a brunch spread, I’ve stacked them on a cake stand and watched them disappear.
- Pairings : These bars are great on their own, but they really shine with a hot drink. A pumpkin cream cold foam coffee is my current favorite pairing. They also go well with Greek yogurt and fresh fruit for a more complete breakfast.
- Refrigerator storage : Place the bars in an airtight container, layered with parchment paper between them. They’ll stay fresh for up to 5 days. I usually make a batch on Sunday and grab one each morning.
- Freezer storage : These freeze beautifully. Wrap each bar individually in plastic wrap, then place them in a freezer-safe bag or container. They’ll keep for up to 3 months. To thaw, just leave one in the fridge overnight or microwave for 20-30 seconds.
- Reheating : Microwave for 15-20 seconds if you want a warm, soft bar. For a firmer texture, skip the microwave and let them come to room temperature. I actually prefer them cold straight from the fridge—they’re denser and more satisfying that way.
Flavor note: these bars actually taste better on day two. The spices have time to meld, and the texture evens out. So if you can resist eating them all on day one, you’re in for a treat.
Nutritional Information & Benefits
Here’s a rough breakdown per bar (based on 9 servings, without mix-ins):
- Calories : ~180
- Protein : 5g
- Carbohydrates : 28g
- Fiber : 4g
- Sugar : 8g (naturally occurring from pumpkin and maple syrup)
- Fat : 6g
These numbers will shift if you add chocolate chips or nuts, but they’re a solid baseline.
What I love about these bars nutritionally: they’re packed with fiber from the oats and pumpkin, which keeps you full without that heavy, weighed-down feeling. Pumpkin is also loaded with vitamin A and antioxidants. The oats provide steady energy, not a sugar spike and crash like most packaged breakfast bars.
If you’re watching your sugar intake, this recipe is a winner. Most store-bought breakfast bars have 12-15 grams of sugar per serving. These have half that, and the sweetness comes from whole food sources. Plus, they’re dairy-free and can easily be made gluten-free or vegan. The only potential allergen to note is eggs, but we covered the flax egg swap above.
I’m not a nutritionist, but I’ve done enough label-reading to know these bars are a solid choice for a busy morning. They fuel me through my morning meetings without the 10 a.m. slump. That’s worth more than any number on a nutrition panel.
Conclusion
These Healthy Pumpkin Oat Breakfast Bars are the kind of recipe that earns a permanent spot in your rotation. They’re simple enough for a weekday morning, impressive enough for a fall brunch, and flexible enough to adapt to whatever you have in your pantry. I’ve made them for myself, for friends, for tailgates, and for lazy Sunday breakfasts. They’ve never let me down.
What I love most is that they taste like something you’d buy at a fancy bakery, but they’re made with ingredients you can actually pronounce. No preservatives, no weird additives, no guilt. Just real food that happens to taste amazing.
If you try these, I’d love to hear how they turn out. Did you add chocolate chips? Swap the pumpkin for sweet potato? Make them for a crowd? Drop a comment below or tag me in your photos. I read every single one, and honestly, your tweaks might inspire my next batch. That’s how this whole thing started for me—someone else’s variation that I couldn’t stop thinking about.
So go ahead. Preheat that oven, grab a can of pumpkin, and make your kitchen smell like fall. You deserve a breakfast that actually makes you look forward to mornings.
Frequently Asked Questions
Can I use quick oats instead of rolled oats?
You can, but the texture will be different. Quick oats absorb more liquid and break down faster, so the bars will be softer and less chewy. They’ll still taste good, just more like a soft baked oatmeal than a bar you can hold. If quick oats are all you have, reduce the applesauce by a tablespoon to compensate.
Why did my bars fall apart?
This usually happens for one of two reasons: they were underbaked, or they were cut while still warm. The bars need time to set as they cool, so be patient. If you’re sure they were baked through and cooled completely, check your measurements. Too much applesauce or pumpkin can throw off the ratio. Next time, drain your pumpkin puree on a paper towel for a few minutes to remove excess moisture.
Can I make these without eggs?
Yes! Use a flax egg (1 tablespoon ground flaxseed mixed with 2.5 tablespoons water per egg, let sit for 5 minutes). The bars will be a bit denser and less fluffy, but they’ll hold together just fine. I’ve tested this swap multiple times and it works reliably.
How do I make these bars less sweet?
Reduce the maple syrup to 2 tablespoons and increase the applesauce to ⅓ cup. You can also skip any sweet mix-ins like chocolate chips or dried fruit. The pumpkin and spices provide plenty of natural sweetness, especially if you use a good-quality pumpkin puree. I’ve made them with zero sweetener before (just applesauce) and they were still tasty, though definitely more savory.
Can I double this recipe?
Absolutely. Double all the ingredients and bake in a 9×13 pan. Increase the baking time to 35-40 minutes, checking for doneness with the toothpick test. The edges will brown faster than the center, so tent the pan with foil if the top gets too dark before the middle is set. I do this all the time when I’m bringing a batch to a gathering.
Pin This Recipe!
Best Healthy Pumpkin Oat Breakfast Bars (Easy Recipe)
These Healthy Pumpkin Oat Breakfast Bars are soft, chewy, and perfectly spiced for fall. Made with simple ingredients like oats, pumpkin puree, and a touch of maple syrup, they’re a wholesome breakfast or snack that tastes indulgent but isn’t.
- Prep Time: 15 minutes
- Cook Time: 28 minutes
- Total Time: 43 minutes
- Yield: 9 servings 1x
- Category: Breakfast
- Cuisine: American
Ingredients
- 2 cups rolled oats (not quick oats)
- 1 cup pumpkin puree (100% pure, not pie filling)
- 2 large eggs (room temperature preferred)
- ¼ cup pure maple syrup
- ¼ cup unsweetened applesauce
- 2 tablespoons coconut oil, melted (or neutral oil)
- 1 teaspoon vanilla extract (pure)
- 1½ teaspoons pumpkin pie spice
- 1 teaspoon cinnamon
- 1 teaspoon baking powder
- ¼ teaspoon salt
- Optional mix-ins: chocolate chips, chopped pecans, dried cranberries, or unsweetened shredded coconut (up to ⅓ cup total)
Instructions
- Preheat your oven to 350°F (175°C). Line an 8×8-inch baking pan with parchment paper, leaving overhang on two opposite sides. Lightly spray exposed edges with nonstick spray if desired.
- In a large bowl, whisk together the pumpkin puree, eggs, maple syrup, applesauce, melted coconut oil, and vanilla extract until smooth and uniform.
- Sprinkle the pumpkin pie spice, cinnamon, baking powder, and salt over the wet mixture. Whisk until fully incorporated.
- Add the rolled oats to the bowl. Use a rubber spatula to fold them in gently until every oat is coated and no dry patches remain. If using mix-ins, fold them in now.
- Pour the batter into the prepared pan. Use the spatula to spread it evenly, pushing into the corners and leveling the surface.
- Bake for 25-30 minutes, until the edges are golden brown and the center feels firm to the touch. A toothpick inserted into the middle should come out clean or with a few moist crumbs.
- Cool completely in the pan on a wire rack for at least 30 minutes. Then use the parchment overhang to lift the block out and transfer to a cutting board.
- Slice into 9 or 12 squares using a sharp knife. Wipe the knife clean between cuts for neater edges.
Notes
Let the batter rest for 5 minutes before baking to help the bars hold together. Don’t overmix the batter once oats are added. For cleaner slices, run your knife under hot water before cutting. These bars taste even better on day two as the spices meld. If using fresh pumpkin puree, drain it well to avoid soggy bars.
Nutrition
- Serving Size: 1 bar (based on 9 se
- Calories: 180
- Sugar: 8
- Sodium: 150
- Fat: 6
- Saturated Fat: 3
- Carbohydrates: 28
- Fiber: 4
- Protein: 5
Keywords: pumpkin oat bars, healthy breakfast bars, pumpkin breakfast bars, easy pumpkin recipe, fall breakfast, oat bars, pumpkin oats


