I figured chili cheese dip was just melted cheese with a can of chili dumped on top. It took about one bite of a sad, greasy version at a friend’s house for that illusion to fall apart completely. That dip was a puddle of orange oil with a few mysterious brown flecks floating in it, and it tasted like nothing but salt and regret. I remember standing there, holding a chip loaded with lukewarm slickness, thinking, “This can’t be what everyone raves about on game day.”
So I went home and started tinkering. I wanted a dip that actually tasted like something—like real chili, with depth and heat, but still gooey and indulgent. The kind of dip you’d actually want to elbow someone for the last bite of. After a few batches that were either too soupy or too stiff, I landed on this version. It’s thick enough to cling to a sturdy scoop chip but still creamy, with actual chunks of seasoned ground beef and a serious cheese pull. Honestly, the first time I made this, I ate it for dinner three nights in a row. No regrets.
This dip has become my unofficial football Sunday signature. It’s the thing people text me about before the first game of the season. “Are you making the dip?” they ask. And I always am. Because once you’ve had a chili cheese dip that actually delivers on its promise, you can’t go back to the oily stuff.
Why You’ll Love This Recipe
This isn’t just another dip you’ll forget about by halftime. This is the dip people stand around the kitchen island eating straight from the pan. I’ve tested this recipe about six times to get the cheese-to-chili ratio just right, and I can tell you with confidence—this is the version you want.
- Real Ingredients, Real Flavor : No canned chili in sight. You get actual seasoned ground beef, diced tomatoes, and a blend of cheeses that melt into something silky and savory.
- One Skillet Wonder : Everything comes together in a single oven-safe skillet from stove to oven. Less cleanup, more time watching the game.
- Perfectly Thick & Creamy : This dip holds its shape on a chip without dripping all over your hand. It’s sturdy but still luscious—the Goldilocks of dips.
- Prep-Ahead Friendly : You can assemble it the night before and just pop it in the oven when guests arrive. It’s a lifesaver when you’re hosting.
- Always a Crowd-Pleaser : I’ve brought this to tailgates, potlucks, and family gatherings. It disappears fast. Kids love it, adults love it, and people who claim they don’t like chili love it.
What makes this dip different from the dozens of other recipes out there? It’s the balance. The chili part is actually chunky and flavorful, not just a backdrop for cheese. And the cheese isn’t an afterthought—it’s a carefully chosen mix of sharp cheddar and Monterey Jack that melts beautifully without turning greasy. Plus, I add a little cream cheese for extra richness and stability. Trust me, this dip doesn’t separate or get oily. It stays smooth and luscious from the first scoop to the last.
This is the kind of dip that makes you close your eyes after the first bite. It’s game-day comfort food reimagined—heartier, cheesier, and way more satisfying than anything from a can. Perfect for impressing a crowd without spending all day in the kitchen.
What Ingredients You Will Need
This recipe uses simple, everyday ingredients that come together to create something truly special. Most of these are pantry staples for me now, and you probably have most of them on hand already.
For the Chili Base
- 1 pound ground beef (80/20 blend works best; drain excess fat after browning)
- 1 tablespoon olive oil (only needed if your beef is very lean)
- 1 medium yellow onion, finely diced (about 1 cup)
- 3 cloves garlic, minced
- 1 can (14.5 oz) diced tomatoes, undrained (I prefer fire-roasted for extra flavor)
- 1 can (8 oz) tomato sauce
- 2 tablespoons tomato paste
- 1 can (15 oz) kidney beans, drained and rinsed (optional, but I love the texture they add)
- 1 tablespoon chili powder
- 1 teaspoon ground cumin
- 1/2 teaspoon smoked paprika
- 1/2 teaspoon dried oregano
- 1/4 teaspoon cayenne pepper (adjust to your heat preference)
- Salt and black pepper to taste
For the Cheese Layer
- 8 ounces cream cheese, softened to room temperature (this is the secret to a silky, stable dip)
- 2 cups shredded sharp cheddar cheese (I recommend Tillamook or Cabot for best melting)
- 1 cup shredded Monterey Jack cheese
- 1/2 cup sour cream, at room temperature
For Topping
- 1/4 cup sliced green onions
- 1/4 cup chopped fresh cilantro
- 1 jalapeño, thinly sliced (optional, for heat)
- Additional shredded cheese for the top
Ingredient Tips: For the best texture, make sure your cream cheese and sour cream are at room temperature before mixing. Cold dairy can make the dip grainy. I prefer sharp cheddar here because its flavor stands up to the chili without getting lost. If you want a milder dip, use mild cheddar or Colby Jack instead. And if you’re feeling adventurous, try adding a tablespoon of pickled jalapeño brine to the chili base—it adds a subtle tang that cuts through the richness beautifully.
Equipment Needed
- Large oven-safe skillet (10 to 12 inches, cast iron is ideal but any oven-safe pan works)
- Wooden spoon or spatula for stirring
- Cheese grater (pre-shredded cheese contains anti-caking agents that affect melting, so grate your own if possible)
- Cutting board and sharp knife
- Measuring spoons and cups
- Can opener
- Small mixing bowl for the cream cheese mixture
If you don’t have an oven-safe skillet, you can brown the beef in a regular skillet and then transfer everything to a baking dish (like an 8×8 or 9×9) before adding the cheese and baking. I’ve done this plenty of times, and it works just as well. Just make sure to grease the dish lightly so nothing sticks.
Preparation Method
- Preheat your oven to 375°F (190°C). Position a rack in the center of the oven.
- Brown the ground beef. Heat your oven-safe skillet over medium-high heat. Add the ground beef and cook, breaking it apart with your spoon, until it’s nicely browned—about 6 to 8 minutes. You want some good caramelization here, not just gray meat. If there’s excess fat, carefully drain it off, leaving about a tablespoon in the pan for flavor.
- Sauté the aromatics. Reduce heat to medium. Add the diced onion to the skillet and cook for 3 to 4 minutes, until it starts to soften and turn translucent. Stir in the minced garlic and cook for another 30 seconds until fragrant. Your kitchen should smell amazing at this point.
- Build the chili base. Stir in the tomato paste and cook for 1 minute, stirring constantly. This deepens the tomato flavor. Then add the diced tomatoes (with their juices), tomato sauce, kidney beans (if using), chili powder, cumin, smoked paprika, oregano, cayenne, and a generous pinch of salt and pepper. Stir everything together well.
- Simmer the chili. Bring the mixture to a gentle simmer, then reduce heat to low. Let it cook uncovered for 10 to 15 minutes, stirring occasionally, until it thickens slightly. You want it to be thick enough that a spoon dragged through it leaves a clear path. If it looks too loose, let it simmer a few more minutes.
- Prepare the cheese mixture. While the chili simmers, combine the softened cream cheese and sour cream in a small bowl. Mix until smooth and fully combined. It should look like a thick, creamy paste.
- Assemble the dip. Once the chili has thickened, remove the skillet from heat. Dollop the cream cheese mixture over the chili in spoonfuls, then gently swirl it in with a spatula. You don’t need to fully incorporate it—some streaks are fine. Sprinkle the shredded cheddar and Monterey Jack over the top, covering the surface evenly.
- Bake until bubbly. Transfer the skillet to the preheated oven and bake for 15 to 18 minutes, until the cheese is fully melted and the edges are bubbly. For a golden-brown top, switch to broil for the last 2 minutes, but watch it closely so it doesn’t burn.
- Add toppings and serve. Remove from the oven and let it rest for 5 minutes. This rest is important—it lets the dip set up a bit so it doesn’t slide off your chips. Sprinkle with green onions, cilantro, and jalapeño slices. Serve warm with tortilla chips, sliced baguette, or even celery sticks for a lighter option.
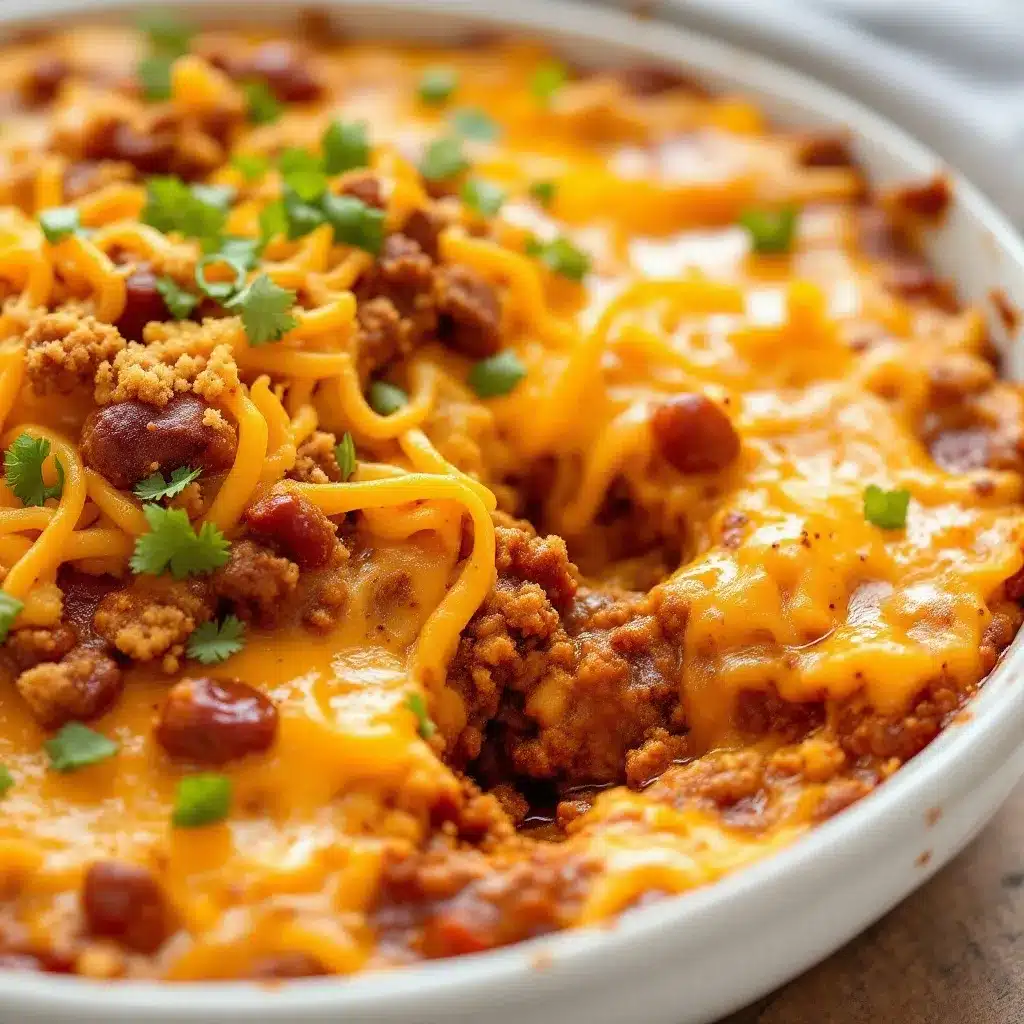
Visual cues: The dip is ready when the cheese is completely melted and the edges are bubbling gently. The top should be lightly golden if you broiled it. When you dip a chip in, the dip should cling to it without dripping.
Cooking Tips & Techniques
I’ve made this dip more times than I can count, and I’ve definitely learned a few things the hard way. Here are my best tips to make sure yours turns out perfect every time.
Don’t skip draining the beef. I once got lazy and left all the fat in the pan. The dip turned into an oily mess. Drain off all but about a tablespoon of fat after browning. That little bit adds flavor without making things greasy.
Let your cream cheese soften properly. Cold cream cheese won’t blend smoothly into the chili—you’ll end up with lumpy white bits. Leave it out on the counter for at least 30 minutes, or microwave it in 10-second bursts until it’s soft but not melted.
Grate your own cheese. I know it’s tempting to use the bagged shredded cheese, but those anti-caking coatings really do mess with the melt. Pre-shredded cheese takes longer to melt and can leave your dip with a slightly grainy texture. Grating a block of cheddar takes two minutes and makes a noticeable difference.
Taste the chili before adding the cheese. This is your last chance to adjust seasoning. The cheese will add saltiness, so go easy on the salt, but make sure the chili is flavorful enough on its own. If it tastes a little flat, add another pinch of chili powder or a splash of hot sauce.
Let it rest before serving. I know you’ll be tempted to dig in right away, but that 5-minute rest is crucial. It lets the dip firm up slightly, so it stays on your chip instead of running down your hand. Trust me on this one.
Multitasking tip: While the chili simmers, grate your cheese and prep your toppings. That way, everything is ready to go when it’s time to assemble. It makes the process feel effortless.
Variations & Adaptations
One of the best things about this dip is how easily it adapts to different tastes and dietary needs. Here are some of my favorite variations.
Spicy Kick Version: Add 1 diced jalapeño along with the onions, and stir in 1 tablespoon of pickled jalapeño brine with the tomatoes. Top with fresh jalapeño slices and a drizzle of hot honey. This version has a nice slow burn that builds with each bite.
Smoky Bacon Version: Cook 4 slices of bacon until crispy before browning the beef. Crumble the bacon and set aside. Use the rendered bacon fat instead of olive oil for cooking the onions. Stir the crumbled bacon into the chili before adding the cheese. It adds an incredible smoky depth that pairs perfectly with the cheddar.
Vegetarian Version: Swap the ground beef for 1 can of black beans (drained and rinsed) plus 1 cup of finely chopped mushrooms. Sauté the mushrooms with the onions until they release their liquid and start to brown. The texture is surprisingly meaty, and the flavor is just as rich.
Slow Cooker Version: Brown the beef and sauté the onions on the stove, then transfer everything (except the cheeses and sour cream) to a slow cooker. Cook on low for 2 to 3 hours. Stir in the cream cheese mixture and top with shredded cheese. Cover and cook on low for another 20 minutes until melted. This is perfect for parties where you want to keep the dip warm all afternoon.
Dairy-Free Adaptation: Use dairy-free cream cheese and shredded vegan cheddar. I’ve tried this with Violife brand and it melts surprisingly well. Add an extra tablespoon of nutritional yeast to the chili for a cheesy flavor boost. It’s not exactly the same, but it’s still delicious in its own right.
I personally love the smoky bacon version for playoff games. Something about the combination of smoky, spicy, and cheesy just hits different when the stakes are high.
Serving & Storage Suggestions
This dip is best served hot, straight from the skillet. I like to set it on a trivet in the middle of the table with a stack of sturdy tortilla chips around it. Scoop-style chips are ideal—they can hold a generous amount of dip without breaking.
What to serve with it: Beyond chips, this dip is fantastic with sliced baguette, pita chips, pretzel bites, or even crispy potato wedges. For a lighter option, serve with celery sticks, bell pepper strips, or cucumber rounds. I also love it spooned over loaded nachos for an over-the-top game day spread.
Complementary dishes: This dip pairs beautifully with a bowl of classic chili on the side, or alongside crispy buffalo cauliflower bites for a complete spread. For drinks, a cold beer or a margarita cuts through the richness perfectly.
Storage: Leftover dip keeps well in an airtight container in the refrigerator for up to 4 days. The flavors actually meld together overnight, so it might taste even better the next day.
Reheating: The best way to reheat is in the oven at 350°F for 10 to 15 minutes, or until bubbly. You can also reheat individual portions in the microwave, but the texture won’t be quite as smooth. If the dip seems thick after refrigeration, stir in a tablespoon of milk or water before reheating.
Freezing: I don’t recommend freezing this dip. The cream cheese and sour cream can separate when thawed, leaving you with a grainy texture. It’s best made fresh or stored in the fridge.
Nutritional Information & Benefits
This dip is definitely an indulgence, but it does have some redeeming qualities. Here’s an approximate breakdown per serving (based on 8 servings):
- Calories: 420
- Protein: 24g
- Fat: 28g
- Carbohydrates: 14g
- Fiber: 4g
- Sugar: 6g
- Sodium: 680mg
Health highlights: The ground beef provides a solid dose of protein and iron. The beans add fiber and plant-based protein, which helps keep you full. Tomatoes are rich in lycopene, an antioxidant linked to heart health. And cheese, in moderation, is a good source of calcium. If you use low-fat cream cheese and reduced-fat cheddar, you can cut the fat and calories by about 20% without sacrificing too much flavor.
Dietary considerations: This recipe is naturally gluten-free (just double-check your spice blends for hidden gluten). For a lower-carb version, skip the beans and serve with cucumber rounds or bell pepper strips instead of chips. It’s not exactly health food, but it’s real food made from scratch—and that counts for something.
Frequently Asked Questions
Can I make this dip ahead of time?
Yes! Assemble the dip completely (including the cheese on top) but don’t bake it. Cover and refrigerate for up to 24 hours. When you’re ready to serve, bake at 375°F for 20 to 25 minutes, or until bubbly and hot throughout. You may need to add 5 extra minutes since you’re starting from cold.
Why is my dip greasy?
This usually happens if you didn’t drain the fat from the ground beef after browning, or if you used pre-shredded cheese with anti-caking agents. Next time, drain the beef well and grate your own cheese. Also, make sure you’re using full-fat cream cheese—low-fat versions can break and release liquid.
Can I use ground turkey instead of beef?
Absolutely. Ground turkey works great, but it’s leaner, so you’ll need to add the olive oil when sautéing the onions. Turkey also benefits from a little extra seasoning—add an extra teaspoon of chili powder and a pinch of smoked paprika to boost the flavor.
How do I make this dip spicier?
There are several ways to turn up the heat. Add a diced jalapeño with the onions, stir in 1 tablespoon of pickled jalapeño brine, use hot smoked paprika instead of sweet, or add an extra 1/2 teaspoon of cayenne. For serious heat, finely chop a habanero pepper and add it with the garlic. Just be careful—habaneros are no joke.
What are the best chips for this dip?
Sturdy scoop-style tortilla chips are your best bet. They’re thick enough to hold the weight of the dip without breaking. I also love thick-cut restaurant-style chips or even kettle-cooked potato chips for a salty crunch. Avoid thin, delicate chips—they’ll snap under the weight of all that cheesy goodness.
Conclusion
This Football Sunday Chili Cheese Dip is more than just a snack—it’s a tradition waiting to happen. It’s the dish that makes people hover around the kitchen island, the one that gets scraped clean before halftime, the one people ask for by name year after year. And the best part? It’s incredibly easy to make with real ingredients you can feel good about serving.
I love this recipe because it delivers on every level. It’s hearty enough to be a meal, cheesy enough to satisfy any craving, and flexible enough to adapt to whatever you have on hand. Whether you’re hosting a Super Bowl party, a casual Sunday gathering, or just want a cozy dinner with a side of football, this dip is your answer.
I’d love to hear how yours turns out! Leave a comment below and let me know if you tried any variations, or tag me in your photos on social media. And if you’re looking for more game day inspiration, don’t miss my football charcuterie cups or this sweet and salty snack mix to round out your spread. Happy game day, and happy dipping!
Pin This Recipe!
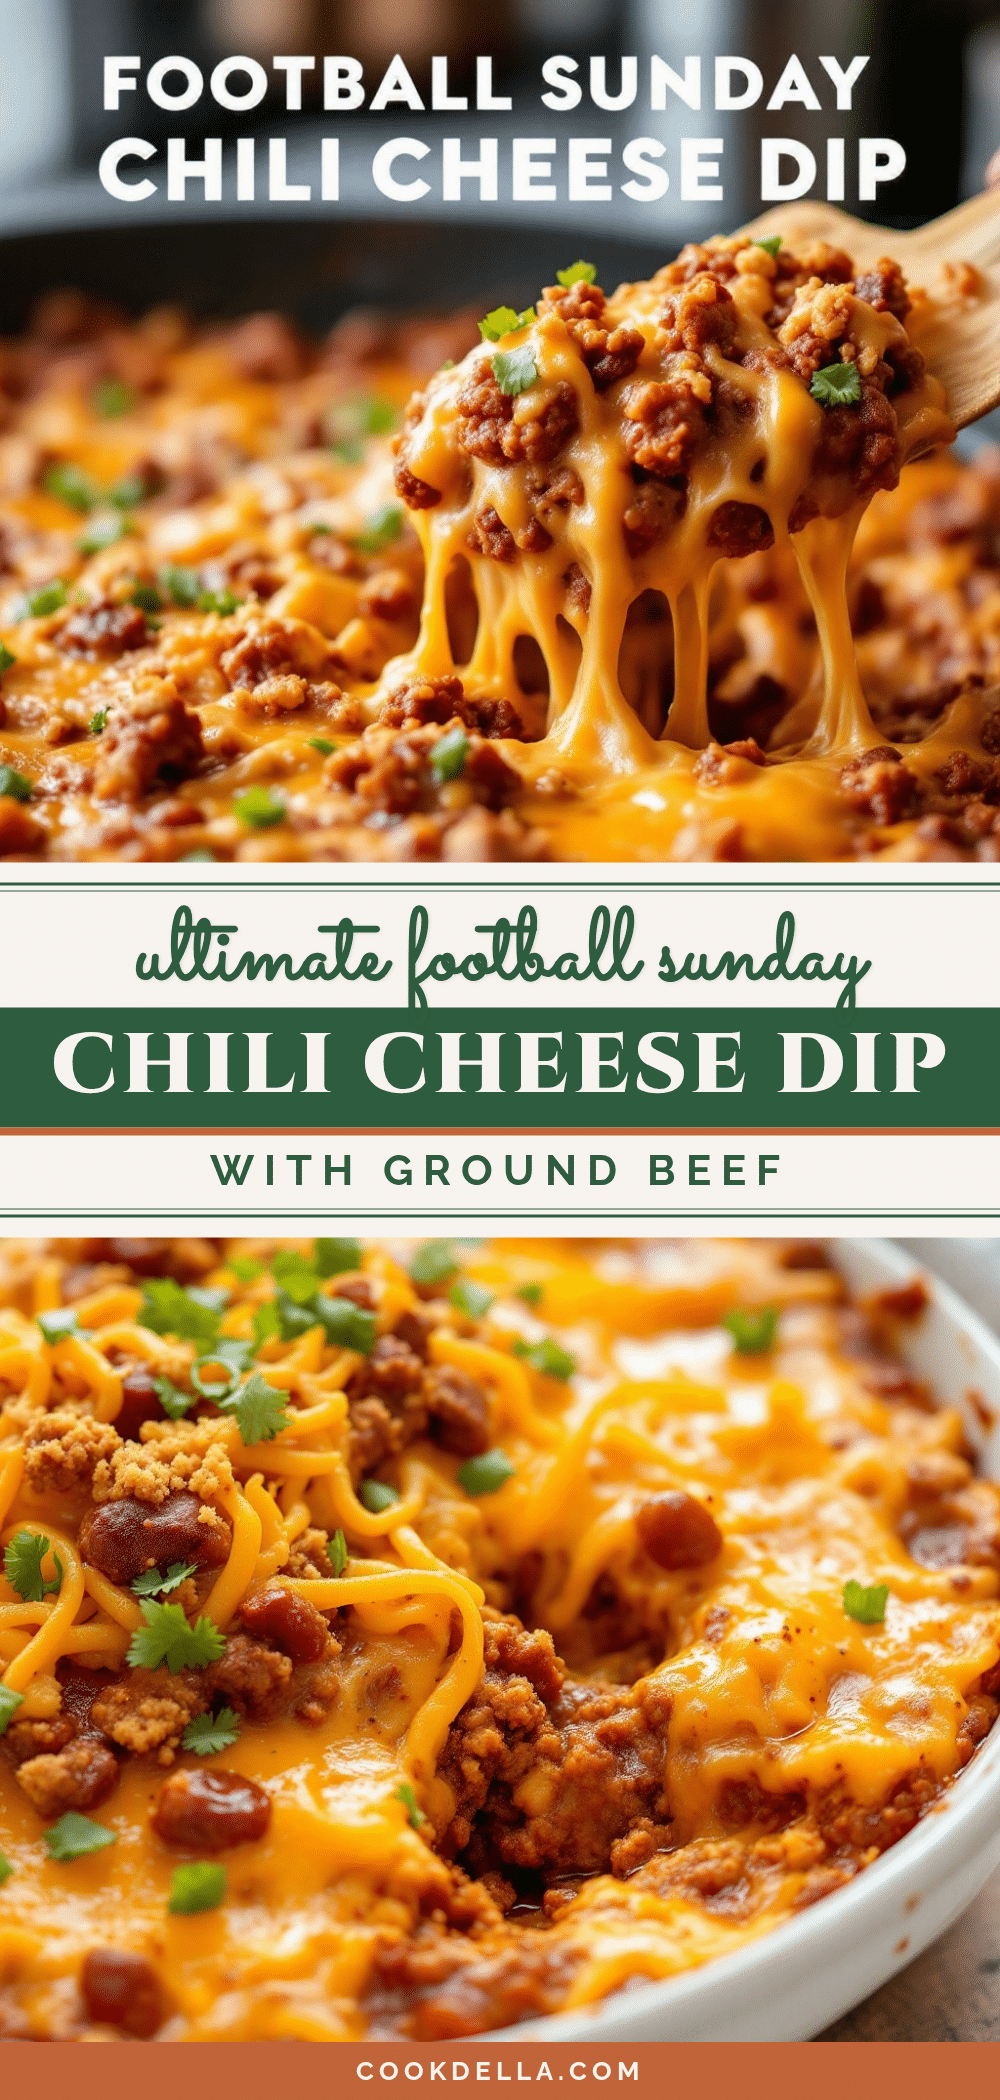
Best Football Sunday Chili Cheese Dip with Ground Beef

This chili cheese dip features real seasoned ground beef, a blend of sharp cheddar and Monterey Jack, and a creamy texture that clings to chips without dripping. It’s a one-skillet wonder perfect for game day, potlucks, or any gathering.
- Prep Time: 15 minutes
- Cook Time: 30 minutes
- Total Time: 45 minutes
- Yield: 8 servings 1x
- Category: Appetizer
- Cuisine: American
Ingredients
- 1 pound ground beef (80/20 blend works best; drain excess fat after browning)
- 1 tablespoon olive oil (only needed if your beef is very lean)
- 1 medium yellow onion, finely diced (about 1 cup)
- 3 cloves garlic, minced
- 1 can (14.5 oz) diced tomatoes, undrained (fire-roasted preferred)
- 1 can (8 oz) tomato sauce
- 2 tablespoons tomato paste
- 1 can (15 oz) kidney beans, drained and rinsed (optional)
- 1 tablespoon chili powder
- 1 teaspoon ground cumin
- 1/2 teaspoon smoked paprika
- 1/2 teaspoon dried oregano
- 1/4 teaspoon cayenne pepper (adjust to heat preference)
- Salt and black pepper to taste
- 8 ounces cream cheese, softened to room temperature
- 2 cups shredded sharp cheddar cheese (Tillamook or Cabot recommended)
- 1 cup shredded Monterey Jack cheese
- 1/2 cup sour cream, at room temperature
- 1/4 cup sliced green onions
- 1/4 cup chopped fresh cilantro
- 1 jalapeño, thinly sliced (optional, for heat)
- Additional shredded cheese for topping
Instructions
- Preheat your oven to 375°F (190°C). Position a rack in the center of the oven.
- Brown the ground beef. Heat your oven-safe skillet over medium-high heat. Add the ground beef and cook, breaking it apart, until nicely browned—about 6 to 8 minutes. Drain excess fat, leaving about a tablespoon in the pan.
- Reduce heat to medium. Add the diced onion and cook for 3 to 4 minutes until softened. Stir in the minced garlic and cook for 30 seconds until fragrant.
- Stir in the tomato paste and cook for 1 minute. Add the diced tomatoes (with juices), tomato sauce, kidney beans (if using), chili powder, cumin, smoked paprika, oregano, cayenne, and a generous pinch of salt and pepper. Stir well.
- Bring the mixture to a gentle simmer, then reduce heat to low. Cook uncovered for 10 to 15 minutes, stirring occasionally, until thickened slightly.
- While the chili simmers, combine the softened cream cheese and sour cream in a small bowl. Mix until smooth.
- Remove the skillet from heat. Dollop the cream cheese mixture over the chili and gently swirl it in. Sprinkle the shredded cheddar and Monterey Jack evenly over the top.
- Transfer the skillet to the oven and bake for 15 to 18 minutes, until the cheese is fully melted and the edges are bubbly. For a golden top, broil for the last 2 minutes.
- Remove from the oven and let rest for 5 minutes. Sprinkle with green onions, cilantro, and jalapeño slices. Serve warm with tortilla chips.
Notes
For best texture, ensure cream cheese and sour cream are at room temperature. Grate your own cheese for optimal melting. Let the dip rest 5 minutes before serving to set. To make ahead, assemble completely (including cheese) and refrigerate up to 24 hours; bake at 375°F for 20-25 minutes. Not recommended for freezing.
Nutrition
- Serving Size: 1 serving (about 1/8
- Calories: 420
- Sugar: 6
- Sodium: 680
- Fat: 28
- Saturated Fat: 14
- Carbohydrates: 14
- Fiber: 4
- Protein: 24
Keywords: chili cheese dip, football Sunday dip, game day dip, ground beef dip, one skillet dip, party dip, Super Bowl dip


