My sister did not trust pumpkin spice in cinnamon rolls. She said it loudly, over the phone, while I was stirring brown butter on the stove. “You’re going to ruin a perfectly good cinnamon roll,” she told me. And honestly, I almost believed her. Cinnamon rolls are sacred in our family—my grandmother’s recipe, the one we fought over the last sticky corner of, the one that showed up at every holiday morning without fail. Messing with that felt like drawing a mustache on a family portrait.
But here’s the thing—I had a half-can of pumpkin puree in the fridge, a container of pumpkin pie spice I’d bought on impulse at the farmers market, and a Sunday afternoon with nothing but gray sky and rain outside my window. I wanted something that smelled like fall felt. I wanted warmth that went beyond the oven. So I made a batch with pumpkin in the dough and a heavy hand of spice in the filling. I didn’t tell my sister until she’d already eaten three.
“Wait,” she said, licking icing off her thumb. “These are better.” She looked almost annoyed about it. And that’s when I knew I had something worth keeping. These perfect pumpkin spice cinnamon rolls with brown butter icing aren’t a gimmick. They’re not trying to be fancy or trendy. They’re just really, really good cinnamon rolls that happen to taste like October. The pumpkin keeps the dough incredibly soft—like pillow-soft, the kind that doesn’t dry out by day two. The brown butter icing is nutty and rich without being too sweet. And the spice blend? It hits that cozy note without screaming “pumpkin spice latte” at you. It’s subtle. It’s balanced. It’s the kind of breakfast that makes you sit down and actually enjoy your coffee.
I’ve made these four times since that rainy Sunday. Twice for brunch with friends, once for a chilly weekday morning when I needed something to look forward to, and once just to prove to myself it wasn’t a fluke. It wasn’t. This recipe works. And if you’re skeptical like my sister was—I get it. Just make them anyway. You’ll see.
Why You’ll Love This Recipe
I’ve tested this recipe more times than I care to admit, and each batch taught me something. The first one was too dense. The second needed more salt in the icing. The third? That was the one where my neighbor knocked on my door asking what smelled so good. By the fourth, I had it dialed in. Here’s why these rolls are worth your time:
- Incredibly soft dough. The pumpkin puree adds moisture and tenderness in a way that butter alone just can’t. These rolls stay soft for days—if they last that long.
- Brown butter icing that’s actually easy. No candy thermometers, no finicky ratios. Just butter, powdered sugar, vanilla, and a little patience while it browns. I’ll walk you through it so you don’t burn it like I did the first time.
- Real pumpkin flavor, not artificial. We’re using actual pumpkin puree and a homemade spice blend. No shortcuts, no weird aftertaste. It tastes like fall should taste.
- Perfect for make-ahead mornings. Assemble them the night before, pop them in the fridge, and bake fresh in the morning. Your future self will thank you when you wake up to the smell of cinnamon and brown butter.
- No stand mixer required. I use my hands and a wooden spoon. It’s more satisfying that way, honestly. You get to feel the dough come together.
These rolls have become my go-to for fall gatherings, lazy Sunday mornings, and even Thanksgiving breakfast. They’re the kind of recipe that makes people close their eyes when they take a bite. And that’s not something I say lightly. I’ve been developing recipes for years, and I can count on one hand the ones that get that reaction every single time. This is one of them.
What Ingredients You Will Need
This recipe uses simple, pantry-friendly ingredients to create something that tastes far more complicated than it is. Most of these you probably already have, especially if you’ve been baking through fall like I have. Let me walk you through each one so you know what to look for and why it matters.
For the Dough
- 3 ½ cups all-purpose flour (plus extra for dusting) — I use Gold Medal unbleached for consistent results. Bread flour works too if you want a chewier texture, but all-purpose gives that soft, pillowy crumb we’re after.
- ¼ cup granulated sugar — Just enough to feed the yeast and add a touch of sweetness to the dough. Don’t skip it or the rolls won’t rise as well.
- 2 ¼ teaspoons active dry yeast (one packet) — Make sure your yeast is fresh. I’ve killed a batch with expired yeast before, and it’s heartbreaking. Test it by proofing in warm milk first.
- ½ cup warm milk (about 110°F) — Whole milk gives the richest dough, but 2% works fine. Heat it gently—too hot and you’ll kill the yeast, too cold and it won’t activate.
- ½ cup pumpkin puree — Not pumpkin pie filling. Look for 100% pure pumpkin. Libby’s is my go-to because it’s consistently thick and not watery. If your puree seems loose, blot it with a paper towel before using.
- ¼ cup unsalted butter, melted and slightly cooled — Salted butter works if that’s all you have, just reduce the added salt in the dough by a pinch.
- 1 large egg, room temperature — Cold eggs can shock the dough and slow the rise. Set yours out 30 minutes before starting, or place it in a bowl of warm water for 5 minutes.
- 1 teaspoon vanilla extract — Pure vanilla, not imitation. It makes a difference in the overall flavor, even if it’s subtle.
- ½ teaspoon salt — Don’t skip this. Salt controls the yeast and enhances every other flavor.
For the Pumpkin Spice Filling
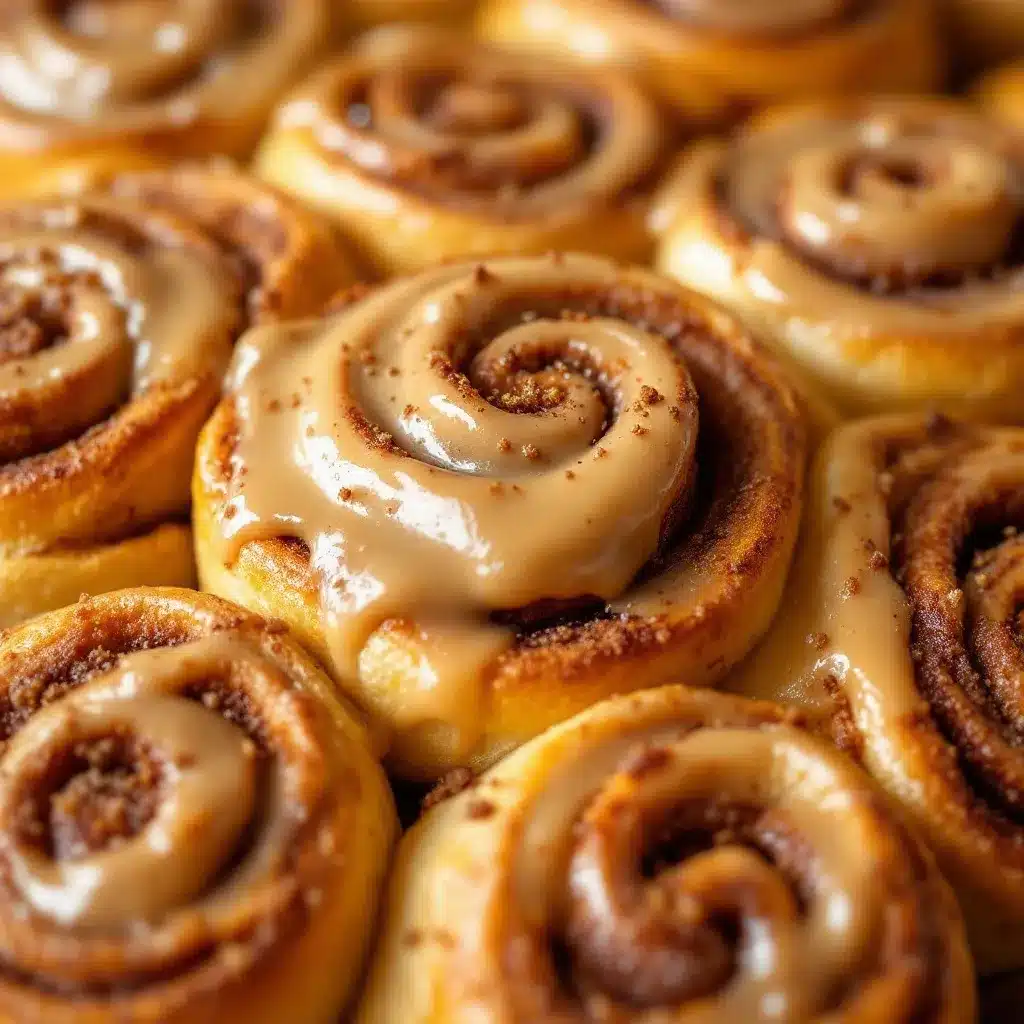
- ½ cup unsalted butter, very soft but not melted — Let it sit out for at least an hour. Cold butter won’t spread evenly, and you’ll end up with bare spots in your rolls.
- ¾ cup packed brown sugar — Light or dark both work. Dark brown sugar gives a deeper molasses flavor that I personally love with the pumpkin.
- 2 tablespoons pumpkin pie spice — Homemade is best, but store-bought works. I’ll share my blend below if you want to make your own.
- 1 tablespoon ground cinnamon — Yes, in addition to the pumpkin pie spice. Cinnamon is the backbone here; the pumpkin spice just adds depth.
- Pinch of salt — Sounds weird in a sweet filling, but it balances everything and prevents the rolls from tasting one-dimensional.
For the Brown Butter Icing
- ½ cup unsalted butter — This is the star. Use good butter here because it’s the main flavor. I prefer Kerrygold or Plugrà for the richness.
- 2 cups powdered sugar, sifted — Sifting prevents lumps. I know it’s an extra step, but lumpy icing on beautiful rolls is a letdown.
- 2-3 tablespoons milk — Start with 2 and add more if needed. Whole milk gives a creamier texture.
- 1 teaspoon vanilla extract — Add it after browning the butter so the heat doesn’t cook off the flavor.
- Pinch of salt — Essential for cutting the sweetness and bringing out the nutty notes in the brown butter.
Homemade Pumpkin Pie Spice (Optional)
If you want to make your own blend, mix together: 2 tablespoons cinnamon, 2 teaspoons ground ginger, 1 ½ teaspoons ground nutmeg, 1 teaspoon ground cloves, and 1 teaspoon ground allspice. Store in a small jar and use it anywhere you’d use store-bought. I keep a jar of this on my counter all fall long—it goes into everything from pumpkin sourdough bread to my morning coffee.
Equipment Needed
You don’t need a lot of fancy equipment for these rolls, which is part of why I love making them. Here’s what you’ll need:
- A large mixing bowl — Glass or ceramic works best. Avoid metal if you can, especially for the yeast mixture, as metal can sometimes react with the yeast.
- A wooden spoon or dough whisk — I use my hands for the final kneading, but a sturdy spoon helps bring everything together at the start.
- A 9×13-inch baking dish — Glass lets you see the browning on the bottom, but metal works fine too. Just grease it well, even if it’s nonstick.
- Parchment paper — Line your dish with it for easy removal and cleanup. Trust me on this one.
- A rolling pin — Any size works. If you don’t have one, a wine bottle works in a pinch (clean it first!).
- Unflavored dental floss — For cutting the rolls cleanly. A knife will squish them. Floss gives perfect, round slices every time.
- A small saucepan — Light-colored is best for browning butter so you can see the color change. Dark pans make it harder to judge.
- A kitchen scale — Optional but helpful. Weighing your flour ensures consistent results, especially if you live in a humid climate where flour compacts differently.
- Plastic wrap or a clean kitchen towel — For covering the dough while it rises. Make sure it’s large enough to fully cover the bowl without touching the dough.
I’ve made these rolls in a tiny apartment kitchen with a warped baking pan and a butter knife, and they still turned out great. Don’t let missing equipment stop you. Improvise where you need to.
Preparation Method
Let’s make some rolls. I’ll walk you through every step, including what to look for so you know you’re on the right track. This recipe takes about 2 ½ hours total, but most of that is hands-off rising time. The actual work is maybe 30 minutes.
Step 1: Proof the Yeast (5 minutes)
Warm your milk to about 110°F—it should feel like warm bath water, not hot. Sprinkle the yeast and a pinch of sugar over the milk, give it a gentle stir, and let it sit for 5-7 minutes. It should get foamy and smell like bread. If it doesn’t, your yeast is dead. Start over with fresh yeast. I learned this the hard way and wasted an entire batch of dough. Don’t be like me.
Step 2: Make the Dough (10 minutes)
In a large bowl, whisk together the pumpkin puree, melted butter, egg, vanilla, sugar, and salt until smooth. Pour in the yeast mixture and stir. Add the flour, one cup at a time, stirring with a wooden spoon until a shaggy dough forms. It’ll look rough and sticky—that’s normal. Turn it out onto a floured surface and knead for 6-8 minutes. The dough should be soft and slightly tacky but not sticking to your hands. Add flour a tablespoon at a time if it’s too sticky, but resist the urge to add too much. A slightly sticky dough makes softer rolls.
Step 3: First Rise (1 hour)
Place the dough in a lightly greased bowl, turning once to coat. Cover with plastic wrap or a damp towel and let it rise in a warm spot until doubled in size. About an hour, maybe a little longer if your kitchen is cool. I like to put mine in the microwave (turned off) with a cup of hot water next to it. The steam and warmth create the perfect environment. The dough should feel puffy and airy when you poke it, and the indentation should stay.
Step 4: Make the Filling (5 minutes)
While the dough rises, mix the brown sugar, pumpkin pie spice, cinnamon, and salt in a small bowl. Set aside. Make sure your butter is very soft—you should be able to spread it with a spatula like soft cream cheese.
Step 5: Roll and Fill (10 minutes)
Punch down the risen dough and turn it out onto a lightly floured surface. Roll it into a 12×18-inch rectangle—about the size of a half-sheet pan. Don’t stress about perfect edges; rustic is fine. Spread the softened butter evenly over the entire surface, leaving a ½-inch border on one long edge (this helps seal the roll). Sprinkle the sugar-spice mixture over the butter and press it gently into the butter so it sticks.
Step 6: Roll and Cut (10 minutes)
Starting from the long edge opposite the bare border, roll the dough tightly into a log. Use both hands and roll evenly—don’t pull or stretch the dough. Pinch the seam to seal. Now, here’s the trick: take a long piece of unflavored dental floss, slide it under the log, cross the ends over the top, and pull. It cuts through cleanly without squishing the roll. Cut into 12 equal pieces, about 1 ½ inches each. Place them in your greased 9×13 dish, cut side up, spacing them evenly—they’ll grow into each other as they rise.
Step 7: Second Rise (30-45 minutes)
Cover the dish with plastic wrap and let the rolls rise until they’re puffy and touching each other. This takes about 30-45 minutes in a warm spot. They should look doubled in size and feel soft when you gently poke them. If you’re making these ahead, stop here, cover tightly, and refrigerate overnight. In the morning, let them sit at room temperature for 30 minutes before baking.
Step 8: Bake (22-25 minutes)
Preheat your oven to 350°F. Bake the rolls on the middle rack for 22-25 minutes. They should be golden brown on top and the filling should be bubbling around the edges. If the tops brown too quickly, tent loosely with foil for the last 5 minutes. Let them cool in the pan for 5 minutes while you make the icing.
Step 9: Brown the Butter (5 minutes)
While the rolls cool, melt the butter in a light-colored saucepan over medium heat. Stir constantly with a spatula or whisk. The butter will foam, then turn from yellow to golden to amber, and you’ll see brown specks forming at the bottom. This takes about 4-5 minutes. The moment it smells nutty and toasty, remove it from the heat. Pour it into a heat-safe bowl immediately to stop the cooking—it can burn in seconds if left in the hot pan. I’ve burned so many batches of brown butter that I now pull it off the heat a little early. You can always cook it more, but you can’t un-burn it.
Step 10: Make the Icing and Glaze (5 minutes)
Let the brown butter cool for 2-3 minutes, then whisk in the sifted powdered sugar, milk, vanilla, and salt. Start with 2 tablespoons of milk and add more if needed for a pourable consistency. It should be thick but flow off the whisk in a ribbon. Pour the icing over the warm rolls, letting it drip down into all the nooks and crannies. Serve warm, while the icing is still melty.
Cooking Tips & Techniques
I’ve made this recipe enough times to know exactly where things can go wrong. Here are the lessons I learned the hard way so you don’t have to:
Don’t over-flour your dough. I know it’s tempting to keep adding flour when the dough feels sticky, but resist. A slightly tacky dough produces soft, tender rolls. Too much flour makes them dense and dry. Trust the process—the dough will come together as you knead it.
Temperature matters more than you think. Cold ingredients slow down yeast. Warm ingredients speed it up. If your kitchen is cold (under 70°F), your rise times will be longer. Be patient. I once tried to speed things up by putting my dough in a warm oven, and it partially cooked the outside. Not my finest moment. Stick with the microwave-and-hot-water trick—it’s foolproof.
Roll evenly for consistent browning. When you roll out the dough, try to keep an even thickness. Thin spots will overbake, and thick spots might stay doughy in the center. If your rectangle has uneven edges, just trim them with a knife and use the scraps for a tiny test roll (baker’s privilege).
Cut with floss, not a knife. I cannot stress this enough. A sharp knife will still compress the dough and give you oval-shaped rolls. Dental floss gives perfect circles. If you don’t have floss, use a very sharp serrated knife with a gentle sawing motion, but floss is truly the best tool for the job.
Let the brown butter cool slightly. If you add the powdered sugar to piping hot brown butter, it’ll seize up and turn into a grainy mess. Give it a few minutes to cool down. You want it warm, not hot. Also, sift your powdered sugar—lumps in brown butter icing are even more noticeable than in regular icing because the butter specks already add texture.
Bake until just golden. Overbaked cinnamon rolls are dry and sad. Pull them out when they’re golden on top and the center rolls look set, not doughy. An instant-read thermometer inserted into the center roll should read about 190°F. If you don’t have one, the bubbling filling is a good visual cue.
Variations & Adaptations
One of the best things about this recipe is how adaptable it is. I’ve tried several variations, and here are my favorites:
Make it dairy-free. Use vegan butter in both the dough and the filling (I like Miyoko’s or Country Crock plant butter). Substitute oat milk or almond milk for the milk in the dough and icing. The texture will be slightly less tender, but still delicious. I tested this for a friend with a dairy allergy, and she said they were “dangerously good.”
Add a cream cheese drizzle. If brown butter icing isn’t your thing (is that possible?), make a simple cream cheese glaze instead. Beat 4 ounces of softened cream cheese with 2 tablespoons of softened butter, then add 1 cup of powdered sugar and a splash of milk. It’s tangy and rich and pairs beautifully with the pumpkin spice. I sometimes do a half-and-half situation—brown butter icing on some, cream cheese on others—when I can’t decide.
Go nuts. Sprinkle ½ cup of chopped pecans or walnuts over the filling before rolling. The nuts get toasted as the rolls bake and add a lovely crunch. I did this for a Thanksgiving brunch and they disappeared before the regular ones. Just make sure your nuts are fresh—rancid nuts will ruin the whole batch.
Pumpkin spice everything. If you’re a pumpkin spice maximalist (no judgment here), add a teaspoon of pumpkin pie spice to the dough itself. I do this when I want an extra punch of flavor. It’s subtle but noticeable, especially in the outer layers of the roll.
Make them mini. For parties or brunch buffets, roll the dough into a tighter log and cut 18-20 smaller rolls. Bake for 18-20 minutes instead. They’re perfect for grabbing and going, and they look adorable on a platter alongside pumpkin cream cheese muffins.
Serving & Storage Suggestions
These rolls are best served warm, when the icing is still soft and the dough is pillowy. But let’s be real—they’re pretty incredible at room temperature too. Here’s how to handle them at every stage:
Serve them warm. If you’re serving a crowd, time the baking so the rolls come out 10-15 minutes before you want to eat. Make the icing while they cool slightly, then pour it on. The contrast between warm rolls and cool-ish icing is pure magic. Pair them with a hot cup of coffee or a homemade pumpkin spice latte for the ultimate fall breakfast.
Presentation tip. I like to serve these right in the baking dish—it keeps them warm longer and feels cozy. If you’re transferring them to a platter, use a thin spatula to lift them out individually. Drizzle any extra icing from the pan over the top.
Storage. Leftover rolls (if you have any) keep well in an airtight container at room temperature for up to 2 days. After that, I recommend refrigerating them. The icing will soak into the rolls over time, which some people love and others don’t. If you prefer firmer icing, store the rolls and icing separately and reheat before glazing.
Reheating. The microwave works in a pinch—15-20 seconds per roll—but it can make them a little rubbery. For best results, reheat in a 300°F oven for 5-7 minutes. Cover loosely with foil to prevent the icing from burning. They’ll taste almost as fresh as the day you made them.
Freezing. These rolls freeze beautifully. You have two options: freeze the unbaked rolls after cutting (do the second rise in the pan, then freeze without baking), or freeze the fully baked and cooled rolls. For unbaked, thaw in the fridge overnight, then let rise at room temperature for 30 minutes before baking. For baked, thaw at room temperature and reheat in the oven. I always keep a pan of unbaked rolls in my freezer during fall for unexpected guests or lazy Sunday mornings.
Nutritional Information & Benefits
Let’s be honest—cinnamon rolls are a treat, not a health food. But that doesn’t mean they can’t have some redeeming qualities. Here’s the breakdown for one roll (with icing):
- Calories: Approximately 380-420
- Fat: 18g
- Carbohydrates: 52g
- Protein: 6g
- Fiber: 2g
- Sugar: 28g
The pumpkin puree adds vitamin A and fiber, which you wouldn’t get from a standard cinnamon roll. Brown butter, despite its indulgent reputation, actually has a slightly lower lactose content than regular butter because the browning process breaks down some of the milk solids. That said, these are still a special occasion breakfast—and that’s okay. Food doesn’t have to be “healthy” to be good for you. Sometimes what you need is a warm, buttery, spice-scented roll on a crisp fall morning, shared with people you love. That counts for something.
If you’re watching your sugar intake, you can reduce the sugar in the filling by a couple of tablespoons without affecting the texture too much. The icing is harder to adjust, but you could use a sugar-free powdered sweetener or simply use less. I’ve tried both, and honestly? Just eat the regular version. Life is short.
Conclusion
These perfect pumpkin spice cinnamon rolls with brown butter icing are everything I want fall baking to be—warm, spiced, a little indulgent, and deeply comforting. They’re the kind of recipe that makes your house smell like a bakery and your heart feel full. My sister, the original skeptic, now requests them by name. She’s already texted me about making a batch for her book club next weekend. That’s a win in my book.
I hope you make these rolls and love them as much as I do. Maybe you’ll tweak the spice blend, add some nuts, or double the icing (no judgment here). That’s the beauty of baking—every batch is a little different, and every batch tells a story. If you try this recipe, I’d love to hear about it. Drop a comment below and tell me how they turned out, what variations you tried, or just share your favorite fall memory. And if you’re looking for more cozy fall recipes, check out this fall harvest charcuterie board for a savory option, or these soft-baked pumpkin snickerdoodle cookies for another sweet treat. Happy baking, friends. Your kitchen is about to smell incredible.
Frequently Asked Questions
Can I use canned pumpkin pie filling instead of pumpkin puree?
No, I don’t recommend it. Pumpkin pie filling is pre-sweetened and spiced, which will throw off the sugar and spice balance in this recipe. Stick with 100% pure pumpkin puree for the best results. If you only have pumpkin pie filling, you’ll need to reduce the sugar in the dough and adjust the spices, but honestly, it’s easier just to buy the right ingredient.
Why didn’t my rolls rise properly?
Several things could be going on. Your yeast might be expired—always proof it first to check. Your milk might have been too hot (over 120°F kills yeast) or too cold (under 100°F won’t activate it). Your kitchen might be too cold for rising. Try the microwave-and-hot-water trick I mentioned above. And finally, make sure your salt isn’t touching the yeast directly—salt can inhibit yeast activity if they’re mixed together before the yeast activates.
Can I make these gluten-free?
I haven’t tested a gluten-free version of this exact recipe, but I’ve had success with gluten-free cinnamon rolls using a 1:1 gluten-free baking flour blend. Look for one that contains xanthan gum. The dough will be stickier and harder to roll, so you’ll need to flour your surface generously. I recommend using parchment paper to help roll the dough without it sticking. The texture won’t be exactly the same—slightly more crumbly—but still delicious.
How do I know when the brown butter is done?
Watch for three signs: the color turns from yellow to golden amber, you’ll see brown specks forming at the bottom of the pan, and the smell becomes nutty and toasty. The whole process takes about 4-5 minutes over medium heat. Stir constantly. The moment you smell that nutty aroma, remove the pan from the heat and pour the butter into a heat-safe bowl. It continues cooking in the hot pan, so don’t leave it sitting there. If it smells burnt, you’ve gone too far—start over.
Can I skip the brown butter and use regular butter in the icing?
You can, but you’ll be missing out. Brown butter adds a nutty, caramelized depth that regular butter just can’t match. It transforms the icing from “sweet” to “complex and interesting.” If you’re short on time, regular butter works fine—just melt it and proceed with the recipe. But if you have an extra 5 minutes, please try the brown butter. It’s worth the tiny bit of effort, I promise.
Pin This Recipe!
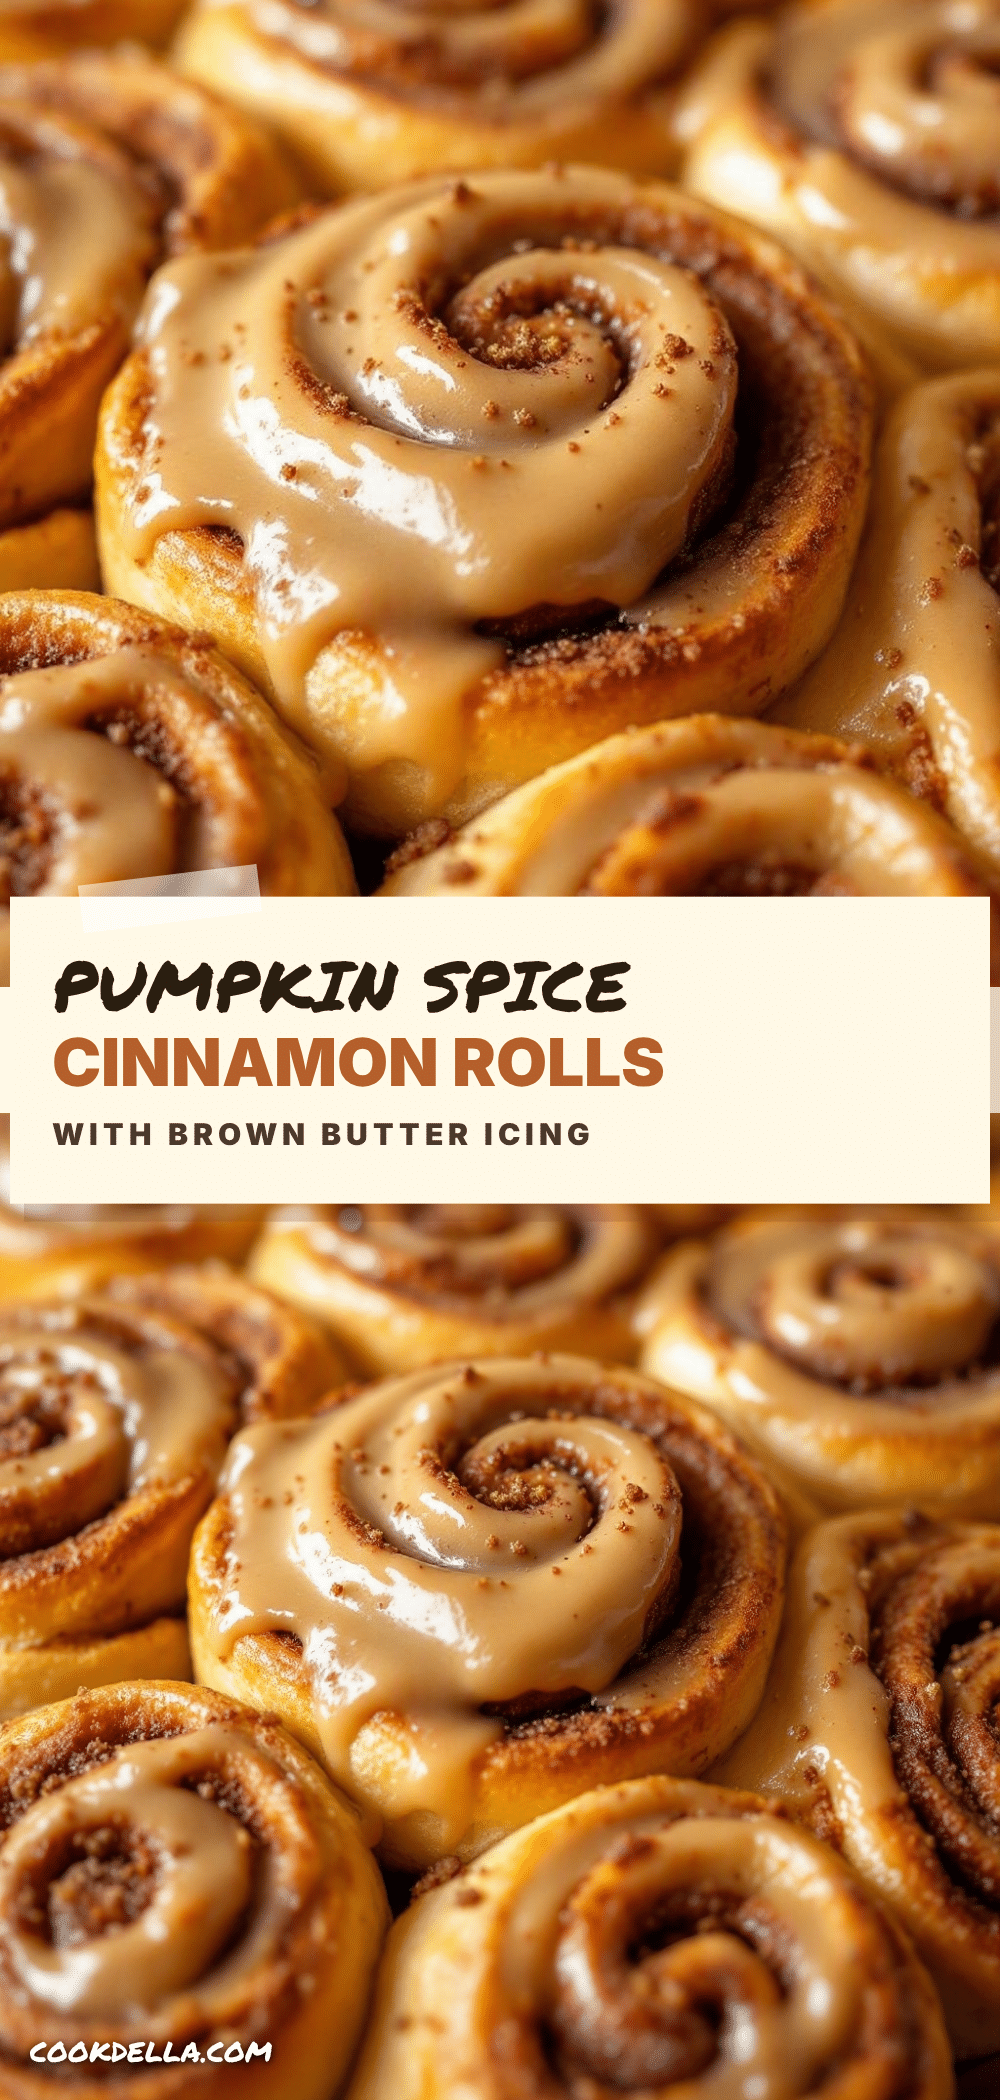
Best Perfect Pumpkin Spice Cinnamon Rolls with Easy Brown Butter Icing
These pumpkin spice cinnamon rolls feature an incredibly soft, pillow-like dough enriched with pumpkin puree, a warmly spiced filling, and a nutty brown butter icing. They’re perfect for fall mornings and make-ahead breakfasts.
- Prep Time: 30 minutes
- Cook Time: 25 minutes
- Total Time: 2 hours 30 minutes
- Yield: 12 servings 1x
- Category: Breakfast
- Cuisine: American
Ingredients
- 3 ½ cups all-purpose flour (plus extra for dusting)
- ¼ cup granulated sugar
- 2 ¼ teaspoons active dry yeast (one packet)
- ½ cup warm milk (about 110°F)
- ½ cup pumpkin puree (not pumpkin pie filling)
- ¼ cup unsalted butter, melted and slightly cooled
- 1 large egg, room temperature
- 1 teaspoon vanilla extract
- ½ teaspoon salt
- ½ cup unsalted butter, very soft but not melted (for filling)
- ¾ cup packed brown sugar (light or dark)
- 2 tablespoons pumpkin pie spice
- 1 tablespoon ground cinnamon
- Pinch of salt (for filling)
- ½ cup unsalted butter (for icing)
- 2 cups powdered sugar, sifted
- 2–3 tablespoons milk
- 1 teaspoon vanilla extract (for icing)
- Pinch of salt (for icing)
Instructions
- Proof the yeast: Warm milk to about 110°F. Sprinkle yeast and a pinch of sugar over the milk, stir gently, and let sit for 5-7 minutes until foamy.
- Make the dough: In a large bowl, whisk together pumpkin puree, melted butter, egg, vanilla, sugar, and salt until smooth. Pour in yeast mixture and stir. Add flour one cup at a time, stirring with a wooden spoon until a shaggy dough forms. Turn out onto a floured surface and knead for 6-8 minutes until soft and slightly tacky.
- First rise: Place dough in a lightly greased bowl, turning to coat. Cover and let rise in a warm spot until doubled in size, about 1 hour.
- Make the filling: In a small bowl, mix brown sugar, pumpkin pie spice, cinnamon, and salt. Set aside. Ensure butter is very soft.
- Roll and fill: Punch down dough and roll into a 12×18-inch rectangle. Spread softened butter evenly over the surface, leaving a ½-inch border on one long edge. Sprinkle sugar-spice mixture over butter and press gently.
- Roll and cut: Starting from the long edge opposite the bare border, roll dough tightly into a log. Pinch seam to seal. Use unflavored dental floss to cut into 12 equal pieces. Place in a greased 9×13-inch baking dish, cut side up.
- Second rise: Cover and let rise until puffy and touching, about 30-45 minutes. (For make-ahead, refrigerate overnight and let sit at room temperature for 30 minutes before baking.)
- Bake: Preheat oven to 350°F. Bake on middle rack for 22-25 minutes until golden brown and filling is bubbling. Tent with foil if browning too quickly. Cool in pan for 5 minutes.
- Brown the butter: In a light-colored saucepan over medium heat, melt butter, stirring constantly. Cook until it turns golden amber with brown specks and smells nutty, about 4-5 minutes. Immediately pour into a heat-safe bowl.
- Make the icing: Let brown butter cool for 2-3 minutes. Whisk in sifted powdered sugar, 2 tablespoons milk, vanilla, and salt. Add more milk if needed for pourable consistency. Pour over warm rolls.
Notes
For best results, use 100% pure pumpkin puree, not pumpkin pie filling. Brown butter can burn quickly—remove from heat as soon as it smells nutty. Rolls can be assembled the night before and refrigerated; let sit at room temperature for 30 minutes before baking. Leftover rolls keep in an airtight container at room temperature for up to 2 days. Freeze unbaked rolls after cutting for up to 3 months.
Nutrition
- Serving Size: 1 roll
- Calories: 400
- Sugar: 28
- Sodium: 200
- Fat: 18
- Saturated Fat: 11
- Carbohydrates: 52
- Fiber: 2
- Protein: 6
Keywords: pumpkin spice cinnamon rolls, brown butter icing, fall breakfast, pumpkin cinnamon rolls, homemade cinnamon rolls


