The crackle of that caramel top when you cut through it. That’s what I was after. Not just the taste, not even the pumpkin spice smell that fills the kitchen — but that specific, thin, glassy layer of salted caramel that shatters under the knife and then melts back together on the bar. It’s the whole reason these exist, honestly. Everything else — the creamy cheesecake layer, the buttery shortbread crust — is just the supporting cast for that moment.
I’d been fiddling with pumpkin cheesecake bars for a while, the kind you see everywhere in September. They were fine. Good, even. But they always felt like they were missing an edge, you know? A little too polite. Then I made a batch of salted caramel sauce for some soft baked pumpkin snickerdoodle cookies I was testing, and I had extra. I poured it over a cooling pan of cheesecake bars on a whim, and the second I saw it set into that glossy, rippled shell, I knew I’d stumbled onto something. It wasn’t a garnish. It was the whole point.
These bars aren’t complicated. They’re the kind of thing you can throw together on a Sunday afternoon while the kids are watching a movie, and then you slice into them Monday morning with your coffee and feel like you’ve got your life together (even if the laundry is still sitting in the basket). The pumpkin keeps them soft, the cheesecake keeps them rich, and that caramel? It keeps you coming back for one more sliver. And then another. I’m not here to pretend these are a health food. They’re a moment. And honestly? We all deserve a little moment.
Why You’ll Love This Recipe
Listen, I’ve tested a lot of pumpkin bars. A lot. Some are too cakey, some are too dense, and some just don’t have enough of that tangy cheesecake punch. These bars hit that sweet spot between a classic pumpkin dessert and a creamy cheesecake, with a salted caramel finish that makes them feel fancy without any real effort. Here’s why they keep showing up on my counter every fall:
- Easy No-Fuss Crust: No rolling, no chilling, no fuss. Just press a buttery shortbread crust into the pan and you’re done. It bakes up crisp and sturdy enough to hold all that creamy filling.
- That Perfect Swirl: The pumpkin and cheesecake layers stay distinct but marry together in the middle. Every bite has that ribbon of tangy cream cheese running through the spiced pumpkin. It’s not a uniform batter — and that’s the whole beauty of it.
- The Caramel Crack: The salted caramel sets into a thin, brittle shell on top that cracks when you cut it. It’s not gooey or sticky — it’s a crisp, glassy layer that adds texture and a deep, buttery saltiness that balances the sweetness.
- Simple Ingredients: You probably already have most of this in your pantry. Canned pumpkin, cream cheese, butter, sugar, eggs, and a can of sweetened condensed milk for the caramel. No trips to a specialty store.
- Perfect for Fall Gatherings: These bars travel well, slice cleanly, and look stunning on a dessert table. They’re great for Thanksgiving, Friendsgiving, or just a cozy weekend treat. I’ve brought them to potlucks and watched them disappear before the pie.
- Make-Ahead Friendly: They actually taste better the next day after the flavors have had time to meld in the fridge. You can make them two days ahead and just add the caramel topping the day you serve them.
I’m not saying these will replace your grandma’s pumpkin pie at Thanksgiving. But I am saying they might earn a permanent spot on the dessert rotation. They’re the kind of bar that makes people close their eyes after the first bite and go, “Okay, I need this recipe.” That’s the reaction you want.
What Ingredients You Will Need
This recipe uses pretty standard baking staples, but a few key ingredients really make the difference. Let’s break them down so you know exactly what to grab and why it matters.
For the Shortbread Crust
- 1 ½ cups all-purpose flour (190g) — Spoon and level it. Don’t scoop from the bag or you’ll end up with a dry, crumbly crust.
- ½ cup granulated sugar (100g) — Just enough sweetness to balance the salty caramel later.
- ¾ cup unsalted butter, cold and cubed (170g) — Cold butter is key here. It creates that tender, shortbread texture. I use Kerrygold when I’m feeling fancy, but any good unsalted butter works.
- ¼ teaspoon salt — A little salt in the crust keeps it from tasting flat.
For the Cheesecake Layer
- 16 oz cream cheese, softened to room temperature (two 8-ounce blocks) — Full-fat is non-negotiable here. Low-fat cream cheese gets grainy and won’t set up properly. Let it sit out for at least an hour before you start.
- ¾ cup granulated sugar (150g)
- 2 large eggs, room temperature — Cold eggs will seize the cream cheese mixture and leave you with lumps. Trust me on this one.
- 1 teaspoon vanilla extract — Pure vanilla, not imitation. It makes a difference in the final flavor.
For the Pumpkin Layer
- 1 cup pumpkin puree (240g) — Not pumpkin pie filling. Just plain canned pumpkin. Libby’s is my go-to because it’s consistently thick and not watery.
- ½ cup granulated sugar (100g)
- 1 large egg, room temperature
- 1 teaspoon pumpkin pie spice — You can use store-bought or make your own with cinnamon, nutmeg, ginger, and cloves.
- ½ teaspoon cinnamon — Because you can never have too much cinnamon.
- ¼ teaspoon salt — Balances the sweetness and brings out the spice.
For the Salted Caramel Topping
- ½ cup unsalted butter (113g), cut into pieces
- 1 cup packed light brown sugar (200g) — Light brown sugar gives a milder caramel flavor. Dark brown works too, but it’ll be more intense.
- ½ cup sweetened condensed milk (120ml) — This is the secret to a foolproof caramel that sets up firm. No candy thermometer needed.
- 2 tablespoons light corn syrup (optional, but helps prevent crystallization) — If you skip it, just be extra careful not to stir the caramel once it starts boiling.
- 1 teaspoon flaky sea salt — Maldon is my favorite. It’s delicate and crunchy. Regular table salt will work in a pinch, but use half the amount.
- ½ teaspoon vanilla extract
Equipment Needed
You don’t need a fancy kitchen for these bars. Here’s what you’ll actually use:
- 9×13-inch baking pan — Glass or metal both work. If using glass, reduce the oven temperature by 25°F to prevent over-browning.
- Parchment paper — Line the pan with two overlapping sheets that hang over the sides. This creates “handles” so you can lift the whole block of bars out cleanly.
- Electric hand mixer or stand mixer — You can mix the crust by hand, but the cheesecake and pumpkin layers need some power to get smooth.
- Medium saucepan — For the caramel. A heavy-bottomed one is best to prevent scorching.
- Rubber spatula — For scraping every last bit of cheesecake into the pan.
- Sharp knife — A chef’s knife works better than a butter knife for clean slices. Wipe it clean between cuts.
- Offset spatula — Not essential, but it makes spreading the caramel layer much easier.
If you don’t have a 9×13 pan, you can use two 8×8 pans and reduce the baking time by about 5-7 minutes. Just keep an eye on them. The edges should be set but the center should still have a slight jiggle.
Preparation Method
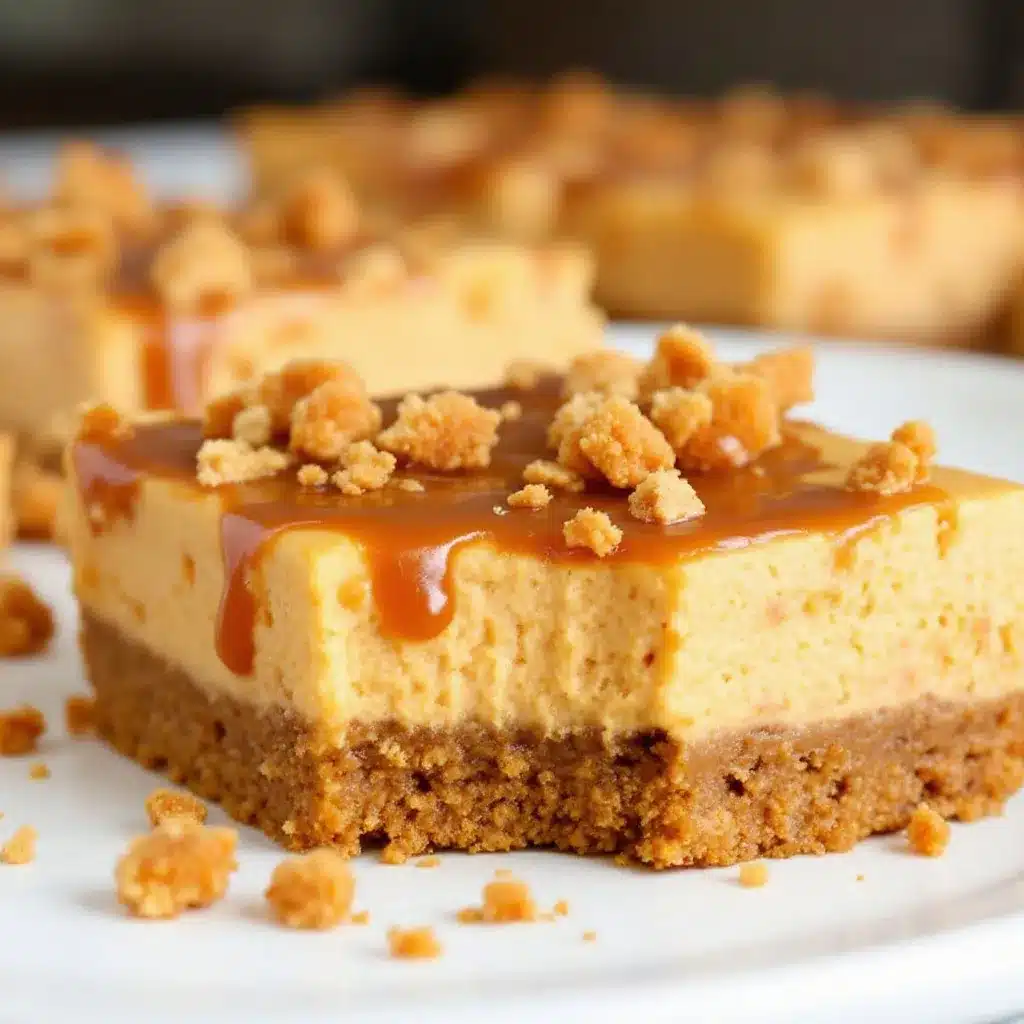
Alright, let’s make these bars. Take your time with each layer — they’re all simple, but rushing leads to lumps and cracks.
Step 1: Prep the Pan and Preheat
Preheat your oven to 350°F (175°C). Line your 9×13 pan with parchment paper, leaving a 2-inch overhang on the long sides. Lightly grease the parchment with butter or non-stick spray. This is your insurance policy against stuck bars.
Step 2: Make the Crust
In a medium bowl, whisk together the flour, sugar, and salt. Add the cold, cubed butter. Use a pastry cutter, two forks, or your fingertips to work the butter into the flour mixture until it looks like coarse meal with some pea-sized butter pieces still visible. Don’t overwork it — you want little pockets of butter that will steam and create flakiness. Dump the mixture into the prepared pan and press it firmly into an even layer. I use the bottom of a flat measuring cup to really pack it down. Bake for 18-20 minutes, until lightly golden around the edges. Set aside to cool slightly while you make the fillings.
Step 3: Make the Cheesecake Layer
In a large bowl, beat the softened cream cheese with an electric mixer on medium speed until smooth and creamy — about 2 minutes. Scrape down the sides and the bottom of the bowl. Add the sugar and beat for another minute. Add the eggs one at a time, beating just until combined after each addition. Overbeating at this stage incorporates too much air and can cause cracks. Stir in the vanilla. Set the bowl aside.
Step 4: Make the Pumpkin Layer
In a separate bowl, whisk together the pumpkin puree, sugar, egg, pumpkin pie spice, cinnamon, and salt. It should be smooth and uniform. Don’t overmix — just whisk until everything comes together.
Step 5: Assemble the Layers
Pour the cheesecake mixture over the warm crust and spread it into an even layer. Then, dollop the pumpkin mixture on top in spoonfuls. Use a butter knife or offset spatula to gently swirl the two together. You don’t want to fully combine them — just create a marbled pattern. A few figure-eight motions are all it takes. Don’t over-swirl or you’ll lose the distinct layers.
Step 6: Bake
Place the pan in the oven and bake for 35-40 minutes. The edges should be set and puffed, but the center should still jiggle slightly when you gently shake the pan. It will continue to set as it cools. If the top starts browning too quickly after 25 minutes, tent loosely with foil. Let the bars cool completely on a wire rack — about 1 hour — then transfer to the refrigerator to chill for at least 4 hours, preferably overnight. Chilling is essential for clean slices.
Step 7: Make the Salted Caramel
About 30 minutes before you’re ready to serve, make the caramel. In a medium saucepan over medium heat, melt the butter. Add the brown sugar, sweetened condensed milk, and corn syrup (if using). Stir constantly with a rubber spatula until the sugar dissolves and the mixture comes to a gentle boil. Let it boil for 4-5 minutes, stirring constantly, until it thickens and turns a deep amber color. Remove from heat and stir in the vanilla and flaky sea salt. Let it cool for 5 minutes — it will thicken as it cools.
Step 8: Top and Slice
Pour the warm caramel over the chilled bars and spread it into an even layer. Let it set at room temperature for 15-20 minutes, or until the caramel firms up into a glossy, crackly shell. Use the parchment handles to lift the entire block out of the pan. Slice into bars with a sharp knife, wiping the blade clean between cuts. For the cleanest slices, run the knife under hot water and dry it before each cut.
Cooking Tips & Techniques
I’ve made these bars about a dozen times now, and I’ve learned a few things the hard way. Here’s what I wish someone had told me:
- Don’t skip the chilling step. I know it’s tempting to cut into them while they’re still warm, but the cheesecake layer needs that cold set to hold its shape. Warm bars turn into a delicious but messy puddle. Chilling overnight gives you those clean, photogenic slices.
- Use room temperature ingredients. Cold cream cheese and cold eggs will leave you with a lumpy cheesecake batter. Set everything out on the counter an hour before you start. It’s a small step that makes a huge difference in texture.
- Watch the caramel carefully. Caramel can go from perfect to burnt in about 30 seconds. Stir constantly and don’t walk away from the stove. If you see dark specks forming, you’ve gone too far. Start over — burnt caramel has a bitter, acrid taste that ruins the whole batch.
- Use a light hand with the swirl. I once got too enthusiastic with the swirling and ended up with a muddy, marbled mess instead of distinct layers. Two or three gentle figure-eight motions are plenty. You want ribbons of pumpkin running through the cheesecake, not a fully blended batter.
- Let the caramel cool slightly before pouring. If it’s too hot, it will sink into the cheesecake layer instead of sitting on top. Let it cool for 5 minutes after boiling so it thickens enough to stay on the surface.
One time, I forgot to add the salt to the caramel and ended up with a cloyingly sweet topping. I stirred in a pinch of flaky salt after the fact, but it wasn’t the same. The salt needs to dissolve into the hot caramel to distribute evenly. Don’t skip it — it’s what makes the whole thing sing.
Variations & Adaptations
These bars are pretty forgiving, so feel free to play around. Here are some variations I’ve tried and loved:
- Gluten-Free Version: Swap the all-purpose flour in the crust with a 1:1 gluten-free baking flour. I’ve used King Arthur’s Measure for Measure and it worked perfectly. The texture is slightly more crumbly, but still delicious.
- Dairy-Free Adaptation: Use vegan butter in the crust and a dairy-free cream cheese alternative. Miyoko’s is my favorite for baking because it has a similar tang and texture. The caramel needs real butter to set properly, so this one is trickier — you could try a coconut cream-based caramel, but the texture will be different.
- Spice It Up: Add a pinch of cayenne pepper or chipotle powder to the pumpkin layer for a smoky, spicy kick. It sounds weird, but the heat pairs beautifully with the sweet caramel. Start with ⅛ teaspoon and taste the raw batter first.
- Nutty Crunch: Sprinkle ½ cup of toasted pecans or walnuts over the caramel before it sets. The nuts add a nice crunch and make the bars feel even more decadent. I did this for a Thanksgiving potluck and they were a hit.
- Chocolate Drizzle: Melt ¼ cup of dark chocolate chips with a teaspoon of coconut oil and drizzle it over the set caramel. The chocolate and pumpkin combo is surprisingly good — kind of like a pumpkin chocolate chip cookie in bar form.
If you’re feeling really ambitious, you can turn these into individual cheesecake bites using a mini muffin pan. Just press the crust into the bottom of each well, fill with the cheesecake and pumpkin mixtures, and bake for about 15 minutes. Top with caramel after chilling. They’re perfect for parties.
Serving & Storage Suggestions
These bars are best served cold, straight from the fridge. The caramel stays firm and crackly, and the cheesecake layer has that dense, creamy texture that melts on your tongue. If you let them sit at room temperature for too long, the caramel softens and gets sticky — still delicious, but not as pretty.
For serving, I like to arrange them on a white platter with a few fresh rosemary sprigs and a dusting of cinnamon. It sounds fussy, but it takes 30 seconds and makes them look like they came from a bakery. A dollop of whipped cream on the side never hurts either.
Storage: Keep leftover bars in an airtight container in the refrigerator for up to 5 days. Layer them between sheets of parchment paper so the caramel doesn’t stick together. They actually taste better on day two after the flavors have had time to meld.
Freezing: These freeze beautifully. Wrap the entire block (without the caramel topping) tightly in plastic wrap, then foil. Freeze for up to 3 months. When you’re ready to serve, thaw overnight in the fridge, then make the caramel fresh and pour it on top. Don’t freeze them with the caramel already on — it gets soft and loses its crackly texture.
Reheating: I don’t recommend reheating these. They’re meant to be served cold. If you want a warm dessert, make the bars without the caramel, warm a slice in the microwave for 10 seconds, and then drizzle fresh caramel on top. The contrast between the warm bar and the cool caramel is incredible.
Nutritional Information & Benefits
Let’s be real — these are a treat, not a health food. But here’s the breakdown if you’re curious. Per bar (assuming 16 servings):
- Calories: 385
- Fat: 22g
- Saturated Fat: 14g
- Carbohydrates: 44g
- Sugar: 33g
- Protein: 6g
- Sodium: 280mg
On the plus side, pumpkin is packed with vitamin A, fiber, and antioxidants. The cream cheese adds a decent amount of protein and calcium. And the caramel? Well, it’s mostly sugar and butter, but it makes you happy, and that counts for something, right?
If you’re watching your sugar intake, you can reduce the sugar in the cheesecake and pumpkin layers by about 25% without affecting the texture too much. The caramel is harder to adjust — it needs the sugar to set properly. Just have one bar instead of three and call it a win.
These bars are not gluten-free, dairy-free, or low-carb in their standard form, but I’ve included adaptations above if you need them. They do contain eggs, so they’re not vegan-friendly either. But for a classic fall indulgence? They’re pretty hard to beat.
Conclusion
These Ultimate Salted Caramel Pumpkin Cheesecake Bars are the kind of recipe that makes you look like a hero with very little effort. The buttery shortbread crust, the creamy cheesecake swirl, the spiced pumpkin layer, and that glassy salted caramel topping — every element works together to create something that’s greater than the sum of its parts. They’re the dessert you bring to a party and watch people hover around the table, coming back for “just one more.”
I love that this recipe feels special without being fussy. You don’t need a pastry degree or a fancy kitchen. You just need a pan, some patience for the chilling step, and a willingness to stand over a pot of bubbling caramel for a few minutes. The payoff is worth every second.
I’d love to hear how these turn out for you. Did you add the cayenne? Did you use pecans? Did you double the caramel because you couldn’t help yourself? (I won’t judge.) Drop a comment below and let me know. And if you’re looking for another fall favorite, these pair beautifully with a slice of easy one bowl chocolate chip pumpkin bread for a full pumpkin spread. Happy baking, friends.
Frequently Asked Questions
Can I use homemade pumpkin puree instead of canned?
Yes, but you’ll need to strain it first. Homemade pumpkin puree tends to be more watery than canned, which can make the pumpkin layer too loose. Spread the puree on a paper towel-lined plate, cover with another paper towel, and let it sit for 10 minutes to absorb excess moisture. Then use it as directed.
Why did my caramel turn out grainy?
Grainy caramel usually means the sugar crystallized. This happens when you stir the caramel too aggressively after it starts boiling, or when sugar crystals get splashed onto the sides of the pan. Use a clean, wet pastry brush to wipe down the sides of the pan before boiling, and stir gently once it starts bubbling. The corn syrup also helps prevent crystallization.
Can I make these bars without a mixer?
Absolutely. You can beat the cream cheese and sugar together with a wooden spoon — it just takes a little more elbow grease. Make sure the cream cheese is very soft so it blends easily. The pumpkin layer can be whisked by hand. The crust is actually easier to make by hand since you’re cutting butter into flour.
How do I get clean, sharp slices?
Chill the bars for at least 4 hours, preferably overnight. Use a sharp chef’s knife and run it under hot water, then dry it, before each cut. Wipe the blade clean between cuts. This prevents the caramel from sticking and dragging through the bars. For the cleanest slices, cut them while they’re still cold from the fridge.
Can I double this recipe for a larger crowd?
Yes, but use a half-sheet pan (18×13 inches) and double all the ingredients. The baking time will be similar — start checking at 35 minutes. You might need to make the caramel in two batches so it doesn’t overflow the saucepan. And you’ll definitely need a bigger knife for slicing.
Pin This Recipe!
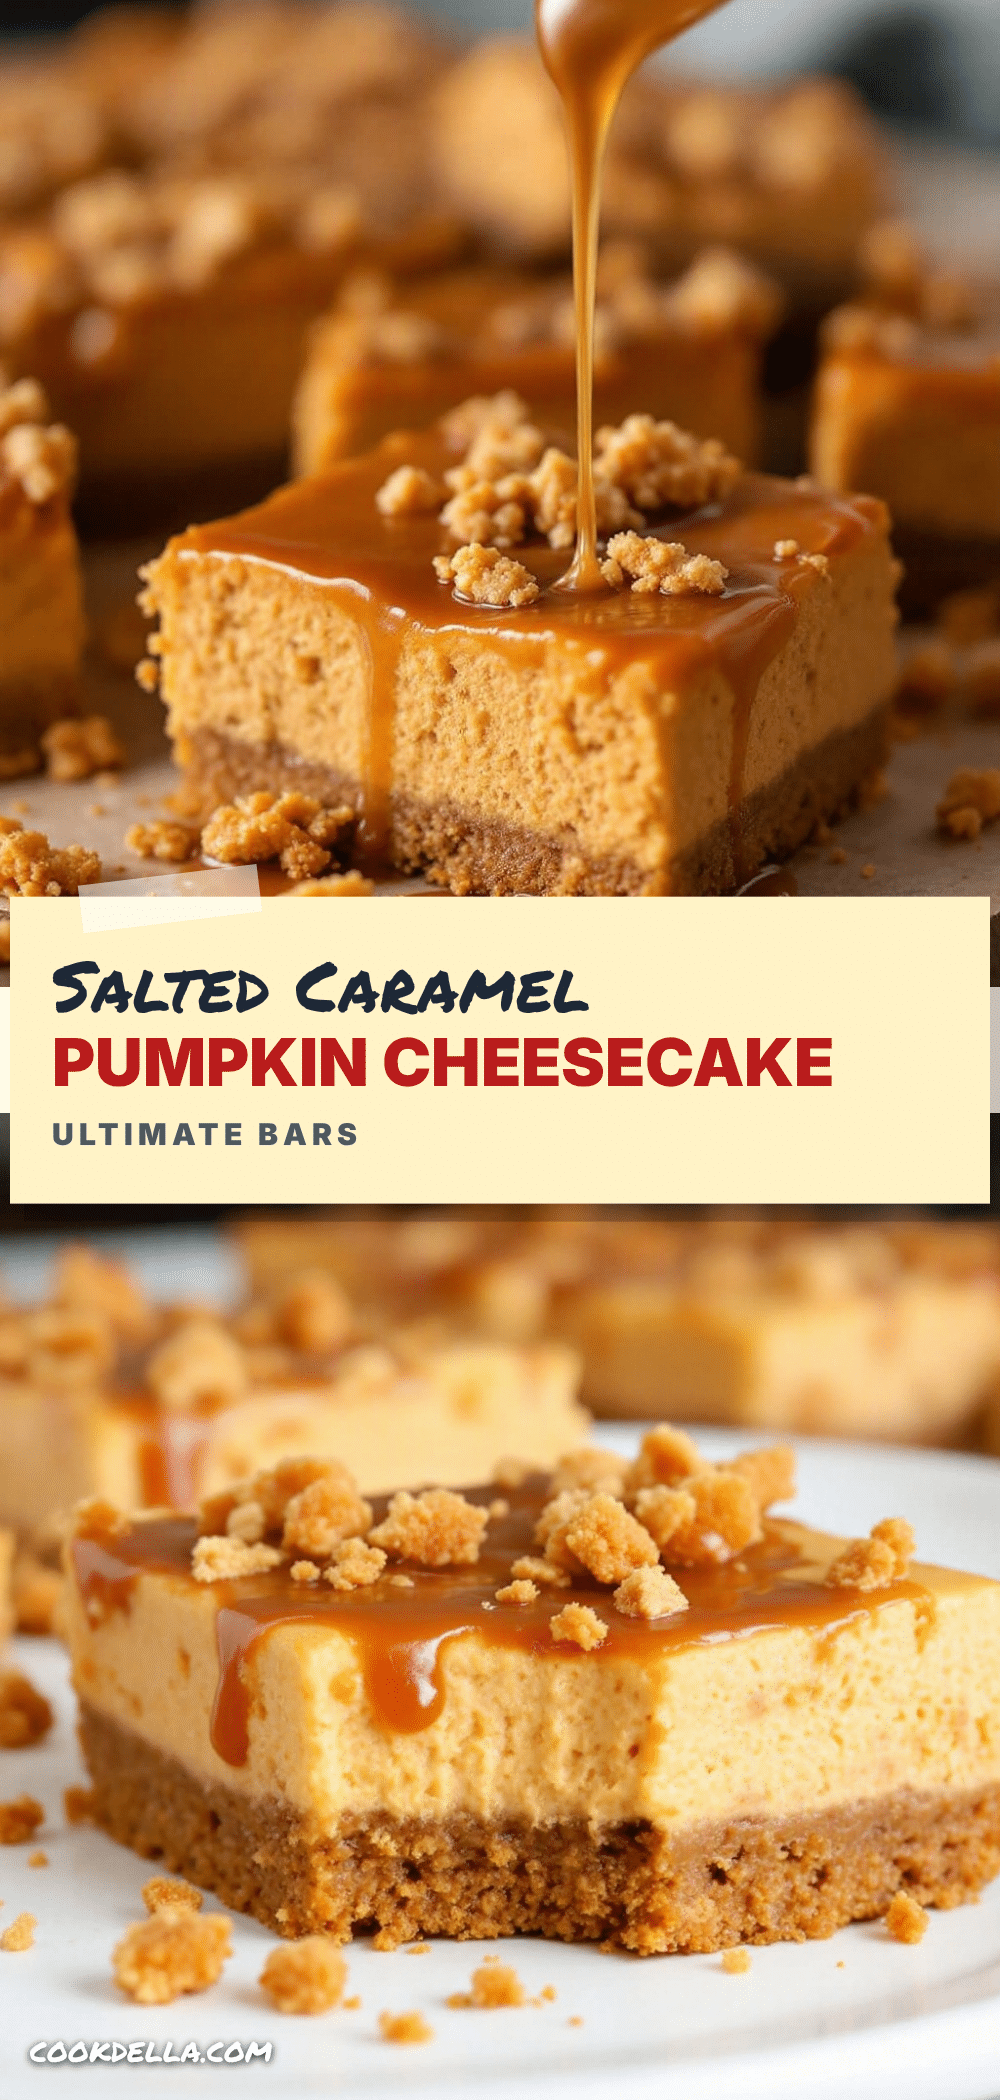
Best Salted Caramel Pumpkin Cheesecake Bars (Easy Recipe)
These salted caramel pumpkin cheesecake bars feature a buttery shortbread crust, creamy cheesecake swirl, spiced pumpkin layer, and a glassy salted caramel topping that cracks when you cut into it. They’re the perfect fall dessert that looks fancy but comes together easily.
- Prep Time: 30 minutes
- Cook Time: 40 minutes
- Total Time: 5 hours 10 minutes (includes chilling)
- Yield: 16 servings 1x
- Category: Dessert
- Cuisine: American
Ingredients
- 1 ½ cups all-purpose flour (190g)
- ½ cup granulated sugar (100g)
- ¾ cup unsalted butter, cold and cubed (170g)
- ¼ teaspoon salt
- 16 oz cream cheese, softened to room temperature (two 8-ounce blocks)
- ¾ cup granulated sugar (150g)
- 2 large eggs, room temperature
- 1 teaspoon vanilla extract
- 1 cup pumpkin puree (240g)
- ½ cup granulated sugar (100g)
- 1 large egg, room temperature
- 1 teaspoon pumpkin pie spice
- ½ teaspoon cinnamon
- ¼ teaspoon salt
- ½ cup unsalted butter (113g), cut into pieces
- 1 cup packed light brown sugar (200g)
- ½ cup sweetened condensed milk (120ml)
- 2 tablespoons light corn syrup (optional)
- 1 teaspoon flaky sea salt
- ½ teaspoon vanilla extract
Instructions
- Preheat oven to 350°F (175°C). Line a 9×13-inch baking pan with parchment paper, leaving a 2-inch overhang on the long sides. Lightly grease the parchment.
- Make the crust: In a medium bowl, whisk together flour, ½ cup sugar, and ¼ teaspoon salt. Add cold cubed butter. Use a pastry cutter or fingertips to work butter into flour until mixture resembles coarse meal with some pea-sized butter pieces. Press firmly into prepared pan. Bake 18-20 minutes until lightly golden. Set aside to cool slightly.
- Make the cheesecake layer: In a large bowl, beat softened cream cheese with an electric mixer on medium speed until smooth (about 2 minutes). Add ¾ cup sugar and beat 1 minute. Add eggs one at a time, beating just until combined. Stir in 1 teaspoon vanilla. Set aside.
- Make the pumpkin layer: In a separate bowl, whisk together pumpkin puree, ½ cup sugar, 1 egg, pumpkin pie spice, cinnamon, and ¼ teaspoon salt until smooth.
- Assemble: Pour cheesecake mixture over warm crust and spread evenly. Dollop pumpkin mixture on top in spoonfuls. Gently swirl with a knife or offset spatula using a few figure-eight motions (do not over-swirl).
- Bake 35-40 minutes until edges are set but center still jiggles slightly. If top browns too quickly, tent with foil after 25 minutes. Cool completely on a wire rack (about 1 hour), then refrigerate at least 4 hours, preferably overnight.
- Make the salted caramel: About 30 minutes before serving, melt ½ cup butter in a medium saucepan over medium heat. Add brown sugar, sweetened condensed milk, and corn syrup (if using). Stir constantly until sugar dissolves and mixture comes to a gentle boil. Boil 4-5 minutes, stirring constantly, until thickened and deep amber. Remove from heat, stir in ½ teaspoon vanilla and flaky sea salt. Cool 5 minutes.
- Pour warm caramel over chilled bars and spread evenly. Let set at room temperature 15-20 minutes until firm and crackly. Use parchment handles to lift bars out of pan. Slice with a sharp knife, wiping blade clean between cuts.
Notes
Don’t skip the chilling step—it’s essential for clean slices. Use room temperature cream cheese and eggs to avoid lumps. Watch the caramel carefully to prevent burning. Let caramel cool slightly before pouring so it stays on top of the bars. For gluten-free, use a 1:1 gluten-free flour blend. For dairy-free, use vegan butter and dairy-free cream cheese (caramel may need adjustment).
Nutrition
- Serving Size: 1 bar
- Calories: 385
- Sugar: 33
- Sodium: 280
- Fat: 22
- Saturated Fat: 14
- Carbohydrates: 44
- Fiber: 1
- Protein: 6
Keywords: pumpkin cheesecake bars, salted caramel, fall dessert, Thanksgiving dessert, easy cheesecake bars


