Four times in two weeks, and I still could not stop. The fourth focaccia came out of the oven at 10 p.m. on a Tuesday, and I stood over the counter tearing off pieces with my bare hands, burning my fingertips, not caring one bit. The crust crackled like thin glass under pressure, and the interior—soft, airy, almost custard-like—gave way with a sigh. That is when I knew this sourdough discard focaccia with rosemary had officially taken over my kitchen, my schedule, and probably my sanity.
The thing is, I have made focaccia before. Plenty of times. But this version? This one uses the discard—the unfed, tangy starter that usually gets thrown out or saved for pancakes. And somehow, that leftover goop creates a bread with a crust so shatteringly crisp it sounds like stepping on autumn leaves. The rosemary, fresh from the garden (or the sad little pot on the windowsill, no judgment), sinks into the dimpled dough and roasts until it smells like a holiday you did not plan.
I kept making it because the texture changed every time. Sometimes it was crispier. Sometimes the crumb was more open. Sometimes the salt crystals stayed on top like little jewels. I wanted to understand why it worked so well—and honestly, I just wanted to eat it again. This recipe is not about perfection. It is about what happens when you stop following rules and start trusting a sticky, bubbly mess of flour and water.
Why You Will Love This Recipe
Let me be real with you. I have tested this sourdough discard focaccia with rosemary more times than I care to admit, and each batch taught me something new. Here is why this version stands out from every other focaccia recipe you have seen:
- Uses Sourdough Discard : No need to feed your starter first. This recipe turns that tangy leftover into a bread that is far more flavorful than any quick yeast version.
- Crust That Actually Crackles : The high hydration and long fermentation create a crust so crispy it stays audible for hours. I am not exaggerating.
- Simple Pantry Ingredients : Flour, water, oil, salt, rosemary, and your discard. That is it. No fancy equipment, no specialty flours.
- Forgiving Timeline : You can speed it up or slow it down. The dough waits for you, not the other way around.
- Perfect for Sharing : Bring this to a dinner party, and people will ask for the recipe before they finish their first piece.
- Deeply Satisfying to Make : There is something meditative about stretching and folding this dough. It is messy, tactile, and weirdly therapeutic.
This is not just another bread recipe. This is the one that makes you close your eyes after the first bite, because the contrast between that glassy crust and the pillowy interior is genuinely hard to believe. It is comfort food that feels elevated without trying too hard—the kind of bread that makes a simple bowl of soup feel like a feast or turns a salad into a full meal.
What Ingredients You Will Need
This recipe uses simple, everyday ingredients to create something that tastes far more complex than it should. Here is everything you need and why each ingredient matters:
For the Dough
- 500 grams (4 cups) bread flour : Bread flour gives the focaccia its chewy structure and helps develop that crackling crust. All-purpose works in a pinch, but the crumb will be softer and less airy. I prefer King Arthur or Bob’s Red Mill for consistent results.
- 400 grams (1 2/3 cups) lukewarm water : The water temperature should feel like warm bathwater—around 80°F (27°C). Too hot, and you will kill the natural yeast in the discard. Too cold, and fermentation slows down.
- 150 grams (about 3/4 cup) sourdough discard : Use unfed discard straight from the fridge. It can be cold, bubbly, or flat—any state works. The tanginess adds depth, and the discard itself provides the leavening power over time.
- 10 grams (2 teaspoons) fine sea salt : Salt controls fermentation and strengthens the gluten structure. Do not skip it or reduce it too much, or the dough will feel slack and flavorless.
- 15 grams (1 tablespoon) olive oil : A small amount in the dough adds tenderness and helps with browning. Save the good stuff for the topping.
For the Topping
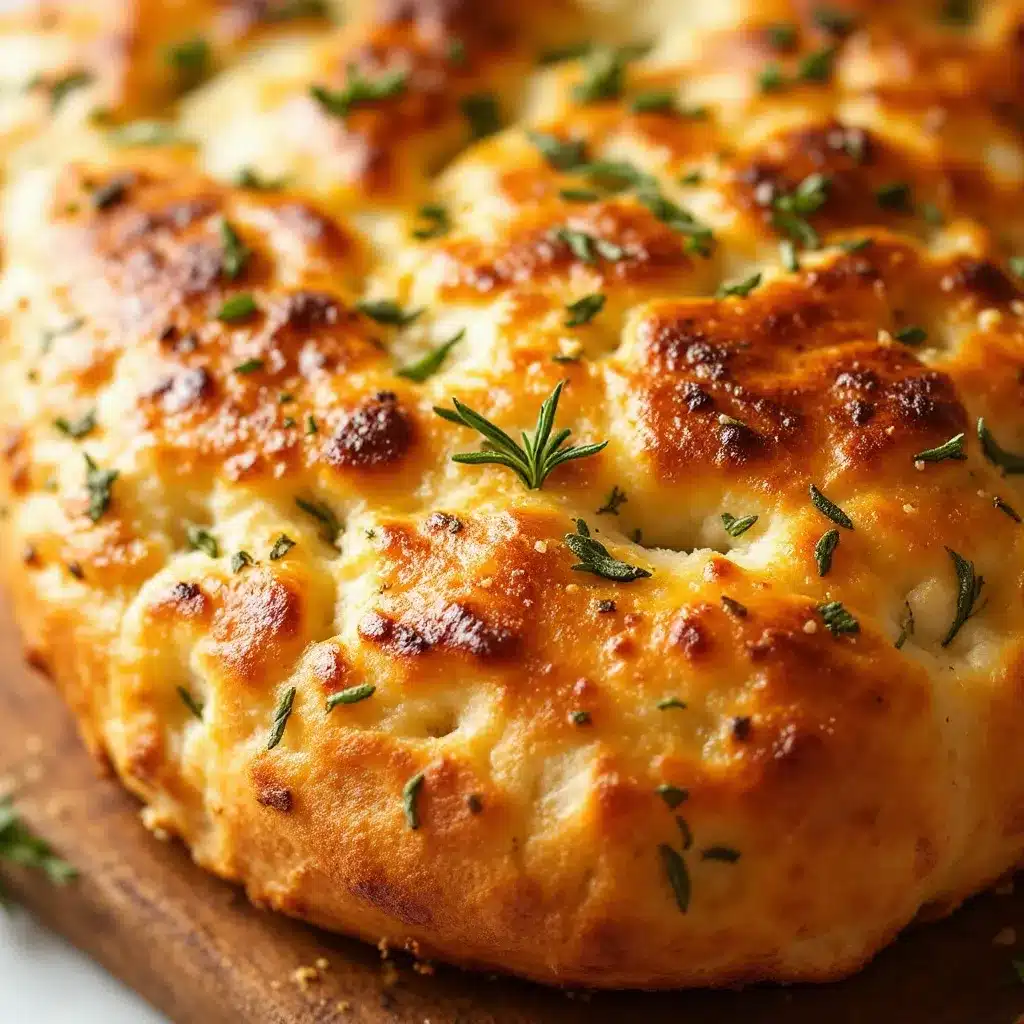
- 60 ml (1/4 cup) extra virgin olive oil : This is non-negotiable. The oil pools in the dimples and fries the bottom crust as it bakes, creating that signature crispy texture. Use a fruity, peppery oil if you have it.
- 2 tablespoons fresh rosemary, finely chopped : Fresh rosemary is best here—dried rosemary can be too sharp and woody. Strip the leaves from the stems and chop them just before using to keep the oils intact.
- Flaky sea salt (such as Maldon) : The finishing salt adds little bursts of salinity that contrast with the rich olive oil. Regular table salt will dissolve and disappear.
- Optional: 1/2 teaspoon garlic powder or 2 cloves thinly sliced garlic : Garlic and rosemary are best friends. Add garlic powder to the olive oil for a subtle background note, or press sliced garlic into the dimples for a bolder flavor.
Ingredient Notes & Substitutions
If you do not have bread flour, use all-purpose flour and expect a slightly softer crumb. The crust will still be crispy, just not quite as shattery. For a gluten-free version, I have had success with a 1:1 gluten-free flour blend, though the texture is denser and more cake-like. You can also swap the rosemary for thyme, oregano, or even dried za’atar if you want to change the flavor profile entirely. The olive oil is harder to substitute—coconut oil or butter will not create the same crispy bottom crust, but avocado oil works in a pinch.
Equipment Needed
- Large mixing bowl : Any bowl works, but a wide, shallow bowl makes mixing and folding easier.
- Digital kitchen scale : I cannot stress this enough. Measuring flour by volume leads to inconsistent hydration. A scale costs $15 and changes your baking forever.
- 9×13-inch (23×33 cm) baking pan : A metal pan conducts heat better than glass or ceramic, giving you a crispier bottom crust. If you only have glass, reduce the oven temperature by 25°F (15°C).
- Bench scraper or flexible spatula : You will use this to fold the dough and scrape it out of the bowl. A plastic dough scraper is ideal because it does not stick.
- Plastic wrap or a damp kitchen towel : To cover the dough during its long rise. A reusable beeswax wrap works too.
- Parchment paper : Optional but helpful for easy removal from the pan.
If you do not have a 9×13 pan, a 10-inch cast iron skillet works beautifully. The focaccia will be thicker and more rounded, but the crust gets even crispier thanks to the skillet’s heat retention. I have also used a half-sheet pan for a thinner, cracker-like focaccia—just reduce the bake time by 5 to 7 minutes.
Preparation Method
This recipe follows a stretch-and-fold method that builds strength without kneading. It takes time, but most of it is hands-off.
- Mix the dough (10:00 AM) : In a large bowl, combine the bread flour and salt. In a separate measuring cup, whisk together the lukewarm water and sourdough discard until mostly smooth. Pour the wet mixture into the dry ingredients and stir with a spatula or your hand until no dry flour remains. The dough will look shaggy and rough—this is normal. Cover the bowl with plastic wrap and let it rest for 30 minutes. This autolyse period allows the flour to absorb the water and start developing gluten naturally.
- First stretch and fold (10:30 AM) : Wet your hands slightly to prevent sticking. Grab one corner of the dough, stretch it up and over itself, then rotate the bowl 90 degrees and repeat. Do this four times total (all four corners). The dough will start to feel smoother and more elastic. Cover and rest for 30 minutes.
- Second stretch and fold (11:00 AM) : Repeat the same process. The dough will resist less this time and feel more cohesive. Add the 15 grams of olive oil now—drizzle it over the dough and fold it in. Cover and rest for 30 minutes.
- Third stretch and fold (11:30 AM) : The dough should be smooth, silky, and slightly bubbly. Perform one more round of folds. Cover and let the dough bulk ferment at room temperature (70-75°F / 21-24°C) for 4 to 6 hours, or until it has doubled in size and is dotted with small bubbles on the surface.
- Prepare the pan (5:00 PM, approximately) : Pour half of the extra virgin olive oil (about 2 tablespoons) into your 9×13 pan and spread it evenly. Gently tip the risen dough into the pan—do not deflate it too much. Let it sit for 10 minutes, then use oiled fingertips to gently stretch the dough to the edges of the pan. If it resists, let it rest for another 10 minutes and try again. Cover and let it proof for 1 to 2 hours, until the dough is puffy and fills the pan completely.
- Dimple the dough (6:30 PM) : Preheat your oven to 450°F (230°C) with a rack in the middle position. Drizzle the remaining olive oil over the dough. Dip your fingertips in oil and press straight down into the dough, creating deep dimples all the way to the bottom of the pan. Space them about 2 inches apart. Sprinkle the chopped rosemary evenly over the surface, followed by a generous pinch of flaky sea salt. If using garlic slices, press them into the dimples now.
- Bake (6:45 PM) : Place the pan on the middle rack and bake for 22 to 28 minutes, rotating halfway through. The focaccia is done when the top is deep golden brown, the edges are darker and pulling away from the pan, and the bottom sounds hollow when tapped. If you want an even crispier bottom, remove the focaccia from the pan and place it directly on the oven rack for the last 3-4 minutes of baking.
- Cool (7:10 PM) : Let the focaccia cool in the pan for 5 minutes, then transfer it to a wire rack. Do not skip this step—the steam needs to escape or the crust will soften. Let it cool for at least 15 minutes before cutting, though I know it is hard to wait.
Sensory Cue : During the final proof, the dough should look pillowy and jiggle slightly when you shake the pan. When you dimple it, you should hear a soft pop as the air pockets collapse. The baking focaccia will smell like toasted olive oil and piney rosemary—your whole kitchen will smell like a trattoria.
Cooking Tips & Techniques
I learned most of these the hard way, so you do not have to.
Do not rush the bulk fermentation. The first time I made this, I tried to speed things up by using warm water and placing the bowl near the oven. The dough rose quickly but had no depth of flavor, and the crust was pale and chewy instead of crispy. The tangy flavor of sourdough discard develops over time—give it at least 6 hours at room temperature, or even better, refrigerate it overnight after the folds and bake it the next day. The cold fermentation builds flavor and makes the crust even crispier.
Oil is your best friend. I used to be stingy with the olive oil, thinking it would make the focaccia greasy. Big mistake. The oil in the pan fries the bottom of the dough as it bakes, creating that crackling crust. The oil on top keeps the surface from drying out and helps the rosemary crisp up without burning. Use enough oil that you see a thin layer pooling in the pan before you add the dough.
Wet hands are essential. If you try to stretch and fold dry dough with dry hands, you will end up with a sticky mess on your fingers and a deflated blob in the bowl. Keep a small bowl of water next to your work surface and dip your fingers before each fold. It makes the process so much smoother.
Watch the salt timing. Adding the flaky salt before baking is fine, but if you add it too early, it can dissolve into the oil and lose its texture. I sprinkle the salt right before the pan goes into the oven. If you want a more intense salt hit, add a little more immediately after baking while the oil is still hot.
One mistake I made : I once baked the focaccia on a lower rack because I was also roasting vegetables. The bottom burned before the top was golden. Keep the pan on the middle rack for even heat distribution, and if your oven runs hot, check it at the 20-minute mark.
Variations & Adaptations
This recipe is surprisingly flexible. Here are some ways to change it up:
- Rosemary and Sea Salt (Classic) : The version I make most often. The rosemary gets slightly crispy in the hot oil, and the salt flakes add little pops of salinity. It is simple, elegant, and never boring.
- Everything Bagel Focaccia : After dimpling, sprinkle the dough with everything bagel seasoning (sesame seeds, poppy seeds, dried garlic, dried onion, and salt). The seeds toast in the oven and add incredible crunch. This version is dangerously addictive.
- Caramelized Onion and Thyme : Slow-cook 2 large sliced onions in olive oil for 30 minutes until deeply golden, then dot them over the dough before baking. Swap the rosemary for fresh thyme. The sweetness of the onions balances the tangy sourdough beautifully.
- Gluten-Free Adaptation : Use a high-quality gluten-free bread flour blend (I like Cup4Cup). Increase the water by 25 grams (2 tablespoons) because gluten-free flours absorb more liquid. The texture will be softer and less airy, but the flavor is still excellent.
- Low-Carb / Keto Version : This is trickier because traditional focaccia relies on gluten structure. I have had moderate success using a blend of almond flour, coconut flour, and psyllium husk, but the texture is more like a dense flatbread. It works as a vehicle for dips, just do not expect the same airy crumb.
I once made a version with sun-dried tomatoes and kalamata olives pressed into the dimples, and it was so good I ate half the pan standing over the counter. Do not be afraid to experiment—the dough is forgiving enough to handle most add-ins.
Serving & Storage Suggestions
This sourdough discard focaccia with rosemary is best served warm, within an hour of baking. The crust is at its crispiest, and the interior is still soft and steamy. I love serving it alongside a bowl of tomato soup or a hearty minestrone—the bread soaks up the broth without getting soggy. It also makes an incredible base for sandwiches; slice it horizontally and fill it with roasted vegetables, fresh mozzarella, and pesto for a lunch that feels like a treat.
If you are serving it as an appetizer, set out a small dish of high-quality olive oil mixed with balsamic vinegar for dipping. The focaccia is also fantastic with a simple salad of arugula, lemon juice, and shaved Parmesan on the side—the peppery greens cut through the richness of the oil. For a heartier meal, pair it with this crispy lemon rosemary salmon sheet pan dinner; the flavors complement each other perfectly, and you can use the focaccia to soak up the lemony pan juices.
Storage : Leftover focaccia keeps well at room temperature for up to 2 days. Wrap it loosely in parchment paper or foil—do not seal it in plastic, or the crust will turn soft and rubbery. To reheat, place slices directly on the oven rack at 350°F (175°C) for 5 to 7 minutes. The microwave will ruin the texture, so avoid it unless you are in a desperate hurry.
Freezing : Focaccia freezes beautifully. Cool it completely, wrap it tightly in plastic wrap and then foil, and freeze for up to 3 months. To serve, thaw at room temperature and reheat in a 350°F oven for 10 minutes. The crust comes back to life almost perfectly.
One thing I have noticed: the flavor actually deepens on the second day. The sourdough tang becomes more pronounced, and the rosemary mellows into something more herbal and subtle. If you can resist eating it all in one sitting, day-old focaccia makes incredible croutons or breadcrumbs.
Nutritional Information & Benefits
This recipe makes 12 generous servings. Per serving (one piece):
- Calories : 210
- Total Fat : 9g
- Saturated Fat : 1.5g
- Carbohydrates : 28g
- Fiber : 1.5g
- Protein : 5g
- Sodium : 320mg
While focaccia is not a health food, it does offer some surprising benefits. The sourdough fermentation process breaks down phytic acid in the flour, making the minerals more bioavailable and easier for your body to absorb. This also means the bread has a lower glycemic impact compared to yeast-risen breads—your blood sugar will not spike quite as dramatically. The olive oil provides heart-healthy monounsaturated fats, and rosemary contains antioxidants like rosmarinic acid that have anti-inflammatory properties.
For those watching their sodium, you can reduce the flaky salt on top, but keep the salt in the dough for proper fermentation. This recipe is naturally dairy-free and egg-free, and it can be made vegan by using a vegan-friendly sourdough starter (most are, but check your discard). It is not gluten-free in its standard form, but the adaptation above works for those who need it.
Conclusion
This sourdough discard focaccia with rosemary has become my go-to recipe for so many reasons. It uses up the discard that would otherwise go to waste, it requires no special skills or equipment, and it produces bread that genuinely surprises people. The first time I served it at a dinner party, my friend took one bite and said, “This is the best bread I have ever eaten,” and I believed her because I felt the same way.
What I love most about this recipe is how forgiving it is. You can rush it or slow it down, add different toppings, bake it in different pans, and it still turns out beautiful. It is the kind of bread that makes you feel like a professional baker even if you have never made bread before in your life. The crackling crust, the airy crumb, the fragrant rosemary—it all comes together in a way that feels almost magical.
I would love to hear how yours turns out. Did you try a different herb? Add toppings? Bake it in a cast iron skillet? Drop a comment below and let me know what worked for you. And if you are looking for more ways to use your sourdough discard, check out this collection of easy homemade recipes for more inspiration. Happy baking, friends—your kitchen is about to smell incredible.
Frequently Asked Questions
Can I use active sourdough starter instead of discard?
Yes, absolutely. If you use active, bubbly starter, you may need to reduce the bulk fermentation time slightly because the yeast is more active. The flavor will be milder and less tangy, but the texture will be even airier. Just watch the dough, not the clock.
Why is my focaccia dense and not airy?
This usually happens for one of three reasons: not enough water (hydration is too low), under-fermentation (the dough did not rise long enough), or over-handling (you deflated the dough when transferring it to the pan). Next time, make sure your dough feels very wet and sticky after mixing, and be gentle when moving it to the oiled pan.
Can I make this recipe without a kitchen scale?
You can, but I do not recommend it. Flour volume measurements vary wildly depending on how you scoop. One cup of flour can weigh anywhere from 120 to 150 grams. For a recipe that relies on precise hydration, a $15 scale is worth the investment. If you must measure by volume, spoon the flour into the cup and level it off—do not scoop directly from the bag.
How do I know when the focaccia is fully baked?
The top should be deep golden brown with darker edges. The bottom should sound hollow when you tap it. If you have an instant-read thermometer, the internal temperature should read 205-210°F (96-99°C). When in doubt, bake it 2 to 3 minutes longer—under-baked focaccia will be gummy in the center.
Can I add cheese to this focaccia?
Yes, and it is fantastic. Sprinkle shredded Parmesan or crumbled feta over the dough after dimpling, before baking. For a more decadent version, dot small cubes of fresh mozzarella into the dimples. Keep in mind that cheese adds moisture, so the bottom crust may be slightly less crispy. Bake on the lower rack for the last 5 minutes to compensate.
Pin This Recipe!
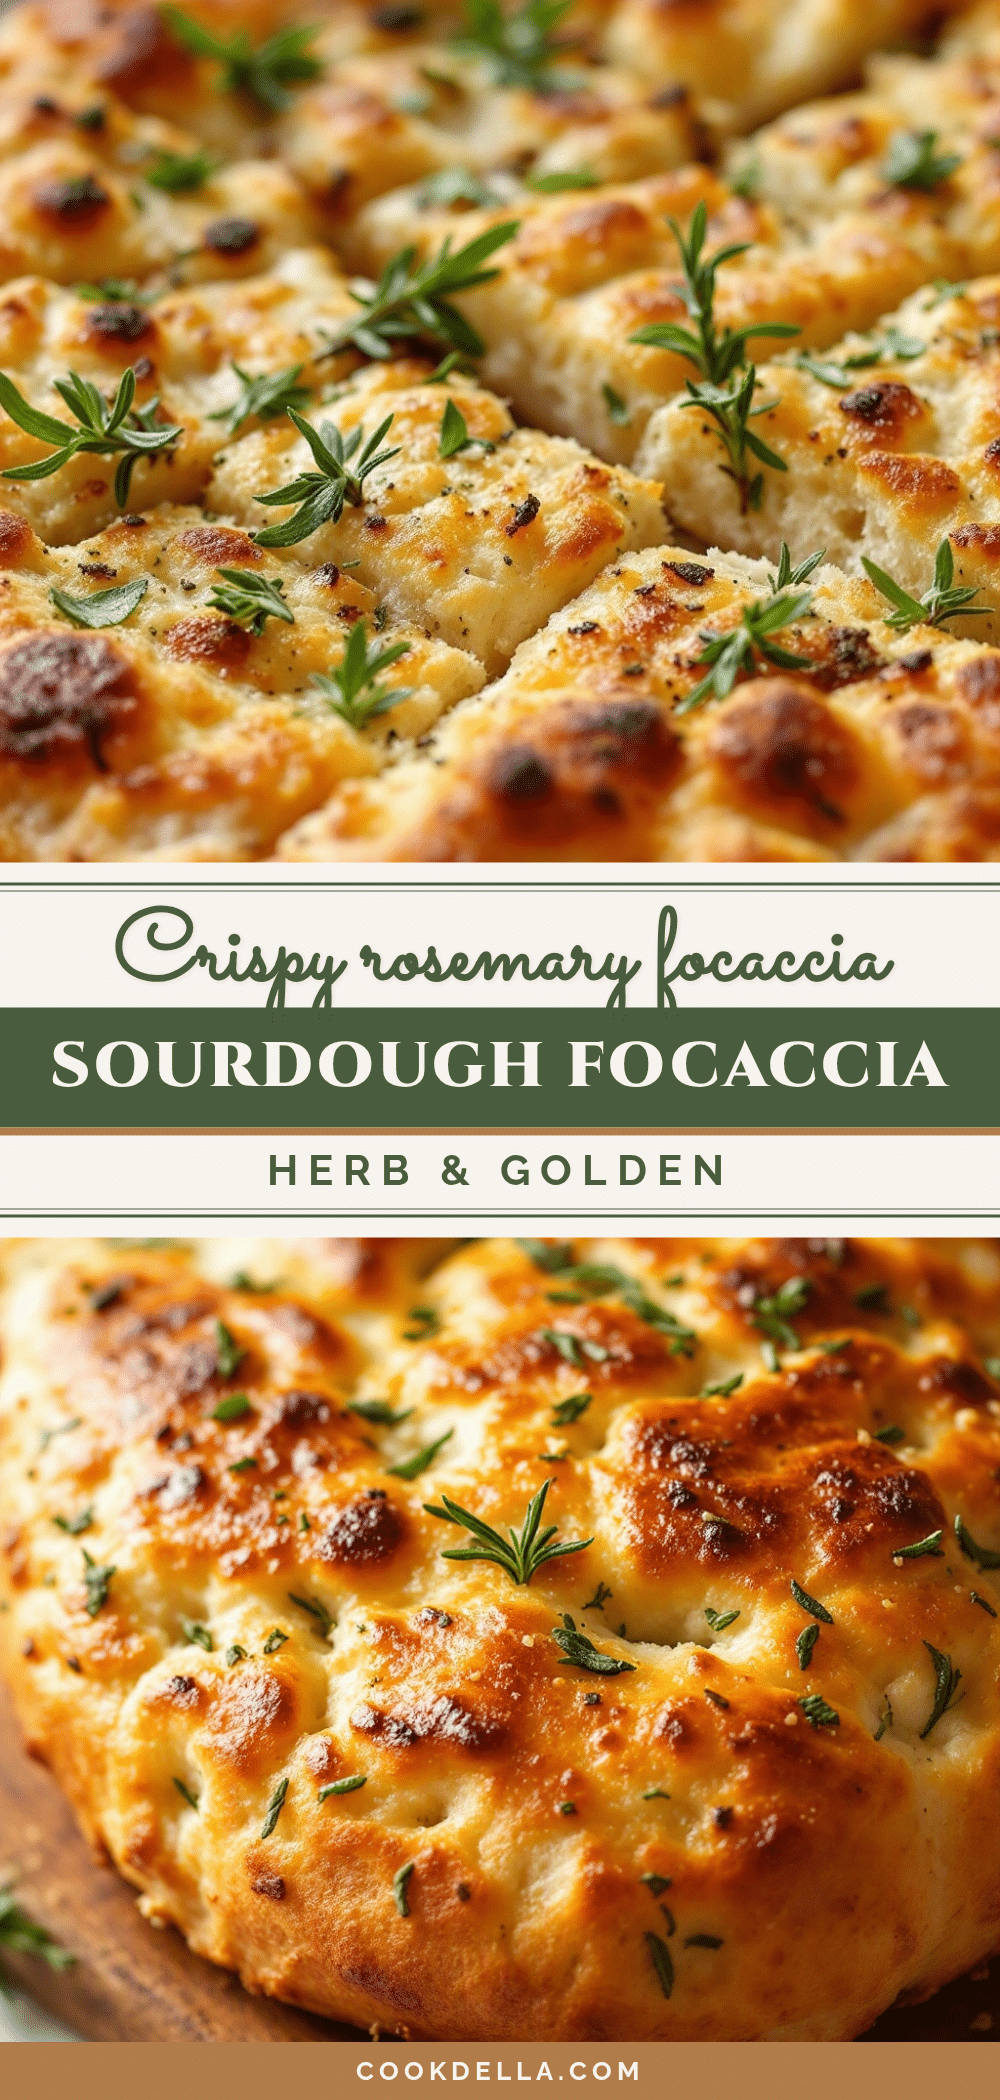
Crispy Homemade Sourdough Discard Focaccia with Rosemary
This sourdough discard focaccia with rosemary uses unfed starter to create a bread with a shatteringly crisp crust and a soft, airy interior. It’s a forgiving, deeply flavorful recipe that turns simple pantry ingredients into an unforgettable loaf.
- Prep Time: 15 minutes
- Cook Time: 25 minutes
- Total Time: 9 hours 30 minutes (includes fermentation and proofing)
- Yield: 12 servings 1x
- Category: Bread
- Cuisine: Italian
Ingredients
- 500 grams (4 cups) bread flour
- 400 grams (1 2/3 cups) lukewarm water
- 150 grams (about 3/4 cup) sourdough discard
- 10 grams (2 teaspoons) fine sea salt
- 15 grams (1 tablespoon) olive oil
- 60 ml (1/4 cup) extra virgin olive oil
- 2 tablespoons fresh rosemary, finely chopped
- Flaky sea salt (such as Maldon)
- Optional: 1/2 teaspoon garlic powder or 2 cloves thinly sliced garlic
Instructions
- Mix the dough (10:00 AM): In a large bowl, combine the bread flour and salt. In a separate measuring cup, whisk together the lukewarm water and sourdough discard until mostly smooth. Pour the wet mixture into the dry ingredients and stir with a spatula or your hand until no dry flour remains. The dough will look shaggy and rough—this is normal. Cover the bowl with plastic wrap and let it rest for 30 minutes.
- First stretch and fold (10:30 AM): Wet your hands slightly to prevent sticking. Grab one corner of the dough, stretch it up and over itself, then rotate the bowl 90 degrees and repeat. Do this four times total (all four corners). The dough will start to feel smoother and more elastic. Cover and rest for 30 minutes.
- Second stretch and fold (11:00 AM): Repeat the same process. The dough will resist less this time and feel more cohesive. Add the 15 grams of olive oil now—drizzle it over the dough and fold it in. Cover and rest for 30 minutes.
- Third stretch and fold (11:30 AM): The dough should be smooth, silky, and slightly bubbly. Perform one more round of folds. Cover and let the dough bulk ferment at room temperature (70-75°F / 21-24°C) for 4 to 6 hours, or until it has doubled in size and is dotted with small bubbles on the surface.
- Prepare the pan (5:00 PM, approximately): Pour half of the extra virgin olive oil (about 2 tablespoons) into your 9×13 pan and spread it evenly. Gently tip the risen dough into the pan—do not deflate it too much. Let it sit for 10 minutes, then use oiled fingertips to gently stretch the dough to the edges of the pan. If it resists, let it rest for another 10 minutes and try again. Cover and let it proof for 1 to 2 hours, until the dough is puffy and fills the pan completely.
- Dimple the dough (6:30 PM): Preheat your oven to 450°F (230°C) with a rack in the middle position. Drizzle the remaining olive oil over the dough. Dip your fingertips in oil and press straight down into the dough, creating deep dimples all the way to the bottom of the pan. Space them about 2 inches apart. Sprinkle the chopped rosemary evenly over the surface, followed by a generous pinch of flaky sea salt. If using garlic slices, press them into the dimples now.
- Bake (6:45 PM): Place the pan on the middle rack and bake for 22 to 28 minutes, rotating halfway through. The focaccia is done when the top is deep golden brown, the edges are darker and pulling away from the pan, and the bottom sounds hollow when tapped. If you want an even crispier bottom, remove the focaccia from the pan and place it directly on the oven rack for the last 3-4 minutes of baking.
- Cool (7:10 PM): Let the focaccia cool in the pan for 5 minutes, then transfer it to a wire rack. Do not skip this step—the steam needs to escape or the crust will soften. Let it cool for at least 15 minutes before cutting, though I know it is hard to wait.
Notes
Do not rush the bulk fermentation; the tangy flavor develops over time. Use enough olive oil to create a thin layer in the pan for a crispy bottom crust. Keep hands wet when handling the dough to prevent sticking. Add flaky salt just before baking to preserve its texture. For an even crispier bottom, remove the focaccia from the pan and place it directly on the oven rack for the last 3-4 minutes of baking.
Nutrition
- Serving Size: 1 piece (1/12 of rec
- Calories: 210
- Sodium: 320
- Fat: 9
- Saturated Fat: 1.5
- Carbohydrates: 28
- Fiber: 1.5
- Protein: 5
Keywords: sourdough discard focaccia, rosemary focaccia, crispy focaccia, homemade focaccia, sourdough bread, discard recipe


