I want wings. Not just any wings—the kind that shatter when you bite into them, the kind where the honey-garlic glaze sticks to your fingers and you don’t even care. But I also want to stay in my sweatpants and not deal with a vat of hot oil on the stove. That’s the whole internal debate happening in my head at 2 PM on a Sunday before the big game. The solution? It has to be baked. It has to be crispy. And it absolutely has to be smothered in that sticky-sweet-savory honey garlic situation that makes people hover around the snack table. These crispy honey garlic baked chicken wings are what happened when I refused to compromise on texture or flavor. No deep fryer, no mess, just pure wing perfection that’ll have everyone asking for the recipe before halftime.
Look, I’ve tested a lot of wing methods over the years. I’ve tried the baking powder trick, the cornstarch dusting, the low-and-slow then high-heat finish. I’ve even attempted the air fryer route (which works, don’t get me wrong). But these wings? They hit different. The skin gets this incredible crackly crunch while the meat stays juicy, and that honey garlic glaze caramelizes just enough to create a glossy, finger-licking coating that makes you forget you’re eating baked wings. It’s the kind of snack that disappears fast, so you might want to make a double batch. Trust me on that one.
Why You’ll Love This Recipe
I’ve made these wings for three different game day gatherings now, and every single time, someone asks if I ordered them from a restaurant. That’s the kind of energy we’re working with here. Here’s why these crispy honey garlic baked chicken wings deserve a permanent spot in your game day rotation:
- Oven-Baked, Not Fried : You get that same satisfying crunch without dealing with splattering oil or the smell of fried food lingering in your house for days. Your kitchen stays clean, and your wings stay crispy.
- Simple Pantry Ingredients : The glaze comes together with honey, soy sauce, garlic, and a few staples you probably already have. No fancy Asian ingredients required—just honest, bold flavors that work.
- Perfect for Game Day : These wings hold up beautifully on a buffet table. They stay crispy longer than sauced wings typically do, which is a game-changer when you’re hosting a crowd.
- Crowd-Pleaser Status : I’ve served these to picky eaters, wing snobs, and people who claim they “don’t like baked wings.” They all went back for seconds. And thirds.
- Unbelievably Crispy : The secret is a combination of baking powder and a low-temp then high-temp roasting method. It sounds fancy, but honestly, it’s just smart cooking.
What makes these wings different from every other honey garlic recipe out there? It’s the double-bake technique. Most recipes just toss wings in sauce and call it a day. I take the extra step of baking them until they’re perfectly crisp, then tossing them in a reduced glaze that clings to every nook and cranny. The result is a wing that’s crispy on the outside, tender on the inside, and coated in a glossy, caramelized honey garlic sauce that’s equal parts sweet, savory, and sticky. It’s the kind of wing that makes you close your eyes after the first bite. No exaggeration.
Plus, these wings are perfect for game day because they’re make-ahead friendly. You can par-bake them earlier in the day, then finish them with the glaze right before serving. That means less stress when your friends show up early and you’re still figuring out how to arrange the football charcuterie board.
What Ingredients You Will Need
This recipe uses simple, everyday ingredients to create something that tastes way more complex than it actually is. The magic happens when these humble components come together in the oven.
For the Wings
- 3 pounds chicken wings (about 15-18 wings, separated into flats and drumettes) — Look for party wings if you want to skip the cutting step. I prefer buying whole wings and separating them myself—it’s cheaper and you get better control over the pieces.
- 1 ½ teaspoons baking powder — This is not baking soda! Baking powder is the key to crispy skin. It raises the pH of the skin, helping it brown and crisp up beautifully. Aluminum-free baking powder works best here.
- 1 teaspoon salt — I use kosher salt for its clean flavor and easy pinching. Fine table salt works too, just use slightly less.
- ½ teaspoon black pepper — Freshly ground is always better, but pre-ground works in a pinch.
- ½ teaspoon garlic powder — Not the same as the fresh garlic in the glaze. This adds a subtle background savory note to the wings themselves.
For the Honey Garlic Glaze
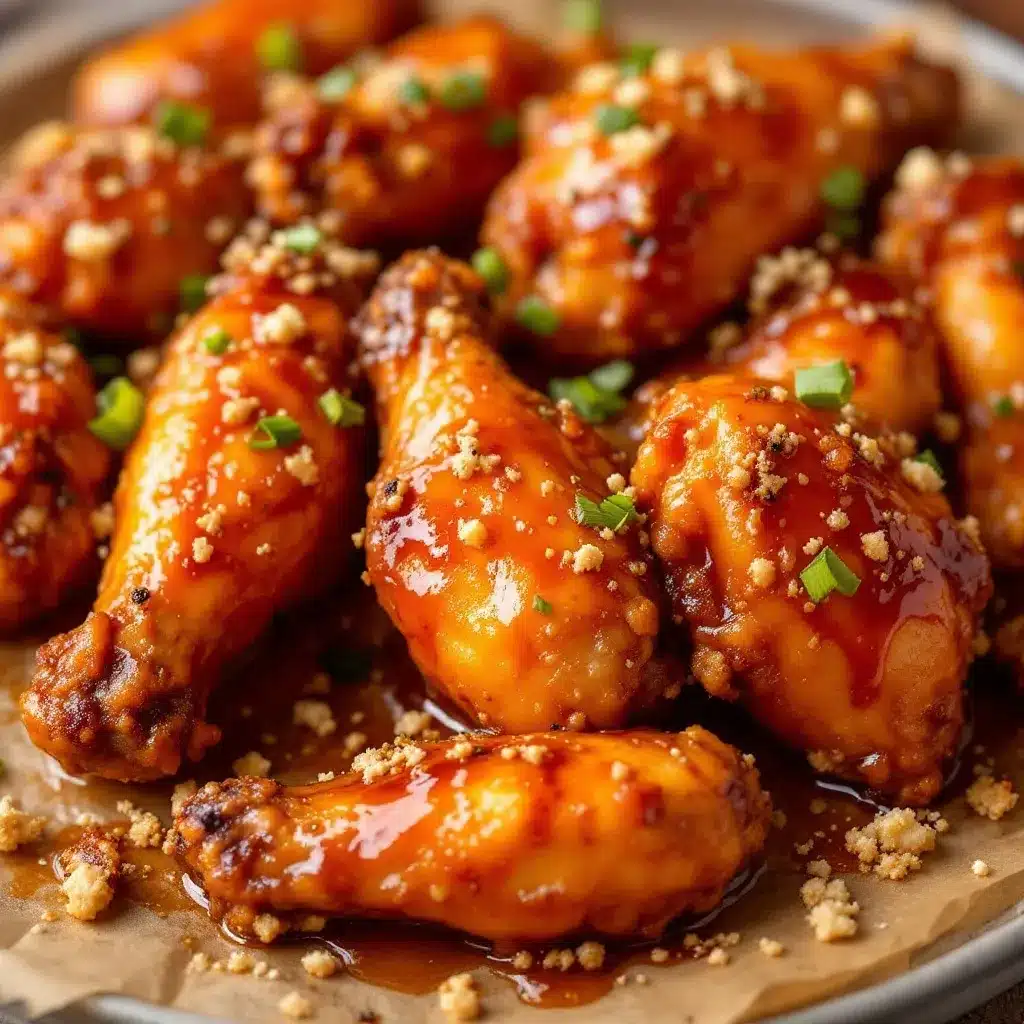
- ⅓ cup honey — Use a good quality honey here. The floral notes really come through in the finished glaze. Local honey is my go-to, but any pure honey works.
- ¼ cup low-sodium soy sauce — Regular soy sauce is fine, but low-sodium lets you control the salt level better. Tamari or coconut aminos work if you’re gluten-free.
- 4 cloves garlic, minced — Fresh garlic is non-negotiable here. The jarred stuff won’t give you the same punch. I’ve tried both, and fresh wins every time.
- 2 tablespoons unsalted butter — Adds richness and helps the glaze coat the wings evenly. Salted butter works too, just reduce the added salt slightly.
- 1 tablespoon rice vinegar — A splash of acidity balances the sweetness. Apple cider vinegar or white wine vinegar can substitute in a pinch.
- 1 teaspoon sesame oil — Optional but highly recommended. It adds that nutty, toasty flavor that makes the glaze taste like it came from your favorite takeout spot.
- Pinch of red pepper flakes — Optional, for a subtle kick. I add them because I like a little heat with my sweet, but feel free to skip or double them.
For Garnish
- 2 green onions, sliced — Adds freshness and color. Don’t skip these—they make the wings look restaurant-worthy.
- 1 tablespoon sesame seeds — Toasted sesame seeds add a nice crunch and visual appeal.
I want to mention that I’ve tested this recipe with different wing sizes, and party wings (already separated) from Costco or your local grocery store work perfectly. Just make sure to pat them really dry before seasoning—that’s the number one tip for crispy skin.
Equipment Needed
You don’t need a professional kitchen to make these wings. Here’s what you’ll need:
- Baking sheet — A half-sheet pan (18×13 inches) is ideal. It gives the wings enough space to spread out without steaming each other.
- Wire rack — This is the secret weapon for crispy wings. Placing the wings on a wire rack set inside the baking sheet allows hot air to circulate underneath, preventing soggy bottoms. If you don’t have one, you can still make these wings—just flip them halfway through and expect slightly less crispiness.
- Large mixing bowl — For tossing the wings with the seasoning mixture.
- Small saucepan — For making the honey garlic glaze. A non-stick pan works best for easy cleanup.
- Tongs — For flipping the wings and tossing them in the glaze. Silicone-tipped tongs won’t scratch your baking sheet.
- Paper towels — For drying the wings thoroughly. This step is crucial, so don’t skimp here.
- Pastry brush — Optional, but helpful for applying the glaze evenly if you prefer brushing over tossing.
I’ve made these wings without a wire rack before, and honestly, they still turned out great—just not AS crispy. If you’re in the market for one, look for an oven-safe wire rack that fits your baking sheet. They’re usually under $10 and worth every penny for recipes like this.
Preparation Method
Let’s walk through this step by step. I’ll include all the little details I’ve learned from making these wings more times than I care to admit.
- Preheat your oven to 250°F (120°C). I know that sounds low, but trust the process. The low initial temperature renders the fat slowly, which gives you that ultra-crispy skin later. Position your oven rack in the middle position.
- Prepare the wings. If you bought whole wings, separate them at the joints. Cut through the joint between the drumette and flat, then cut through the joint between the flat and tip. Discard the wing tips or save them for making stock. Pat each piece completely dry with paper towels—this is the most important step for crispy skin. Wet wings = steamed wings, and nobody wants that.
- Season the wings. In a large mixing bowl, combine the baking powder, salt, pepper, and garlic powder. Add the dried wings and toss until each piece is evenly coated. Don’t rush this step—make sure every surface is covered. The baking powder mixture should look like a light dusting on each wing.
- Arrange on the wire rack. Place the wire rack over your baking sheet (line the baking sheet with foil for easier cleanup). Arrange the wings in a single layer, making sure they’re not touching each other. Crowding the pan will trap steam and prevent crisping. If you need to use two baking sheets, do it.
- Bake at 250°F for 30 minutes. This slow bake renders the fat and starts the crisping process. Don’t open the oven door during this time—you want to maintain an even temperature.
- Increase oven temperature to 425°F (220°C). After 30 minutes, crank up the heat. Bake for another 40-45 minutes, flipping the wings halfway through (at the 20-minute mark). The wings should be deep golden brown and the skin should look crackly and dry. If they’re not brown enough, give them another 5-10 minutes. Every oven is different, so trust your eyes more than the timer.
- Make the honey garlic glaze. While the wings are baking their final stretch, combine the honey, soy sauce, minced garlic, butter, rice vinegar, sesame oil, and red pepper flakes in a small saucepan. Heat over medium heat, stirring occasionally, until the butter melts and the mixture comes to a gentle simmer. Let it bubble for 3-4 minutes until it thickens slightly—it should coat the back of a spoon but still be pourable. Remove from heat and set aside.
- Toss the wings in the glaze. Once the wings are done, transfer them to a large clean bowl. Pour the warm glaze over the wings and toss gently with tongs until every wing is coated. Don’t toss too aggressively—you don’t want to break the crispy skin you worked so hard to achieve.
- Optional: Broil for extra stickiness. If you want that caramelized, sticky finish, arrange the glazed wings back on the wire rack and broil for 2-3 minutes. Watch them closely—the sugar in the honey can burn quickly. This step is optional but highly recommended for maximum flavor.
- Garnish and serve. Transfer the wings to a serving platter. Sprinkle with sliced green onions and toasted sesame seeds. Serve immediately while they’re hot and crispy.
A quick note about timing: The total cook time is about 75-85 minutes, but most of that is hands-off. You can prep the glaze and garnishes while the wings bake. If you’re hosting a game day party, you can also bake the wings up to the point before glazing, then finish them with the glaze and broil right before serving. That’s a lifesaver when you’re juggling multiple dishes like this loaded pulled pork nacho bar.
Cooking Tips & Techniques
I’ve made enough mistakes in the kitchen to know exactly what can go wrong with baked wings. Here’s what I’ve learned so you don’t have to learn the hard way.
Don’t skip the drying step. I know it’s tedious, but patting each wing dry with paper towels is non-negotiable. Moisture is the enemy of crispy skin. If you’re really serious about texture, you can even let the seasoned wings sit uncovered in the fridge for an hour before baking. That extra drying time makes a noticeable difference.
The baking powder matters. Make sure you’re using baking powder, not baking soda. They’re not interchangeable here. Baking powder helps the skin brown and crisp through a chemical reaction, while baking soda would leave a metallic taste. Also, check that your baking powder is fresh—if it’s been sitting in your pantry for two years, it might not work as well.
Don’t overcrowd the pan. I’ve made this mistake more times than I want to admit. When wings are too close together, they release steam and essentially braise instead of roast. Give them space. If you’re making a big batch (and you should be), use two baking sheets and rotate them between racks halfway through.
Use a meat thermometer if you’re nervous. Chicken wings are safe to eat at 165°F (74°C), but honestly, they’re usually done well before that if they’re golden brown and crispy. I pull mine out when they hit 175°F—the higher temperature helps render more fat and gives you that fall-off-the-bone tenderness.
Glaze wisely. The biggest mistake people make with glazed wings is adding the sauce too early. If you toss the wings in the glaze and then bake them again for too long, the sugar burns and you get bitter, charred wings. Glaze them at the very end, and if you broil, keep a close eye on them. Thirty seconds can be the difference between perfection and a smoke-filled kitchen.
I once forgot to flip the wings halfway through and ended up with one side perfectly crispy and the other side pale and sad. Don’t be like me. Set a timer for flipping. Your future self will thank you.
Variations & Adaptations
One of the best things about this recipe is how adaptable it is. Here are some ways to switch things up based on your preferences or what you have on hand.
Spicy Honey Garlic Wings : Add 1-2 tablespoons of sriracha or gochujang to the glaze along with the other ingredients. The heat balances the sweetness beautifully. I’ve made this version for friends who love spice, and it’s become their requested game day snack.
Air Fryer Method : If you want even faster results, you can adapt this recipe for the air fryer. Cook the seasoned wings at 380°F (193°C) for 25-30 minutes, shaking the basket halfway through. Toss with the glaze and air fry for another 2-3 minutes. The air fryer gives you that deep-fried texture without the oil.
Gluten-Free Version : This recipe is naturally gluten-free as long as you use tamari or coconut aminos instead of regular soy sauce. The baking powder method works perfectly without any flour, so you don’t need any special substitutions.
Honey Garlic Chicken Thighs : If you’re not in the mood for wings, this same glaze works beautifully on boneless, skin-on chicken thighs. Bake them at 400°F (200°C) for 35-40 minutes, then glaze and broil. It’s a great option for a weeknight dinner that feels special.
Keto-Friendly Adaptation : Skip the honey and use a sugar-free honey substitute or a combination of allulose and a few drops of honey extract. The glaze won’t be as sticky, but the flavor will still be delicious. You can also increase the sesame oil and add a splash of fish sauce for extra umami.
I’ve personally tried the spicy version for a crispy baked buffalo cauliflower bites inspired game day spread, and it was a hit. The heat from the gochujang pairs surprisingly well with the honey sweetness.
Serving & Storage Suggestions
These wings are best served hot and fresh, but let’s be real—they’re still pretty amazing at room temperature during a game. Here’s how to make the most of them.
Serving Temperature : Serve the wings immediately after glazing and broiling. They’re at their peak crispiness within the first 15 minutes. If you’re serving them buffet-style, keep them on a warm platter or in a low oven (200°F) for up to 30 minutes.
Presentation Ideas : Arrange the wings on a large wooden board or platter. Sprinkle generously with green onions and sesame seeds. Add a few lime wedges on the side for squeezing—the acidity cuts through the richness beautifully. Serve with ranch or blue cheese dressing for dipping, and maybe some celery and carrot sticks for crunch.
What to Serve Alongside : These wings pair perfectly with other game day favorites. Try them alongside this creamy crockpot jalapeño popper dip for a winning combo. They also go great with a cold beer, a crisp coleslaw, or some sweet and salty football snack mix for variety.
Storage Instructions : Leftover wings can be stored in an airtight container in the refrigerator for up to 4 days. The glaze will soften the skin over time, so don’t expect them to be as crispy as day one. To reheat, place them on a wire rack over a baking sheet and warm them in a 375°F (190°C) oven for 8-10 minutes. This helps restore some of the crispiness. Avoid microwaving—it turns the skin rubbery.
Freezer Tips : You can freeze the baked (but unglazed) wings for up to 3 months. Place them on a baking sheet in a single layer and freeze until solid, then transfer to a freezer bag. When you’re ready to serve, thaw them in the refrigerator overnight, then reheat at 400°F (200°C) for 15-20 minutes before glazing. The flavor actually improves after freezing—the seasonings have time to meld.
Flavor Development : Honestly, the wings taste even better the next day if you store them properly. The glaze seeps into the meat overnight, creating an even more intense honey garlic flavor. Just don’t expect the same level of crispiness. I’ve been known to make a double batch just so I have leftovers for lunch the next day.
Nutritional Information & Benefits
Let’s be honest—these wings aren’t health food, but they’re not terrible for you either. Here’s the breakdown for a serving of about 4-5 wings (based on the full recipe making about 6 servings).
| Nutrient | Amount Per Serving |
|---|---|
| Calories | 385 |
| Total Fat | 22g |
| Saturated Fat | 7g |
| Cholesterol | 95mg |
| Sodium | 820mg |
| Total Carbohydrates | 22g |
| Sugars | 19g |
| Protein | 28g |
Health Benefits : Chicken wings are a good source of protein, which keeps you full and supports muscle health. The skin contains collagen, which is great for joint health and skin elasticity. Honey provides antioxidants and has natural antibacterial properties. Garlic is known for its immune-boosting compounds—perfect for cold and flu season.
Dietary Considerations : This recipe is naturally gluten-free (with tamari), dairy-free (if you skip the butter or use a plant-based alternative), and can be made low-carb with a sugar substitute. It contains soy (from the soy sauce), so it’s not suitable for soy allergies unless you use coconut aminos. The sesame oil is optional, so you can omit it for sesame allergies.
Personal Wellness Note : I’m a big believer in balance. Game day isn’t the time to count calories. These wings are made with real ingredients, baked instead of fried, and portion-controlled by nature (who can eat more than 5 wings in one sitting?). Enjoy them guilt-free, and maybe pair them with a big salad the next day. That’s how I roll, anyway.
Conclusion
These crispy honey garlic baked chicken wings are everything you want in a game day snack—crispy, sticky, sweet, savory, and completely satisfying. They come together with simple ingredients and a few smart techniques that make all the difference. No deep fryer required, no complicated steps, just honest, delicious wings that’ll have everyone gathered around the table.
I love this recipe because it proves you don’t need to compromise on texture or flavor when you’re baking. The double-bake method gives you that crackly skin you crave, and the honey garlic glaze is the kind of sauce that makes you want to lick the bowl clean. Whether you’re hosting a Super Bowl party, a casual get-together, or just treating yourself on a Sunday afternoon, these wings deliver every time.
I’d love to hear how these turn out for you! Drop a comment below and let me know if you tried any variations or if these wings were a hit at your game day gathering. Don’t forget to share this recipe with your friends—they’ll thank you when they’re biting into the crispiest baked wings they’ve ever had.
Now go make some wings. Your game day spread deserves this.
Frequently Asked Questions
Can I make these wings ahead of time for a party?
Absolutely! You can bake the wings up to the point before glazing, then let them cool completely and store them in the refrigerator for up to 2 days. When you’re ready to serve, reheat them on a wire rack at 400°F (200°C) for 10 minutes, then toss with the warm glaze and broil for 2-3 minutes. This method actually saves you time on game day.
Why are my baked wings not crispy?
There are a few common culprits. The most likely issue is moisture—if you didn’t pat the wings dry enough, they’ll steam instead of crisp. Another possibility is overcrowding the pan, which traps steam. Make sure your wings are in a single layer with space between them. Also, check that your baking powder is fresh—old baking powder loses its effectiveness.
Can I use this recipe for other chicken parts?
Yes! This method works beautifully for chicken thighs (bone-in, skin-on), drumsticks, or even chicken breast strips. Adjust the cooking time based on the size of the pieces. Thighs and drumsticks will need about 35-40 minutes at 425°F after the initial 250°F bake. Chicken breast strips will need about 15-20 minutes. The glaze works on everything.
Is this recipe gluten-free?
It can be! The wings themselves are naturally gluten-free. The only potential gluten source is the soy sauce in the glaze. Simply swap the regular soy sauce for tamari or coconut aminos, and you’re good to go. Double-check that your baking powder is gluten-free (most brands are, but it’s worth verifying).
How do I prevent the glaze from burning under the broiler?
The sugar in honey burns quickly, so keep a close eye on the wings under the broiler. I recommend broiling for no more than 2-3 minutes, and I usually stand by the oven with the light on to watch them. If you see the glaze starting to bubble and darken too fast, pull them out immediately. You can also skip the broiler step entirely—the wings are still delicious with just the glaze tossed on.
Pin This Recipe!
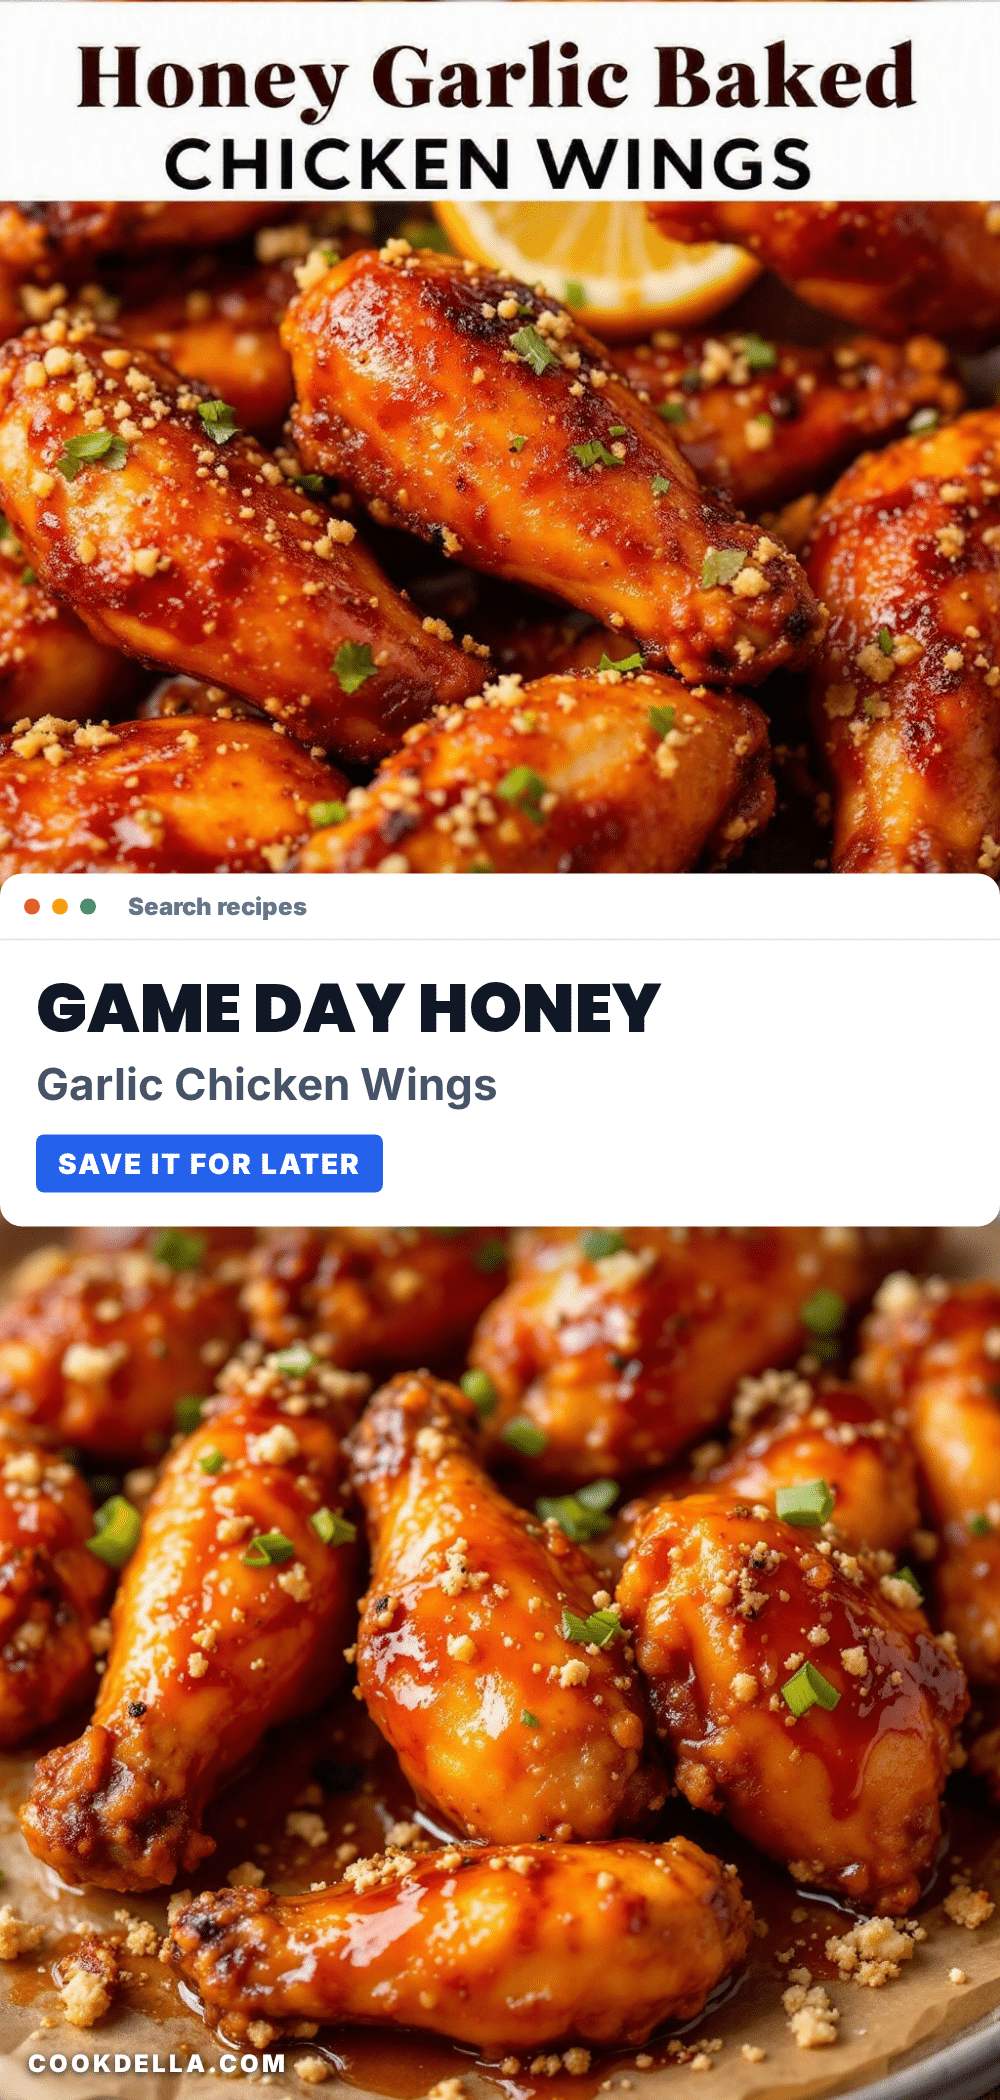
Crispy Honey Garlic Baked Chicken Wings: Best Game Day Snack

These crispy honey garlic baked chicken wings are baked to perfection with a crackly crunch and a sticky-sweet-savory glaze. No deep fryer needed, just pure wing perfection perfect for game day.
- Prep Time: 15 minutes
- Cook Time: 75 minutes
- Total Time: 90 minutes
- Yield: 6 servings 1x
- Category: Appetizer
- Cuisine: American
Ingredients
- 3 pounds chicken wings (about 15–18 wings, separated into flats and drumettes)
- 1 ½ teaspoons baking powder
- 1 teaspoon kosher salt
- ½ teaspoon black pepper (freshly ground)
- ½ teaspoon garlic powder
- ⅓ cup honey
- ¼ cup low-sodium soy sauce
- 4 cloves garlic, minced
- 2 tablespoons unsalted butter
- 1 tablespoon rice vinegar
- 1 teaspoon sesame oil (optional)
- Pinch of red pepper flakes (optional)
- 2 green onions, sliced
- 1 tablespoon sesame seeds (toasted)
Instructions
- Preheat your oven to 250°F (120°C). Position the oven rack in the middle.
- If using whole wings, separate them at the joints into drumettes and flats. Discard wing tips or save for stock. Pat each piece completely dry with paper towels.
- In a large mixing bowl, combine baking powder, salt, pepper, and garlic powder. Add the dried wings and toss until each piece is evenly coated.
- Place a wire rack over a foil-lined baking sheet. Arrange the wings in a single layer on the rack, making sure they are not touching.
- Bake at 250°F for 30 minutes. Do not open the oven door during this time.
- Increase oven temperature to 425°F (220°C). Bake for another 40-45 minutes, flipping the wings halfway through (at the 20-minute mark), until deep golden brown and crispy.
- While the wings bake, make the glaze: In a small saucepan, combine honey, soy sauce, minced garlic, butter, rice vinegar, sesame oil, and red pepper flakes. Heat over medium heat, stirring occasionally, until butter melts and mixture comes to a gentle simmer. Let bubble for 3-4 minutes until slightly thickened. Remove from heat.
- Once wings are done, transfer them to a large clean bowl. Pour the warm glaze over the wings and toss gently with tongs until every wing is coated.
- Optional: For extra stickiness, arrange glazed wings back on the wire rack and broil for 2-3 minutes, watching closely to prevent burning.
- Transfer wings to a serving platter. Sprinkle with sliced green onions and toasted sesame seeds. Serve immediately.
Notes
Pat wings completely dry for crispy skin. Use fresh baking powder, not baking soda. Do not overcrowd the pan. Glaze at the very end to prevent burning. For make-ahead, bake wings up to glazing point, then reheat and glaze before serving.
Nutrition
- Serving Size: 4-5 wings
- Calories: 385
- Sugar: 19
- Sodium: 820
- Fat: 22
- Saturated Fat: 7
- Carbohydrates: 22
- Protein: 28
Keywords: crispy honey garlic chicken wings, baked chicken wings, game day snack, honey garlic wings, oven baked wings


