Third time this week I found myself elbow-deep in crushed Oreos at 9 p.m., and honestly, I wasn’t even mad about it. The first batch of Easy Halloween Dirt Cups with Gummy Worms I made for my niece’s classroom party disappeared so fast I barely got a taste. So I made them again for a movie night with friends. Then again just because—and somewhere between the third crushed cookie layer and the perfectly placed gummy worm, I realized this little dessert had me completely hooked.
There’s something about assembling these individual cups that feels almost meditative. You layer the chocolate pudding, you sprinkle the Oreo “dirt,” you poke the gummy worms through the surface so they look like they’re crawling out. Every single time, the person who sees them for the first time lets out this little gasp or laugh. It’s pure Halloween magic in a cup, and it takes maybe fifteen minutes of actual work.
What got me, though, was watching a grown man—my brother-in-law, no less—sneak a second cup when he thought nobody was looking. He didn’t care that it was a “kids’ dessert.” These dirt cups have a way of making everyone feel like a kid again. And that’s the thing about this recipe: it’s not fancy or complicated, but it hits this specific nostalgic nerve that nothing else quite does.
So here’s my version—the one I’ve made enough times to know exactly which shortcuts work and which details matter. Trust me on this one.
Why You’ll Love This Recipe
I’ve tested this one more times than I care to admit, and here’s why it keeps winning.
- No Baking Required: This is a true no-bake dessert. No oven, no stove, no sweat. Perfect for hot October days or when you just don’t want to deal with a kitchen mess.
- Kid-Friendly Fun: Kids can actually help assemble these. My five-year-old niece handles the gummy worm placement like it’s her official job. It’s a great way to get little hands involved without any danger.
- Quick Prep Time: From start to finish, you’re looking at about 15 minutes of active work. The hardest part is waiting for the pudding to set.
- Budget-Friendly Ingredients: You probably already have most of this stuff in your pantry. No expensive specialty items or hard-to-find ingredients.
- Perfect for Parties: Individual servings mean no slicing, no serving utensils, no fuss. Grab a cup and go. They’re ideal for Halloween parties, classroom celebrations, or spooky movie nights.
- Make-Ahead Magic: These actually taste better after a few hours in the fridge. The flavors meld together, and the texture gets perfectly creamy.
What makes this version different from the others I’ve tried? It’s the pudding-to-crumb ratio. I’ve dialed it in so every spoonful gives you that perfect creamy-crunchy balance. No dry bites, no soupy spots. Just consistent, delicious dirt cup perfection every single time.
And honestly? There’s something about watching a room full of people—kids and adults alike—dig into these creepy little cups that just makes me happy. It’s comfort food with a spooky twist, and it never gets old.
What Ingredients You Will Need
This recipe uses simple, everyday ingredients that come together to create something unexpectedly magical. No weird stuff here—just classic pantry staples that do exactly what they’re supposed to do.
For the Pudding Base
- 2 packages (3.9 ounces each) instant chocolate pudding mix – I recommend Jell-O brand for the smoothest, creamiest texture. The instant kind is important here; cook-and-serve won’t set up the same way.
- 4 cups cold whole milk – Whole milk gives the richest, creamiest pudding. You can use 2% in a pinch, but don’t go lower than that. The fat content matters for texture.
For the Dirt Layer
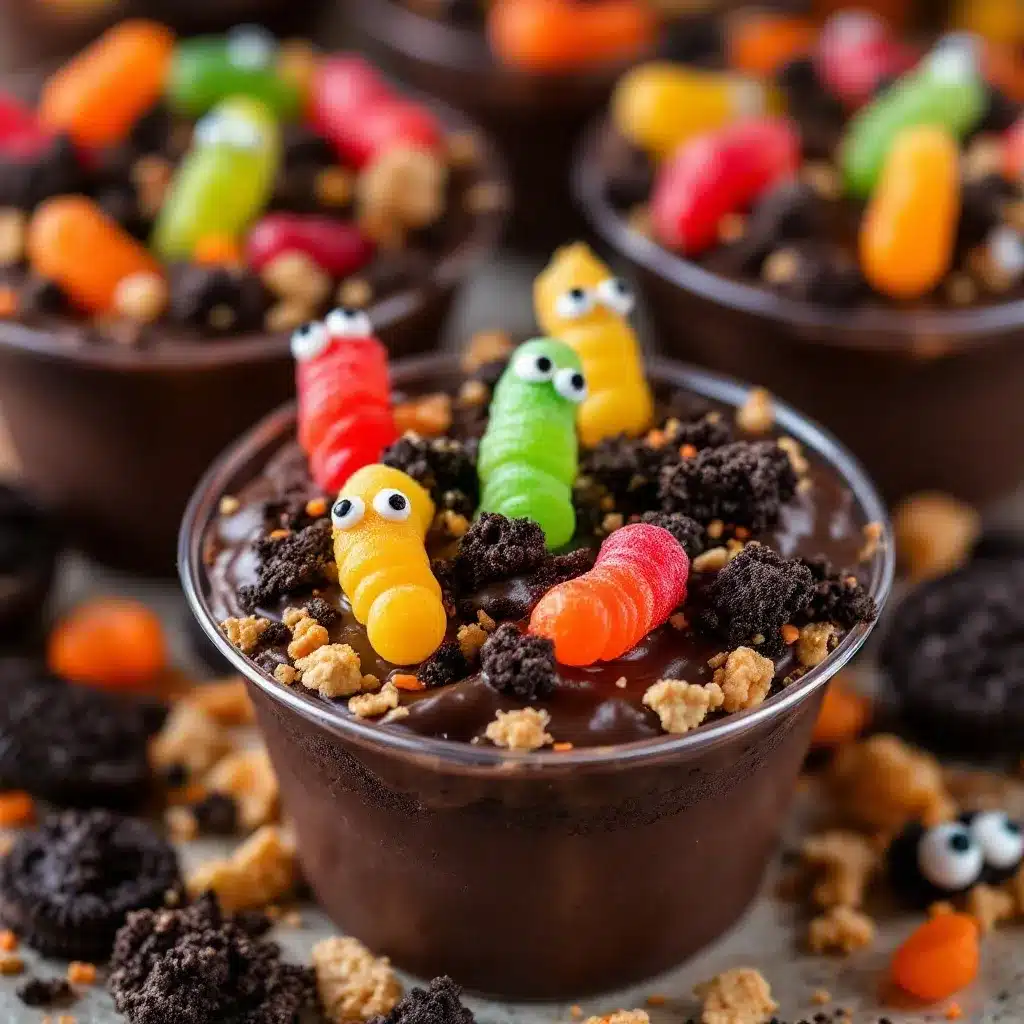
- 1 package (14.3 ounces) Oreo cookies – Regular Oreos work best. Double Stuf is fine too, but you’ll get slightly less “dirt” color since there’s more cream filling. I’ve tested both and prefer regular for the most realistic dirt look.
- 2 tablespoons unsalted butter, melted – This is optional but gives the crumbs a slightly toasted, richer flavor. Skip it if you want a quicker version.
For Decoration
- 1 bag gummy worms – Get the colorful sour kind for the most dramatic effect. I like the Trolli brand because they’re extra wiggly and come in fun colors. You’ll want about 2-3 worms per cup.
- Optional: green or purple food coloring – For tinting the pudding if you want to get extra spooky. I’ve done green pudding with black dirt before and it looked amazing.
- Optional: crushed chocolate graham crackers – For an extra layer of texture on top. I sometimes add a thin layer between the pudding and Oreo dirt for variety.
Substitution Notes
If you need a dairy-free version, use coconut milk or oat milk and a dairy-free chocolate pudding mix. The texture will be slightly different—a bit less creamy—but still delicious. For a gluten-free option, use gluten-free chocolate sandwich cookies (they exist!) and check your pudding mix label. Most instant pudding is gluten-free, but always double-check.
I’ve also made these with sugar-free pudding mix and reduced-fat Oreos for a lighter version. They work fine, but I’ll be honest—the full-fat version tastes noticeably better. For a special occasion like Halloween, I say go all out.
Equipment Needed
You don’t need much for this recipe, which is part of its charm. Here’s what you’ll need:
- 8-10 small clear cups or glasses – I use 8-ounce plastic cups from the party store. Clear is essential so you can see the layers. Small mason jars work great too, and they make the dessert feel fancier.
- Mixing bowls – One medium bowl for the pudding, one small bowl for the crushed Oreos.
- Whisk – For mixing the pudding. A hand whisk works fine, but an electric mixer makes it even smoother.
- Food processor or rolling pin – For crushing the Oreos. A food processor gives you the most consistent, fine crumb. But honestly? A zip-top bag and a rolling pin (or even a heavy saucepan) works just as well and is way more satisfying. I’ve crushed Oreos with a wine bottle before, and it worked perfectly.
- Measuring cups and spoons – For accurate milk measurement.
- Spatula – For scraping every last bit of pudding into the cups. Waste not, want not.
- Small spoon or piping bag – For layering. A piping bag makes neat layers, but a small spoon works fine. I usually just spoon it in.
If you don’t have a food processor, don’t let that stop you. The zip-top bag method is actually more fun, especially if you have kids who want to help. Just make sure the bag is well-sealed before you start smashing—I learned that one the hard way.
Preparation Method
Let me walk you through this step by step. I’ve made these dirt cups so many times I could do it in my sleep, but I’ll share all the little details that make the difference between good dirt cups and great ones.
Step 1: Make the Pudding
In a medium mixing bowl, whisk together the two packages of instant chocolate pudding mix with 4 cups of cold whole milk. Whisk vigorously for about 2 minutes until the mixture starts to thicken. You’ll feel it getting heavier as you whisk—that’s the magic of instant pudding at work.
Let the pudding sit for 5 minutes to fully set. It should be thick enough to hold its shape when you lift the whisk. If it’s still runny after 5 minutes, give it another minute or two. Sometimes it takes a little longer depending on the temperature of your milk.
Pro tip: If you want extra-creamy pudding, use an electric mixer on low speed for about 1 minute instead of whisking by hand. It incorporates less air and gives you a silkier texture.
Step 2: Crush the Oreos
While the pudding sets, crush your Oreos. If using a food processor, pulse until you get fine, even crumbs that look like potting soil. You want some tiny pieces but no large chunks. If using the zip-top bag method, put the whole cookies in a gallon-sized bag, seal it tight, and go to town with a rolling pin or heavy pan. This takes about 2-3 minutes of solid smashing.
For the most realistic “dirt” look, leave the cream filling in the cookies. It blends into the crumbs and gives them that slightly clumpy, moist texture that real dirt has. I tried removing the cream once, and the crumbs were too dry and powdery. Not the look we’re going for.
If you’re using the melted butter option, drizzle it over the crushed Oreos and stir with a fork until evenly distributed. This gives the crumbs a slightly toasted flavor and helps them stick together a bit—more like actual dirt clods.
Step 3: Assemble the Layers
Now for the fun part. Take your clear cups and start layering. I use about 2-3 tablespoons of pudding per layer, depending on the size of your cups. Here’s my preferred order:
Bottom layer: A thin layer of crushed Oreos (about 1 tablespoon). This creates a solid base and prevents the bottom from getting too pudding-heavy.
Middle layer: Half the remaining pudding, divided evenly among the cups. Use a spoon or piping bag to get it in there neatly.
Second Oreo layer: Another thin layer of crumbs (about 1 tablespoon). This is the “hidden” dirt layer that makes the dessert interesting.
Top pudding layer: The remaining pudding, divided evenly. Smooth the top with the back of a spoon.
Final dirt layer: A generous layer of crushed Oreos on top. This should be thick enough to completely hide the pudding underneath—about 2 tablespoons per cup. You want it to look like a little pot of soil.
Step 4: Add the Gummy Worms
Here’s where the magic happens. Take your gummy worms and gently press them into the top layer of Oreo crumbs. Place them so they look like they’re crawling out of the dirt—some partially buried, some fully exposed, some with just a tail sticking out. I usually put 2-3 worms per cup, positioned at different angles for maximum creepiness.
For the best effect, push the worms down so they touch the pudding layer underneath. This helps them stay in place and makes it look like they’re truly emerging from the dirt. If you just lay them on top, they’ll slide off when someone picks up the cup.
Step 5: Chill and Serve
Refrigerate the assembled dirt cups for at least 2 hours before serving. This allows the pudding to fully set and the flavors to meld together. The Oreo crumbs will also soften slightly, which actually improves the texture—it becomes more like real dirt than just crushed cookies.
I’ve found that 4 hours is the sweet spot. The pudding is perfectly firm, the crumbs have softened just enough, and the gummy worms are still chewy. Overnight works too, but the worms might get a bit softer. Some people like that, some don’t.
Cooking Tips & Techniques
After making these dirt cups more times than I can count, I’ve picked up a few tricks that make the process smoother and the results better.
The Oreo Crushing Technique
Don’t over-crush your Oreos. You want some variation in texture—tiny crumbs mixed with slightly larger pieces. If you pulse them into a fine powder, it looks less like dirt and more like cocoa powder. Aim for the texture of actual garden soil: mostly fine with a few small clumps.
I learned this lesson the hard way when I made my first batch and ended up with what looked like chocolate dust. It still tasted fine, but the visual effect wasn’t nearly as convincing. Now I pulse in short bursts and check after each one.
The Pudding Consistency Trick
For the creamiest pudding, make sure your milk is really cold. I’m talking straight from the fridge cold. Room temperature milk won’t thicken properly and can leave you with soupy pudding. If you’re in a hurry, stick the milk in the freezer for 10 minutes before using it.
Also, don’t over-whisk the pudding. Once it starts to thicken, stop. Over-mixing can break down the structure and make it watery. Two minutes of steady whisking is usually perfect.
Timing and Multitasking
The best way to approach this recipe is to make the pudding first, then crush the Oreos while the pudding sets. That way you’re not standing around waiting. The whole active prep time is about 15 minutes, and most of that is crushing cookies.
If you’re making these for a party, assemble them the night before. They actually improve overnight as the flavors meld. Just add the gummy worms right before serving so they stay nice and chewy.
Common Mistakes to Avoid
Too much pudding, not enough crumbs: I see this all the time. People go heavy on the pudding and skimpy on the Oreos, and the result is a cup of pudding with a sprinkle of crumbs on top. The magic of dirt cups is the balance between creamy and crunchy. Don’t be shy with the Oreos.
Worms sliding off: If your gummy worms won’t stay put, press them deeper into the crumbs so they touch the pudding layer. The pudding acts like glue and holds them in place.
Soggy Oreos: If you assemble these too far in advance (more than 24 hours), the Oreo crumbs can get mushy. For the best texture, assemble within 12 hours of serving. If you need to prep earlier, keep the crumbs separate and add them just before serving.
Variations & Adaptations
One of the best things about this recipe is how easy it is to adapt. Here are some variations I’ve tried and loved.
Spooky Green Slime Dirt Cups
Add a few drops of green food coloring to the pudding before mixing. The green pudding with black Oreo “dirt” looks like toxic waste—perfect for a gross-out Halloween party. I made these for a “Monster Mash” themed party and they were a huge hit. The kids called them “slime cups” and couldn’t get enough.
Pumpkin Dirt Cups
Swap the chocolate pudding for vanilla or butterscotch, and mix in 1/2 cup of pumpkin puree and 1 teaspoon of pumpkin pie spice. Use crushed graham crackers or ginger snaps instead of Oreos. Top with gummy worms or candy corn. This is a great fall twist that still gives you that dirt cup vibe. For more fall dessert inspiration, try our Easy No-Bake Pumpkin Pie with Perfect Gingersnap Crust.
Peanut Butter Chocolate Dirt Cups
Add 1/4 cup of creamy peanut butter to the pudding mix before adding the milk. Whisk until smooth. The peanut butter adds richness and a savory note that balances the sweetness. This version is dangerously good—I’ve eaten two in one sitting more times than I’d like to admit.
Vegan Dirt Cups
Use dairy-free chocolate pudding mix and oat milk or coconut milk. Use vegan chocolate sandwich cookies (most are accidentally vegan, but check the label). Skip the butter in the Oreos. The texture is slightly less creamy but still delicious. I’ve served these to vegans and non-vegans alike, and nobody complained.
Low-Sugar Version
Use sugar-free chocolate pudding mix and reduced-fat Oreos. The taste is about 85% as good as the original—good enough for everyday, but I’d stick with the real thing for a party. You can also use dark chocolate pudding for a richer flavor with less sugar.
Serving & Storage Suggestions
These dirt cups are best served cold, straight from the fridge. The contrast between the cold, creamy pudding and the crunchy Oreo crumbs is what makes them so satisfying. If you let them sit at room temperature too long, the texture suffers.
Presentation Ideas
For a Halloween party, arrange the cups on a tray lined with fake spiderwebs. Add a few plastic spiders or skeleton hands for extra creepiness. I’ve also served them in small flower pots (the plastic kind from craft stores) for a “garden” theme. Just make sure the pots are food-safe and lined with plastic wrap.
If you’re feeling extra creative, top each cup with a small plastic tombstone or a candy spider. The kids at my niece’s party went crazy for the spider-topped ones.
What to Serve With Them
These dirt cups pair perfectly with other Halloween treats. Set up a dessert table with our Easy Halloween Mummy Hot Dogs with Puff Pastry for a savory-sweet combo that everyone will love. For drinks, try our Perfect Easy Halloween Pumpkin Spice Coffee Bar Station—the warm coffee balances the cold dessert beautifully.
I also love serving these alongside Easy Candy Corn Rice Krispie Treats for a full Halloween dessert spread. The colors pop together, and both are no-bake, which means less stress for you.
Storage Instructions
Store assembled dirt cups in the refrigerator, covered with plastic wrap or a lid, for up to 3 days. The texture is best within the first 24 hours. After that, the Oreo crumbs start to soften and the gummy worms get a bit chewier.
If you want to prep ahead, make the pudding and crush the Oreos separately. Store them in the fridge and pantry, respectively, and assemble the cups the day of your event. This gives you the freshest possible texture.
I don’t recommend freezing these. The pudding gets icy and the texture is off when thawed. Trust me, I tried it once and it was not good.
Reheating (Wait, Don’t)
These are meant to be served cold. Don’t even think about microwaving them. The pudding will separate, the Oreos will turn into paste, and the gummy worms will melt into a sticky mess. Cold is the way to go.
Nutritional Information & Benefits
Let’s be real: these are a treat, not a health food. But here’s the breakdown if you’re curious.
Per serving (1 cup, using whole milk and regular Oreos):
- Calories: approximately 380-420
- Total Fat: 16-18g
- Saturated Fat: 8-10g
- Carbohydrates: 55-60g
- Sugar: 40-45g
- Protein: 6-8g
- Calcium: 15% of daily value
- Iron: 10% of daily value
These numbers vary based on your specific ingredients and portion sizes. If you use reduced-fat milk and sugar-free pudding, you can cut the calories to around 280-320 per serving.
Health Highlights: The milk provides calcium and vitamin D for bone health. Chocolate contains antioxidants called flavonoids, though the amount in instant pudding is minimal. The Oreos don’t offer much nutritionally, but hey—it’s Halloween. Everything in moderation, right?
Allergen Notes: This recipe contains dairy (milk), wheat (Oreos), and soy (often in Oreos and pudding mix). Gummy worms may contain gelatin, which is animal-derived. Check labels if you’re serving guests with allergies or dietary restrictions.
Conclusion
These Easy Halloween Dirt Cups with Gummy Worms are everything I want in a holiday dessert: fun, fast, and genuinely delicious. They’re the kind of treat that makes people smile before they even take a bite, and that first spoonful of creamy pudding with crunchy Oreo crumbs and chewy gummy worms? Pure joy.
I love that this recipe brings people together. Kids get to help assemble them, adults get to relive their childhood, and everyone gets to enjoy a spooky-sweet treat that doesn’t require hours in the kitchen. It’s Halloween magic in its simplest, most delicious form.
So go ahead and make a batch—or three. Customize them with your favorite pudding flavors, try different gummy shapes, or experiment with the variations I shared. And when you do, come back and tell me how they turned out. I’d love to hear about your dirt cup creations, your kids’ reactions, or any fun twists you came up with.
Drop a comment below, share a photo on social media, or tag me in your Halloween dessert spread. Let’s make this the spookiest, tastiest Halloween yet!
Frequently Asked Questions
Can I make these dirt cups ahead of time?
Yes! You can assemble them up to 24 hours in advance. For the best texture, add the gummy worms right before serving so they stay chewy. If you need to prep even further ahead, make the pudding and crush the Oreos separately, then assemble the day of your event.
Can I use homemade chocolate pudding instead of instant?
You can, but it will change the texture and setting time. Homemade pudding is thinner and takes longer to set. If you go this route, make the pudding a day ahead and let it chill thoroughly before assembling. The layers won’t be as neat, but the taste will be richer.
What if I don’t have clear cups?
Any small cups or bowls will work. The clear cups just let you see the layers, which is part of the fun. If you’re using opaque cups, consider adding a label or tag so people know what’s inside. Mason jars, ramekins, or even small paper cups work great.
How do I keep the gummy worms from sliding off?
Press the worms deep enough that they touch the pudding layer underneath. The pudding acts like glue and holds them in place. If they’re still sliding, add a tiny dab of pudding on the end of the worm before inserting it into the crumbs.
Can I use a different type of cookie for the dirt?
Absolutely! Chocolate wafer cookies, chocolate graham crackers, or even crushed chocolate chip cookies work. Each gives a slightly different flavor and texture. For a fun twist, use crushed golden Oreos for a “sand” effect, or crushed red velvet cookies for a “bloody dirt” look.
Pin This Recipe!
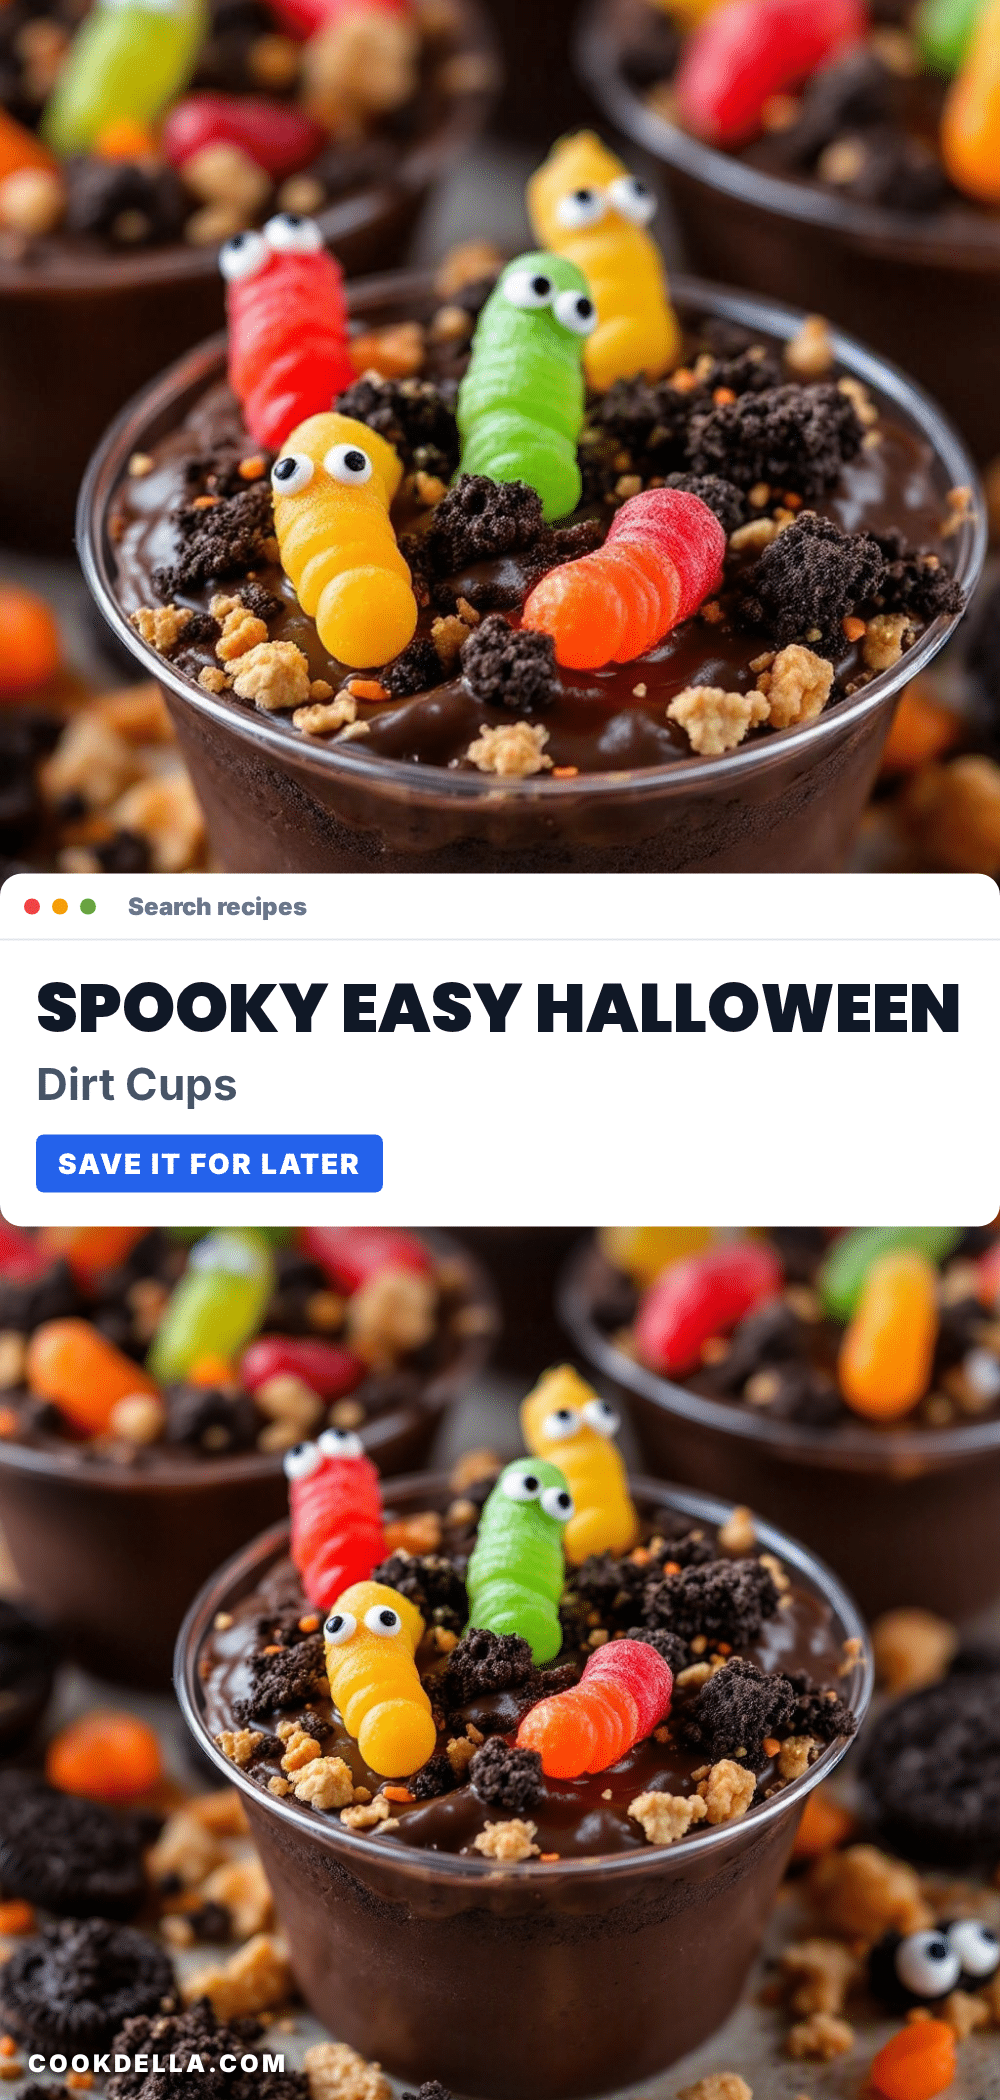
Easy Halloween Dirt Cups: The Best Fun Dessert

These no-bake Halloween dirt cups with gummy worms are a fun, kid-friendly dessert that comes together in minutes. Layers of creamy chocolate pudding and crushed Oreo ‘dirt’ topped with gummy worms create a spooky treat that both kids and adults love.
- Prep Time: 15 minutes
- Cook Time: 0 minutes
- Total Time: 2 hours 15 minutes (includes chilling time)
- Yield: 8-10 servings 1x
- Category: Dessert
- Cuisine: American
Ingredients
- 2 packages (3.9 ounces each) instant chocolate pudding mix
- 4 cups cold whole milk
- 1 package (14.3 ounces) Oreo cookies
- 2 tablespoons unsalted butter, melted (optional)
- 1 bag gummy worms
- Green or purple food coloring (optional)
- Crushed chocolate graham crackers (optional)
Instructions
- In a medium mixing bowl, whisk together the two packages of instant chocolate pudding mix with 4 cups of cold whole milk. Whisk vigorously for about 2 minutes until the mixture starts to thicken. Let the pudding sit for 5 minutes to fully set.
- While the pudding sets, crush the Oreos. If using a food processor, pulse until you get fine, even crumbs that look like potting soil. If using the zip-top bag method, put the whole cookies in a gallon-sized bag, seal it tight, and crush with a rolling pin or heavy pan until fine crumbs form.
- If using the melted butter option, drizzle it over the crushed Oreos and stir with a fork until evenly distributed.
- Take clear cups and start layering: Bottom layer: a thin layer of crushed Oreos (about 1 tablespoon). Middle layer: half the remaining pudding, divided evenly among the cups. Second Oreo layer: another thin layer of crumbs (about 1 tablespoon). Top pudding layer: the remaining pudding, divided evenly. Smooth the top with the back of a spoon. Final dirt layer: a generous layer of crushed Oreos on top (about 2 tablespoons per cup).
- Gently press gummy worms into the top layer of Oreo crumbs, positioning them so they look like they’re crawling out of the dirt. Use 2-3 worms per cup.
- Refrigerate the assembled dirt cups for at least 2 hours before serving. For best results, chill for 4 hours.
Notes
For the creamiest pudding, use cold whole milk. Don’t over-crush the Oreos; aim for a texture like garden soil. Assemble within 12 hours of serving for best texture. Add gummy worms just before serving to keep them chewy. Store in the refrigerator for up to 3 days.
Nutrition
- Serving Size: 1 cup
- Calories: 400
- Sugar: 43
- Sodium: 480
- Fat: 17
- Saturated Fat: 9
- Carbohydrates: 58
- Fiber: 2
- Protein: 7
Keywords: Halloween dessert, dirt cups, no-bake dessert, chocolate pudding, Oreo, gummy worms, kid-friendly, party dessert


