My phone buzzed for the third time that afternoon. “Can you send me that recipe? The one you brought to the park?” I had thrown a handful of these little oat-and-honey bites into my bag as a quick snack for the kids, thinking nothing of it. By the time we packed up the picnic blanket, three different moms had asked me what they were. One of them had already eaten three. I honestly just shrugged and said, “It’s oats, peanut butter, and honey. That’s pretty much it.” But they didn’t believe me — they wanted the exact measurements, the secret touch, the whole thing.
That moment caught me off guard. I hadn’t set out to create a showstopper. I was just tired of buying expensive protein bars that tasted like cardboard and cost five bucks a pop. So I started messing around in my kitchen one Tuesday afternoon, mixing things together in a bowl until something felt right. The first batch was too dry. The second was too sticky. The third — well, the third disappeared before I could even pack them up for the week. That’s when I knew I had stumbled onto something good.
These Easy No-Bake Protein Energy Balls with Oats and Honey have become my go-to for everything. Pre-workout fuel, afternoon slump rescue, after-school snack chaos — they handle it all. And the best part? No oven, no fuss, no complicated steps. Just a bowl, a spoon, and five minutes of your time. Honestly, if I can make these while half-asleep on a Monday morning, you can too.
This recipe stuck because it’s not trying to be fancy. It’s just honest, good-for-you food that actually tastes like a treat. And that’s the kind of recipe worth sharing.
Why You’ll Love This Recipe
Let me tell you why these little bites have earned a permanent spot in my fridge. I’ve tested more energy ball recipes than I care to admit — some turned out like hockey pucks, others fell apart before they even made it to the lunchbox. This one? It’s the real deal.
- Quick & Easy: Five minutes of active prep. That’s it. No baking, no waiting, no complicated techniques. Mix, roll, eat. You can literally make these while your coffee brews.
- Simple Ingredients: You likely already have everything in your pantry right now. Oats, peanut butter, honey, chocolate chips — no weird health food store finds required. I’ve made these in a pinch with whatever was on hand, and they always work.
- Perfect for Busy Days: Whether you’re heading to work, running kids to practice, or just need something to grab between meetings, these hold up beautifully. They don’t melt, they don’t crumble, and they travel like a dream.
- Crowd-Pleaser: I’ve served these to picky toddlers, skeptical teenagers, and health-conscious adults. Every single group comes back for seconds. There’s something about that sweet-salty-chewy combo that just works.
- Unbelievably Delicious: Here’s the thing — most healthy snacks taste like a compromise. These don’t. They taste like dessert, but they fuel your body like a proper snack. The texture is soft but firm, the sweetness is just right, and that hint of salt ties it all together.
What makes this recipe different from the dozens of other energy ball recipes out there? It’s the ratio. I spent weeks tweaking the balance of wet to dry ingredients until I landed on something that holds together perfectly without being greasy or dry. The oats stay tender, the honey provides just enough sweetness, and the peanut butter binds everything into a perfect little sphere. It’s not just another version — it’s the one I keep coming back to, batch after batch.
These are the kind of snacks that make you feel good about grabbing a second one. And honestly, that’s exactly what a snack should do.
What Ingredients You Will Need
This recipe uses simple, wholesome ingredients that work together to create the perfect texture and flavor. Most of these are pantry staples, which means you’re probably already halfway there. Here’s what you’ll need and why each one matters.
For the Base
- Rolled oats, 1 cup (90g) — Use old-fashioned rolled oats, not instant. They give the energy balls a nice chewy texture and hold their shape better. I prefer Quaker Old-Fashioned Oats for consistency, but any brand works. If you’re gluten-sensitive, look for certified gluten-free oats.
- Creamy peanut butter, ½ cup (130g) — Natural peanut butter works best here. The kind that separates and needs stirring. Avoid the sugary processed stuff — it makes the balls too sweet and greasy. I like Adams or Smucker’s Natural. If your peanut butter is thick, give it a good stir before measuring.
- Honey, ⅓ cup (110g) — Raw honey adds natural sweetness and helps bind everything together. Local honey is my first choice for flavor, but any liquid honey works. If your honey is crystallized, warm the jar in a bowl of hot water for a few minutes to loosen it up.
For Texture and Flavor
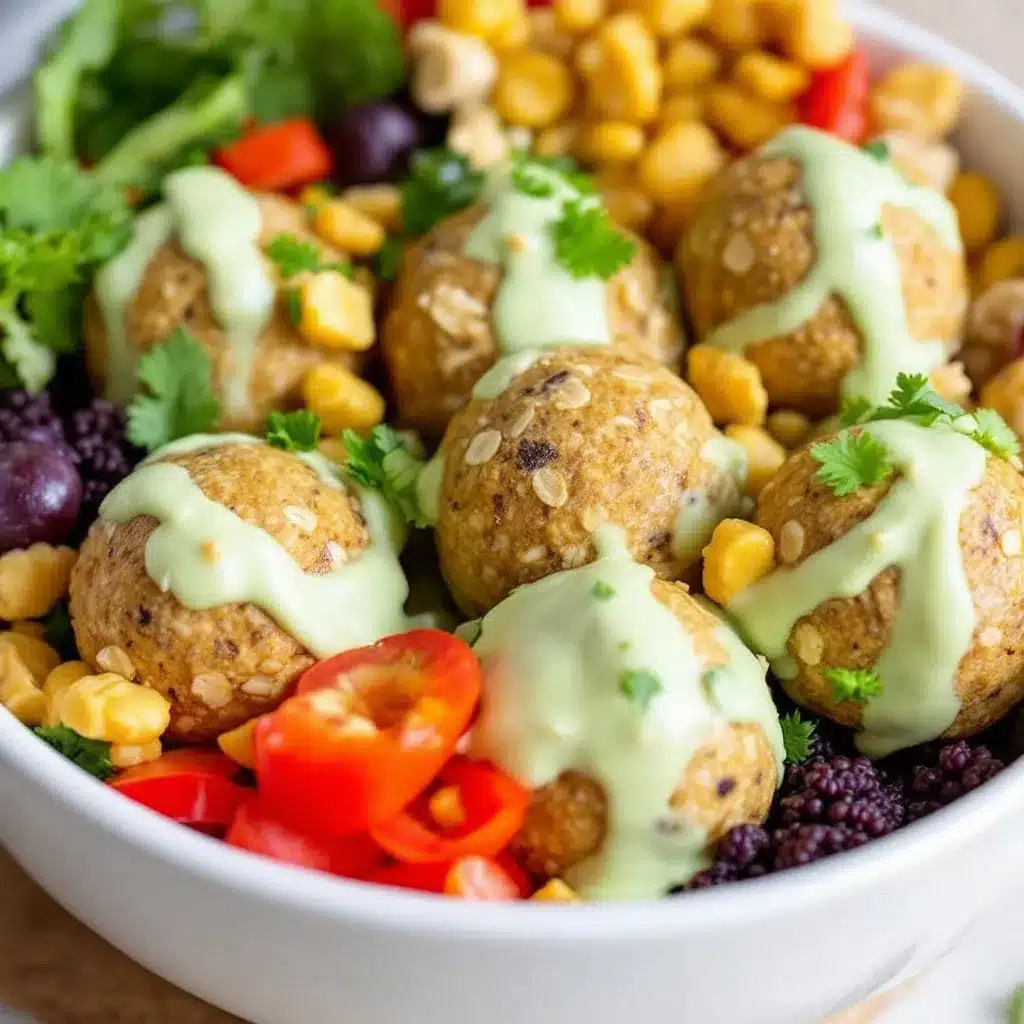
- Mini chocolate chips, ¼ cup (45g) — Semi-sweet or dark chocolate chips add little pockets of melty goodness. I use Ghirardelli 60% Cacao Bittersweet Chips because they’re not too sweet. If you only have regular-sized chips, give them a rough chop first.
- Ground flaxseed, 2 tablespoons (14g) — This is my secret ingredient. It adds fiber, omega-3s, and helps bind the mixture without making it dry. You can buy pre-ground flax or grind whole seeds in a coffee grinder. Store it in the fridge to keep it fresh.
- Vanilla extract, 1 teaspoon — Pure vanilla extract adds warmth and depth. Don’t skip it — it makes a noticeable difference. Imitation vanilla works in a pinch, but the real stuff is better.
- Salt, ¼ teaspoon — A pinch of salt balances the sweetness and makes the flavors pop. If your peanut butter is salted, reduce this to a tiny pinch.
Optional Add-Ins
- Shredded coconut, ¼ cup (20g) — Adds texture and a tropical twist. Toast it lightly first for extra flavor.
- Chia seeds, 1 tablespoon — Boosts the nutritional profile with extra fiber and protein. They also help absorb moisture if your mixture feels too wet.
- Protein powder, 2 tablespoons — For an extra protein kick. Use a vanilla or unflavored variety. Note that this will make the mixture drier, so you may need to add an extra tablespoon of honey or peanut butter.
I recommend sticking with the base recipe the first time, then experimenting with add-ins once you know how the texture should feel. Trust me — you’ll be making these often enough to try every variation.
Equipment Needed
You don’t need a fancy kitchen to make these energy balls. In fact, the simpler the better. Here’s what you’ll need:
- Large mixing bowl — Any medium-to-large bowl works. I use a stainless steel one because it’s lightweight and easy to clean. Glass or ceramic is fine too.
- Measuring cups and spoons — Accuracy matters for the first batch. After you’ve made these a few times, you’ll be able to eyeball it. But start with proper measurements.
- Spatula or wooden spoon — For mixing everything together. A rubber spatula is my favorite because it scrapes the sides clean. A wooden spoon works just as well.
- Small cookie scoop or tablespoon — For portioning the mixture into even balls. A #60 cookie scoop (about 1 tablespoon) gives you perfectly uniform bites. If you don’t have one, just use a regular tablespoon.
- Parchment paper or silicone baking mat — For placing the rolled balls on while they chill. You can also use a plate or baking sheet. The parchment just makes cleanup easier.
- Baking sheet or large plate — To hold the balls while they firm up in the fridge. Any flat surface that fits in your refrigerator works.
That’s it. No food processor, no stand mixer, no special gadgets. I’ve made these in hotel rooms with just a bowl and a spoon. If you have hands and a refrigerator, you’re fully equipped.
Preparation Method
Alright, let’s get rolling — literally. This process takes about five minutes of active work, plus 30 minutes of chill time. Here’s exactly how to do it.
- Combine the dry ingredients. In your large mixing bowl, add 1 cup rolled oats, 2 tablespoons ground flaxseed, and ¼ teaspoon salt. If you’re using any optional dry add-ins like chia seeds or shredded coconut, add them now. Give everything a quick stir with your spatula to distribute the ingredients evenly.
- Add the wet ingredients. Pour in ½ cup creamy peanut butter, ⅓ cup honey, and 1 teaspoon vanilla extract. Don’t dump them all in one spot — try to distribute the peanut butter and honey in dollops across the oat mixture. This makes mixing much easier.
- Mix until combined. Use your spatula to fold everything together. Start by pressing down and scraping the bottom of the bowl, then fold the mixture over itself. Keep going until no dry oats remain. The mixture should look cohesive and slightly sticky. If it feels too dry and crumbly, add another tablespoon of honey or peanut butter. If it’s too wet and sticky, add a tablespoon of oats. Trust your hands here — the texture should feel like soft cookie dough that holds together when pressed.
- Fold in the chocolate chips. Sprinkle ¼ cup mini chocolate chips over the mixture. Gently fold them in until they’re evenly distributed. Be careful not to overmix at this point — you want the chips to stay intact, not melt into the dough.
- Chill the mixture (optional but recommended). Pop the bowl into the refrigerator for 10-15 minutes. This firms up the mixture and makes rolling much easier. If you’re in a hurry, you can skip this step, but the balls will be stickier to handle.
- Roll into balls. Line your baking sheet or plate with parchment paper. Using your cookie scoop or a tablespoon, scoop out even portions of the mixture. Roll each portion between your palms to form smooth balls about 1 inch in diameter. You should get about 16-18 balls. If the mixture sticks to your hands, lightly wet your palms with water or rub a tiny bit of oil on them.
- Chill to set. Place the rolled balls on the prepared baking sheet. Refrigerate for at least 30 minutes to let them firm up. This step is crucial — the balls will be soft at room temperature, but they firm up beautifully after chilling.
- Store and enjoy. Transfer the chilled balls to an airtight container. Keep them in the refrigerator for up to two weeks, or freeze for up to three months. They’re perfect straight from the fridge or after sitting at room temperature for a few minutes.
Cooking Tips & Techniques
I’ve made these energy balls more times than I can count, and I’ve learned a few things along the way. Here are my best tips to ensure success every time.
Get the texture right. The biggest mistake people make is using peanut butter that’s too runny or too stiff. Natural peanut butter varies wildly between brands. If yours is super runny, refrigerate it for 15 minutes before using. If it’s thick and dry, microwave it for 10 seconds to soften it. The goal is a consistency that’s spreadable but not drippy.
Don’t overmix. I know it’s tempting to keep stirring until everything looks perfectly uniform, but overmixing can make the oats break down and turn the mixture pasty. Stop mixing as soon as no dry spots remain. A few slightly uneven patches are fine — they’ll disappear when you roll the balls.
Use the palm test. Before you roll all the balls, test one. Squeeze a small amount of mixture in your palm. If it holds together without falling apart, you’re good. If it crumbles, add a bit more honey or peanut butter. If it’s too sticky to handle, add more oats. This quick test saves you from rolling a whole batch that won’t hold together.
Chill before rolling. I learned this one the hard way. Trying to roll warm, sticky mixture is a mess. Ten minutes in the fridge transforms it from frustrating to effortless. The mixture firms up just enough to roll smoothly without sticking to your hands.
Keep your hands cool. Warm hands melt the peanut butter and make everything stickier. Run your hands under cold water before rolling, or keep a small bowl of cold water nearby to dip your fingers in. Dry your hands thoroughly before rolling — wet hands make the balls slippery.
Batch consistency matters. Make all the balls the same size so they chill evenly. A cookie scoop is worth its weight in gold here. If you don’t have one, use a tablespoon and level it off each time.
Variations & Adaptations
One of the best things about this recipe is how easily it adapts. Here are some of my favorite variations, all tested and approved.
Nut-Free Version
Swap the peanut butter for sunflower seed butter or tahini. Sunflower seed butter gives a similar creamy texture with a slightly earthy flavor. Tahini adds a savory-sesame note that pairs surprisingly well with honey. Both options work perfectly — just make sure they’re well-stirred before measuring.
Vegan Version
Replace the honey with maple syrup or agave nectar. Maple syrup adds a lovely caramel note, while agave is more neutral. Use the same amount — ⅓ cup. The texture will be slightly softer, so you may need to add an extra tablespoon of oats. Chill for an extra 15 minutes before rolling.
Chocolate Lover’s Version
Increase the chocolate chips to ⅓ cup and add 1 tablespoon of cocoa powder to the dry ingredients. This turns them into double-chocolate energy balls that taste like brownie batter. Reduce the honey by 1 tablespoon to balance the bitterness of the cocoa.
Protein-Packed Version
Add 2 tablespoons of your favorite protein powder. Vanilla or chocolate both work. Reduce the oats by 2 tablespoons to compensate for the extra dry ingredient. You may also need to add an extra tablespoon of honey or a splash of milk to keep the mixture from drying out.
Seasonal Twist
In fall, add ½ teaspoon cinnamon and ¼ teaspoon nutmeg, plus 2 tablespoons dried cranberries. In summer, swap the chocolate chips for white chocolate chips and add 2 tablespoons freeze-dried strawberries crushed into powder. Both versions are absolutely delightful.
Serving & Storage Suggestions
These energy balls are incredibly versatile when it comes to serving and storing. Here’s what I’ve learned from keeping a constant supply in my fridge.
Serving temperature: These are best enjoyed chilled or at cool room temperature. Straight from the fridge, they’re firm and satisfying. If you let them sit out for 10-15 minutes, they soften slightly and become almost fudge-like. Both textures are delicious — it just depends on your preference.
Presentation ideas: For parties or gatherings, arrange them on a platter with fresh fruit and a drizzle of honey. For lunchboxes, pack them in a small container with a note — they make lunch feel special. For post-workout fuel, eat them straight from the fridge with a glass of cold milk or a refreshing cucumber mint green tea cooler for the perfect recovery duo.
Storage instructions: Store in an airtight container in the refrigerator for up to two weeks. Layer them between sheets of parchment paper to prevent sticking. If you’re stacking them, make sure they’re fully chilled first — warm balls will stick together.
Freezer instructions: These freeze beautifully. Place the rolled balls on a baking sheet and freeze until solid, about 1 hour. Transfer to a freezer-safe bag or container. They’ll keep for up to three months. To thaw, just move them to the refrigerator overnight, or let them sit at room temperature for 15-20 minutes. You can also eat them frozen — they’re like little ice cream bites.
Flavor development: Here’s something interesting — these actually taste better after a day in the fridge. The flavors meld together, the oats soften slightly, and the texture becomes perfectly uniform. I always make them a day ahead if I’m serving them to guests.
Nutritional Information & Benefits
Let’s talk numbers. Per ball (based on 16 servings), here’s what you’re looking at:
- Calories: Approximately 140-160
- Protein: 5-6g
- Carbohydrates: 18-20g
- Fiber: 3-4g
- Sugar: 10-12g (mostly from honey and a small amount from chocolate chips)
- Fat: 7-8g (mostly healthy unsaturated fats from peanut butter)
These aren’t just empty calories. The oats provide complex carbohydrates for sustained energy, while the peanut butter delivers protein and healthy fats to keep you full. Flaxseed adds omega-3 fatty acids and extra fiber, which supports digestive health. The honey offers quick-digesting natural sugars for an immediate energy boost — perfect before a workout or during that 3 PM slump.
These energy balls are naturally gluten-free if you use certified gluten-free oats. They’re also dairy-free and contain no refined sugar. The main allergen to watch for is peanuts — if that’s a concern, use the nut-free variation with sunflower seed butter.
I love that I can feel good about grabbing these for a snack. They’re not a health food in the trendy sense — they’re just real food, made from real ingredients, that happens to taste amazing. That’s the kind of snack I can stand behind.
Conclusion
Look, I know there are a million energy ball recipes out there. I’ve tried more than my fair share. But these Easy No-Bake Protein Energy Balls with Oats and Honey are the ones I keep coming back to, week after week. They’re simple enough for a harried Tuesday morning, impressive enough for a brunch spread, and satisfying enough to actually curb those between-meal cravings.
The beauty of this recipe is how forgiving it is. You can tweak it, swap things out, add your favorite mix-ins, and it still works. It’s a template for good eating, not a rigid formula. So go ahead — make them your own. Add a pinch of cinnamon, throw in some dried cherries, swap the chocolate for white chocolate. The base recipe is solid, and the possibilities are endless.
I’d love to hear how yours turn out. Drop a comment below and let me know what variations you tried, or tag me in your photos — I genuinely get excited seeing other people make these. And if you’re looking for another easy, wholesome snack to add to your rotation, you might also enjoy my creamy make-ahead vegan chocolate avocado pudding — it’s another no-bake winner that disappears fast.
Here’s to snacks that actually make life easier. Happy rolling!
Frequently Asked Questions
Can I use quick oats instead of rolled oats?
Yes, but the texture will be different. Quick oats are more finely ground, so they absorb moisture faster and create a softer, almost mushy texture. Rolled oats give a chewier, more satisfying bite. If you only have quick oats, reduce the honey by 1 tablespoon to compensate for the extra absorption.
Why are my energy balls falling apart?
This usually means the mixture is too dry. The most common culprit is peanut butter that’s too stiff or not enough honey. Try adding another tablespoon of honey or peanut butter and mixing thoroughly. Also, make sure you’re chilling the mixture before rolling — it helps everything bind together.
How long do these last at room temperature?
They’re best kept refrigerated, but they can sit at room temperature for up to 4-6 hours without issue. If you’re packing them for a lunchbox or a day out, they’ll be fine. Just don’t leave them in a hot car or in direct sunlight — the chocolate chips might melt and the texture will soften.
Can I make these without chocolate chips?
Absolutely. The chocolate chips are optional. You can omit them entirely, or replace them with dried fruit like raisins, chopped dates, or dried cranberries. Chopped nuts like almonds or walnuts also work great. If you’re skipping the chocolate, consider adding an extra tablespoon of honey to maintain the sweetness balance.
How do I make these lower in sugar?
Reduce the honey to ¼ cup and use sugar-free chocolate chips or omit them entirely. You can also replace half the honey with mashed banana — use 2 tablespoons mashed banana plus 2 tablespoons honey. This cuts the sugar while adding natural sweetness and a hint of banana flavor. Just note that the texture will be slightly softer, so add an extra tablespoon of oats to compensate.
Pin This Recipe!
Easy No-Bake Protein Energy Balls: Best 5-Minute Healthy Snack
These no-bake protein energy balls with oats and honey are the perfect healthy snack. Made with simple pantry ingredients, they come together in just 5 minutes and are great for pre-workout fuel, afternoon slumps, or after-school snacks.
- Prep Time: 5 minutes
- Cook Time: 0 minutes
- Total Time: 35 minutes (includes 30 minutes chill time)
- Yield: 16-18 balls 1x
- Category: Snack
- Cuisine: American
Ingredients
- 1 cup (90g) rolled oats
- ½ cup (130g) creamy peanut butter
- ⅓ cup (110g) honey
- ¼ cup (45g) mini chocolate chips
- 2 tablespoons (14g) ground flaxseed
- 1 teaspoon vanilla extract
- ¼ teaspoon salt
- ¼ cup (20g) shredded coconut (optional)
- 1 tablespoon chia seeds (optional)
- 2 tablespoons protein powder (optional)
Instructions
- Combine the dry ingredients: In a large mixing bowl, add 1 cup rolled oats, 2 tablespoons ground flaxseed, and ¼ teaspoon salt. If using optional dry add-ins like chia seeds or shredded coconut, add them now. Stir to distribute evenly.
- Add the wet ingredients: Pour in ½ cup creamy peanut butter, ⅓ cup honey, and 1 teaspoon vanilla extract. Distribute the peanut butter and honey in dollops across the oat mixture.
- Mix until combined: Use a spatula to fold everything together until no dry oats remain. The mixture should be cohesive and slightly sticky. If too dry, add another tablespoon of honey or peanut butter. If too wet, add a tablespoon of oats.
- Fold in the chocolate chips: Sprinkle ¼ cup mini chocolate chips over the mixture and gently fold until evenly distributed.
- Chill the mixture (optional but recommended): Refrigerate the bowl for 10-15 minutes to firm up the mixture for easier rolling.
- Roll into balls: Line a baking sheet or plate with parchment paper. Using a cookie scoop or tablespoon, scoop even portions and roll into smooth balls about 1 inch in diameter. You should get about 16-18 balls.
- Chill to set: Place the rolled balls on the prepared baking sheet and refrigerate for at least 30 minutes to firm up.
- Store and enjoy: Transfer to an airtight container. Refrigerate for up to two weeks or freeze for up to three months.
Notes
For best texture, use natural peanut butter that has been stirred well. If the mixture is too sticky, chill before rolling. These taste even better after a day in the fridge as flavors meld.
Nutrition
- Serving Size: 1 ball
- Calories: 150
- Sugar: 11
- Sodium: 80
- Fat: 8
- Saturated Fat: 2
- Carbohydrates: 19
- Fiber: 3
- Protein: 5
Keywords: energy balls, protein balls, no-bake, healthy snack, oats, peanut butter, honey, gluten-free, dairy-free


