That quiet, almost metallic pop of a jar lid sealing — the kind that happens when you’re not even paying attention — still takes me straight to my grandmother’s cramped summer kitchen. I wasn’t thinking about canning that day. I was just standing there, half-listening, while she moved between the stove and the counter with a rhythm she didn’t even notice anymore. The air was thick with the smell of tomatoes, sweet and sun-soaked, and steam clung to the windows like fog. She didn’t have a fancy setup, no water bath canner, no special tools. Just a big pot, some jars, and a knowing look when she said, “You don’t need all that fuss.”
That moment stuck with me, honestly, more than any recipe book ever could. It wasn’t about being precise — it was about trusting the process. And that’s exactly what this easy small-batch canned tomato sauce is. No water bath, no complicated equipment, no standing over a boiling pot for hours. It’s the kind of thing you make on a lazy Sunday afternoon when the farmer’s market haul is starting to look a little too real. You know the one — where you bought way too many tomatoes because they were just too pretty to leave behind.
This sauce has become my little secret weapon. It’s not just about having a jar of summer tucked away for a rainy Tuesday. It’s about the feeling of pulling it out months later, opening it, and being hit with that same tomato-heavy air. The kind that makes you close your eyes for a second. I’ve made this more times than I can count, and every single batch tastes a little like that day in her kitchen. It’s simple, it’s honest, and it works.
Why You’ll Love This Recipe
Let’s be real — canning can feel like a whole science experiment. But this recipe? It’s the opposite of that. I’ve tested this method over and over, tweaking the acid balance and the timing until it felt foolproof. It’s chef-tested in my own home kitchen, family-approved by everyone who’s snuck a spoonful straight from the jar, and honestly, it’s the kind of thing that builds your confidence in the kitchen.
- No Water Bath Needed : You read that right. No giant pot, no rack, no boiling for an hour. Just a simple stovetop method that works for small batches.
- Quick & Easy : From start to finish, you’re looking at about an hour and a half. Most of that is just simmering — you barely lift a finger.
- Simple Ingredients : Tomatoes, salt, a little acid. That’s it. No weird preservatives or grocery store runs for obscure items.
- Perfect for Tomato Season : When the garden or market is overflowing, this is your answer. It’s like bottling up sunshine.
- Crowd-Pleaser : Use it for pasta, pizza, soups, or just dipping crusty bread. Everyone always asks for the recipe.
What makes this different from every other canned sauce out there? It’s the method. By skipping the water bath, you keep the sauce fresher, brighter, and way less cooked-down. It’s not that heavy, overcooked jarred stuff — it tastes like you just picked the tomatoes. And honestly, the texture is next-level. It’s smooth but still has that rustic, homemade feel that store-bought just can’t touch.
This recipe isn’t just good — it’s the kind that makes you feel like you actually know what you’re doing. It’s comfort food you made yourself, waiting in the pantry. Perfect for impressing guests without the stress, or turning a simple weeknight pasta into something that feels special.
What Ingredients You Will Need
This recipe uses the simplest ingredients to deliver a bold, honest tomato flavor. No fancy stuff — just the good, fresh things you probably already have or can grab easily.
- 5 lbs ripe Roma tomatoes (or any meaty tomato variety — Roma works best for sauce because they’re less watery; look for ones that are deep red and firm but give slightly to pressure)
- 2 tablespoons fresh lemon juice (bottled works in a pinch, but fresh gives a cleaner taste; this is your acid for safe canning)
- 1 ½ teaspoons kosher salt (I prefer Diamond Crystal for its clean flavor; adjust to your taste, but don’t skip it — salt is crucial for preservation and flavor)
- 1 tablespoon olive oil (optional, but I love a good quality extra virgin here for richness; it’s not necessary for canning safety, just taste)
- 2-3 fresh basil leaves per jar (optional, but adds that classic Italian note; use whole leaves, not chopped, to keep the flavor subtle)
That’s it. Five ingredients. You might be wondering about garlic or onions — and you can absolutely add them if you want, but for a basic, versatile sauce, I keep it clean. You can always doctor it up later when you open a jar. Trust me, a plain tomato sauce is way more useful than one that’s already seasoned a specific way.
When picking your tomatoes, go for the ripest ones you can find. If they’re not quite there, let them sit on the counter for a day or two. The more sun and sweetness they have, the better your sauce will be. I’ve also used a mix of cherry tomatoes and larger ones in a pinch — it works fine, just adjust the simmering time since cherry tomatoes have more skin.
For the lemon juice, don’t stress too much. It’s there to safely acidify the sauce so it can be stored at room temperature. If you’re using bottled lemon juice, check the label — some have added preservatives that can affect flavor. Fresh is always my go-to.
Equipment Needed
You don’t need a fancy canning setup for this. Here’s what you’ll actually use:
- Large pot or Dutch oven (at least 6-quart capacity; enameled cast iron is my favorite for even heating, but a heavy-bottomed stainless steel pot works great too)
- 4-5 pint-sized glass jars with lids (wide-mouth jars are easier to fill; make sure they’re clean and free of chips or cracks)
- Sharp knife and cutting board (a good chef’s knife makes quick work of the tomatoes)
- Food mill or immersion blender (a food mill gives the smoothest sauce, but an immersion blender is faster and easier to clean; a regular blender works too, just let the sauce cool slightly first)
- Ladle and funnel (a wide-mouth funnel is a lifesaver for filling jars without making a mess)
- Clean kitchen towels (for wiping jar rims and handling hot jars)
- Pot holders or jar lifter (safety first — hot jars are no joke)
If you don’t have a food mill, no worries. A simple colander and the back of a spoon can work, though it takes a little more elbow grease. I’ve used an immersion blender for years and honestly prefer it — it’s faster and leaves a bit more texture, which I like. Just be careful not to over-blend or you’ll end up with tomato juice instead of sauce.
Preparation Method
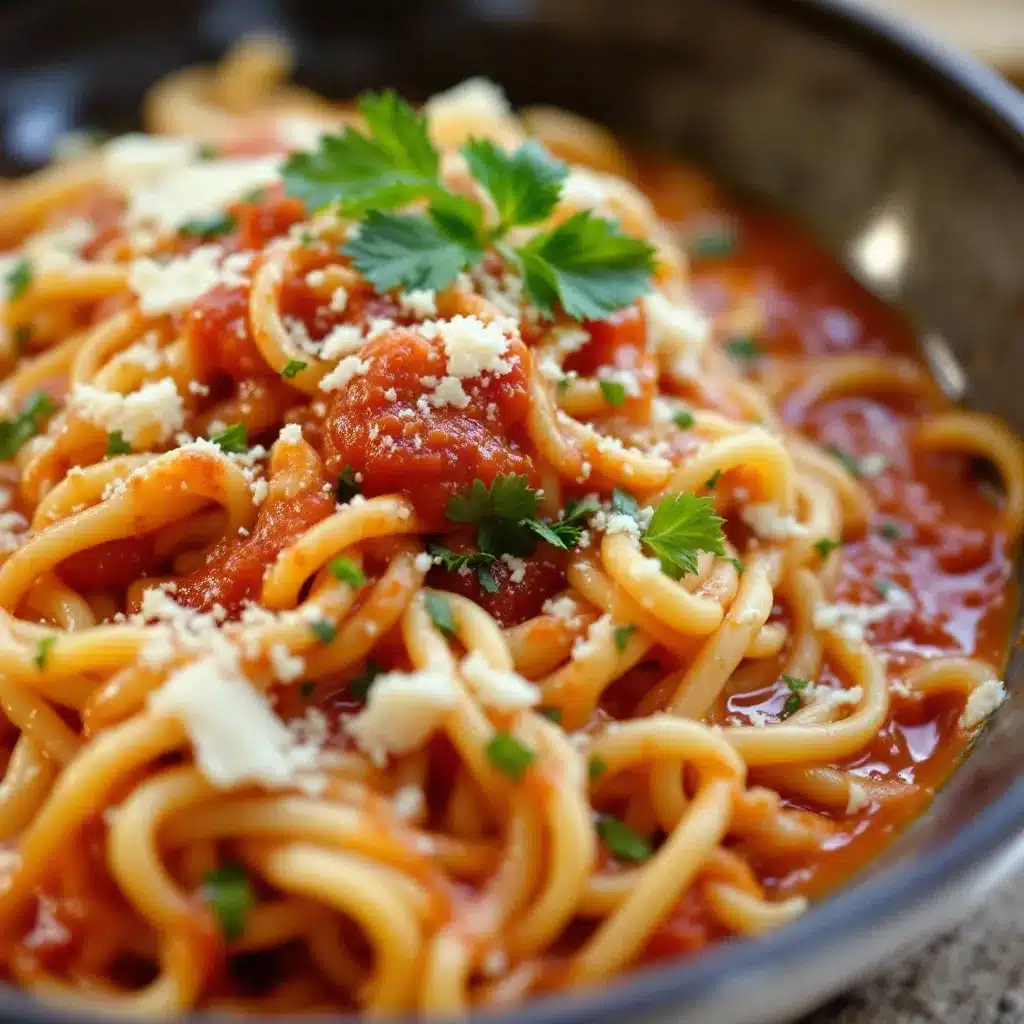
Alright, let’s get into it. This method is straightforward, but I’ll walk you through every step so you feel confident.
- Prep your tomatoes (10 minutes) : Wash your Roma tomatoes well. Cut a small X on the bottom of each one — this helps the skins slip off later. Bring a large pot of water to a boil, then drop the tomatoes in for about 30-45 seconds, or until the skins start to peel back. Transfer them immediately to a bowl of ice water. The skins should slide right off. Peel them, then roughly chop the tomatoes. Don’t worry about being perfect — they’ll break down as they cook.
- Start the sauce (15 minutes) : In your large pot or Dutch oven, add the chopped tomatoes. Turn the heat to medium-high and bring them to a gentle boil, stirring occasionally so they don’t stick. You’ll see them start to release their juices pretty quickly. Reduce the heat to medium-low and let them simmer for about 10 minutes, breaking them up with a wooden spoon as they soften.
- Blend or mill the sauce (5 minutes) : This is where you decide on texture. For a smooth sauce, run the cooked tomatoes through a food mill. For a chunkier sauce, use an immersion blender directly in the pot and pulse a few times. If you’re using a regular blender, let the sauce cool for 10 minutes first, then blend in batches — hot liquid can explode in a blender, so be careful.
- Season and simmer (30-40 minutes) : Return the blended sauce to the pot. Stir in the salt and lemon juice. If you’re using olive oil, add it now. Bring the sauce to a low simmer — you want gentle bubbles, not a rolling boil. Let it cook uncovered, stirring every 5-10 minutes, until it thickens to your liking. It should reduce by about a third. The sauce will look darker and smell incredibly rich. Taste it and adjust salt if needed.
- Prepare your jars (during the simmer) : While the sauce cooks, wash your jars and lids in hot, soapy water. Rinse well. Place them in a clean pot, cover with water, and bring to a boil. Let them boil for 10 minutes to sterilize. Turn off the heat and leave them in the hot water until you’re ready to fill them. This step is important — it prevents bacteria from spoiling your sauce.
- Fill the jars (10 minutes) : Carefully remove a jar from the hot water using your jar lifter or pot holders. Place it on a clean kitchen towel. Using your funnel and ladle, fill the jar with hot sauce, leaving about ½ inch of headspace at the top. Wipe the rim of the jar with a clean, damp towel to remove any sauce — this ensures a good seal. Place a lid on the jar and screw on the band until it’s fingertip-tight (tight but not forced). Repeat with the remaining jars.
- Process the jars (15 minutes) : Place the filled jars back into the pot of hot water. The water should cover the jars by at least an inch. Bring the water to a gentle boil and let the jars process for 15 minutes. This step creates the seal. After 15 minutes, turn off the heat and let the jars sit in the water for 5 minutes before removing them.
- Cool and check seals (12 hours) : Carefully remove the jars and place them on a clean towel on the counter. Leave them undisturbed for 12-24 hours. You’ll hear the satisfying pop of the lids sealing as they cool. After 12 hours, press the center of each lid — if it doesn’t pop back, it’s sealed. If it does pop, refrigerate that jar and use it within a week.
One thing I learned the hard way — don’t overtighten the bands. I did that once and the lids buckled. Just a gentle twist is all you need. Also, if a jar doesn’t seal, don’t panic. Just pop it in the fridge and use it like fresh sauce. It’s still delicious.
Cooking Tips & Techniques
I’ve made this recipe more times than I can count, and I’ve definitely had my share of mishaps. Here’s what I’ve learned so you don’t have to repeat my mistakes.
Don’t skip the lemon juice. I know it seems like a small thing, but the acid is what keeps the sauce safe for room-temperature storage. I once tried to cut back on it because I thought the tomatoes were acidic enough — they weren’t. The sauce tasted flat and I ended up refrigerating the whole batch. Trust the process.
Watch your simmer. You want a gentle bubble, not a violent boil. If you boil the sauce too hard, it can scorch on the bottom and develop a bitter taste. I learned this the hard way when I walked away for “just a minute” and came back to a burnt pot. Stir every 5-10 minutes, especially toward the end when the sauce is thicker.
Use a timer for the processing step. It’s easy to get distracted, but those 15 minutes are critical for a good seal. I set a timer on my phone every single time. No exceptions.
Let the jars cool completely before moving them. I know it’s tempting to check on them, but moving hot jars can break the seal. Just leave them alone on the counter overnight. In the morning, you’ll have perfectly sealed jars of summer.
If you’re new to canning, start with a small batch. This recipe makes about 4-5 pints, which is perfect for learning. You’re not committing to a massive project, and if something goes wrong, you haven’t wasted a whole season’s worth of tomatoes.
Variations & Adaptations
This basic sauce is a blank canvas. Here are some ways to make it your own:
- Herb-Infused Sauce : Add a few sprigs of fresh oregano, thyme, or rosemary to the pot while the sauce simmers. Remove them before blending. The flavor is subtle but adds a lovely complexity.
- Spicy Arrabbiata Style : Toss in 1-2 dried red chili peppers or a teaspoon of red pepper flakes during the simmer. It gives the sauce a gentle heat that’s perfect for pasta.
- Roasted Tomato Version : For a deeper, smokier flavor, roast the tomatoes at 400°F for 30 minutes before simmering. This caramelizes the natural sugars and adds a whole new dimension. Just be aware the sauce will be a bit thicker.
- Garlic Lovers’ Sauce : Sauté 4-5 cloves of minced garlic in olive oil before adding the tomatoes. It’s a classic for a reason — just don’t burn the garlic or it’ll turn bitter.
- Low-Sodium Option : Cut the salt in half or omit it entirely. The lemon juice provides enough acidity for safe canning, so you can adjust salt to your dietary needs. Just note the flavor will be milder.
I’ve personally tried the roasted tomato version and it’s become my fall favorite. It’s a little more work, but the flavor is incredible — like a slow-simmered Sunday sauce without the all-day commitment.
Serving & Storage Suggestions
This sauce is incredibly versatile. Here’s how to use and store it:
- Serving Temperature : Serve the sauce warm, straight from the jar. It’s perfect over pasta, as a pizza base, or simmered with meatballs. I also love it as a dipping sauce for crusty bread or roasted vegetables.
- Complementary Dishes : Pair it with a simple fresh quinoa and kale power bowl for a light meal, or use it as a base for a slow cooker honey garlic chicken for a cozy dinner. It also works beautifully with crispy lemon rosemary salmon for a surprising twist.
- Storage Instructions : Sealed jars can be stored in a cool, dark place (like a pantry) for up to 12 months. Once opened, refrigerate and use within 5-7 days. If a jar doesn’t seal, refrigerate immediately and use within a week.
- Reheating Methods : For the best flavor, reheat the sauce gently on the stovetop over medium-low heat. You can also microwave it in a microwave-safe bowl for 1-2 minutes, stirring halfway through. Avoid boiling it again or it can become too thick.
- Flavor Development : The sauce actually gets better after a few weeks in the jar. The flavors meld together and deepen. I’ve found that jars I open in winter taste richer than the ones I open in the first month. It’s like the sauce is aging gracefully.
Nutritional Information & Benefits
This sauce is as healthy as it is delicious. Here’s a quick look at what you’re getting:
Estimated nutrition per ½ cup serving : Calories: 45, Total Fat: 1.5g, Sodium: 290mg, Total Carbohydrates: 8g, Dietary Fiber: 2g, Sugars: 5g, Protein: 2g, Vitamin C: 20% DV, Vitamin A: 15% DV.
- Rich in Lycopene : Tomatoes are packed with lycopene, a powerful antioxidant that supports heart health and may reduce the risk of certain cancers. Cooking actually increases the lycopene content, so this sauce is especially beneficial.
- Low in Calories : At just 45 calories per serving, this sauce is a guilt-free way to add flavor to your meals. It’s naturally low in fat and sugar.
- Dietary Considerations : This recipe is naturally gluten-free, dairy-free, vegan, and Whole30-friendly. It contains no common allergens beyond tomatoes (which are nightshades for those sensitive).
- Potential Allergens : None, unless you add garlic or other ingredients. Always check labels on bottled lemon juice if you have sensitivities.
I love that this sauce lets me enjoy summer tomatoes all year long without any weird additives. It’s real food, plain and simple.
Conclusion
This easy small-batch canned tomato sauce is more than just a recipe — it’s a way to hold onto summer. No water bath, no stress, just honest, delicious tomatoes in a jar. Whether you’re a seasoned canner or a total beginner, this method is forgiving and rewarding. I’ve made it through scorched pots and unsealed lids, and I keep coming back because the result is always worth it.
I’d love to hear how yours turns out. Did you add garlic? Roast the tomatoes? Use them in a Mediterranean chickpea and feta stuffed mini peppers recipe? Drop a comment below and share your version. And if you found this helpful, share it with a friend who’s been scared of canning — this might just change their mind. Happy cooking!
Frequently Asked Questions
Can I use any type of tomato for this recipe?
Yes, but Roma or plum tomatoes work best because they have less water and more flesh. If you use larger, juicier tomatoes like beefsteak, you’ll need to simmer the sauce longer to thicken it. Cherry tomatoes also work in a pinch, just be prepared for more seeds and skin.
How long will the sealed jars last?
Properly sealed jars can be stored in a cool, dark place for up to 12 months. After that, the quality may start to decline, but the sauce will still be safe to eat if the seal is intact. Always check for signs of spoilage before using — if the lid is bulging or the sauce smells off, toss it.
Can I double this recipe?
Absolutely. Just make sure your pot is large enough to hold the doubled amount without overflowing. You may need to increase the simmering time slightly to achieve the right thickness. The processing time stays the same — 15 minutes for pint jars.
What if my jars don’t seal?
Don’t panic. If a jar doesn’t seal, simply refrigerate it and use it within a week. You can also reprocess it with a new lid, but I find it’s easier to just use it fresh. Unsealed sauce is still delicious — it just won’t last as long on the shelf.
Can I add other vegetables to the sauce?
Yes, but be careful with low-acid vegetables like onions, garlic, or bell peppers. If you add too many, you’ll need to increase the lemon juice to maintain safe acidity. A good rule of thumb is to keep added vegetables to no more than 10% of the total volume. For bigger additions, consider pressure canning instead.
Pin This Recipe!
Easy Small-Batch Canned Tomato Sauce (No Water Bath)

This easy small-batch canned tomato sauce requires no water bath and no complicated equipment. Made with simple ingredients like ripe Roma tomatoes, lemon juice, and salt, it’s a quick and rewarding way to preserve summer’s bounty for use all year long.
- Prep Time: 15 minutes
- Cook Time: 1 hour 10 minutes
- Total Time: 1 hour 25 minutes
- Yield: 4-5 pint jars 1x
- Category: Preserves
- Cuisine: American
Ingredients
- 5 lbs ripe Roma tomatoes (or any meaty tomato variety)
- 2 tablespoons fresh lemon juice
- 1 ½ teaspoons kosher salt (preferably Diamond Crystal)
- 1 tablespoon olive oil (optional)
- 2–3 fresh basil leaves per jar (optional)
Instructions
- Prep your tomatoes (10 minutes): Wash the Roma tomatoes well. Cut a small X on the bottom of each one. Bring a large pot of water to a boil, then drop the tomatoes in for about 30-45 seconds, or until the skins start to peel back. Transfer them immediately to a bowl of ice water. Peel the skins off, then roughly chop the tomatoes.
- Start the sauce (15 minutes): In a large pot or Dutch oven, add the chopped tomatoes. Turn the heat to medium-high and bring them to a gentle boil, stirring occasionally. Reduce the heat to medium-low and let them simmer for about 10 minutes, breaking them up with a wooden spoon as they soften.
- Blend or mill the sauce (5 minutes): For a smooth sauce, run the cooked tomatoes through a food mill. For a chunkier sauce, use an immersion blender directly in the pot and pulse a few times. If using a regular blender, let the sauce cool for 10 minutes first, then blend in batches.
- Season and simmer (30-40 minutes): Return the blended sauce to the pot. Stir in the salt and lemon juice. If using olive oil, add it now. Bring the sauce to a low simmer and let it cook uncovered, stirring every 5-10 minutes, until it thickens to your liking (reduced by about a third). Taste and adjust salt if needed.
- Prepare your jars (during the simmer): Wash your jars and lids in hot, soapy water. Rinse well. Place them in a clean pot, cover with water, and bring to a boil. Let them boil for 10 minutes to sterilize. Turn off the heat and leave them in the hot water until ready to fill.
- Fill the jars (10 minutes): Carefully remove a jar from the hot water using a jar lifter or pot holders. Place it on a clean kitchen towel. Using a funnel and ladle, fill the jar with hot sauce, leaving about ½ inch of headspace. Wipe the rim of the jar with a clean, damp towel. Place a lid on the jar and screw on the band until fingertip-tight. Repeat with remaining jars.
- Process the jars (15 minutes): Place the filled jars back into the pot of hot water. The water should cover the jars by at least an inch. Bring the water to a gentle boil and let the jars process for 15 minutes. After 15 minutes, turn off the heat and let the jars sit in the water for 5 minutes before removing them.
- Cool and check seals (12 hours): Carefully remove the jars and place them on a clean towel on the counter. Leave them undisturbed for 12-24 hours. After 12 hours, press the center of each lid — if it doesn’t pop back, it’s sealed. If it does pop, refrigerate that jar and use it within a week.
Notes
Don’t skip the lemon juice — it’s essential for safe canning. Simmer gently to avoid scorching. Use a timer for the 15-minute processing step. Let jars cool completely before moving. If a jar doesn’t seal, refrigerate and use within a week. The sauce flavor improves after a few weeks in the jar.
Nutrition
- Serving Size: ½ cup
- Calories: 45
- Sugar: 5
- Sodium: 290
- Fat: 1.5
- Carbohydrates: 8
- Fiber: 2
- Protein: 2
Keywords: canned tomato sauce, small batch canning, no water bath, homemade tomato sauce, easy canning recipe, Roma tomato sauce, pantry staple


