That first bite — where the soft tortilla gives way to cool, creamy ranch and sharp cheddar, with the salty-savory turkey hitting right after — still takes me straight to my sister’s kitchen, three years ago. She was elbow-deep in a chaotic Sunday meal prep, kids running circles around her legs, and she tossed one of these roll-ups my way without breaking stride. “Try it,” she said, “and then help me wrap the rest.”
I wasn’t expecting much, honestly. A flour tortilla stuffed with deli meat and cheese? That’s a lunch I’ve made a thousand times. But there was something about the way she rolled them tight, sliced them into perfect little pinwheels, and stacked them in a freezer bag like she was packing for an arctic expedition. She had a system. And that system meant she never had to think about lunch again on a busy morning.
These Easy Turkey and Cheddar Freezer Sandwich Roll-Ups aren’t fancy. They’re not meant to be. They’re the kind of recipe you make when you’re tired of deciding what to eat, when you need something your kids will actually finish, or when you just want five minutes of peace knowing tomorrow’s lunch is already handled. They’re reliable. They’re forgiving. And honestly? They taste better than any sad desk sandwich I’ve ever bought.
I’ve made these at least a dozen times since that afternoon in her kitchen. I’ve tweaked the fillings, tested different tortillas, and learned exactly how to wrap them so they don’t get soggy. And now I’m passing all of that along to you — because everyone deserves a lunch that feels this easy.
Why You Will Love This Recipe
Let me tell you why these roll-ups have become my most-recommended recipe for busy weeks, road trips, and school lunches. They solve real problems without creating new ones.
- Freezer-Friendly Genius: Make a batch on Sunday and grab one every morning. They thaw in the lunchbox by noon, no reheating needed. That’s a game-changer for anyone who’s ever forgotten to pack lunch.
- Simple Ingredients, No Fuss: You need exactly six ingredients — tortillas, turkey, cheddar, cream cheese, ranch seasoning, and a little butter. No fancy grocery runs. No obscure items you’ll use once.
- Perfect for School and Work Lunches: These hold up beautifully in a lunchbox. No sogginess, no falling apart. Kids love them, adults love them, and they’re easy to customize for picky eaters.
- Crowd-Pleaser Every Time: I’ve brought these to potlucks, game days, and road trips. They disappear fast. The combination of creamy, cheesy, and savory is just… right.
- Unbelievably Convenient: This isn’t just another wrap recipe. The secret is in the cream cheese spread — it acts as a barrier that keeps the tortilla from getting soggy, even after freezing. That one trick makes all the difference.
I’ve tested these with different fillings and freezing methods, and this version is the one that works every single time. It’s the kind of recipe that makes you feel like you’ve got your life together — even on the days you definitely don’t.
What Ingredients You Will Need
This recipe uses simple, everyday ingredients that come together for a creamy, savory, and satisfying lunch. Here’s what you need and why each one matters.
For the Roll-Ups
- Large flour tortillas (10-inch) — Burrito-sized tortillas work best because they hold the filling without tearing. I prefer Mission or Guerrero brands for their flexibility. Avoid extra-thin tortillas; they can crack when rolling.
- 8 ounces cream cheese, softened — This is the secret weapon. The cream cheese spreads easily when softened and creates a moisture barrier that prevents the tortilla from getting soggy. Full-fat works best for texture and freezing stability.
- 1 packet ranch seasoning mix — Adds that savory, herby flavor that ties everything together. You can use store-bought or homemade. I like Hidden Valley for consistency.
- 1 pound thinly sliced turkey breast — Oven-roasted turkey from the deli counter is my go-to. It’s lean, flavorful, and slices thin enough to roll easily. Avoid honey-roasted or flavored varieties unless you want a sweet-savory mix.
- 8 slices sharp cheddar cheese — Sharp cheddar cuts through the creaminess and adds a tangy punch. You can substitute provolone, Swiss, or pepper jack for different flavor profiles.
- 2 tablespoons unsalted butter, melted — Brushing the outside before freezing helps the tortillas stay soft and prevents them from drying out. It also gives a nice golden color if you decide to toast them before eating.
Optional Add-Ins

- Fresh spinach leaves — Adds color and nutrients. Pat them completely dry before adding to avoid sogginess.
- Sliced bell peppers or cucumber — Adds crunch. Just slice very thin and pat dry.
- Dijon mustard or honey mustard — Spread a thin layer over the cream cheese for extra tang.
I always recommend buying turkey from the deli counter rather than pre-packaged slices. The texture is better, and you can ask for it sliced thin — not shaved, not thick, just thin. It makes a real difference in how easily the roll-ups hold together.
Equipment Needed
You don’t need a fancy kitchen to make these roll-ups. Here’s what you’ll actually use:
- Large cutting board — Gives you space to spread, layer, and roll without everything sliding around.
- Sharp knife — A serrated bread knife works best for clean slices without squishing the roll. A chef’s knife works too, just wipe it clean between cuts.
- Mixing bowl and spatula — For softening and mixing the cream cheese with ranch seasoning.
- Plastic wrap or parchment paper — To wrap each roll-up individually before freezing. Parchment is my preference because it doesn’t stick.
- Freezer-safe zip-top bags or containers — For storing the wrapped roll-ups. I use quart-sized bags and label them with the date.
- Pastry brush (optional) — For brushing melted butter on the tortillas. A paper towel works in a pinch.
If you don’t have a pastry brush, just use your fingers or the back of a spoon to spread the melted butter. It doesn’t have to be perfect — these are roll-ups, not a bakery display.
Preparation Method
Follow these steps, and you’ll have a batch of freezer-ready roll-ups in about 20 minutes. The key is working quickly and keeping everything at room temperature.
Step 1: Make the Cream Cheese Spread
In a small mixing bowl, combine 8 ounces of softened cream cheese with 1 packet of ranch seasoning mix. Stir until completely smooth and well combined. Let it sit at room temperature while you prep the other ingredients — this makes spreading much easier.
Sensory cue: The mixture should be silky and spreadable, not stiff. If it feels too thick, let it sit another 5 minutes.
Step 2: Prep Your Tortillas
Lay one large flour tortilla flat on your cutting board. If the tortillas are cold from the fridge, let them come to room temperature for 10 minutes — cold tortillas crack when rolled.
Using a pastry brush or your fingers, lightly brush the top side of the tortilla with melted butter. This step is optional but highly recommended for keeping the tortilla soft during freezing.
Step 3: Spread the Cream Cheese Mixture
Using a spatula or the back of a spoon, spread about 2 tablespoons of the cream cheese mixture evenly over the entire surface of the tortilla. Leave a 1-inch border around the edges — this helps seal the roll-up when you wrap it.
Personal tip: I learned the hard way that too much cream cheese makes the roll-ups slide apart. Two tablespoons is the sweet spot.
Step 4: Layer the Turkey and Cheese
Place 2 to 3 slices of turkey flat over the cream cheese, overlapping slightly to cover the whole tortilla. Then lay 1 slice of cheddar cheese on top. If you’re adding spinach or other veggies, place them on top of the cheese now.
Troubleshooting tip: If your turkey slices are thick, use only 2 slices. Thick turkey makes the roll-up bulky and harder to slice cleanly.
Step 5: Roll It Tight
Starting at the edge closest to you, roll the tortilla away from you as tightly as you can without tearing it. Use your fingertips to keep the filling tucked in as you roll. When you reach the end, place the seam side down.
Sensory cue: You should feel resistance but not struggle. If the tortilla starts to bulge, you’ve overstuffed it — remove one slice of turkey and try again.
Step 6: Wrap and Freeze
Place the rolled tortilla seam-side down on a piece of plastic wrap or parchment paper. Roll it up tightly, twisting the ends like a candy wrapper. This keeps the roll compact and prevents freezer burn.
Place the wrapped roll-ups in a freezer-safe bag or container. Label with the date and contents. They’ll keep for up to 3 months.
Step 7: Slice Before Serving (Optional)
If you’re packing these for lunch, you can slice them while still slightly frozen or after thawing. Use a serrated knife and wipe the blade between cuts for clean pinwheels. Slice into 1-inch rounds for bite-sized pieces, or leave whole for a wrap-style lunch.
Cooking Tips and Techniques
I’ve made these roll-ups more times than I can count, and I’ve picked up a few tricks along the way. Here’s what I wish someone had told me the first time.
Don’t skip softening the cream cheese. Cold cream cheese tears the tortilla when you try to spread it. Leave it on the counter for 20 minutes, or microwave it in 10-second bursts until soft but not melted.
Pat your add-ins dry. If you’re adding spinach, bell peppers, or any veggie, pat them completely dry with a paper towel. Extra moisture turns the tortilla mushy, especially after freezing.
Roll with confidence. A loose roll falls apart when sliced. Tuck and roll firmly, but don’t crush the filling. Think of it like rolling a sleeping bag — snug but not suffocating.
Freeze them flat. Lay the wrapped roll-ups in a single layer in the freezer for the first hour. Once they’re firm, you can stack them in a bag. This prevents them from getting squished into odd shapes.
I once forgot to label my freezer bag. Three weeks later, I pulled out what I thought were turkey roll-ups and ended up with dessert wraps (leftover Nutella and banana). Label everything. Trust me.
Variations and Adaptations
These roll-ups are endlessly adaptable. Here are a few versions I’ve tried and loved.
Spicy Southwest Roll-Ups
Swap the ranch seasoning for taco seasoning. Use pepper jack cheese instead of cheddar, and add a thin layer of refried beans before the cream cheese. These are fantastic for game day — I’ve served them alongside my Easy Sweet and Salty Football Snack Mix and they disappeared in minutes.
Ham and Swiss Variation
Replace turkey with thinly sliced ham and cheddar with Swiss cheese. Add a smear of Dijon mustard for extra tang. This version tastes like a fancy deli sandwich without any effort.
Veggie-Packed Roll-Ups
Skip the meat entirely. Layer cream cheese with shredded carrots, thinly sliced cucumber, bell peppers, and fresh spinach. Add a sprinkle of everything bagel seasoning for crunch. These are perfect for meatless Mondays or lunchboxes.
Gluten-Free Option
Use gluten-free tortillas (I like Siete or Mission gluten-free). The technique is exactly the same. Just note that some gluten-free tortillas are more fragile, so roll gently and don’t overstuff.
My personal favorite variation is the spicy Southwest version. I made a batch for a football party last fall, and they were gone before the first quarter ended. Something about the creamy, spicy, cheesy combo just hits different.
Serving and Storage Suggestions
These roll-ups are designed for convenience, but a little extra care makes them even better.
Serving: Serve chilled or at room temperature. If you want a warm version, toast the whole roll-up in a skillet over medium heat for 2 minutes per side until golden and the cheese melts. This turns them into a completely different experience — like a grilled wrap.
Storage: Keep wrapped roll-ups in the freezer for up to 3 months. To thaw, transfer one to the refrigerator overnight, or place it directly in a lunchbox in the morning — it will be thawed by lunchtime. Do not microwave to thaw; it makes the tortilla rubbery.
Flavor development: The cream cheese spread actually gets better after a day or two in the freezer. The flavors meld together, and the ranch seasoning becomes more pronounced. I honestly prefer them after a week in the freezer over fresh ones.
These pair beautifully with a side of fresh fruit, veggie sticks, or a simple salad. For a heartier lunch, pack them alongside a cup of Creamy Crockpot Cheeseburger Potato Soup — the contrast between the cold, creamy roll-ups and the warm, hearty soup is pure comfort.
Nutritional Information and Benefits
Each roll-up (sliced into 6-8 pieces, using the full recipe) provides approximately:
- Calories: 280-320 per roll-up
- Protein: 18-22g
- Carbohydrates: 20-24g
- Fat: 14-18g
- Fiber: 1-2g
These roll-ups offer a balanced mix of protein from the turkey and cheese, healthy fats from the cream cheese, and energy from the tortilla. Turkey is a lean protein source that supports muscle maintenance and keeps you full longer. Cheddar provides calcium for bone health.
For a lower-carb option, use low-carb tortillas (they work perfectly with this recipe). For a lower-fat version, use reduced-fat cream cheese and turkey breast — just note the texture will be slightly less creamy.
These are not a health food, but they’re a realistic, satisfying lunch that doesn’t rely on processed lunch kits or fast food. That’s a win in my book.
Conclusion
These Easy Turkey and Cheddar Freezer Sandwich Roll-Ups are the kind of recipe that quietly changes your daily routine. They take 20 minutes to make, save you from last-minute lunch panic, and taste genuinely good — not just “good for a freezer meal.”
I love that I can customize them for different moods and diets. I love that my kids actually eat them without complaint. And I really love that I never have to think about lunch on a busy morning. That peace of mind is worth more than any complicated recipe.
Try these once, and I think you’ll see what I mean. Make a double batch. Experiment with your favorite fillings. And when you pull one out of the freezer on a chaotic Tuesday, you’ll thank yourself.
Have you tried these? Drop a comment below and tell me your favorite variation — I’m always looking for new ideas. And if you loved them, share this recipe with a friend who needs an easier lunch routine.
Frequently Asked Questions
Can I use low-fat cream cheese?
Yes, but the texture will be slightly less creamy and the roll-ups may not hold together as well. Full-fat cream cheese creates a better moisture barrier and freezes more reliably.
How long do these last in the freezer?
Up to 3 months when wrapped tightly in plastic wrap or parchment and stored in a freezer-safe bag. After that, the tortilla may start to dry out.
Can I toast these after thawing?
Absolutely. Heat a skillet over medium heat and cook the whole roll-up for 2-3 minutes per side until golden. This gives you a warm, crispy exterior with a cool, creamy center.
Do I have to use ranch seasoning?
Not at all. You can use taco seasoning, Italian seasoning, garlic herb seasoning, or even plain cream cheese with a pinch of salt and pepper. Ranch is just my favorite for flavor balance.
Can I make these ahead for a party?
Yes! Make them up to 3 days ahead and keep them refrigerated. Slice right before serving for the cleanest cuts. They’re perfect for brunches, potlucks, and game day spreads — I often serve them alongside my Best Football Charcuterie Board for an easy, no-fuss appetizer.
Pin This Recipe!
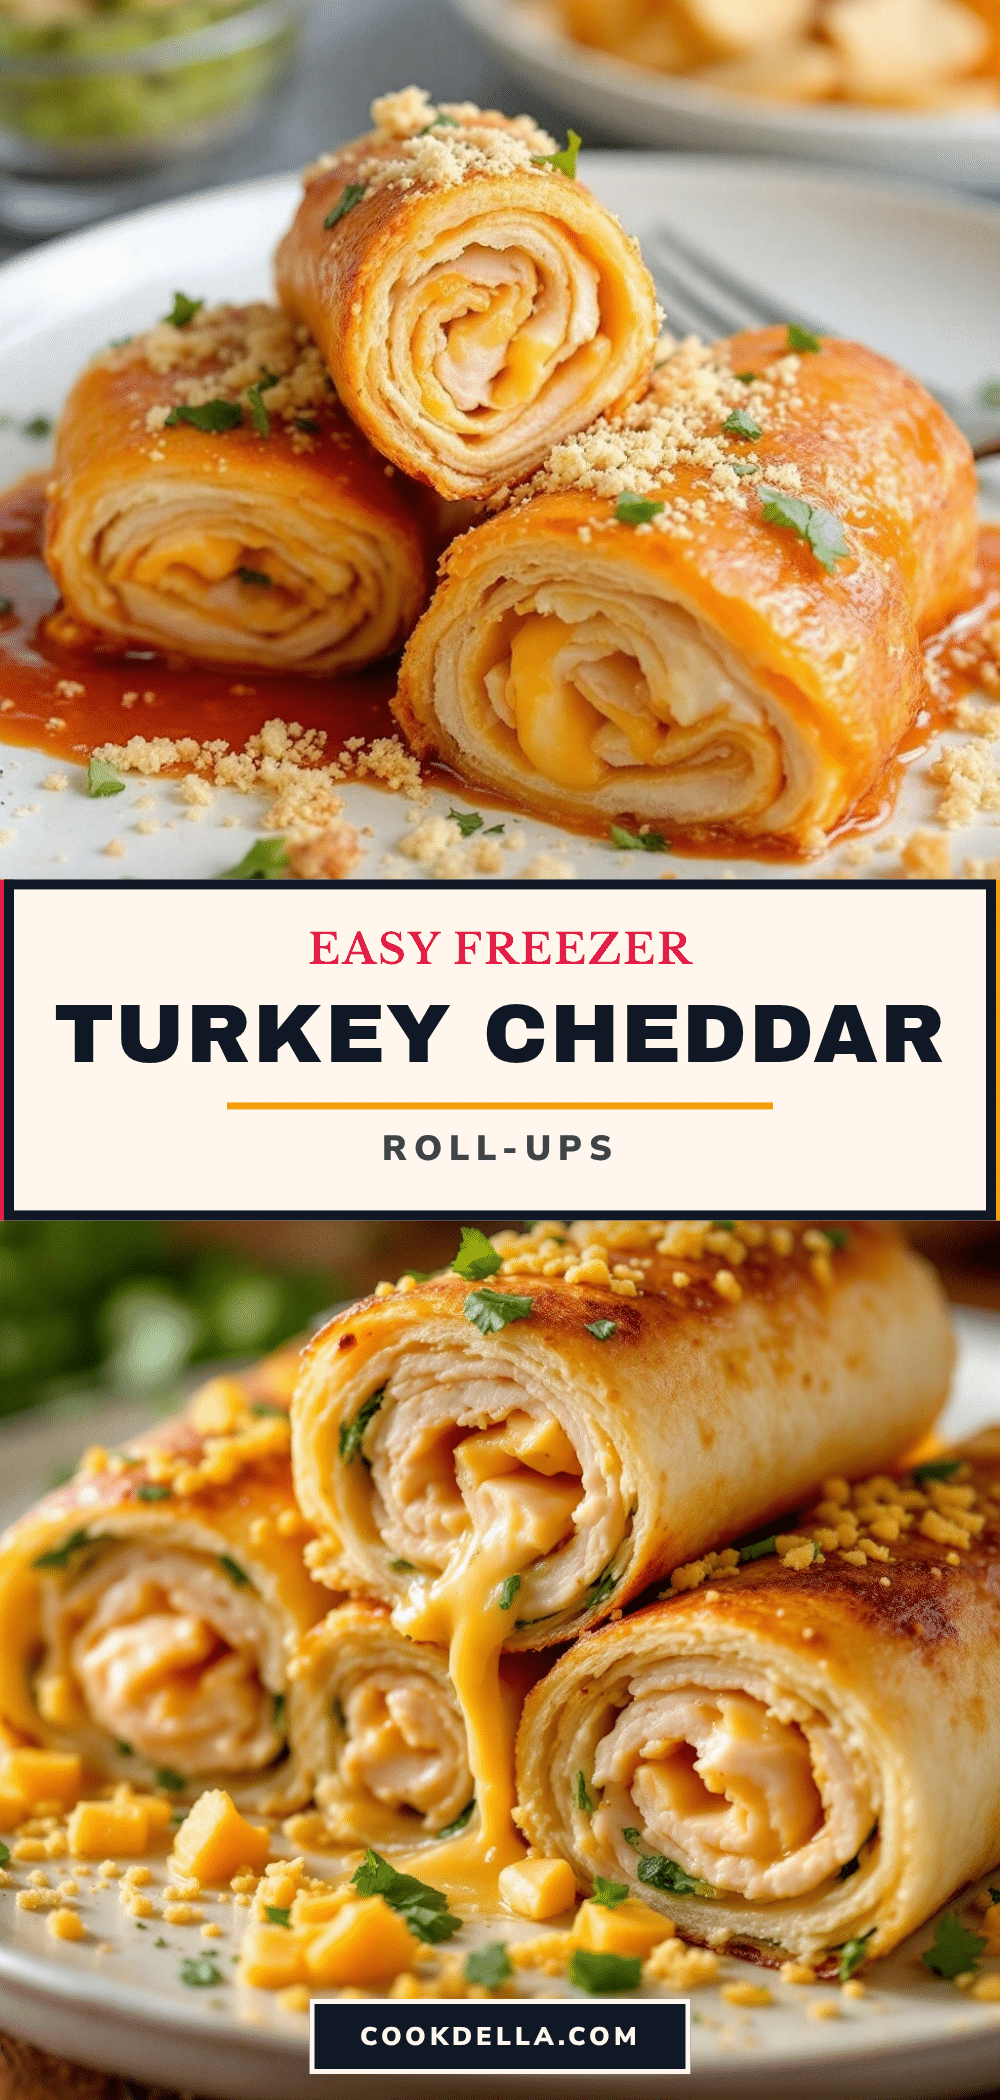
Easy Turkey and Cheddar Roll-Ups: Best Freezer Meal

These Easy Turkey and Cheddar Freezer Sandwich Roll-Ups are the perfect make-ahead lunch. With a creamy ranch and cream cheese spread, turkey, and cheddar, they freeze beautifully and thaw by lunchtime for a no-fuss meal.
- Prep Time: 20 minutes
- Cook Time: 0 minutes
- Total Time: 20 minutes
- Yield: 4 servings 1x
- Category: Lunch
- Cuisine: American
Ingredients
- 4 large flour tortillas (10-inch)
- 8 ounces cream cheese, softened
- 1 packet ranch seasoning mix
- 1 pound thinly sliced turkey breast
- 8 slices sharp cheddar cheese
- 2 tablespoons unsalted butter, melted
- Fresh spinach leaves (optional)
- Sliced bell peppers or cucumber (optional)
- Dijon mustard or honey mustard (optional)
Instructions
- In a small mixing bowl, combine 8 ounces of softened cream cheese with 1 packet of ranch seasoning mix. Stir until completely smooth and well combined. Let it sit at room temperature while you prep the other ingredients.
- Lay one large flour tortilla flat on your cutting board. If the tortillas are cold from the fridge, let them come to room temperature for 10 minutes. Lightly brush the top side of the tortilla with melted butter.
- Using a spatula or the back of a spoon, spread about 2 tablespoons of the cream cheese mixture evenly over the entire surface of the tortilla, leaving a 1-inch border around the edges.
- Place 2 to 3 slices of turkey flat over the cream cheese, overlapping slightly to cover the whole tortilla. Then lay 1 slice of cheddar cheese on top. If adding spinach or other veggies, place them on top of the cheese now.
- Starting at the edge closest to you, roll the tortilla away from you as tightly as you can without tearing it. Use your fingertips to keep the filling tucked in as you roll. When you reach the end, place the seam side down.
- Place the rolled tortilla seam-side down on a piece of plastic wrap or parchment paper. Roll it up tightly, twisting the ends like a candy wrapper.
- Place the wrapped roll-ups in a freezer-safe bag or container. Label with the date and contents. They’ll keep for up to 3 months.
- If packing for lunch, slice while still slightly frozen or after thawing. Use a serrated knife and wipe the blade between cuts for clean pinwheels. Slice into 1-inch rounds for bite-sized pieces, or leave whole for a wrap-style lunch.
Notes
Don’t skip softening the cream cheese; cold cream cheese tears the tortilla. Pat add-ins dry to avoid sogginess. Roll with confidence but don’t overstuff. Freeze flat for the first hour, then stack. Label everything to avoid confusion. For best flavor, let the roll-ups sit in the freezer for a day or two before eating.
Nutrition
- Serving Size: 1 roll-up (sliced in
- Calories: 300
- Sugar: 2
- Sodium: 800
- Fat: 16
- Saturated Fat: 8
- Carbohydrates: 22
- Fiber: 1.5
- Protein: 20
Keywords: turkey roll-ups, freezer meal, lunch, make-ahead, turkey and cheddar, pinwheels, easy lunch


