The first time I made this garlic herb butter roasted turkey, my brother-in-law—who has never in his life asked for seconds of turkey—stood up from the table and walked back to the kitchen with his plate. I watched him from my seat, not wanting to say anything and jinx it. He carved another slice off the breast, drizzled more pan gravy over the top, and sat back down without a word. That silence told me everything I needed to know.
Look, I’ve made a lot of dry, disappointing turkeys. The kind that looks golden and gorgeous on the outside but tastes like sawdust on the inside. The kind you slice and immediately reach for the gravy boat to save the situation. This recipe changed that for me, and honestly, it might change your Thanksgiving too.
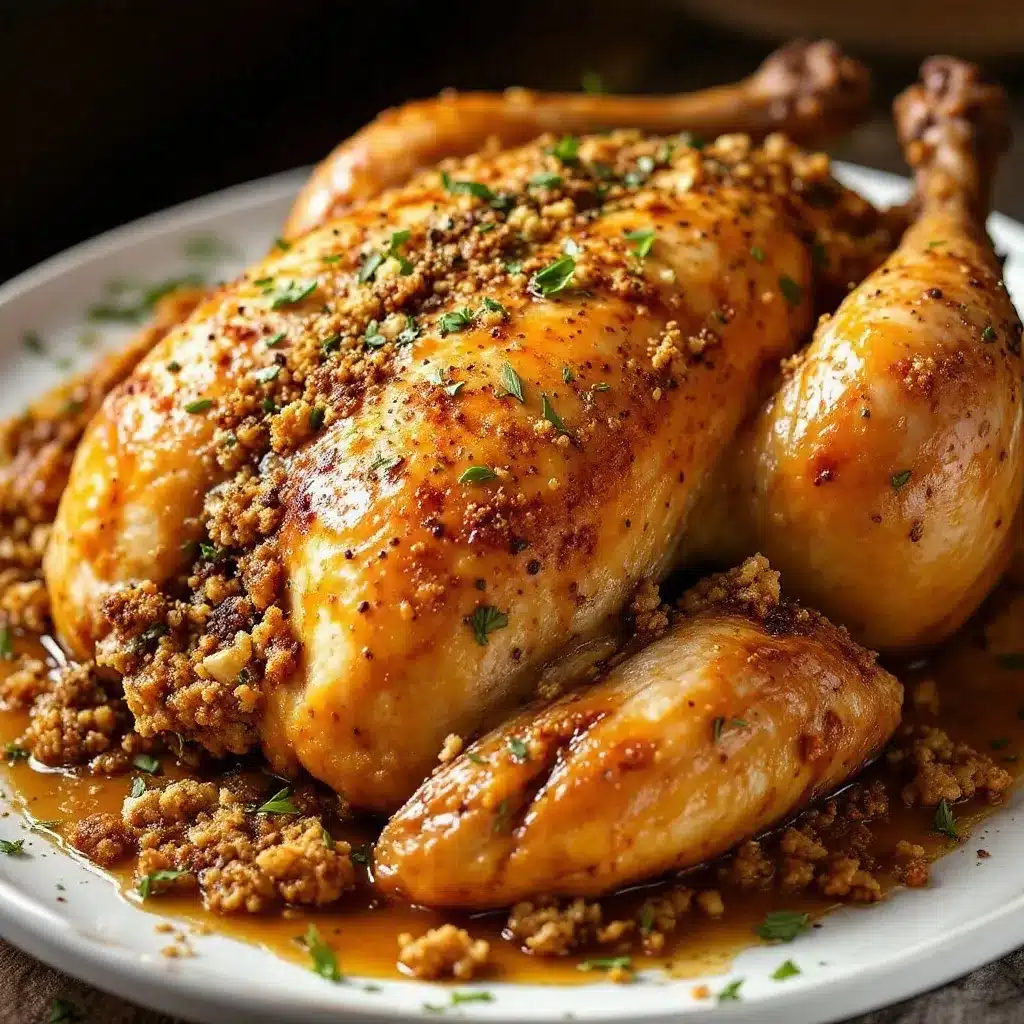
The trick is the compound butter—garlic, fresh herbs, and softened butter mashed together into a paste that you slather under the skin and all over the outside. It bastes the meat from the inside out as it roasts, keeping every single bite juicy and flavorful. No brining required. No complicated techniques. Just good butter and good timing.
If you’ve been burned by dry turkey before, I get it. I was there too. But this one? This one is different. Let me show you how to make it.
Why You’ll Love This Recipe
This garlic herb butter roasted turkey is the kind of recipe that makes you look like a hero without the stress. Here’s why it works.
- Incredibly Juicy Meat: The herb butter melts into the breast meat as it roasts, keeping it moist and tender. No dry white meat here.
- Simple Ingredients: Butter, garlic, fresh herbs, salt, and pepper. That’s it. You probably have most of these in your kitchen right now.
- No Brining Required: Skip the salt water bath and the overnight soak. This recipe delivers flavor without the extra day of prep.
- Perfect for Thanksgiving: It’s impressive enough for a holiday table but simple enough for a Sunday dinner. Works for both.
- Built-In Pan Gravy: The drippings from the butter and turkey create the most incredible base for gravy. You won’t need a recipe for that part—it practically makes itself.
- Crowd-Pleaser: Even the people who “don’t really like turkey” ask for seconds. I’ve seen it happen at my own table.
This isn’t just another turkey recipe. It’s the one I’ve tested and tweaked over three Thanksgivings until I got it exactly right. The butter-to-herb ratio is perfect. The roasting temperature is dialed in. It’s the kind of recipe you’ll make every year—and your family will expect it.
What Ingredients You Will Need
This recipe uses simple, high-quality ingredients to deliver big flavor. No weird specialty items or hard-to-find spices. Just good butter and fresh herbs doing the heavy lifting.
For the Turkey
- 1 whole turkey (12-14 pounds), thawed if frozen, giblets and neck removed (look for a fresh turkey if possible—the texture is better)
- 1 cup unsalted butter, softened to room temperature (I prefer Kerrygold for its rich flavor, but any good unsalted butter works)
- 6 cloves garlic, minced (use fresh garlic, not the jarred stuff—it makes a real difference)
- 2 tablespoons fresh rosemary, finely chopped
- 2 tablespoons fresh thyme leaves, stripped from stems
- 2 tablespoons fresh sage, finely chopped
- 1 tablespoon fresh parsley, chopped (optional, but adds a nice freshness)
- 2 teaspoons kosher salt, plus more for seasoning the cavity
- 1 teaspoon black pepper, freshly ground
- 1 lemon, halved (for stuffing the cavity)
- 1 onion, quartered (adds moisture and flavor to the cavity)
- 4 sprigs fresh rosemary, for the cavity
- 4 sprigs fresh thyme, for the cavity
For the Pan Gravy
- 1/4 cup all-purpose flour (use a gluten-free blend if needed)
- 2 cups turkey or chicken stock, preferably low-sodium (homemade is best, but boxed works in a pinch)
- Salt and pepper, to taste
- Optional: 1 tablespoon heavy cream or butter for extra richness
Ingredient Tip: If you can’t find fresh herbs, dried will work in a pinch—use about one-third of the amount. But honestly, fresh herbs are where this recipe shines. The butter absorbs their oils and distributes that flavor throughout the meat. Dried herbs just don’t deliver the same punch.
Equipment Needed
- Roasting pan with a rack: The rack lifts the turkey off the bottom of the pan so air circulates evenly. No rack? Roll up a few strips of aluminum foil into coils and place them under the turkey.
- Meat thermometer: This is non-negotiable. An instant-read thermometer takes the guesswork out of roasting. I’ve used the same Thermapen for years and it’s never let me down.
- Kitchen twine: For trussing the legs. Not strictly necessary, but it helps the turkey cook evenly and look prettier on the platter.
- Pastry brush or silicone brush: For brushing the herb butter onto the turkey. Your hands work too, but a brush is less messy.
- Small bowl: For mixing the compound butter.
- Chef’s knife and cutting board: For chopping herbs and garlic.
- Aluminum foil: For tenting the turkey if the skin browns too quickly.
- Gravy separator or fat separator: Optional, but makes defatting the pan drippings much easier.
If you don’t have a roasting rack, don’t panic. I’ve used a makeshift rack of carrots and celery stalks before—they add flavor to the drippings and keep the turkey elevated. Problem solved.
Preparation Method
Step 1: Prep the Turkey
Take your turkey out of the refrigerator 1 hour before roasting. This lets it come up to room temperature slightly, which helps it cook more evenly. Remove the giblets and neck from the cavities—save them for stock if you’re feeling ambitious. Pat the turkey completely dry with paper towels, inside and out. Moist skin won’t crisp up, so be thorough here.
Step 2: Make the Herb Butter
In a small bowl, combine the softened butter, minced garlic, chopped rosemary, thyme, sage, parsley (if using), salt, and pepper. Mash everything together with a fork until it’s well combined. The mixture should look like a soft, fragrant paste. Taste a tiny bit—the butter should taste nicely seasoned, not bland. If it needs more salt, add it now.
Step 3: Apply the Butter
Using your fingers, gently loosen the skin over the turkey breast. Start at the neck end and work your way down, being careful not to tear the skin. Slide about half of the herb butter under the skin, spreading it evenly over each breast lobe. Rub the remaining butter all over the outside of the turkey—legs, thighs, wings, every visible surface. Don’t forget the underside. Season the cavity generously with salt and pepper, then stuff it with the lemon halves, onion quarters, and fresh herb sprigs.
Step 4: Truss the Turkey
Tuck the wing tips under the turkey’s back so they don’t burn. Tie the legs together with kitchen twine at the ankles. This keeps the turkey compact and helps it cook evenly. If you don’t have twine, just tuck the legs in as best you can—it’ll still work.
Step 5: Roast the Turkey
Preheat your oven to 425°F (220°C). Place the turkey breast-side up on the rack in your roasting pan. Pour 1 cup of chicken or turkey stock into the bottom of the pan—this prevents the drippings from burning and creates the base for your gravy. Roast at 425°F for 30 minutes. This high heat jump-starts browning and gives you that gorgeous golden skin.
Step 6: Reduce the Heat and Continue Roasting
After 30 minutes, reduce the oven temperature to 350°F (175°C). Continue roasting for about 2 to 2.5 hours, depending on the size of your turkey. The general rule is 13 minutes per pound at 350°F, but always trust your thermometer over the clock. Baste the turkey with the pan juices every 45 minutes or so—this keeps the skin moist and adds another layer of flavor.
Step 7: Check for Doneness
Start checking the temperature about 30 minutes before you expect the turkey to be done. Insert your meat thermometer into the thickest part of the thigh, avoiding the bone. You’re looking for 165°F (74°C). Also check the breast—it should read 160°F (71°C). If the skin is browning too quickly, tent the turkey loosely with aluminum foil.
Step 8: Rest the Turkey
Once the turkey hits the right temperature, transfer it to a cutting board or platter. Let it rest for at least 20-30 minutes before carving. This is the hardest part, I know—your kitchen smells incredible and everyone is hungry. But trust me, resting lets the juices redistribute throughout the meat. Carve too early and all that moisture ends up on the cutting board instead of on your plate.
Step 9: Make the Pan Gravy
While the turkey rests, make your gravy. Pour the pan drippings through a fine-mesh strainer into a fat separator or a glass measuring cup. Let the fat rise to the top, then spoon it off (or use the separator spout). You should have about 1/4 cup of fat and 1.5 to 2 cups of flavorful liquid.
Place the roasting pan on the stovetop over medium heat. Add the reserved fat (or butter if you don’t have enough) and whisk in the flour. Cook for 2 minutes, stirring constantly, until the mixture turns golden brown. Slowly pour in the defatted drippings and the stock, whisking continuously to prevent lumps. Bring to a simmer and cook for 5 minutes until thickened. Season with salt and pepper. Add a splash of cream or a pat of butter at the end if you want extra richness.
Cooking Tips & Techniques
Here’s the stuff I wish someone had told me before my first attempt at a fancy roasted turkey.
Dry the turkey thoroughly. This is the number one mistake people make. Wet skin steams instead of crisps. Use paper towels and really get in there—under the wings, inside the cavity, everywhere. A dry bird equals crispy skin.
Don’t skip the resting time. I know it’s tempting to carve the moment the turkey comes out of the oven. I’ve done it. And I’ve watched the juices pool on the cutting board while everyone waits. Thirty minutes of resting gives you moist, tender meat. Set a timer if you have to.
Use a thermometer, not the pop-up timer. Those little plastic pop-up things that come with some turkeys are notoriously unreliable. They usually trigger well past the point of doneness, which means dry meat. Buy a good instant-read thermometer and trust it.
Let the butter soften properly. Cold butter doesn’t mix well with herbs and won’t spread easily under the turkey skin. Leave it on the counter for an hour before you start. If you forgot, microwave it in 5-second bursts until it’s soft but not melted.
Baste with purpose. Every time you open the oven door, heat escapes and your cooking time stretches. So baste efficiently—get in, do your thing, and close the door. Don’t stand there admiring your work while the oven cools down.
I once forgot to put the rack under my turkey and roasted it directly in the pan. The bottom burned, the top was pale, and the drippings turned into a smoky mess. Learn from my mistakes—always use a rack.
Variations & Adaptations
This recipe is forgiving, so don’t be afraid to make it your own. Here are a few ways I’ve adapted it depending on the season or the crowd.
Citrus Herb Butter: Add the zest of one orange and one lemon to the butter along with the herbs. The citrus brightens up the richness and pairs beautifully with the garlic. I did this for a friend who claimed turkey was “boring,” and she asked for the recipe.
Spicy Southwest Version: Swap the sage and parsley for 1 teaspoon of smoked paprika, 1/2 teaspoon of cumin, and a pinch of cayenne. Add a minced chipotle pepper in adobo sauce to the butter. This version is incredible if you’re serving the turkey with tacos or enchiladas the next day.
Herb and Lemon Stuffing Variation: Instead of just aromatics in the cavity, stuff the turkey with quartered lemons, halved garlic heads, and a handful of fresh thyme and rosemary. The steam from the citrus and garlic infuses the meat from the inside while the herbs perfume everything.
Gluten-Free Gravy: Substitute the all-purpose flour with an equal amount of cornstarch or arrowroot powder. Mix it with a little cold water to make a slurry, then whisk it into the simmering drippings. It thickens just as well and works for anyone avoiding gluten.
Herb-Infused Oil Option: If you’re dairy-free, replace the butter with a good quality olive oil mixed with the same herbs and garlic. Brush it under the skin and over the outside just like you would with butter. The results are slightly less rich but still incredibly flavorful.
Serving & Storage Suggestions
This turkey is best served warm, straight from the resting board, with plenty of pan gravy on the side. I like to arrange the carved meat on a large platter and garnish with fresh herb sprigs and lemon slices. It looks beautiful and gives people something to pick at while they pass the sides.
Pair it with classic Thanksgiving sides like mashed potatoes, green bean casserole, or roasted root vegetables. If you’re feeling ambitious, a batch of soft baked pumpkin snickerdoodle cookies for dessert is the perfect finish. For a lighter option, serve the turkey alongside a simple arugula salad with lemon vinaigrette.
Storage: Leftover turkey keeps in the refrigerator for up to 4 days in an airtight container. Slice the meat off the bone before storing—it reheats more evenly and takes up less space. The gravy will keep for about 5 days in the fridge.
Freezing: Shredded or sliced turkey freezes beautifully for up to 3 months. Wrap it tightly in plastic wrap, then foil, or use a vacuum sealer if you have one. Thaw overnight in the fridge before reheating. The gravy also freezes well—pour it into a freezer bag, lay it flat, and stack it in the freezer.
Reheating: The best way to reheat turkey without drying it out is to place the slices in a baking dish, add a splash of chicken stock or gravy, cover with foil, and warm in a 300°F (150°C) oven for 15-20 minutes. Microwave works in a pinch but tends to toughen the meat. For leftover sandwiches, I like to pile the cold turkey on bread with cranberry sauce and call it a day.
One thing I’ve noticed: the flavors actually deepen overnight. Cold turkey sandwiches the next day are often better than the first serving. Don’t skip the leftovers.
Nutritional Information & Benefits
Turkey is naturally lean, high in protein, and packed with essential nutrients. A 4-ounce serving of roasted turkey breast (without skin) provides about 30 grams of protein, 5 grams of fat, and roughly 200 calories. It’s also a great source of selenium, zinc, and B vitamins, which support immune function and energy metabolism.
The garlic in the herb butter offers anti-inflammatory benefits and may help support heart health. Fresh herbs like rosemary, thyme, and sage are rich in antioxidants and add flavor without extra sodium or calories. The butter adds richness but also provides fat-soluble vitamins A, D, E, and K.
Dietary Considerations: This recipe is naturally gluten-free if you use a gluten-free flour blend for the gravy. It’s also low-carb and keto-friendly if you skip the gravy or use a low-carb thickener. For dairy-free, substitute the butter with olive oil as mentioned in the variations section.
Potential Allergens: This recipe contains dairy (butter) and optional gluten (flour in gravy). Always check your stock for hidden gluten if serving someone with celiac disease.
Honestly, I don’t make turkey for the health benefits—I make it because it’s delicious and brings people together. But it’s nice to know that a plate of this with some roasted vegetables is a pretty balanced meal.
Conclusion
This garlic herb butter roasted turkey is the recipe that turned me into a Thanksgiving person. Before this, I was the one picking at the sides and hoping nobody noticed I’d barely touched the main event. Now I’m the one carving, doling out extra gravy, and watching my brother-in-law go back for thirds.
The magic is in the butter. It’s simple, it’s forgiving, and it delivers every single time. Whether you’re hosting your first Thanksgiving or your fifteenth, this recipe will make you look like you’ve been doing it forever. Customize the herbs, play with the spices, make it your own. That’s the beauty of a good base recipe—it leaves room for your personality.
If you give this a try, I’d love to hear how it turns out. Drop a comment below, tag me in your photos, or tell me about the look on your family’s faces when they take that first bite. That’s my favorite part of sharing recipes—knowing someone else is making memories around their table because of something I put together in my kitchen.
Happy roasting, friends. You’ve got this.
Frequently Asked Questions
Can I use dried herbs instead of fresh?
Yes, but the flavor won’t be as bright. Use about one-third of the amount called for fresh herbs. So if the recipe says 2 tablespoons fresh rosemary, use about 2 teaspoons dried. Fresh really does make a difference here, but dried will still work in a pinch.
How do I keep the turkey from drying out?
The herb butter under the skin is your best defense against dry meat. It bastes the breast from the inside as it melts. Also, don’t overcook—use a meat thermometer and pull the turkey at 165°F in the thigh and 160°F in the breast. Resting for 20-30 minutes before carving also helps lock in moisture.
What size turkey should I buy?
Plan for about 1 to 1.5 pounds per person. For a 12-pound turkey, that serves 8-10 people with leftovers. If you want extra for sandwiches and soup, go bigger. Just adjust your roasting time accordingly—about 13 minutes per pound at 350°F after the initial 30-minute high-heat blast.
Can I prepare the herb butter ahead of time?
Absolutely. Make the compound butter up to 3 days in advance and keep it in the fridge. Let it soften at room temperature for about 30 minutes before applying it to the turkey. You can also freeze the butter for up to 3 months—just thaw it overnight in the fridge before using.
Do I need to baste the turkey?
Basting helps keep the skin moist and adds flavor, but it’s not strictly necessary. The herb butter does most of the work. If you do baste, do it quickly and close the oven door promptly to maintain temperature. Every time you open the oven, you lose heat and extend the cooking time.
If you’re looking for more cozy fall recipes, don’t miss my easy one-bowl chocolate chip pumpkin bread or the Starbucks copycat pumpkin cream cheese muffins. Both are perfect for using up that extra can of pumpkin puree sitting in your pantry.
Pin This Recipe!
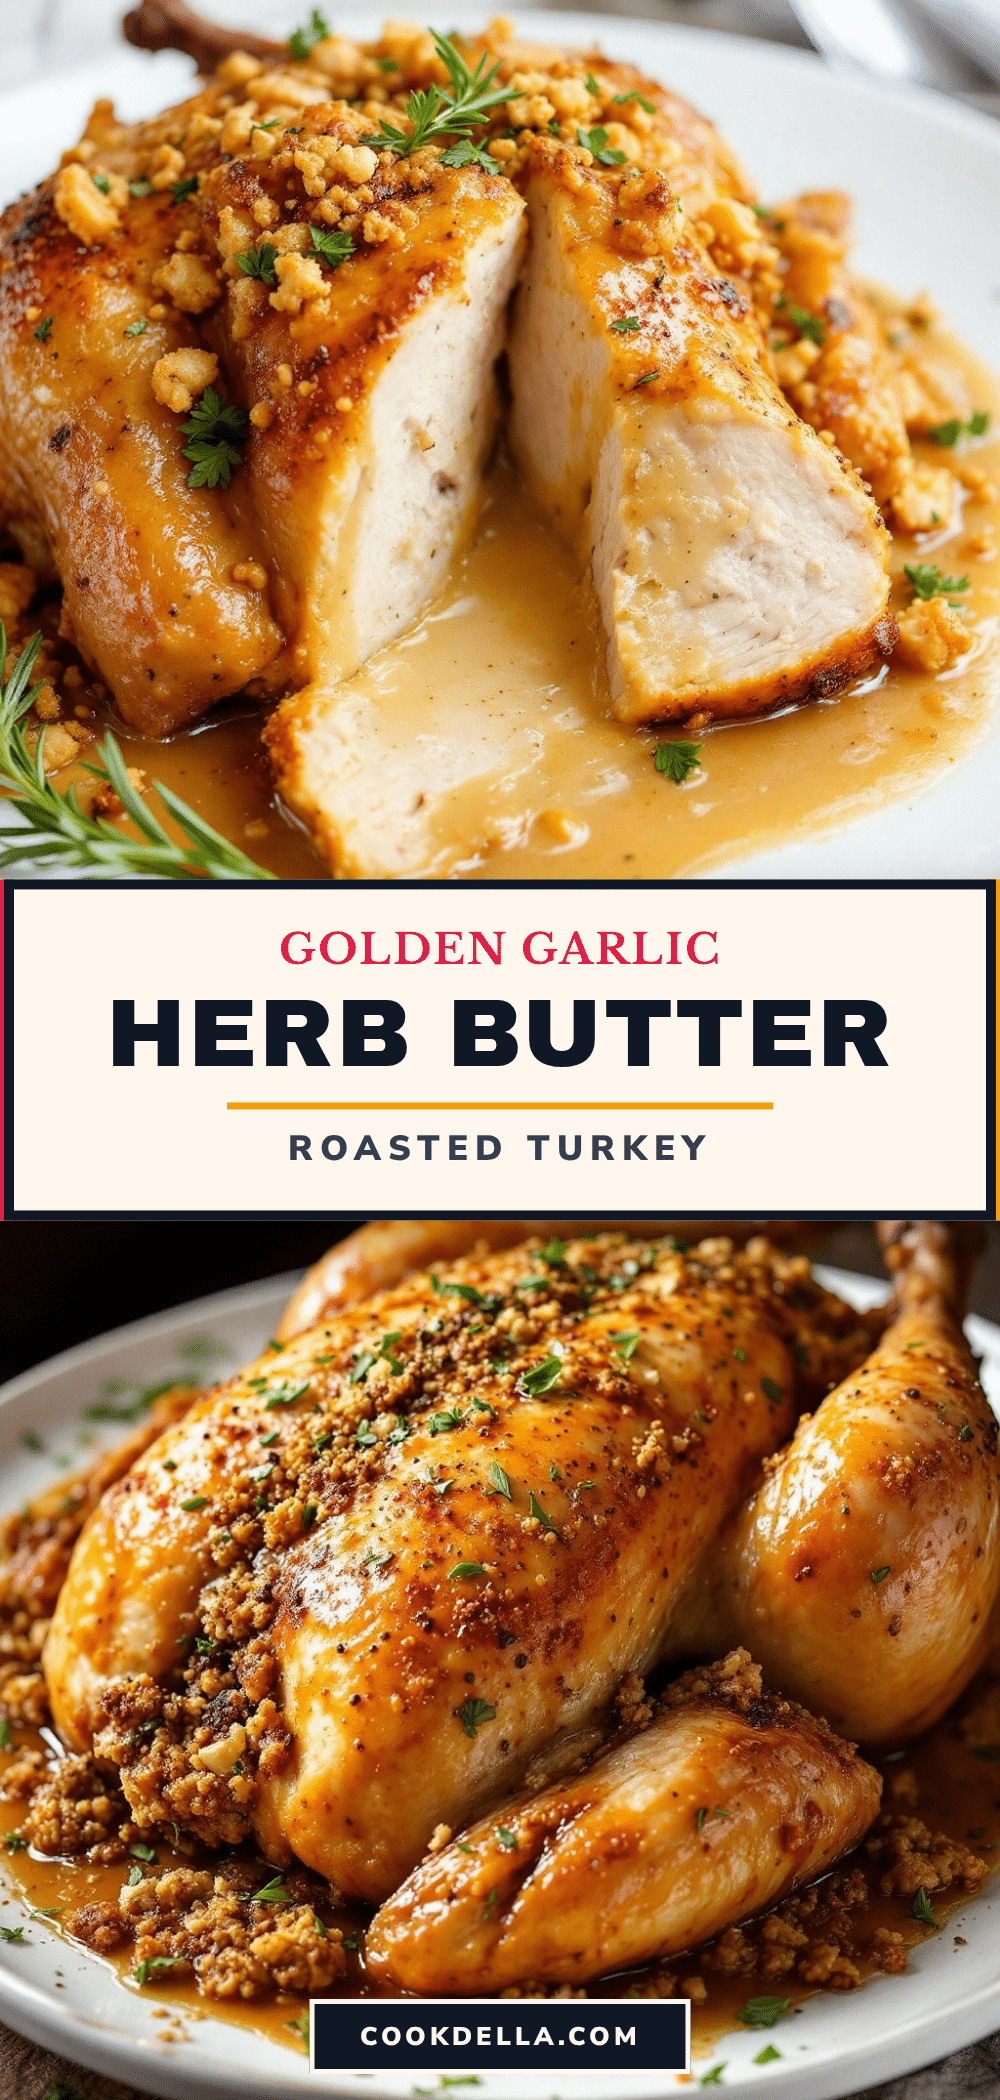
Perfect Garlic Herb Butter Roasted Turkey: Easy Thanksgiving Recipe
This garlic herb butter roasted turkey is incredibly juicy and flavorful, thanks to a simple compound butter slathered under the skin and all over the outside. No brining required, just good butter and good timing for a perfect Thanksgiving centerpiece.
- Prep Time: 1 hour 30 minutes
- Cook Time: 2 hours 30 minutes
- Total Time: 4 hours
- Yield: 8-10 servings 1x
- Category: Main Course
- Cuisine: American
Ingredients
- 1 whole turkey (12–14 pounds), thawed if frozen, giblets and neck removed
- 1 cup unsalted butter, softened to room temperature
- 6 cloves garlic, minced
- 2 tablespoons fresh rosemary, finely chopped
- 2 tablespoons fresh thyme leaves
- 2 tablespoons fresh sage, finely chopped
- 1 tablespoon fresh parsley, chopped (optional)
- 2 teaspoons kosher salt, plus more for seasoning the cavity
- 1 teaspoon black pepper, freshly ground
- 1 lemon, halved
- 1 onion, quartered
- 4 sprigs fresh rosemary, for the cavity
- 4 sprigs fresh thyme, for the cavity
- 1/4 cup all-purpose flour (or gluten-free blend)
- 2 cups turkey or chicken stock, preferably low-sodium
- Salt and pepper, to taste
- 1 tablespoon heavy cream or butter (optional, for extra richness)
Instructions
- Take the turkey out of the refrigerator 1 hour before roasting. Remove giblets and neck. Pat the turkey completely dry with paper towels, inside and out.
- In a small bowl, combine softened butter, minced garlic, chopped rosemary, thyme, sage, parsley (if using), salt, and pepper. Mash together with a fork until well combined into a soft paste.
- Using your fingers, gently loosen the skin over the turkey breast. Slide about half of the herb butter under the skin, spreading evenly over each breast lobe. Rub the remaining butter all over the outside of the turkey. Season the cavity generously with salt and pepper, then stuff with lemon halves, onion quarters, and fresh herb sprigs.
- Tuck the wing tips under the turkey’s back. Tie the legs together with kitchen twine at the ankles.
- Preheat oven to 425°F (220°C). Place turkey breast-side up on a rack in a roasting pan. Pour 1 cup of stock into the bottom of the pan. Roast at 425°F for 30 minutes.
- Reduce oven temperature to 350°F (175°C). Continue roasting for about 2 to 2.5 hours (13 minutes per pound), basting with pan juices every 45 minutes. If skin browns too quickly, tent loosely with aluminum foil.
- Check for doneness: Insert a meat thermometer into the thickest part of the thigh (avoiding bone) – it should read 165°F (74°C). The breast should read 160°F (71°C).
- Transfer turkey to a cutting board or platter. Let rest for at least 20-30 minutes before carving.
- While turkey rests, make pan gravy: Pour pan drippings through a fine-mesh strainer into a fat separator. Spoon off fat. Place roasting pan on stovetop over medium heat. Add reserved fat (or butter) and whisk in flour. Cook for 2 minutes, stirring constantly. Slowly pour in defatted drippings and stock, whisking continuously. Bring to a simmer and cook for 5 minutes until thickened. Season with salt and pepper. Add cream or butter if desired.
Notes
Dry the turkey thoroughly for crispy skin. Don’t skip the resting time – it ensures moist meat. Use a meat thermometer, not the pop-up timer. Let butter soften properly for easy spreading. Baste efficiently to avoid heat loss. If you don’t have a roasting rack, use a makeshift rack of carrots and celery stalks.
Nutrition
- Serving Size: 4 ounces (about 113g
- Calories: 200
- Sodium: 400
- Fat: 5
- Saturated Fat: 2
- Protein: 30
Keywords: roasted turkey, garlic herb butter turkey, Thanksgiving turkey, juicy turkey, easy turkey recipe, holiday turkey, herb butter turkey


